Choose your operating system:
Windows
macOS
Linux
In the following steps, we will have a character jump up onto a platform by applying animations and movement to a Skeletal Mesh . We will also add background music and sounds using the Sound Track .
Creating the Project
In this section, we will set up the project.
-
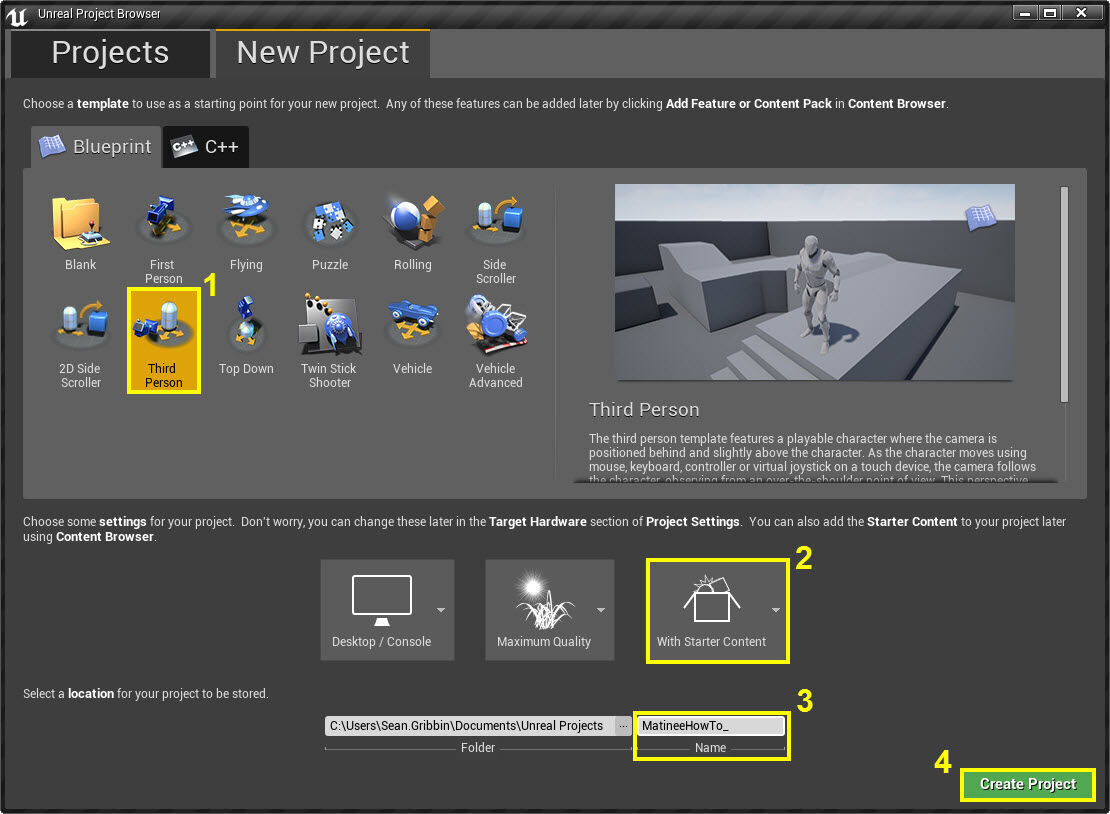
From the Unreal Project Browser window, create a New Project and use the Blueprint Third Person template.
![MatineeHowTo.jpg]()
-
Make sure that Include starter content is enabled.
-
Give the project a name.
-
With each of the above defined, click Create Project to create a new project.
Add the Matinee Actor and Props
In this step, we will add our
Matinee Actor
, a
Skeletal Mesh Actor
and create a platform for the character to jump up on.
-
From the Toolbar menu, select Matinee and click the Add Matinee button.
![MHT1_AddMatinee.png]()
-
If the Matinee undo warning message appears, click the Continue button.
![MHT1_MatineeWarning.png]()
-
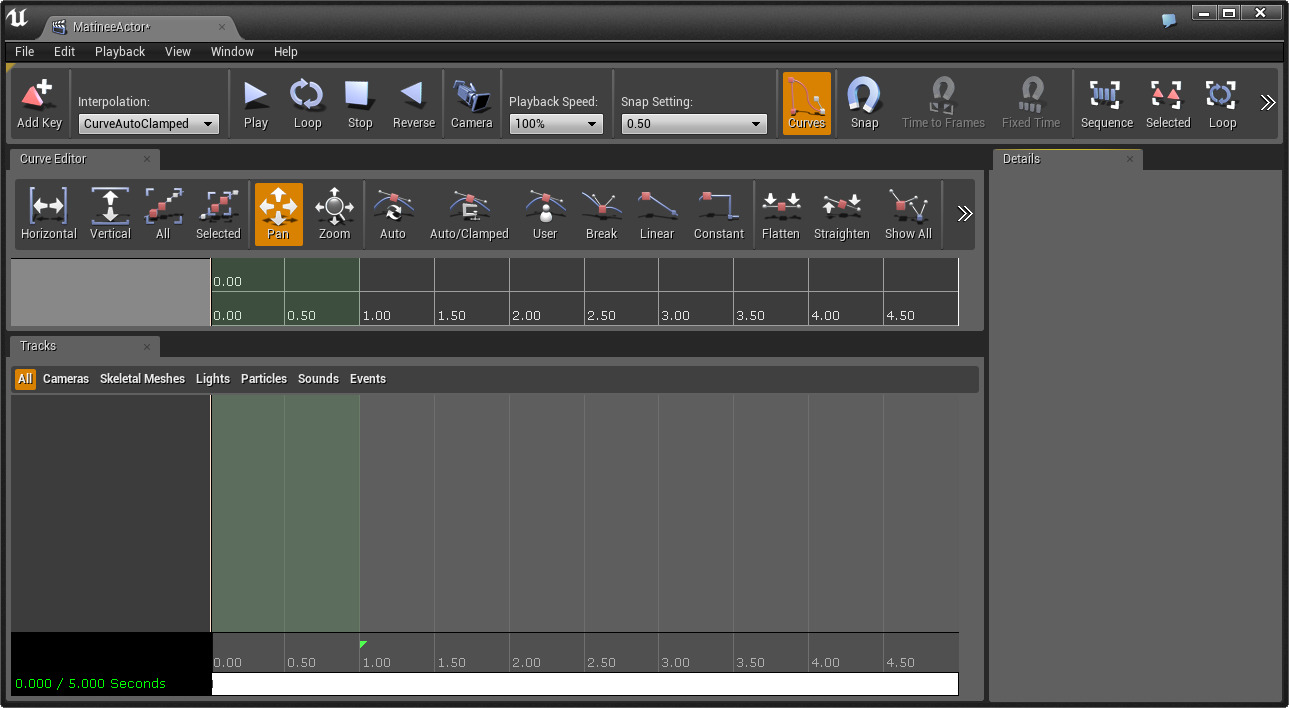
The Matinee Editor window will open.
Click for Full View.
-
Minimize the Matinee then in the Content Browser under the Game/Character folder, drag-and-drop in the SK_Mannequin asset into the level.
![GrayIntoLvl.jpg]()
-
In the Details panel for the SK_Mannequin , under Transform set the Location to -610.0 , -690.0 , 125.0 for the X, Y, Z values.
![MHT7_HeroDetails.png]()
-
In the level, grab the small box brush above the template text and move it in front of the Skeletal Mesh .
![DragBoxMannequin.jpg]()
-
In the Details panel for the box brush under Brush Settings , set the X and Y values to 250.0 and the Z to 1400.0 .
![MHT7_BoxDetails.png]()
Your box should look something like this:
![BoxHeightGray.jpg]()
Add Actor to Matinee and Add Tracks
In this step, we will add the SK_Mannequin to the Matinee and add the tracks we will be using for the sequence.
-
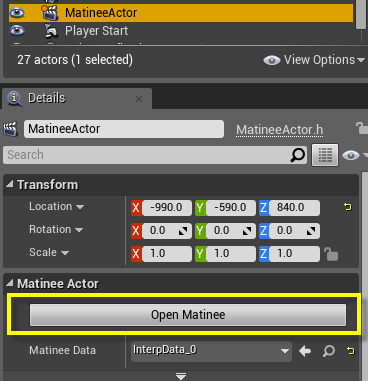
Select the MatineActor from the World Outliner, then click the Open Matinee button.
![MHT7_OpenMatineeActor.png]()
-
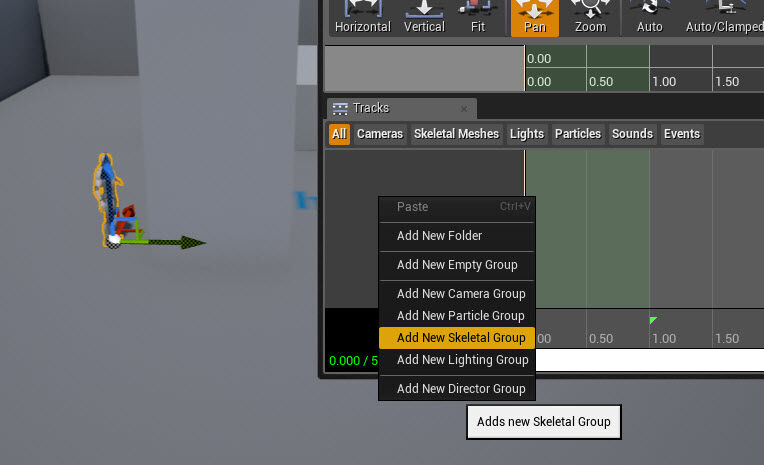
Minimize the Matinee, then select the SK_Mannequin and re-open Matinee, then Right-click in the tracks window and select Add New Skeletal Group .
![NewSkelGroupGray.jpg]()
Give the new group a name, in this example we are calling it SK_Mannequin .
-
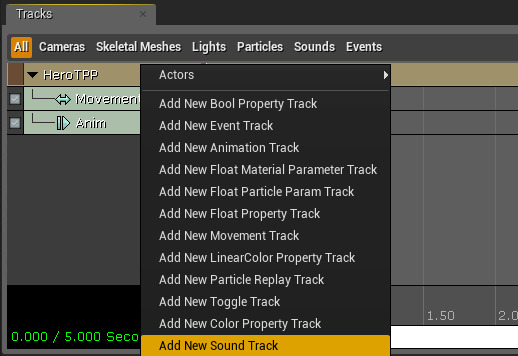
Right-click on the Group Name and select Add New Sound Track from the menu.
![MHT7_AddNewSoundTrack.png]()
-
Repeat the previous step to add another Sound Track so that there are two.
-
Grab the ending marker at 5.00 and move it to the 12.00 mark to increase the length of the Matinee.
![MHT7_MoveEndMarker.png]()
Adding Movement and Animation
In this step, we will setup the movement and animation for our character which will jump to the top of the box.
-
With Matinee open, click on the Movement track then move the Time Bar to 3.00 and press Enter to add a keyframe.
![MHT7_MovementKey2.png]()
-
Repeat the step above to add keyframes at 4.50 , 6.00 , 7.00 , and 8.00 .
![MHT7_MovementKeysAdded.png]()
-
Click on the second keyframe of the Movement track, minimize Matinee, then in the Details panel for SK_Mannequin set the Location of Z to 135 .
![MHT7_MoveDetailsKey2.png]()
-
Return to Matinee, click on the third keyframe for Movement, minimize Matinee and set the Location of Y to -674 and Z to 385 .
![MHT7_MoveDetailsKey3.png]()
-
Return to Matinee, click on the fourth keyframe for Movement, minimize Matinee and set the Location of Y to -622.53 and Z to 804.640 .
![MHT7_MoveDetailsKey4.png]()
-
Return to Matinee, click on the fifth keyframe for Movement, minimize Matinee and set the Location of Y to -561.0 and Z to 872.0 .
![MHT7_MoveDetailsKey5.png]()
-
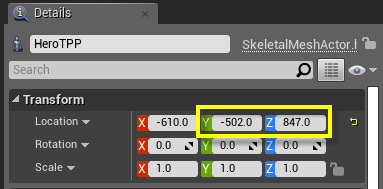
Return to Matinee, click on the sixth keyframe for Movement, minimize Matinee and set the Location of Y to -502.0 and Z to 847.0 .
![MHT7_MoveDetailsKey6.png]()
-
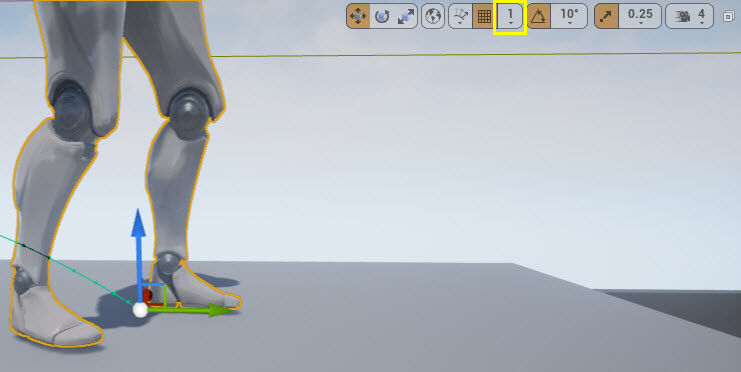
With the final keyframe in the Movement track still selected in the level viewport, the SK_Mannequin Actor should be standing on the top of the platform.
![IdleOnTop.jpg]()
If your Actor is not standing on top of the platform, you can move them (and adjust the snapping size in the box above) so that they are standing on it.
-
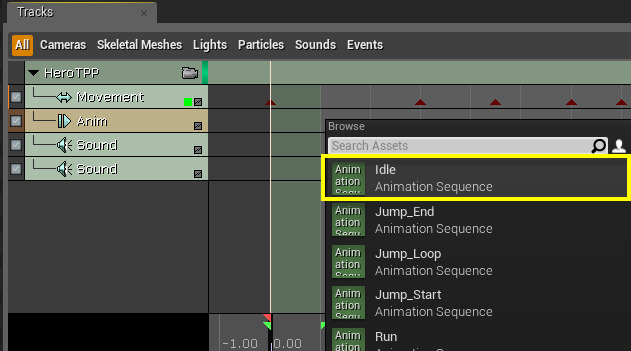
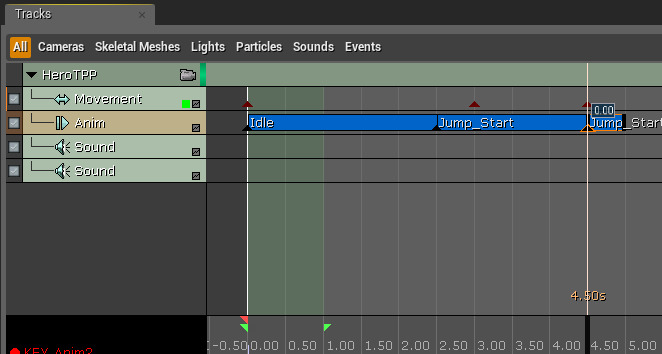
Move the Time Bar back to 0.00 , select the Anim track and press Enter to add a keyframe, then select Idle from the menu that appears.
![MHT7_AnimKey1.png]()
If you look in the level viewport, the SK_Mannequin Actor will now be in an Idle pose since we have specified the animation to use to start the Matinee .
-
Move the Time Bar to 2.50 and press Enter , then select Jump_Start from the menu.
-
Right-click on the Jump_Start keyframe at 2.50 and select Set Play Rate and set the value to 0.23 .
![MHT7_JumpAnimAdded.png]()
-
Move the Time Bar to 4.50 and press Enter , then select Jump_Start again from the menu.
![MHT7_AnimKey3.png]()
We could have added the Jump_Loop animation, however our character is going to continue ascending and using frames from the Jump_Start will look better.
-
Right-click on the Jump_Start keyframe at 4.50 and select Set Start Offset and set this to 5 .
![MHT7_AnimKey4.png]()
By doing this, we have stated that we want this animation to start off at frame 5 instead of frame 0.
![JumpStart.jpg]()
You should also see that the pose on the character has changed and is not using the normal Jump_Start pose of the character crouching.
-
Move the Time Bar to 8.00 and press Enter , then select Jump_End from the menu.
-
Scrub the Time Bar to 8.30 and press Enter , then select Idle from the menu.
![MHT7_AnimKey6.png]()
-
Right-click on the Idle keyframe at 8.30 and choose Set Time and set it to 8.20 .
-
Right-click on the Idle keyframe that was moved to 8.20 and choose Set Looping .
![MHT7_AnimKey7.png]()
The darker section at the end of the sequence indicates that the animation is set to loop.
Adding Sounds and Finishing Matinee
In this step, we will add sounds using the sound tracks and finish up the sequence.
-
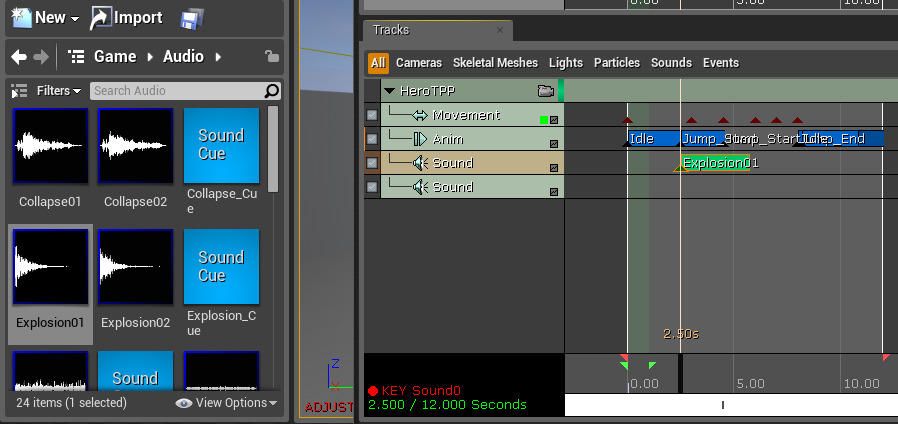
Minimize the Matinee window, then in the Content Browser inside the Game/Audio folder, click on the Explosion01 asset.
-
Return to the Matinee window and move the Time Bar to the 2.50 mark and press Enter .
![MHT7_Sound1.png]()
In order to add a sound asset to the Sound Track , a Sound Wave or Sound Cue asset must be selected in the Content Browser .
-
Right-click on the newly added sound asset's keyframe and select Set Sound Volume and set it to 1.5 .
-
Repeat the previous step , however Right-click and select Set Sound Pitch and set it to 0.5 .
![MHT7_Sound2.png]()
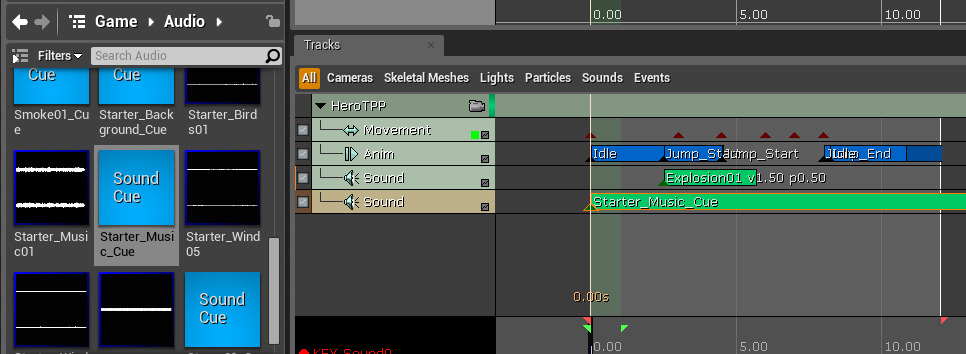
You will see that the volume for this sound has been increased to 1.5 while the pitch has been decreased to 0.5 on the bar in the track.
-
Click on the other Sound Track , then in the Content Browser under Game/Audio , select the Start_Music_Cue asset.
-
Return to the Matinee window and move the Time Bar back to 0.00 and press Enter to add the music.
![MHT7_Sound3.png]()
-
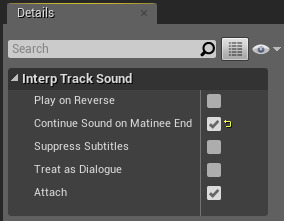
In the Details panel for the Sound Track with the music, check the Continue Sound on Matinee End checkbox.
![MHT7_Sound4.png]()
This will allow the music to continue playing once the 12 second Matinee sequence is over (otherwise the music would abruptly end).
-
Close the Matinee, then select the MatineeActor in the World Outliner .
-
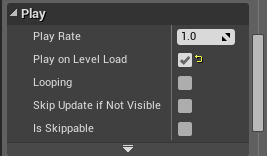
In the Details panel under Play, check the Play on Level Load checkbox.
![MHT7_MatineeFinished.png]()
-
Click the Play button from the main toolbar to play in the editor.
You should now see that the SK_Mannequin Actor will jump to the top of the box, along with an explosion sound effect and music playing.
You could apply a Director Track with multiple camera angles, FOVs, Post Processing effects, or a Slow-mo track to polish it up and make it your own.
