Choose your operating system:
Windows
macOS
Linux
In the following steps, we will create a rock that explodes after a timer count down and spawn effects using Matinee Events and Visibility tracks.
Creating the Project
In this section, we will set up the project.
-
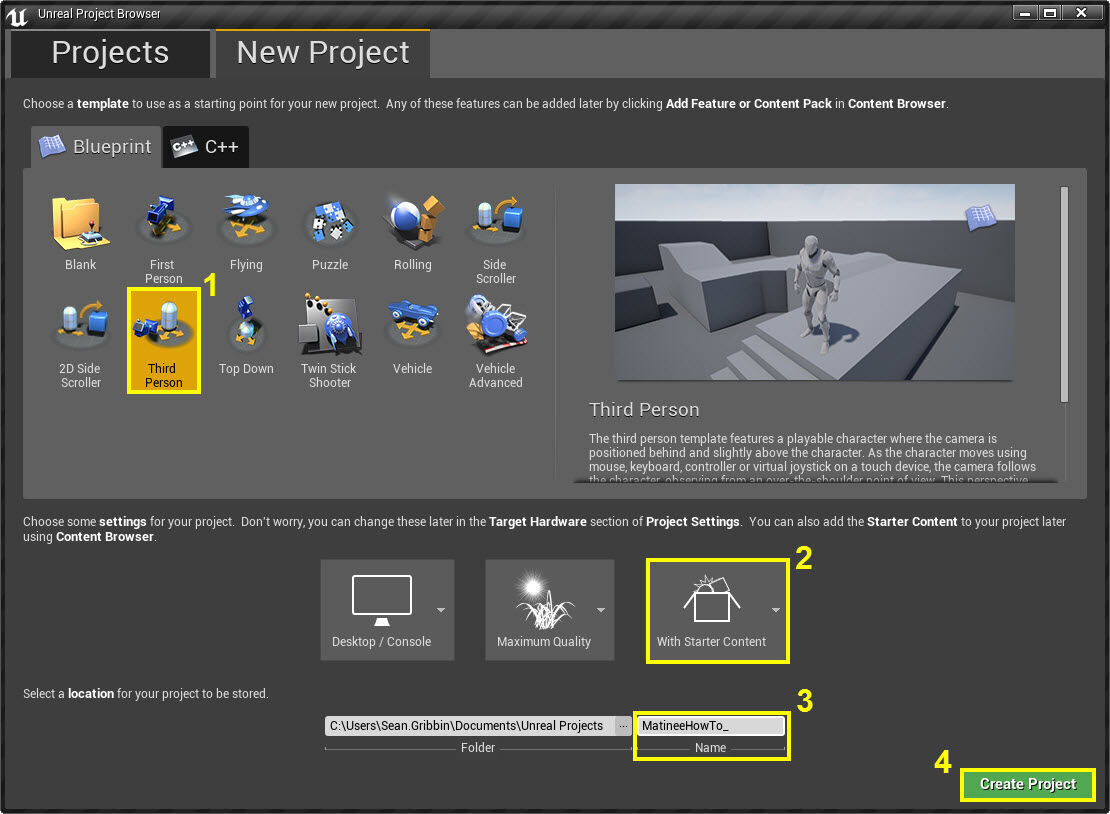
From the Unreal Project Browser window, create a New Project and use the Blueprint Third Person template.
![MatineeHowTo.jpg]()
-
Make sure that Include starter content is enabled.
-
Give the project a name.
-
With each of the above defined, click Create Project to create a new project.
Add the Matinee Actor and Props
In this step, we will add our Matinee Actor and assets that we will use in the scene.
-
From the Toolbar menu, select Matinee and click the Add Matinee button.
![MHT1_AddMatinee.png]()
-
If the Matinee undo warning message appears, click the Continue button.
![MHT1_MatineeWarning.png]()
-
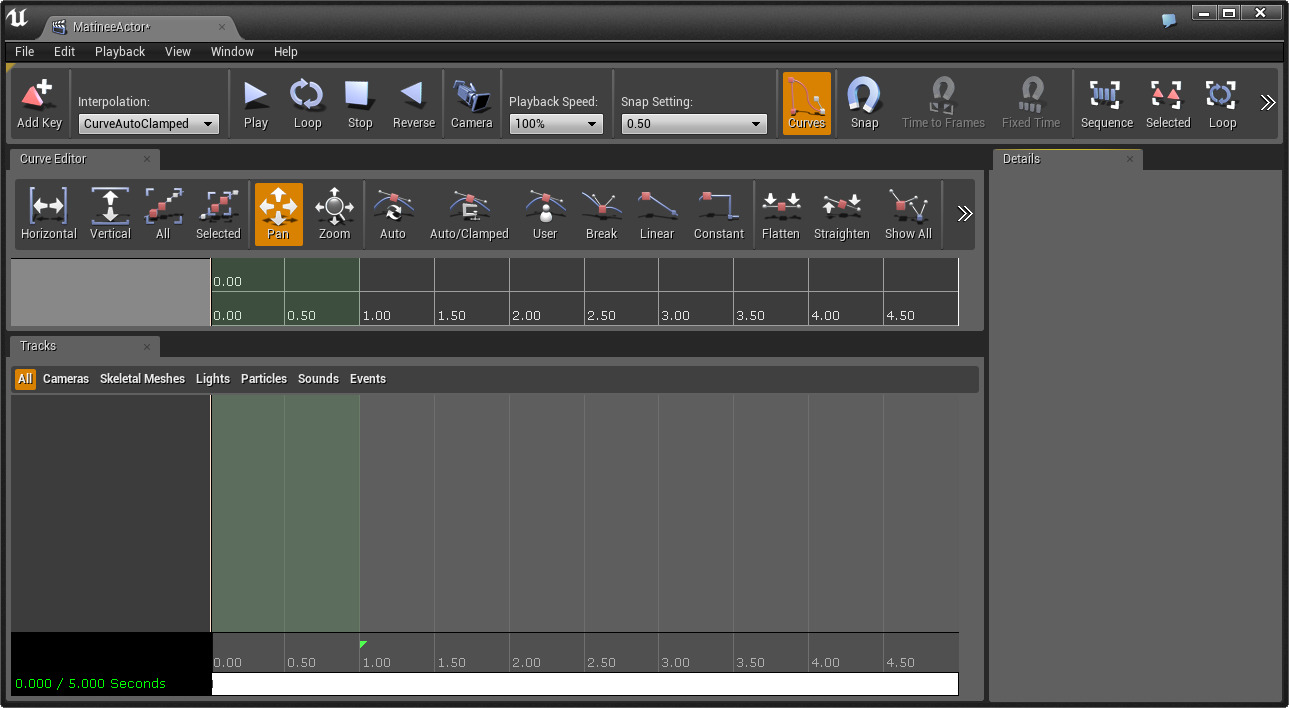
The Matinee Editor window will open.
Click for Full View.
-
Minimize the Matinee and in the Content Browser under the Game/Props folder, Right-click on the SM_Rock and select Create Destructible Mesh .
![MHT8_CreateDM.png]()
-
The Destructible Mesh window will open, click the Fracture Mesh button from the tool bar.
![MHT8_FractureMesh.png]()
-
Under Destructible Settings , expand Fracture Effects and 0 , then under Particle System click the drop-down menu and select P_Explosion .
![MHT8_AssignParticleEffct.png]()
-
In the same section, click the Sound drop-down menu and select the Explosion01 asset.
![MHT8_AssignSound.png]()
-
Click the Save button from the tool bar then close the window.
-
In the Content Browser , drag the SM_Rock_DM asset into the level.
![MHT8_DragRockIn.png]()
-
In the Content Browser under Game/Particles , drag-and-drop the P_Fire effect into the level, inside the rock.
![MHT8_AddFire.png]()
-
In the Details panel for P_Fire , scroll down and find the Activation section and un-check Auto Activate .
![MHT8_UncheckAutoActivate.png]()
This will keep the asset in the level, but not activate it until we tell it to which we will do through Matinee .
-
Select the TextRenderActor text and move it to the little box as shown below (press the E key to enter rotation mode and rotate it forward).
![MHT8_MoveTemplateText.png]()
-
In the Details panel for the TextRenderActor, under the Text section, in the Text field replace the text with 3 .
![MHT8_3.png]()
This is going to serve as our timer and countdown to the explosion we will trigger.
-
Also, inside the Details panel make a note of what the Location values are under Transform for the text as we will need them in a moment.
![MHT8_TextLocation.png]()
-
In the level viewport with the text still selected, press Control+W to duplicate the Text Render Actor.
-
Inside the Details panel for the new Text Render Actor, set Location to the same as the other Text Render Actor and set the Text to 2 .
![MHT8_2.png]()
-
Repeat the previous two steps to create another Text Render Actor. Set it in the same location as the others and set the text to 1 .
-
For each of the Text Render Actors in the Details panel under Rendering , check the box for Actor Hidden In Game .
![MHT8_ActorHiddenInGame.png]()
We will control the visibility of the Actors through Matinee and what them hidden by default.
Adding the Assets to Matinee and Setting the Tracks
In this step, we will add all of our assets to our Matinee and define the tracks that will be used to drive the sequence.
-
Select the Matinee in the World Outliner or viewport, then in the Details panel select Open Matinee and minimize it when it opens.
-
Select the rock in the viewport, then back in Matinee in the Tracks Window , Right-click and select Add New Empty Group .
![MHT8_AddEmptyGroup.png]()
Give the new group a name when prompted, in this example we are simply calling it the Rock group.
-
Right-click on the group and select Add New Event Track from the context menu.
![MHT8_AddEventTrack.png]()
-
With the Event Track selected, move the Time Bar to 4.00 and press Enter to add a keyframe, then name the event Explode .
![MHT8_EventTrackComplete.png]()
-
Right-click on the red ending marker at 5.00 and choose Move To Longest Track Endpoint to shorten the sequence to 4.00 .
![MHT8_SetLength.png]()
-
Minimize Matinee and select the Text Render Actor who is set to 3 in the World Outliner.
-
Back in Matinee in the Tracks Window, Right-click and select Add New Empty Group and name the group something like Text-3 .
![MHT8_Text3Added.png]()
-
Right-click on the group and select Add New Visibility Track .
![MHT8_AddNewVisTrack.png]()
-
Repeat the previous two steps and create two new groups ( Text-2 and Text-1 ), both with Visibility tracks.
![MHT8_MatineeSetupComplete.png]()
-
Click on the Visibility track for Track-3 , move the Time Bar to 1.00 and press Enter , then select Show from the pop-up menu to add a keyframe.
![MHT8_Show3.png]()
-
Move the Time Bar to 2.00 and press Enter and select Hide from the pop-up menu.
![MHT8_Hide3.png]()
A bar will be created between 1.00 and 2.00 which indicates when the text 3 will be shown, which is for 1 second.
-
Repeat the previous two steps to Show/Hide the text 2 from 2.00 to 3.00 and the text 1 from 3.00 to 4.00 , then close the Matinee.
![MHT8_MatineeFinished.png]()
Using the Matinee Actor in Blueprints
In this step, we wll trigger an event when the Explode event is called in our Matinee sequence and activate the particle effect when the Matinee is complete.
-
Select the MatineeActor in the level viewport or World Outliner then click the Blueprints button from the main tool bar and select Open Level Blueprint .
![MHT8_OpenLevelBlueprint.png]()
-
Right-click in the graph window and select the Add MatineeController option.
![MHT8_AddMatineeController.png]()
-
Minimize the Level Blueprint and select the rock in the level, then back in the Level Blueprint, Right-click in the graph and choose Add Reference to SM_Rock_DM .
![MHT8_AddReferenceToRock.png]()
-
Minimize the Level Blueprint again and select the P_Fire asset, then back in the Level Blueprint, Right-click and choose Add Reference to P_Fire .
![MHT8_ReferencesAdded.png]()
-
Left-click on and drag off the out pin of the SM_Rock_DM node and in the window that appears, enter the text Apply then click Apply Radius Damage .
![MHT8_ApplyRadiusDamage.png]()
-
Left-click on and drag off the Explode out pin for the MatineeActor and connect it to the in pin of the Apply Radius Damage node, then set each of the float values to 12000 .
![MHT8_ExplodeComplete.png]()
-
Left-click on and drag off the out pin of the SM_Rock_DM node and in the window that appears, enter the text Location and choose Get Actor Location .
![MHT8_GetActorLocation.png]()
-
Left-click on and drag off the out pin of the Get Actor Location node and connect it to the Hurt Origin in pin of the Apply Radius Damage node.
![MHT8_HurtOrigin.png]()
-
Left-click on and drag off the out pin of the P_Fire node and in the window that appears, enter the text Activate and choose the Activate option.
![MHT8_ActivateNode.png]()
-
Left-click on and drag off the Finished out pin for the MatineeActor and connect it to the in pin of the Activate node.
![MHT8_BlueprintFinished.png]()
-
Click the Compile button on the tool bar and close the Level Blueprint.
![MHT8_Compile.png]()
-
In the World Outliner, click the MatineeActor , then in the Details panel click the Play on Level Load option.
![MHT8_PlayOnLoad.png]()
-
Click the Play button from the main tool bar to play in the editor.
You should see the text countdown and the rock explode with a particle and sound effect, after which fire can be seen in the location where the rock was.


