Choose your operating system:
Windows
macOS
Linux
On this page you will learn how to modify the existing Third Person Template project to create a Top Down 2D style game.
You can use your own 2D character with this tutorial or you can download a sample character from the link below:
Setup Project
Here we will set up our project for this tutorial, you can import your own assets during this section or use the Sample Assets provided.
-
Create a new Third Person Blueprint template project.
-
Inside the project, Right-click on the Content folder in the Content Browser and create a New Folder .
![TopDown1.png]()
Give the folder a name such as TopDown or whatever you would like.
-
Locate the downloaded Sample Assets and drag the SoldierSprites.paper2dsprites asset into Content Browser .
![TopDown2.png]()
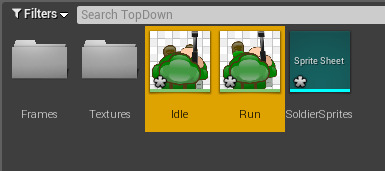
This will automatically create a SolderSprites Sprite Sheet asset and folders containing Frames and Textures .
![TopDown3.png]()
For more information on how to set up assets for importing, see the Paper 2D Import Options documentation.
-
Right-click on the SoldierSprites asset and select create Flipbooks .
![TopDown4.png]()
This will automatically create two Flipbooks based on the sprite sheet for us.
![TopDown5.png]()
-
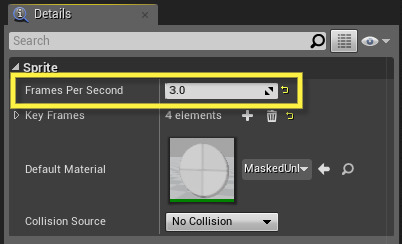
(Optional) Open the Idle Flipbook and in the details panel set Frames Per Second to 3.0 .
![TopDown6.png]()
Also set the Run Flipbook Frames Per Second to 8.0 .
![TopDown7.png]()
This will slow down the playback speed of both Flipbook Animations.
Our project is now set up and we can begin setting up the Top Down Character.
Character Setup
Here we will create a new Paper 2D Character Blueprint and set up the character.
-
Right-click in the Content Browser and select to create a new Blueprint Class .
![TopDown8.png]()
-
In the Pick Parent Class window, click the All Classes drop down and search for and add the PaperCharacter .
![TopDown9.png]()
Give the new Blueprint a name such as TopDownCharacter .
-
Inside the TopDownCharacter Blueprint, in the Components window click the Sprite component.
![TopDown10.png]()
-
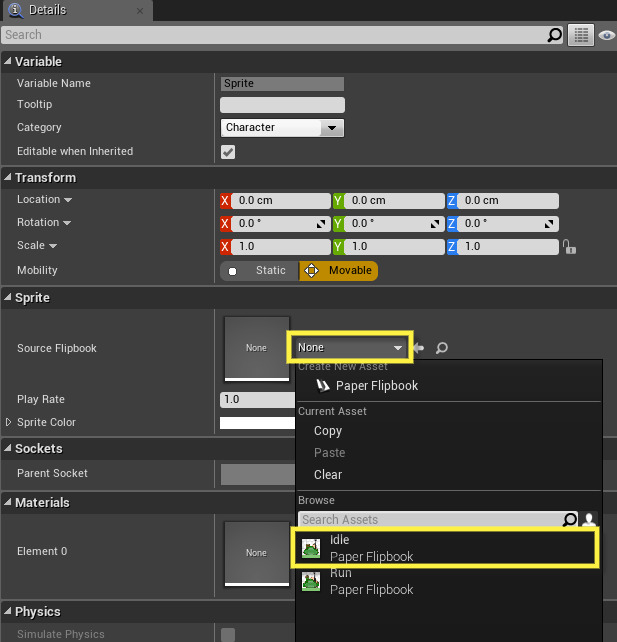
In the Details panel under Sprite click the Source Flipbook drop down and select the Idle Flipbook.
![TopDown11.png]()
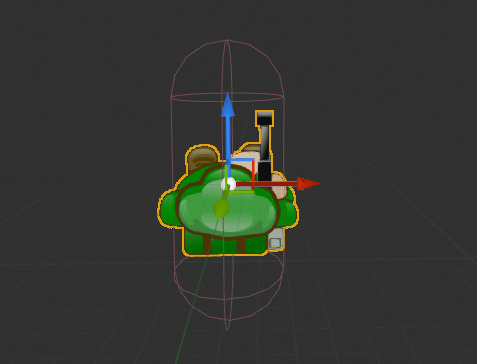
The character will then be added to the Viewport inside the Capsule Component.
![TopDown12.png]()
-
Back inside the Details panel under Transform , set the Rotation to -90,0,90 and Scale to 0.75 for XYZ.
![TopDown13.png]()
This will rotate the Flipbook into position and scale it down so it fits inside the Collision Capsule.
-
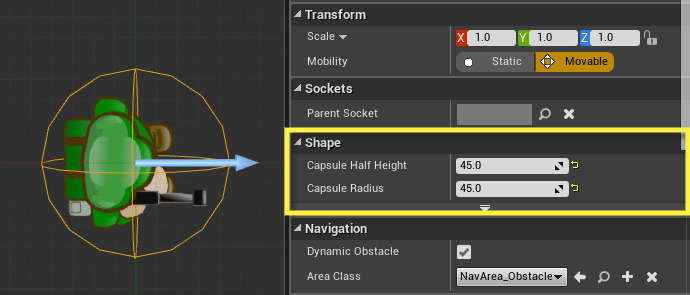
In the Components window, click the CapsuleComponent then in the Details panel adjust the Shape settings.
![TopDown14.png]()
This will vary based on the character you are using, we have set both Half Height and Radius to 45.0 .
-
In the Components window, click TopDownCharacter(self) then in the Details panel, un-check Use Controller Rotation Yaw .
![TopDown15.png]()
For this example we are going to automatically orientate our character to the direction they are moving and not use the controller rotation.
-
In the Components window, click the CharacterMovement component.
-
In the Details panel for CharacterMovement , update the Max Walk Speed to 400 and check Orient Rotation to Movement .
![TopDown16.png]()
This will reduce the characters movement speed and automatically rotate the character based on our movement.
-
In the Components window, click Add Component and search for and add a Spring Arm component.
![TopDown17.png]()
-
Click Add Component again and add a Camera component, then drag the Camera onto the Spring Arm to attach it.
![TopDown18.png]()
-
Select the Camera component, then in the Details panel, zero out the Location setting.
![ZeroCamera.png]()
-
Select the Spring Arm then make the following updates in the Details panel.
![TopDown19.png]()
Here we are adjusting the Rotation of the Spring Arm (and by extension, Camera) to 180, -90, 180 to position the camera directly above the character. We are also adjusting the camera distance away from the character by changing the Target Arm Length to 600 . Finally we've unchecked the Inherit options for Pitch, Yaw and Roll as we do not want to inherit settings from the camera.
-
Click Compile and Save then minimize the Blueprint (we will come back to it in a moment).
The character is setup, however there is no movement script applied to it which we will grab from the Third Person Character Blueprint.
Finishing Up
There is no need to reinvent the wheel here, since this template comes with a character with scripted functionality for movement, we can copy that into our Paper Character to provide movement for it.
For more detailed information on setting up character movement and setting up character movement from a blank project, see the Setting Up Character Movement in Blueprints documentation.
-
Inside the ThirdPersonBP folder in the Content Browser , open the Blueprints folder then the ThirdPersonCharacter Blueprint.
-
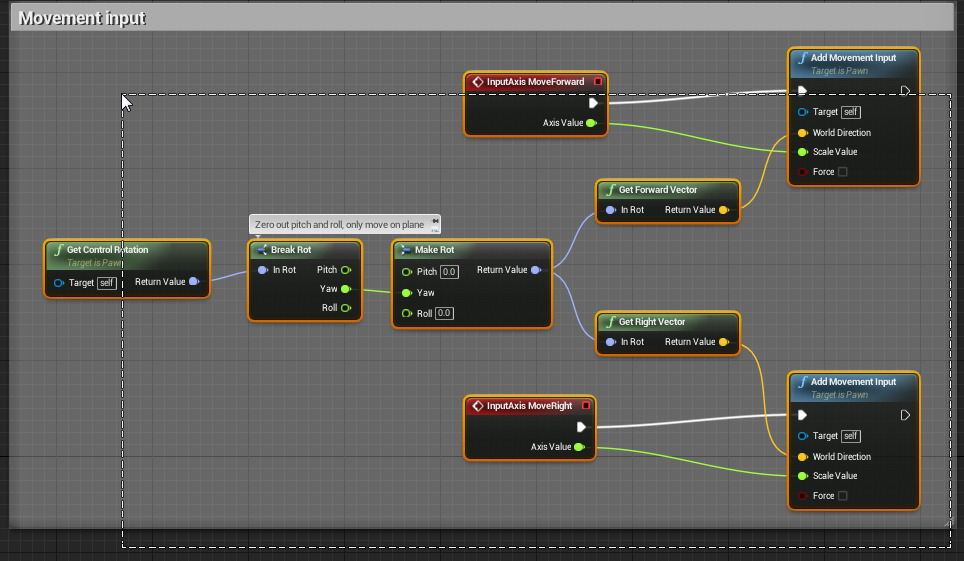
Inside the Event Graph , copy the Movement Input section by Left Mouse dragging a selection box then pressing Ctrl+C to copy.
![TopDown20.png]()
There is other script in here for 3D gameplay such as manipulating the camera, controller input and jumping. For the purposes of this tutorial we are only concerned with general movement.
-
Return to your Paper Character Blueprint and press Ctrl+V in the Event Graph to paste it in.
-
Also inside the ThirdPersonBP and Blueprints folder, open the ThirdPersonGameMode Blueprint.
-
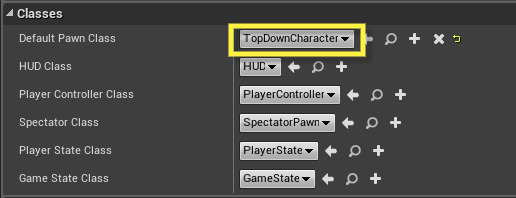
Under Classes , change the Default Pawn Class to your Paper Character ( TopDownCharacter ).
![TopDown21.png]()
This will set our Paper Character as the default character to use during gameplay.
-
Inside the level delete the Blue Character so you will not take control of it when launching the game.
![DeleteMe.png]()
-
From the Main Tool bar, click the Play button to play in the editor.
Although the 2D character is idle, you can now move around the default map using the WASD keys.
This tutorial illustrates how to set up the foundation of a top down game by creating a playable 2D character, there are other tutorials you can take a look at to continue to develop this sample such as the Setting up an Animation State Machine (to set up different Flipbook Animation states for the character to use) as well as the section on Paper 2D Tile Maps to create a 2D map. Want a fixed camera position instead of a follow camera for your top down game? The How to Use Cameras in Blueprints page will show you how to set that up and more.


