Choose your operating system:
Windows
macOS
Linux
One of the methods real-world filmmakers use to produce smooth, sweeping shots, is by attaching a camera to a crane and controlling the shot with the crane's movement. You can create similar shots in Sequencer with the use of the Camera Rig Crane Actor and an attached Camera . You can keyframe the crane's Pitch, Yaw, or the length of the Crane Arm, as well as Lock the Mounted Camera's Pitch or Yaw (which will follow the crane's movement).
In this guide, we will add a Camera Rig Crane, attach a Camera, and create a sample Crane Shot as indicated in the example below:
Steps
For this how-to, we are using the Blueprint Third Person Template project with Starter Content enabled.
-
In the Level Viewport of your project, select the ThirdPersonCharacter , then hold Alt , click a translation widget arrow and drag out, then rotate the copy so that it faces the existing character.
![Crane01.png]()
These two characters are going to be the subject of our crane shot.
-
From the Main Toolbar, click the Cinematics button, then select Add Level Sequence from the drop-down menu.
![Crane02.png]()
-
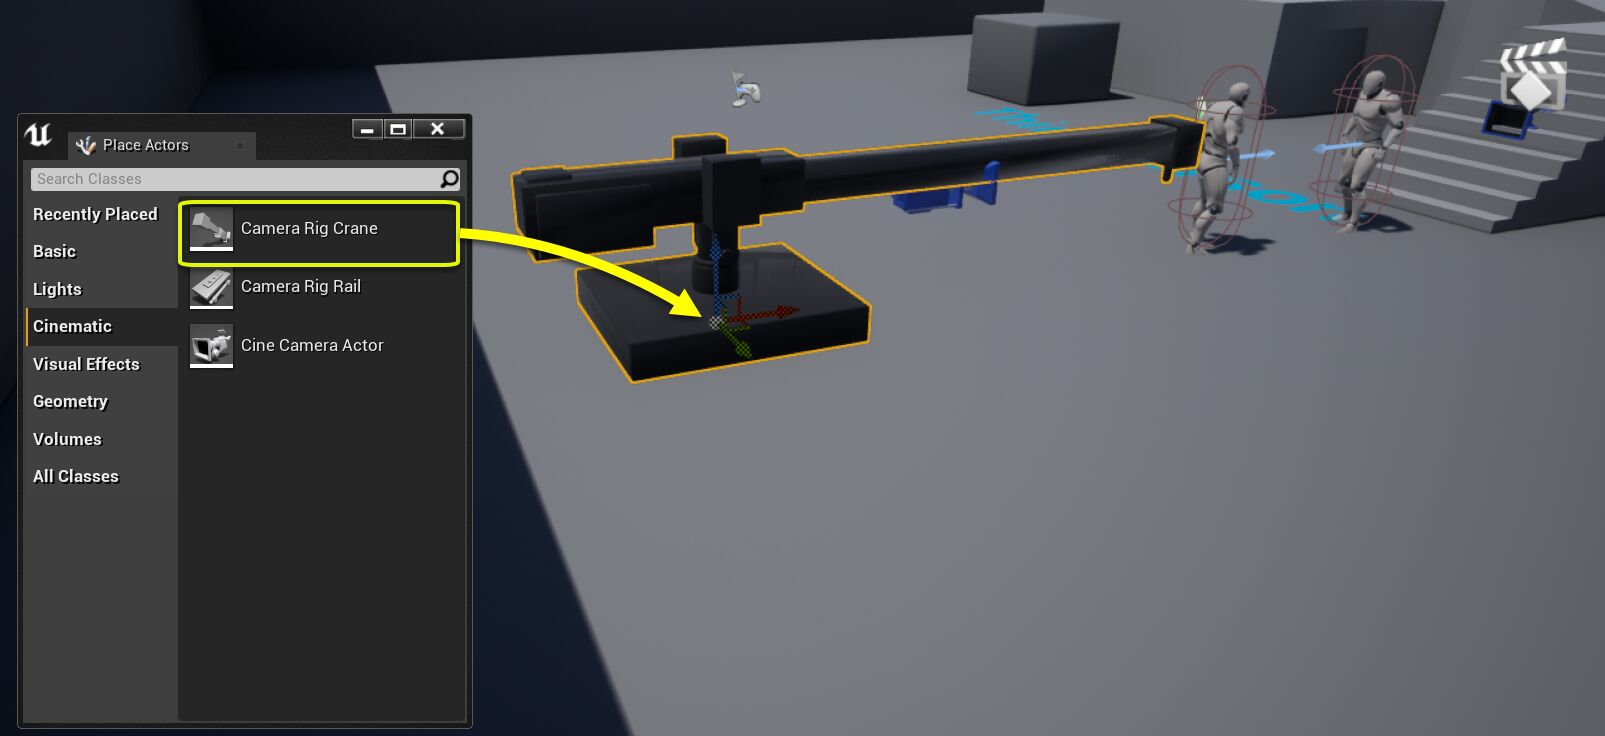
From the Place Actors panel in the Cinematic tab, drag a Camera Rig Crane into the level.
![Crane03.png]()
-
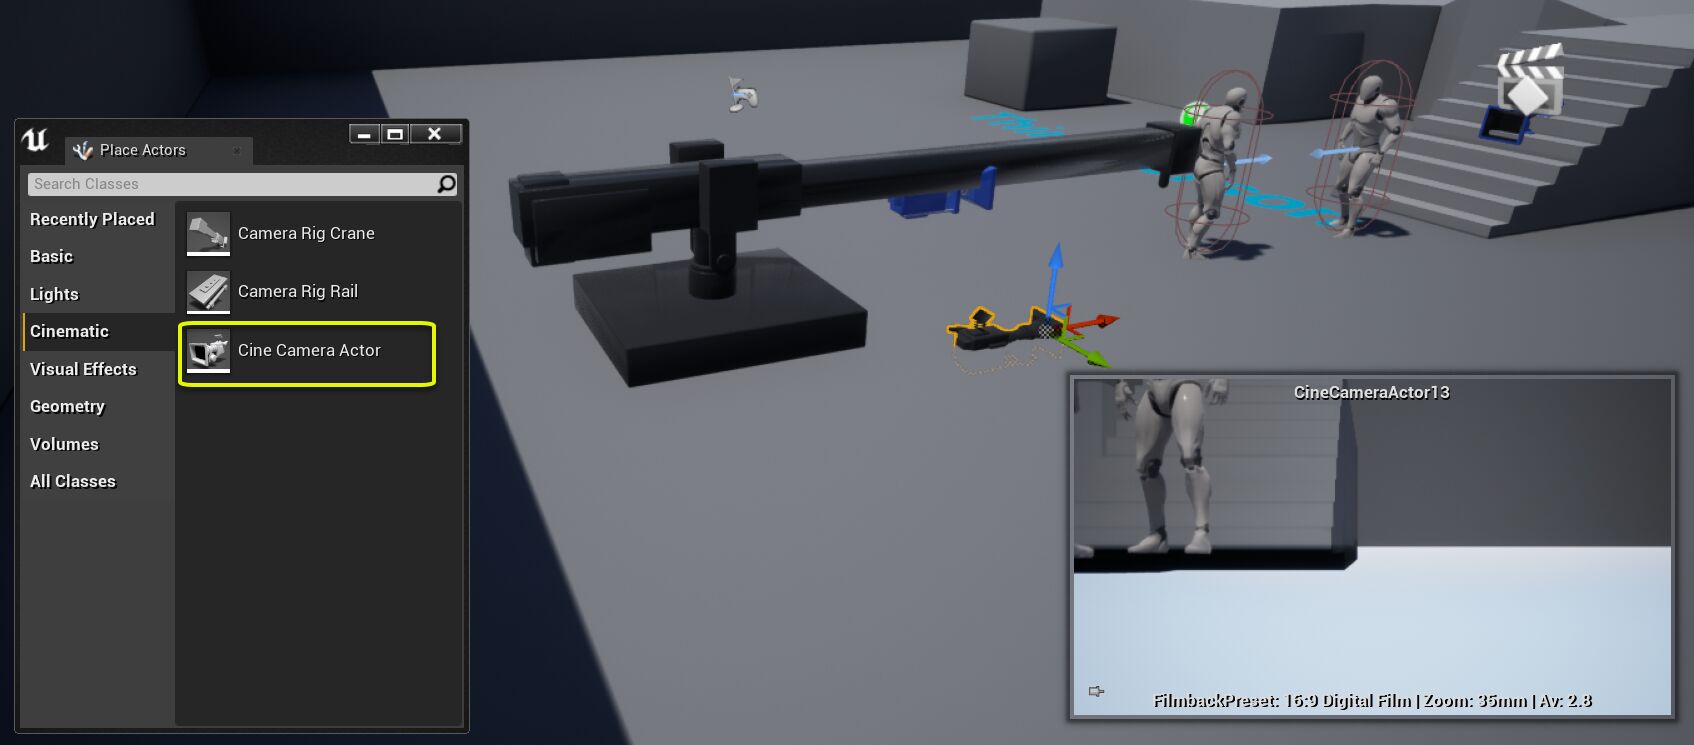
From the Place Actors panel in the Cinematic tab, drag a Cine Camera Actor into the level.
![Crane04.png]()
-
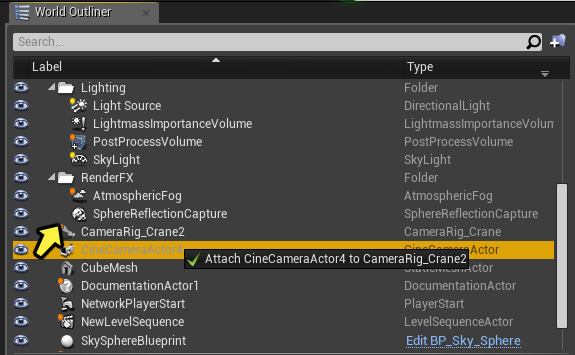
In the World Outliner panel, drag the Cine Camera Actor on top of the Camera Rig Crane to attach it.
![Crane05.png]()
This will attach the camera to the crane, allowing it to move where the crane moves.
-
In the Details panel for the Cine Camera Actor , set the Location and Rotation values to 0.0 .
![Crane06.png]()
This will allow the camera to be attached to the Camera Rig Crane's mount position.
-
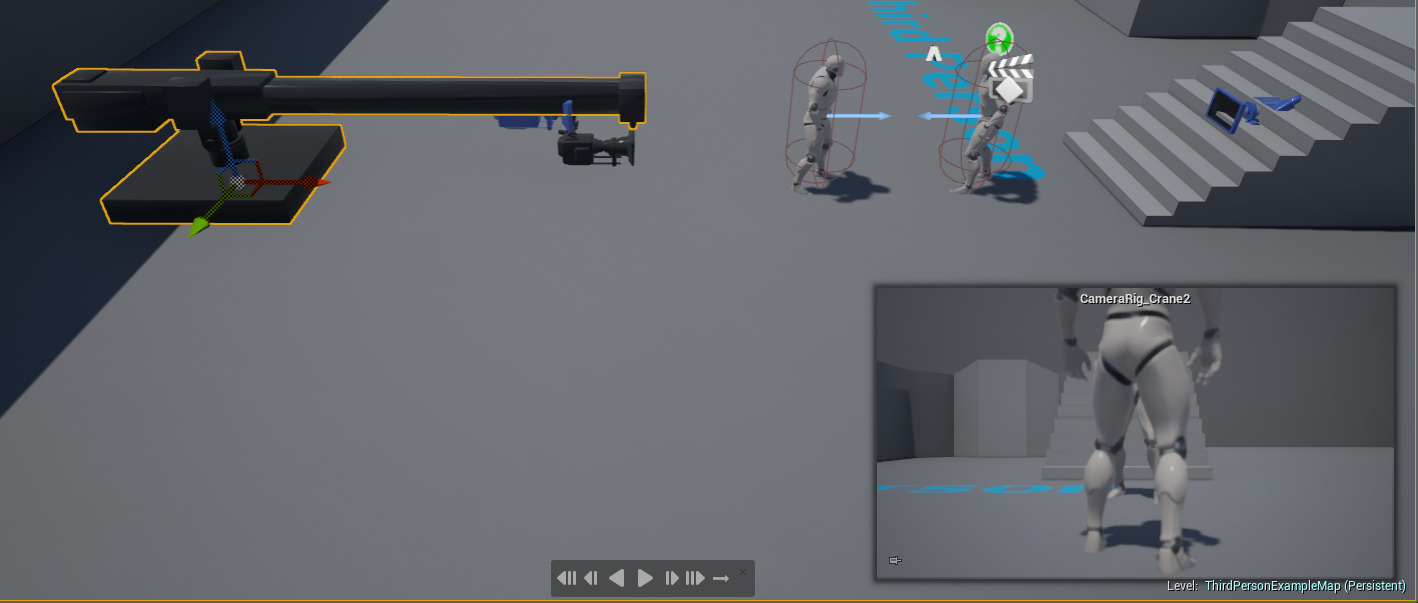
Make any adjustments to the position of the Camera Rig Crane to set up your shot (below, the position is behind the character).
![Crane07.png]()
-
Hold Ctrl and select the Camera Rig Crane and Cine Camera Actor (so that both are selected), then click Add in Sequencer and add both to the Level Sequence.
![Crane08.png]()
-
Select the Camera Rig Crane , then in the Details panel, click the Add Key button for Crane Pitch , Crane Yaw and Crane Arm Length .
![Crane09.png]()
This will set the default position of each to start the sequence.
-
In Sequencer, select the Cine Camera Actor , then press the S key.
![Crane10.png]()
This is a shortcut for adding a key for the current Transform values, initializing the camera's position.
-
Scrub the Timeline to frame 50 , changing the Crane Pitch value on the Camera Rig Crane to 40.0 , and then click the Add Key button.
![Crane11.png]()
If you move the Timeline back to 0 and scrub through to 50, you will see the crane move between the two keyframes (as seen below).
Also included in the video (above), is how enabling the Lock Mount Pitch option affects the attached camera. With the option disabled, the camera maintains its set position. When enabling the option, the mounted camera follows the pitch of the crane and automatically changes as the crane moves. This option can be keyframed so that you can turn the option on/off through Sequencer based on your shot needs.
-
With the Timeline at frame 50 , select the Cine Camera Actor , and then press S to add another keyframe.
![Crane12.png]()
-
Scrub the Timeline ahead to the end of the shot, change the Crane Yaw and Crane Arm Length to 75 and 600 respectively, then add keys for each.
![Crane13.png]()
You should see the values shift between keyframes for the Crane Yaw and Crane Arm Length as you scrub through the Timeline.
Also, similar to the Lock Mount Pitch , the Lock Mount Yaw option allows you to force the mounted camera to be locked to the yaw position of the crane. If you enable both Lock Mount Pitch and Lock Mount Yaw, the mounted camera will pitch and yaw in the same direction of the crane.
-
Rotate the camera in the Level Viewport to frame up the two characters, then press S to add a keyframe for the position.
![Crane14.png]()
-
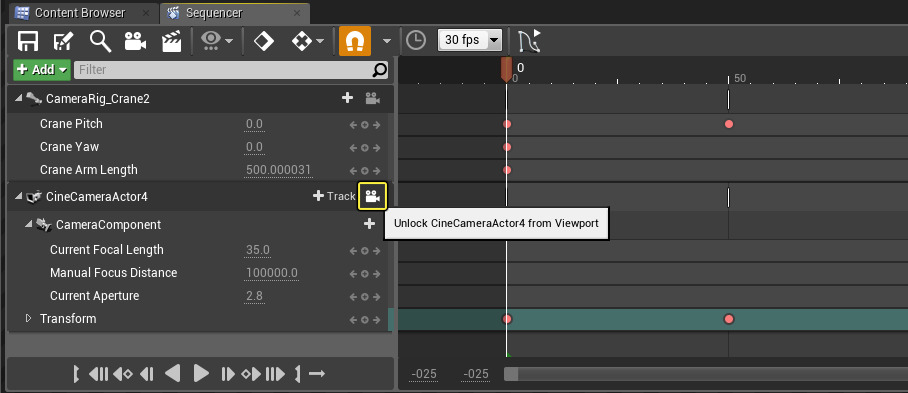
In Sequencer, click the Camera Lock button on the Cine Camera Actor track.
![Crane15.png]()
This will lock the viewport to the perspective of the camera and allow us to view what the shot will look like when using this camera.
End Result
You should have something similar to the following video, where the camera movement follows the path defined by your crane.
In the video, we lock the viewport to our camera and turn on Game View ( G key) to hide all editor icons to give us an idea of what the shot will look like.
In this how-to, we added the Camera Rig Crane to the level, then added a Cine Camera Actor and manually attached it to the crane. There is an advanced method you can use when adding a Camera Rig Crane asset to a level that will automate several of the steps from this how-to, which will automatically add and attach a Cine Camera Actor to your Camera Rig Crane. It will also add both assets to an open Level Sequence, assign a Camera Cuts Track, and assign the camera to use for the shot.
Please see the Workflow Shortcuts Sequencer documentation for the automated method and other Sequencer tips.


