Choose your operating system:
Windows
macOS
Linux
Often times in film, you will have several people working on different facets of a scene at the same time. Sequencer supports this type of workflow through the Subscenes Track which allows you to layer Level Sequences on top of each other to produce a final sequence.
You may have an animator creating the animations for the sequence, while someone else works on the camera and another works on effects which are all part of the same sequence. Doing so this way allows people to have their own working Level Sequence and work independently without altering content in other scenes.
In this example we produce a small scene using the Subscenes Track & Compositing of multiple Level Sequences.
Steps
For this how-to, we are using the Blueprint Third Person Template project with Starter Content enabled.
-
Inside your project in the Content Browser create 5 Level Sequence assets.
![SubTrack1.png]()
Above, we created a folder called Sequences for organizational purposes and created our Level Sequence assets inside it.
In this example, we created a MasterSequence which would hold all of our shots and be used to create the full cinematic sequence. We create Shot_01 as the first shot of that sequence and anticipate that we will have 3 people working on it. We then created sequences for each person e01 - e03 which will be layered to compose the final Shot_01 sequence.
-
Double-click to open Shot_01 , then add a Sub Track inside Sequencer.
![SubTrack2.png]()
-
Click the + Sequence button and add Shot_01_e01 .
![SubTrack3.png]()
-
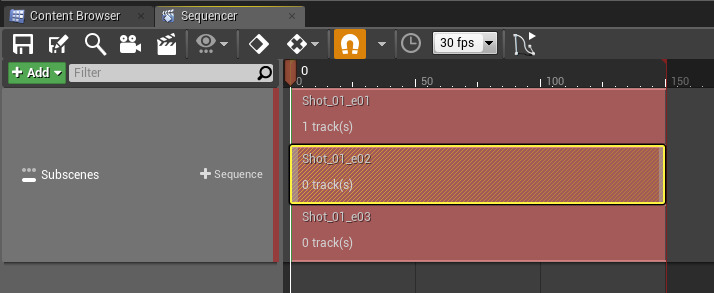
Add Shot_01_e02 and Shot_01_e03 to the Subscenes Track and drag them so they appear on top of each other.
![SubTrack4.png]()
When we play Shot_01 each of these Subscenes will play concurrently with whatever content they have inside them.
-
In the Content Browser under Content/Mannequin/Character/Mesh , drag the SK_Mannequin into the level.
![SubTrack5.png]()
-
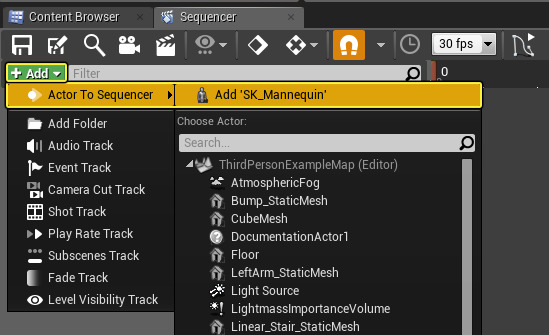
In Sequencer , Double-click on the Shot_01_e01 Subscene to open it then add the SK_Mannequin to the scene.
![SubTrack6.png]()
-
Click the + sign on the Animation track and add the ThirdPersonWalk animation then stretch it to fill the sequence.
![SubTrack7.png]()
-
On the Location track add a key at 0 for the current position, at 150 move the SK_Mannequin forward add key the new position.
![SubTrack8.png]()
Need a refresher to working with Sequencer Transforms, see Working with Camera Cuts for more information.
-
Use the breadcrumbs to return to Shot_01 , move the Timeline back to 0 then Double-click on Shot_01_e02 to open it.
![SubTrack9.png]()
You will also notice now that Shot_01_e01 has 1 track added to it (the SK_Mannequin Skeletal Mesh track).
-
Add a Subscenes Track and add Shot_01_e01 (this will be used for referencing the animation).
-
Click the Add Camera button to add a camera and then create a path to follow the movement of the character.
Since we are working in our own scene, we are not affecting our animators work in Shot_01_e01 but simply referencing it so that we can set up our camera movement. This makes it easier to see and work with others content without working inside it. The alternative method is to jump back up to the Shot_01 level to see how the scenes are playing with one another.
-
Delete the Subscenes and Camera Cuts tracks from Shot_01_e02 .
The Subscene Track we added was for movement reference, if we leave it in it will affect the overall transform as seen below.
![SubTrack11.png]()
After deleting the Subscenes Track in Shot_01_e02 , the transform is correct.
![SubTrack12.png]()
The viewport is locked to the camera assigned in the Camera Cuts track so we are removing this for now so we can continue to work.
-
Open the Shot_01_e03 scene and add a Subscene Track with Shot_01_e01 .
![SubTrack13.png]()
In this sequence our FX artist is going to add effects each time the character walks so we need reference to the movement, similar to what we just did with the camera work. Again, when we are done with the reference we will need to delete it otherwise it will affect the Transform on the Shot_01 level.
-
Add an Event Track and add keys called FootStep each time the character steps on the ground.
Above we added an Event called FootStep, then copied and pasted it each time the character walked. While this particular effect could be accomplished by creating an Anim Notify as well, this demonstrates how an FX artist could use their own track to apply other types of effects for your scenes.
-
Delete the Subscenes Track after setting up the Event Track.
-
Select the SK_Mannequin in the level, then click the Blueprints button and Open Level Blueprint from the Toolbar.
![SubTrack15.png]()
We need to specify what happens when the Events from our Event Track are called.
-
Right-click in the graph and create a reference to the SK_Mannequin .
![SubTrack16.png]()
-
Right-click and create a Custom Event called FootStep then Right-click again and Spawn Emitter at Location .
![SubTrack17.png]()
-
Use P_Explosion as the Emitter Template , drag off the SK_Mannequin and Get Actor Location and connect as shown.
![SubTrack18.png]()
-
Back in the Content Browser , drag the Shot_01 into the level.
![SubTrack19.png]()
-
In the Details panel for the Shot_01 Level Sequence, check the Auto Play option.
![SubTrack20.png]()
-
Click the Play Button to play in the Editor.
End Result
When playing in the editor, you will see that the character walks forward and spawns an explosion with each step.
The example above does not include the camera work which can be added with one minor modification inside the Shot_01_e02 track.
By re-adding the Camera Cuts Track and pointing to the CameraActor, we determine which camera should be used for the scene. The person working on the camera could continue to make modifications to the scene if they wanted such as adjusting the path of the camera movement. Those changes would only occur inside the Shot_01_e02 track and can be made without changing elements in the other tracks.
Our final composited scene plays out when we play in the level.
Using Subscenes is an efficient way of generating content when multiple people are involved as it allows those individuals to create there content without everyone working in the same Level Sequence.


