Choose your operating system:
Windows
macOS
Linux
This page covers the different methods in which you can load and preview animation assets inside the Animation Editor within Unreal Engine 4. The controls used to manipulate the playback or information displayed about the animation currently being previewed is also covered and additional links to more information are provided.
Preview from Content Browser
The most common method of opening and previewing an animation asset is by Double-clicking on it inside the Content Browser .

This will open the asset selected inside the Animation Editor .
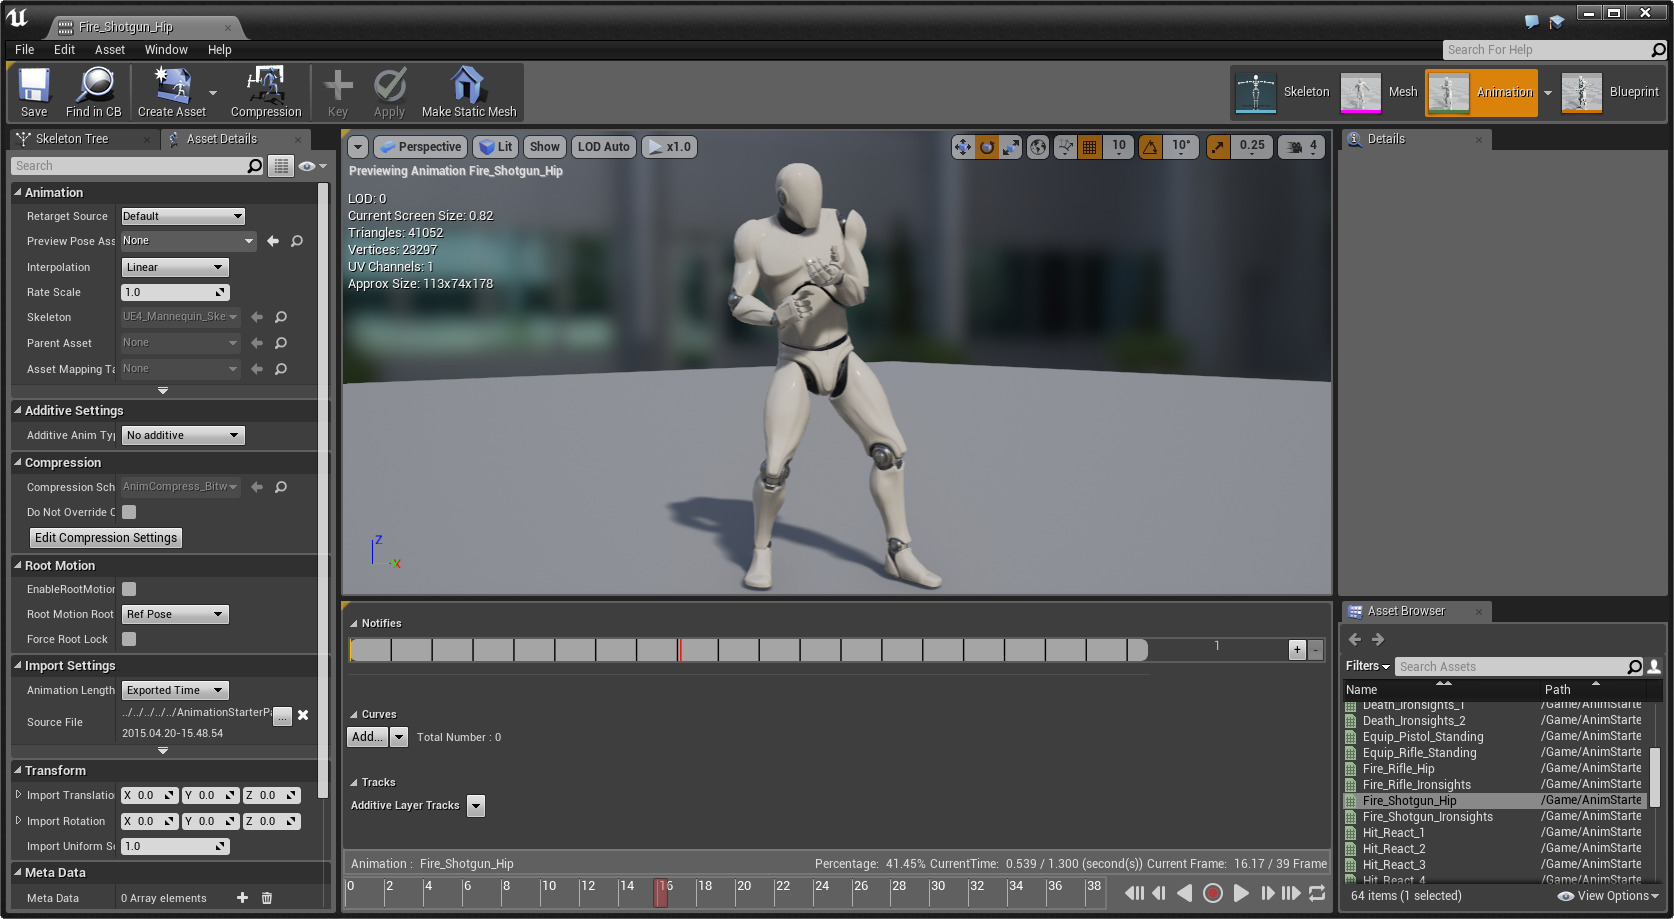
The selected asset will automatically start playing inside the Animation Editor's Viewport and auto-loop playback of the motion.
Preview from Animation Editor
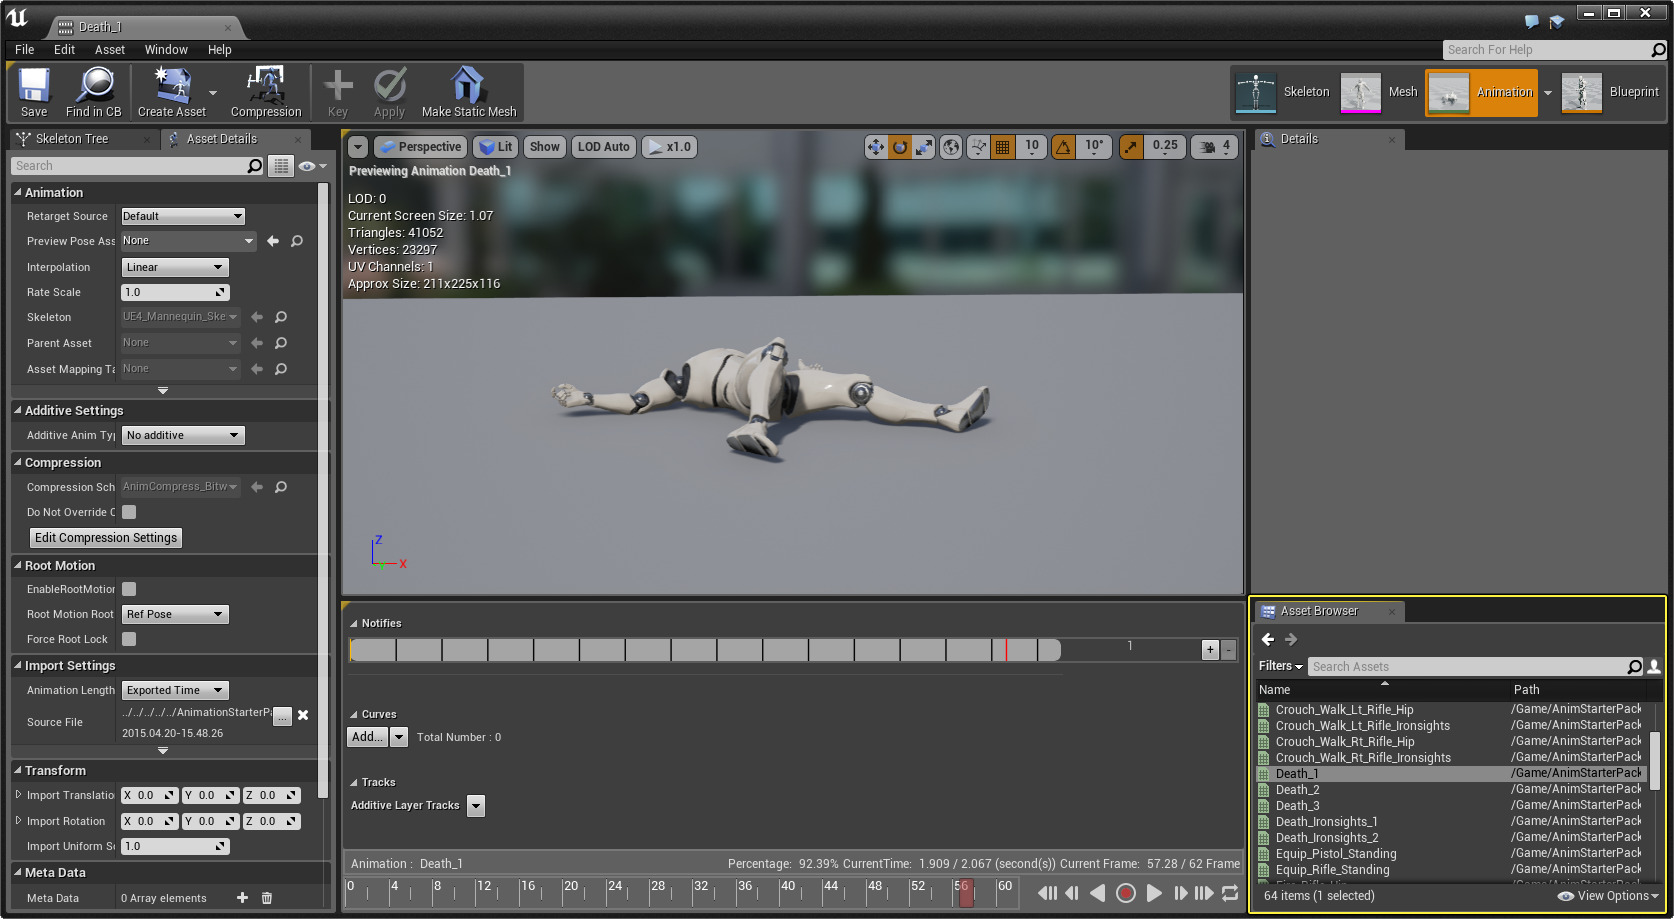
If the Animation Editor is already open, you can Double-click an asset in the Asset Browser to preview it in the Viewport.
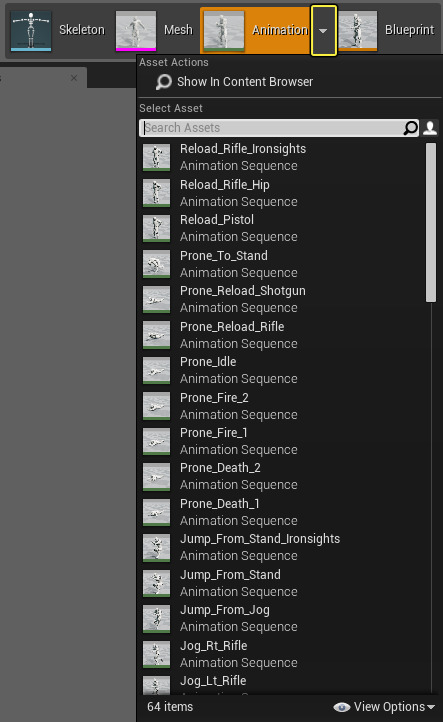
Also while in the Animation Editor , you can set the preview animation from the asset pop-up menu.
Viewport Options
In addition to the standard Editor Viewport controls and options, there are a few settings in particular that you may want to pay attention to when previewing animations.
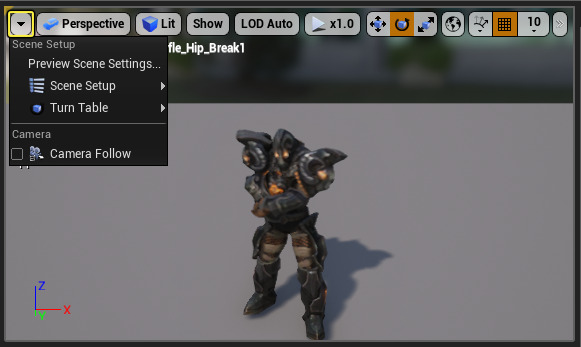
When clicking the

Preview Scene Settings
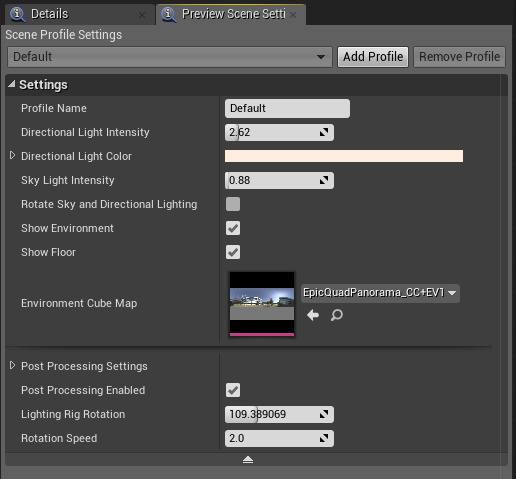
|
Option |
Description |
|---|---|
|
Profile Name |
Name to identify the profile. |
|
Directional Light Intensity |
Manually set the directional light intensity (0.0 - 20.0). |
|
Direction Light Color |
Manually set the directional light color. |
|
Sky Light Intensity |
Manually set the sky light intensity (0.0 - 20.0). |
|
Rotate Sky and Directional Lighting |
Toggle rotating of the sky and directional lighting. Press K and drag for manual rotating of Sky and L for Directional Lighting. |
|
Show Environment |
Toggle visibility of the environment sphere. |
|
Show Floor |
Toggle visibility of the floor mesh. |
|
Environment Cube Map |
Sets the environment cube map used for sky lighting and reflections. |
|
Pose Process Settings |
Manually set Post Process Settings . |
|
Post Processing Enabled |
Whether or not the Post Processing should influence the scene. |
|
Lighting Rig Rotation |
Current rotation value of the sky in degrees (0 - 360). |
|
Rotation Speed |
Speed at which the sky rotates when rotating is toggled. |
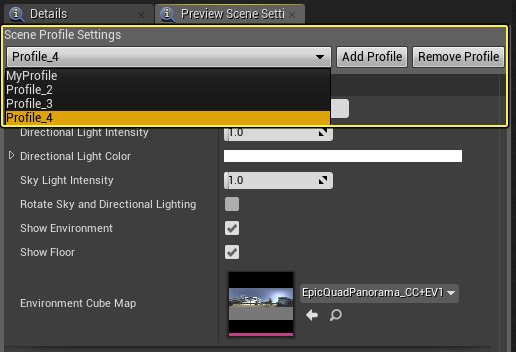
Your settings can be saved as a Profile and you can add and switch between Profiles from the Profiles menu at the top of the window.
Scene Setup
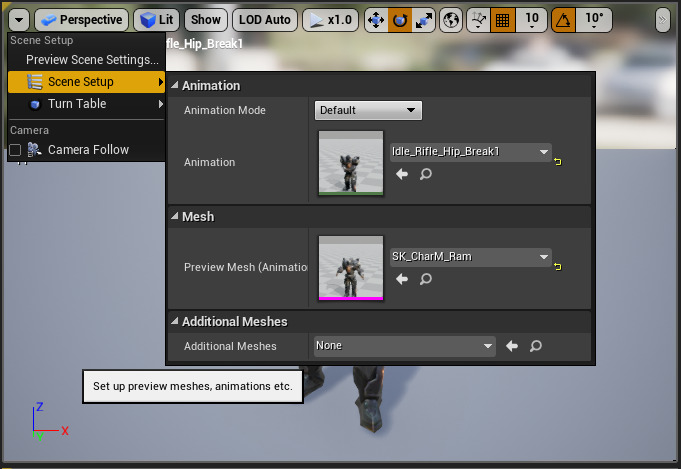
This window is where you can define the animation mode used (toggle between Reference Pose or Animation Asset). There is also an option for assigning the current animation to preview (which is the same as Double-clicking an animation asset from the Asset Browser .
Another important feature of the Scene Setup window is the ability to change the Preview Mesh for your animation. If you have multiple Skeletal Meshes that share animations with one another and want to preview the animation using a different mesh, you can do so from the Preview Mesh (Animation) drop-down menu.
You can also setup and define Preview Mesh Collections to use as Additional Meshes . These are used to build collections of related Skeletal Meshes that are animated together (such as components of a character). You can create a new collection from this window or assign a previously created collection.
Turn Table
This option allows you to set up auto-rotation of the preview mesh.
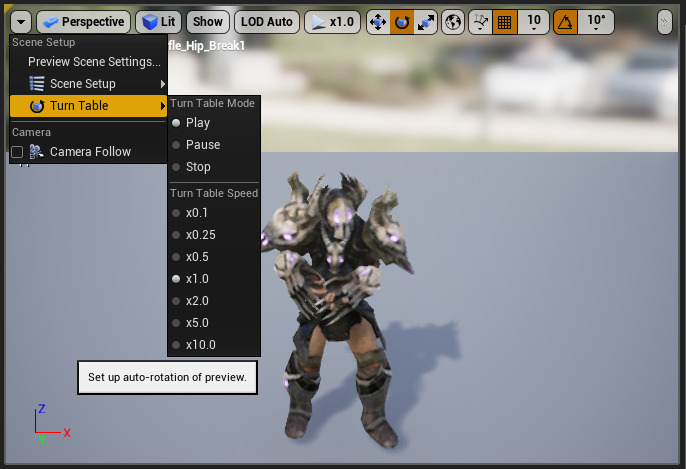
You can Play , Pause or Stop the Turn Table Mode as well as define the Turn Table Speed .
Animation Display Information
You can toggle the information displayed in the viewport from the Show option under Display info .
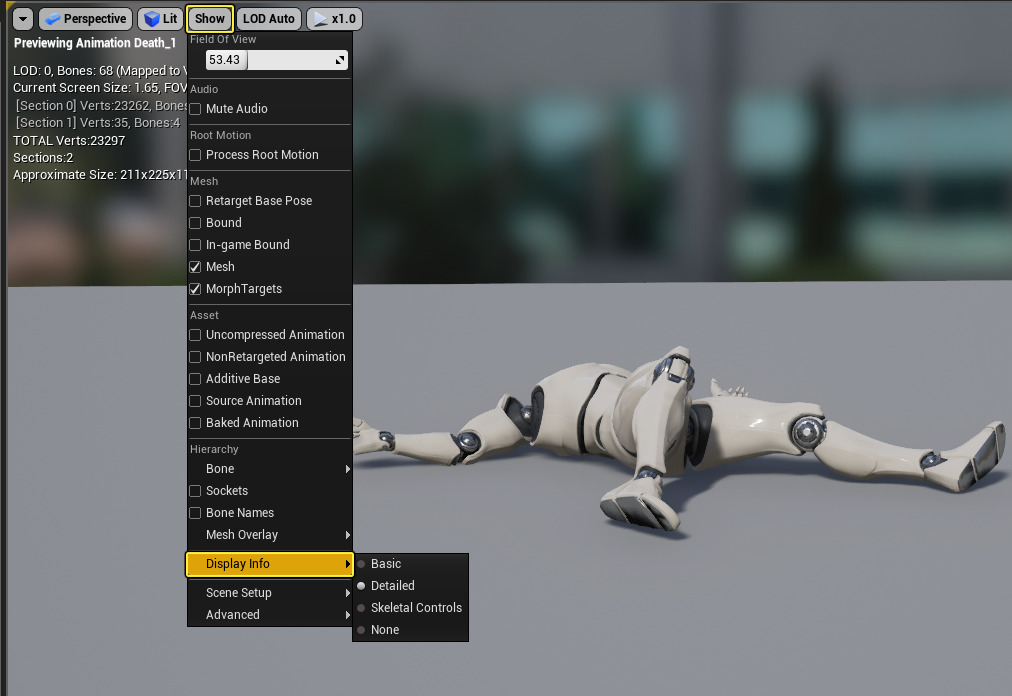
Basic will show a condensed version of the display info, while Detailed will show more information and None will hide the display info.
Playback Controls
When you open an AnimSequence or AnimMontage , at the bottom of the center window you will see the Timeline and Control Bar used to control the playback of the animation asset. You can play, pause, skip, scrub and loop the animation from the Timeline and Control Bar options highlighted in yellow below. You can also record and create a new animation based on your currently selected animation.
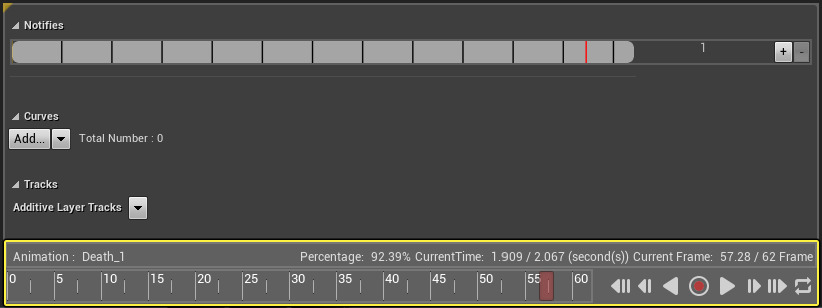
The information bar in the Timeline displays the following playback information:
|
Info |
Description |
|---|---|
|
Animation |
The name of the AnimationSequence currently being edited. |
|
Percentage |
The current playback position expressed as a percentage of the whole animation. |
|
Current Time |
The current playback position expressed in seconds. |
|
Current Frame |
The current playback position expressed in frames. |
The playback controls perform the following actions:
|
Option |
Description |
|---|---|
|
|
The timeline. This shows and allows scrubbing through the frames of the AnimationSequence or AnimationMontage. A red bar is displayed at the current position. Drag the red bar to scrub. |
|
|
Skips to the first frame in the AnimationSequence or AnimationMontage. |
|
|
Skips to the previous frame in the AnimationSequence or AnimationMontage. |
|
|
Begins playback of the AnimationSequence or AnimationMontage in reverse. When playing, the pause button is displayed. |
|
|
Creates a new animation object in the specified location. Click to start recording, click again to stop the recording. |
|
|
Begins playback of the AnimationSequence or AnimationMontage. When playing, the pause button is displayed. |
|
|
Skips to the next frame in the AnimationSequence or AnimationMontage. |
|
|
Skips to the last frame in the AnimationSequence or AnimationMontage. |
|
|
Toggles playback between play once and looping. When looping is enabled, the button turns red. |
Preview Blend Space & Aim Offsets
You can preview the blending of animations when applied to a Blend Space or Aim Offset in the Animation Editor as long as the Enable Preview BlendSpace option is enabled.
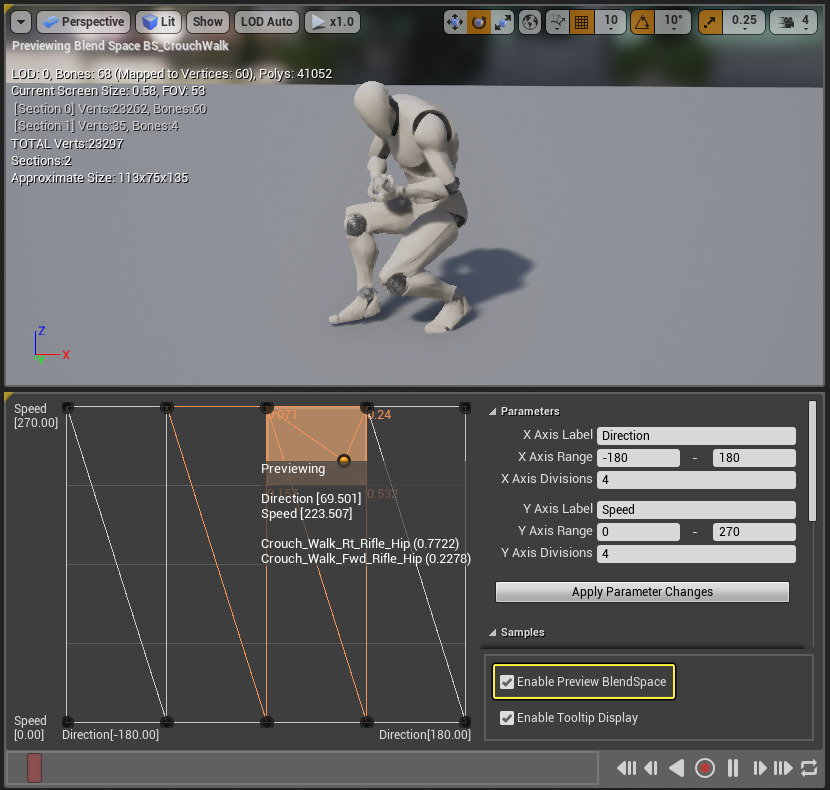
To see the blending between animations, move the Mouse Cursor inside the Parameters grid.
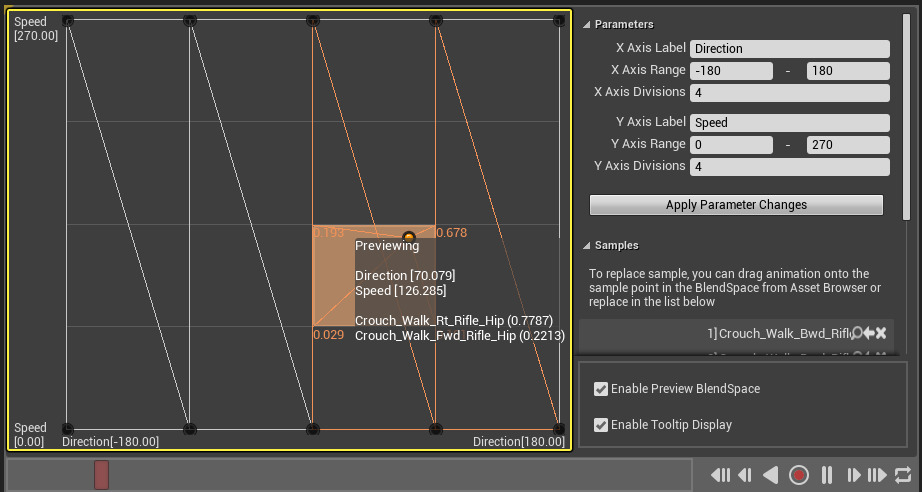
Remove the Tooltip Display by unchecking the Enable Tooltip Display option.

Both Blend Spaces and Aim Offsets can be previewed in the same fashion as cited above.


