
Choose your operating system:
Windows
macOS
Linux
Hardware and Software Requirements
Unreal Engine has some specific hardware and software requirements for running the Editor. This page covers these requirements, as well as describing what is installed by the pre-requisites installer included in the Unreal Engine installer.
Recommended Hardware
Minimum Software Requirements
Minimum requirements for running the engine or editor are listed below.
The requirements for programmers developing with the engine are listed below.
Graphics Card Drivers
We currently recommend using the latest stable releases from each card manufacturer:
Performance Notes
This list represents a typical system used at Epic, providing a reasonable guideline for developing games with Unreal Engine 4:
-
Windows 10 64-bit
-
64 GB RAM
-
256 GB SSD (OS Drive)
-
2 TB SSD (Data Drive)
-
NVIDIA GeForce GTX 970
-
Xoreax Incredibuild (Dev Tools Package)
-
Six-Core Xeon E5-2643 @ 3.4GHz
If you don't have access to Xoreax Incredibuild (Dev Tools Package), we recommend compiling with a machine having 12 to 16 cores; however, we encourage you to read the Hardware Benchmarks (2017) reference to learn more about compiling with and without XGE.
Acquiring Unreal Engine
Source Code Branches
You'll notice that we've published UE4's source code in three rolling branches.

Release Branch
The release branch is extensively tested by our QA team and makes a great starting point for learning UE4 or making Unreal games. We work hard to stabilize this branch with the goal of releasing new builds every one to two months.
Promoted Branch
The promoted branch is updated with builds for use by our designers and artists. We try to update this branch daily so that our subscribers have access to UE4's latest stable features. This branch is a great place to learn how feature development works in UE4.
Master Branch
Because the master branch contains cutting-edge technology, UE4 isn't guaranteed to compile from source.
The master branch tracks live changes being made by our engine team. Our experienced subscribers typically work from this branch when they want to work in tandem with UE4's developers.
Other branches may appear from time-to-time as we work to stabilize new releases or hotfixes.
Downloading the Source Code
Please follow these instructions to download the Unreal Engine source code.
This page shows subscribers how to download and build Unreal Engine from our source code repository on GitHub. If you'd like to download the binary version of Unreal Engine, read our Installing Unreal Engine documentation to learn how to Get Unreal .
Licensing and Contribution
Your access to and use of Unreal Engine on GitHub is governed by the Unreal Engine End User License Agreement . If you don't agree to those terms, as amended from time to time, you are not permitted to access or use Unreal Engine.
We welcome any contributions to Unreal Engine development through pull requests on GitHub. Most of our active development is in the master branch, so we prefer to take pull requests there (particularly for new features). We try to make sure that all new code adheres to the Epic coding standards . All contributions are governed by the terms of the EULA.
Next Steps
Now that you've downloaded and set-up Unreal Engine, you're ready to build the engine from source .
Footnotes
The first time you start the editor from a fresh source build, you may experience long load times. The engine is optimizing content for your platform to the derived data cache , and it should only happen once.
Your private forks of the Unreal Engine code are associated with your GitHub account permissions. If you unsubscribe or switch GitHub user names, you'll need to re-fork and upload your changes from a local copy.
Building Unreal Engine from Source
Read about
-
Inside the root directory, run GenerateProjectFiles.bat to set-up your project files.
All project files are intermediate (
[UE4Root]\Engine\Intermediate\ProjectFiles). You must generate project files each time you sync a new build to ensure they are up to date. If you delete yourIntermediatefolder, you must regenerate project files using the 'GenerateProjectFiles' batch file. -
Load the project into Visual Studio by double-clicking UE4.sln .
-
Set your solution configuration to Development Editor .
![configMenu_updated.png]()
-
Set your solution platform to Win64 .
![platform_menu_updated.png]()
-
Right-click the UE4 target and select Build .
![BuildUE4.png]()


For instructions on building the engine and creating executables on platforms other than Windows, please see Building Unreal Engine from Source .
Launching the Editor
Running the Editor from the Command Line
Running the Editor from the Executable
Running the Editor with No Arguments (Stand-alone)
If the editor is not set to open the most recent project at startup, running the editor executable without any arguments will launch the Project Browser. From here, you can create a new project , open your existing projects , or open content examples and sample games .
Creating Your First Project
When you open Unreal Editor, the Project Browser will appear. The Project Browser provides a jumping off point from which you can create projects, open your existing projects, or open sample content like sample games and Showcases.
When you launch Unreal Engine (UE4), the Unreal Project Browser automatically displays.
Select a Category and Template
-
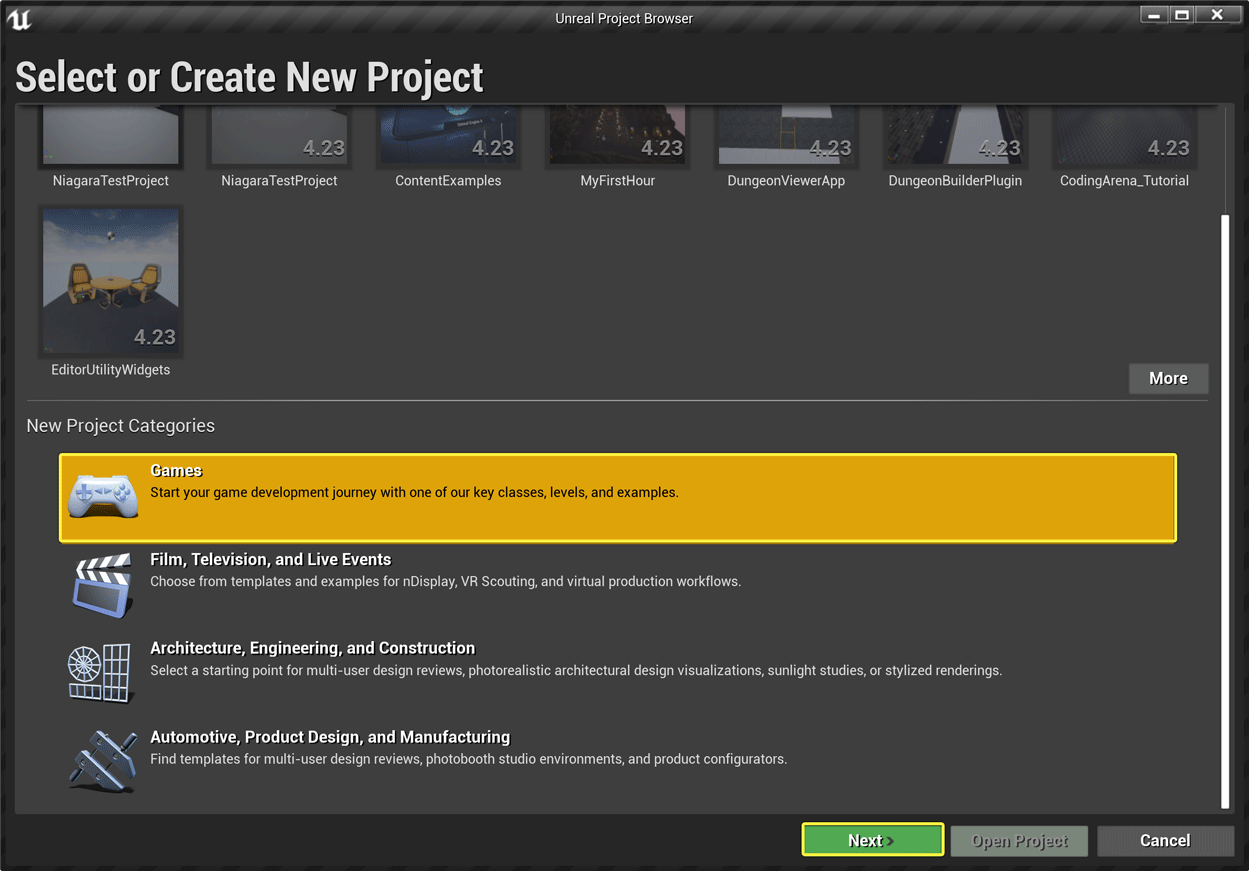
Under New Project Categories , select the development category that best matches your industry. In the example below, Games is selected. You can also select Film, Television, and Live Events ; Architecture, Engineering, and Construction (AEC) ; or Automotive, Product Design, and Manufacturing (APM) .
![Select Category]()
Click image for full size.
-
Select a template for your project, then click Next . The Project Settings page displays.
![Select Template]()
Click image for full size.
The templates shown are for the Games category. For other industries, the following templates are available:
-
Film, Television and Live Events
![Film, TV and Live Events Templates]()
-
Automotive, Product Design, and Manufacturing
![APM Templates]()
-
Architecture, Engineering, and Construction
![AEC Templates]()
-


Select Project Settings
-
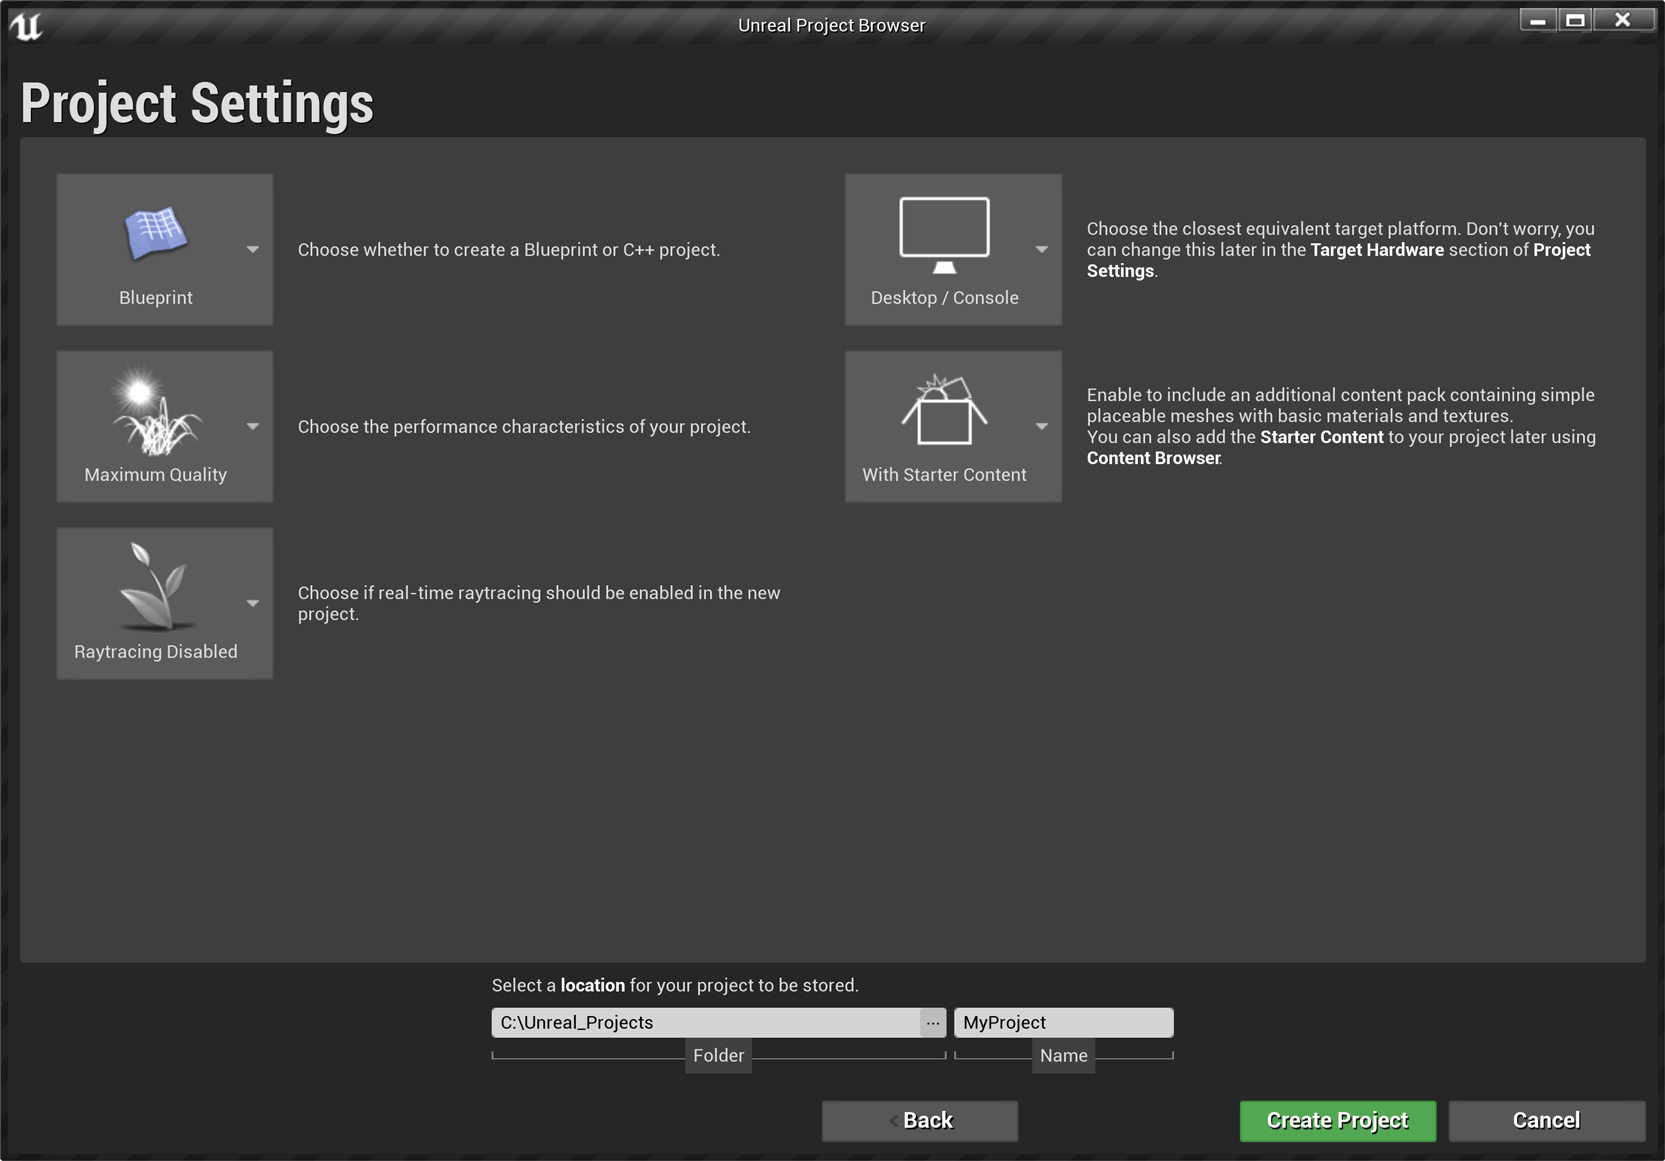
On the Project Settings page, you can choose the quality/performance level, target platform, whether to include Starter Content, and more.
![Project Settings Fullscreen]()
Click image for full size.
-
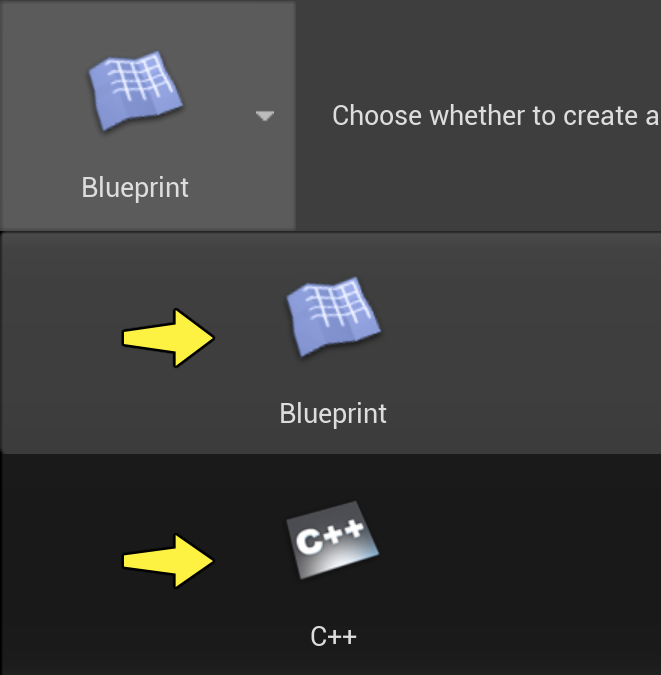
First, click the Blueprint dropdown. Select either Blueprint , or C++ . Choose Blueprint if you want to build your project in the Unreal Editor, and use the Blueprint Visual Scripting system to create interactions and behavior. Choose C++ if you want to build your project by programming with C++ in Visual Studio.
![Blueprint or Code]()
Click image for full size.
-
Next, click the Maximum Quality dropdown. If you are developing your project to be viewed on a computer or game console, choose Maximum Quality . If you are developing your project to be viewed on a mobile device, choose Scalable 3D or 2D .
![Quality]()
Click image for full size.
-
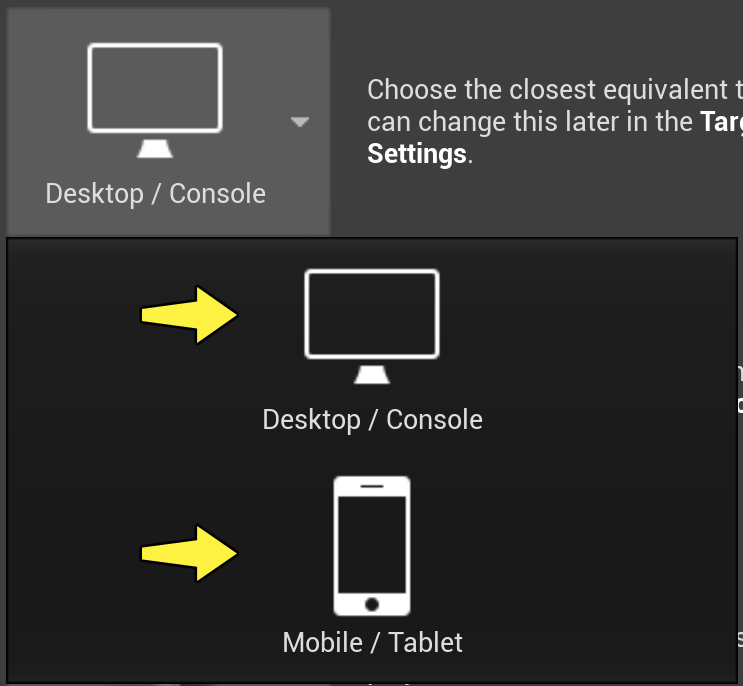
Next, click the Desktop/Console dropdown. If you are developing your project to be viewed on a mobile device, choose Mobile/Tablet . Otherwise, leave it set to Desktop/Console .
![Platform]()
Click image for full size.
-
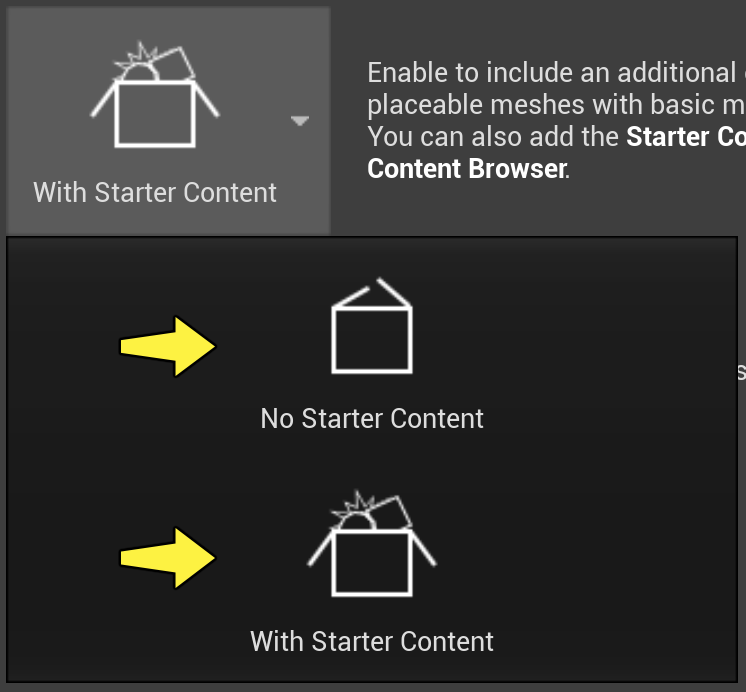
Next, click the With Starter Content dropdown. If you have your own assets and do not need the Starter Content, choose No Starter Content . If you would like some basic assets to start with, choose With Starter Content .
![Starter Content]()
Click image for full size.
-
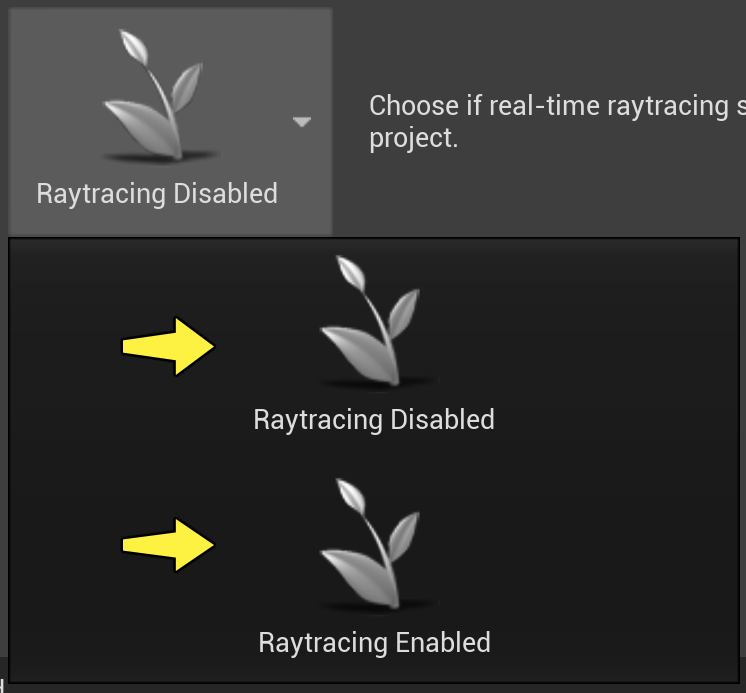
Next, locate the Raytracing Disabled dropdown. If your project needs to be viewed with real-time raytracing, choose Raytracing Enabled . If not, leave it set to Raytracing Disabled .
![Raytracing]()
Click image for full size.
-
Finally, choose where you want to store your project, and give your project a name. Click Create Project to finish.
![Name and Location]()
Click image for full size.


Compiling Code Projects
If you create a project with the Blank template, or any of the Blueprints Only templates, you can immediately begin working with your project in Unreal Editor. When working with any game
or engine C++ code, however, you will need to compile your code in order to see any changes reflected in the game.
Unreal Engine 4 (UE4) uses a custom building method via the UnrealBuildTool which handles all the complex aspects of compiling the project and linking it with the engine. This process occurs transparently allowing you to simply build the project through the standard Visual Studio build workflow.
UnrealBuildTool uses the
.Build.cs
and
.Target.cs
files to build the game project. These are automatically
generated when a project is created using a C++ template, or when the
CPP Class Wizard
is used to add code to a
project created from a Blueprints Only template.
Build Configuration
Unreal projects have multiple targets (Editor, Client, Game, and Server) described by
*.target.cs
files, each of which can be built to different configurations. In Visual Studio, this manifests as a Visual Studio
*.vcxproj
file with different configurations for each target. The solution configurations are named as
[Configuration][Target Type]
(for example, "DevelopmentEditor" for the default editor target, and "Development" for the default standalone game target). The configuration you use will be determined by the purposes of the build you want to create.
Every build configuration contains two keywords, and the first keyword indicates the state of the engine and your game project. For instance, if you compile using a Debug configuration, you will be able to debug your game's code. The second keyword indicates the target you are building for. For example, if you want to open a project in Unreal, you need to build with the Editor target keyword.
|
Build Configuration - State |
Description |
|---|---|
|
Debug |
This configuration contains symbols for debugging. This configuration builds both engine and game code in debug configuration. If you compile your project using the Debug configuration and want to open the project with the Unreal Editor, you must use the "-debug" flag in order to see your code changes reflected in your project. |
|
DebugGame |
This configuration builds the engine as optimized, but leaves the game code debuggable. This configuration is ideal for debugging only game modules. |
|
Development |
This configuration enables all but the most time-consuming engine and game code optimizations, which makes it ideal for development and performance reasons. Unreal Editor uses the Development configuration by default. Compiling your project using the Development configuration enables you to see code changes made to your project reflected in the editor. |
|
Shipping |
This is the configuration for optimal performance and shipping your game. This configuration strips out console commands, stats, and profiling tools. |
|
Test |
This configuration is the Shipping configuration, but with some console commands, stats, and profiling tools enabled. |
|
Build Configuration - Target |
Description |
|---|---|
|
[empty] |
This configuration builds a stand-alone executable version of your project, but requires cooked content specific to the platform. Please refer to our Packaging Projects Reference page to learn more about cooked content. |
|
Editor |
To be able to open a project in Unreal Editor and see all code changes reflected, the project must be built in an Editor configuration. |
|
Client |
If you're working on a multiplayer project using UE4 networking features, this target designates the specified project as being a Client in UE4's client-server model for multiplayer games. If there is a
|
|
Server |
If you're working on a multiplayer project using UE4 networking features, this target designates the specified project as being a Server in UE4's client-server model for multiplayer games. If there is a
|
Unreal Engine Directory Structure
At the top level, there is the Engine directory as well as any game projects you have. The Engine directory contains the engine itself and all of the tools that come with it. Each game folder contains all of the files pertaining to that game. There is a much greater separation between the engine and game projects in UE4 than in previous versions of the engine.
Root Directory
-
Engine - Contains all source code, content, etc. that makes up the engine.
-
Templates - Collection of project templates available when creating new projects .
-
GenerateProjectFiles.bat - Used to create the UE4 solution and project files necessary for working with the engine and your game(s) in Visual Studio. See Project Files for IDEs for details.
-
UE4Games.uprojectdirs - Helper file that allows the engine to discover projects in subdirectories.
Common Directories
Some subdirectories are common amongst both the Engine and game project directories:
-
Binaries - Contains executable files or other files created during compiling.
-
Build - Holds files needed for building the engine or game, including files necessary for creating platform-specific builds.
-
Config - Configuration files for setting values that control engine behavior. Values set in the game project Config files override the values set in the
Engine\Configdirectory. -
Content - Holds content for the engine or game, including asset packages and maps.
-
DerivedDataCache - Contains derived data files generated on-load for referenced content. Not having cache files present for referenced content can increase load times dramatically.
-
Intermediate - Contains temporary files generated during building the engine or game. In game directories, Shaders are stored in the Intermediate directory.
-
Saved - Contains autosaves, configuration (
.ini) files, and log files. Additionally, the Engine > Saved directory contains crash logs, hardware information, and Swarm options and data. -
Source - Contains all of the source files for engine or game, including the engine source code, tools, gameplay classes, etc.
-
Engine - Source files in the Engine directory are categorized into the following:
-
Developer - Files used by both the editor and engine.
-
Editor - Files used by just the editor.
-
Programs - External tools used by the engine or editor.
-
Runtime - Files used by just the engine.
-
-
Game - Source files in a game project directory are organized by module; one directory per module. Each module contains the following:
-
Classes - Contains all gameplay class header (
.h) files. -
Private - Contains all
.cppfiles including gameplay class implementation files and the module implementation file. -
Public - Contains the module header file.
-
-
Engine-specific Directories
Some subdirectories are specific to the Engine directory.
-
Documentation - Contains the engine documentation, both source and published files.
-
HTML - Published HTML documentation files.
-
Source - Source markdown documentation files.
-
-
Extras - Additional helper and utility files.
-
Plugins - Contains plugins used in the engine.
-
Programs - Contains configuration files and log files for projects stored in the UE4 root directory and other Unreal programs such as UnrealFrontend and UnrealHeaderTool.
-
Shaders - Holds the shader source files (
.usf) for the engine.