Explains the Landscape Edit Layers feature for non-destructive layers and splines in heightmaps.
Choose your operating system:
Windows
macOS
Linux
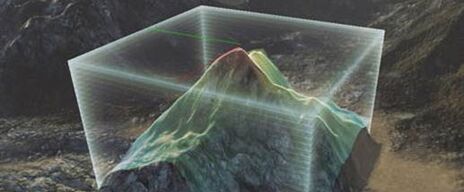
Landscape Gizmos are editor-only Actors that are similar to volumes in that they define a specified area. Their purpose is to hold height and layer data for an area of a Landscape so that it can be copied to another location on the Landscape or exported for use in a different Landscape or heightmap generator (World Machine, Terresculptor,...).
Accessing the Gizmo Tool
To access the Gizmo tool:
-
In Landscape mode, click the Sculpt tab to open the Sculpt Tools toolbar.
![Sculpt Menu Sculpt Menu]()
-
Choose Copy option from the toolbar. The Gizmo brush appears on your selected Landscape as a red-outlined box.
![Gizmo Outline Gizmo Outline]()
Selecting the Gizmo brush creates a temporary Gizmo Actor. You can use the transformation tools to manipulate this Actor as you would any other, to define the area of the Landscape you want to copy.
For more information about the transformation tools, see Transforming Actors .
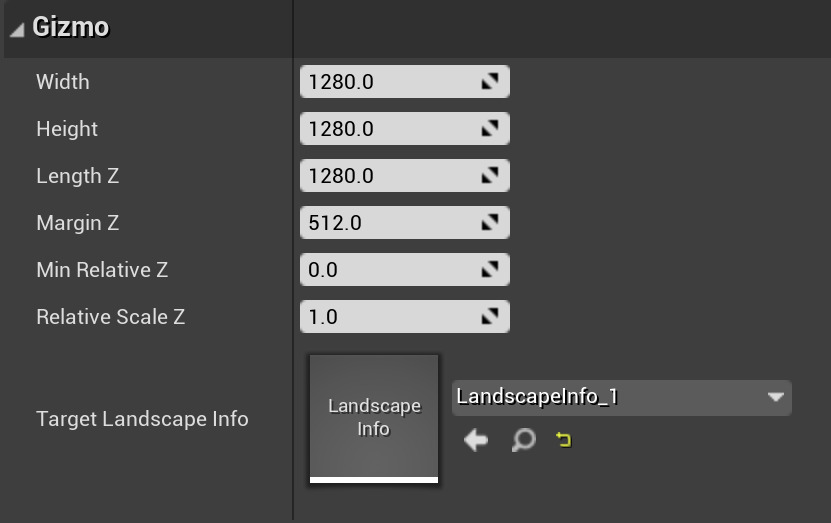
You can also modify the Gizmo Actor's properties in the Details panel.

|
Property |
Description |
|---|---|
|
Width |
The base width for Gizmo Actor in Unreal Units; X axis shown as red line. |
|
Height |
The base height for the Gizmo Actor in Unreal Units; Y axis shown as green line. |
|
LengthZ |
The base Z length for the Gizmo Actor in Unreal Units. |
|
MarginZ |
The Z value for space when you fit the Gizmo to the selection, with Max height and Min height. When you fit Gizmo to selected region, LengthZ = (Max height - Min height) + 2 * MarginZ. |
|
MinRelativeZ |
The minimum height value of data in the Gizmo. Height values in the Gizmo are normalized from 0.f to 1.f and displayed as (Value - MinRelativeZ) * RelativeScaleZ. |
|
RelativeScaleZ |
The height scale of the data in the Gizmo. |
|
TargetLandscape |
The currently selected Landscape, which the Gizmo tool will be used on. |
Copying to the Gizmo
In order to copy a portion of a Landscape, the data for that area must be copied to a Gizmo. Then, that data can later be pasted to another location.
To copy a selected region:
-
In Sculpt mode, select the Region Selection sculpting tool.
![Region Select Region Select]()
-
Use the brush strokes to select a region of the Landscape, similar to the normal painting process.
![Gizmo Copy Gizmo Copy]()
-
Select the Copy/Paste sculpting tool.
![Copy button Copy button]()
The Gizmo will become visible in the viewport.
![Gizmo Tool Gizmo Tool]()
-
Click the Fit Gizmo to Selected Regions button to position and size the Gizmo so that it encompasses all selected regions.
![Copy Gizmo Data Copy Gizmo Data]()
-
Click the Copy Data to Gizmo button to transfer the data for the selected region of the Landscape within the Gizmo's bounds. Pressing Ctrl + C performs the same function.
![Copied Gizmo Data Copied Gizmo Data]()
To copy an area within a Gizmo:
-
Select the Region Copy/Paste sculpting tool. The Gizmo will become visible in the viewport.
-
Select the Gizmo by clicking on it. The transform widget should appear.
![Transform Gizmo Transform Gizmo]()
-
Move, rotate, and scale the Gizmo so that it encompasses the portion of the Landscape you wish to copy.
![Transformed Gizmo Transformed Gizmo]()
-
Press the Copy Data to Gizmo button to transfer the data for the portion of the Landscape within the Gizmo's bounds. Pressing Ctrl + C performs the same function.
![Copied Data to Gizmo Copied Data to Gizmo]()
![Copiy Data to Gizmo button Copiy Data to Gizmo button]()
Pasting from the Gizmo
Pasting data from a Gizmo makes it possible to transfer parts of a Landscape from one location to another. The data can either be pasted completely to create an identical feature, or it can be painted to the new location using brush strokes and strength settings to partially transfer the feature.
Before data can be pasted from a Gizmo, it must first be copied to a Gizmo.
To paste Gizmo data:
-
Move, rotate, and scale a Gizmo that contains data so that it covers the area you wish to paste the data to.
![Translating Gizmo to Paste Translating Gizmo to Paste]()
![Gizmo Paste Gizmo Paste]()
-
Paste the data using one of the available brushes (Circle, Pattern, Alpha, Gizmo) to "paint" the data from the Gizmo.
-
The Gizmo brush is used to fully paste the data from the Gizmo. Pressing Ctrl + V also fully pastes the data from the Gizmo.
-
Other brushes can be used to paint the data from the Gizmo using the current brush size and strength.
![Painting Gizmo Data Painting Gizmo Data]()
![Painted Gizmo Data Painted Gizmo Data]()
-
Gizmo Data Import/Export
Heightmap data can be imported from and exported to the Gizmo through the Gizmo Import/Export section in the Landscape Editor .

To import data to the Gizmo:
-
Click the browse for file button (
![import_filebrowse.png]() ) and select the heightmap file (16-bit raw file) you want to import to the Gizmo.
) and select the heightmap file (16-bit raw file) you want to import to the Gizmo.
![Importing external Gizmo data Importing external Gizmo data]()
Since the import process uses the .raw file format, there is no way to correctly determine which dimension is which. UE4 will populate a dropdown menu with several different sizes that can be accessed by clicking the down arrow shown above. You may need to try a few different sizes before you find the one that works for your Landscape.
-
If you want to import layer weight information as well, press the Add Layer button (
![import_layeradd.png]() ) to add as many layers as desired.
) to add as many layers as desired.
![Importing Layer weight data Importing Layer weight data]()
-
Select the layer weightmap file (8-bit raw file) to import for each layer. The file and layer name will be filled in. The layer name uses the name of the file by default. Change the layer name if needed. Enabling the No Import checkbox will prevent any individual layer information from being imported.
The Layer Name must match the name of a layer that exists on the Landscape or the import will fail.
![Layer name must match exactly what is in the file Layer name must match exactly what is in the file]()
-
Once the heightmap and any layers are selected, press the Import to Gizmo button to import the data to the Gizmo.
If the dimensions are not correct, you may see something similar to this:
![Import Wrong Dimensions Import Wrong Dimensions]()
Reverse the dimensions and re-import to get the correct result. If the dimensions were correct, the Gizmo should show the correct data.
To Export Gizmo Data:
-
With the Gizmo populated with data (see Copying to the Gizmo ), press the Export Gizmo Data button to export the Gizmo data to a file. Enabling the Gizmo copy/paste all layers checkbox at the top of the Gizmo options will export the heightmap and all layers' weight data to files.
-
Choose a location and name for the heightmap file.
![Exporting Heightmap file Exporting Heightmap file]()
-
If exporting layers, choose locations and filenames for each exported layer.
![Exporting Layer file Exporting Layer file]()


 ) and select the heightmap file (16-bit raw file) you want to import to the Gizmo.

 ) to add as many layers as desired.


