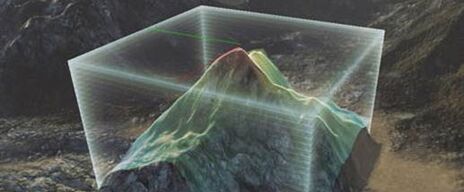
Explains the Landscape Edit Layers feature for non-destructive layers and splines in heightmaps.
Choose your operating system:
Windows
macOS
Linux
In Manage Mode, you can create new Landscapes and use the component tools to modify an existing Landscape's components. You can also select components and modify their properties in the Details panel.
For information about creating Landscapes, see Creating Landscapes .
Landscape Manage Mode also works in the VR Editor. For information on the controls for using Landscape in VR, see the VR Mode Controls .
Landscape Selection
In the Landscape panel, select which Landscape to modify from a list of all the Landscapes currently in your level.

To select a Landscape:
-
In the Landscape panel click the Landscape drop-down box in the Landscape Editor section to display a list of all Landscapes currently in the map.
-
Choose the Landscape you want to edit.
Selecting a Landscape from the list makes that the active Landscape. All subsequent editing will then be applied to that Landscape.
Components
Components are the building blocks of any Landscape Actor. You can work with them using the Component tools and adjust their properties individually in the Details panel.
Component Tools
The tools described below act on the component level of the currently selected Landscape.
Selection

The Selection tool selects Landscape components for subsequent use with other tools, such as moving them to a streaming level or deleting components.
|
Control |
Operation |
|---|---|
|
Left Mouse Button click |
Toggles the selection of the component. |
|
Shift + Left Mouse Button click |
De-Selects components. |
The selection cursor is always limited to one component:

When components have been selected, they become shaded red:

|
Option |
Description |
|---|---|
|
Clear Component Selection |
Clears the current selected component(s). |
Add

The Add tool creates new components for the current Landscape, one at a time.
|
Control |
Operation |
|---|---|
|
Left Mouse Button click |
Adds a new component. |
When the Add Landscape Component tool is active, the cursor shows a green wireframe where new components can be added:

Using the tool adds a new component where the cursor is located:

Delete

The Delete tool deletes any selected components.
|
Control |
Operation |
|---|---|
|
Left Mouse Button click |
Deletes highlighted components selected by the Selection tool. If no components are currently selected, deletes the component highlighted by moving the mouse cursor over it. |

Using the tool removes the selected components:

If you want more control over what areas of your Landscape the player can get through. Check out the Landscape Hole Material .
Move Level

This tool moves the selected components, via using the Selection tool, to the current streaming level. This makes it possible to move sections of a Landscape into a streaming level so that they will be streamed in and out with that level, optimizing the performance of the Landscape.
When the streaming level is visible, the Landscape renders all the components:

You can toggle the visibility of the level by clicking the eye icon (


Edit Splines

Landscape Splines are a flexible system for creating any linear feature that needs to conform to a Landscape, and can even push and pull the terrain to better facilitate building these features. They are created and edited using the spline tool in the Landscape tool.

For information about how to create and modify spline curves, see Landscape Splines .
Component Properties
You can set the properties of individual components, including LODs and component-specific Materials, in the Details panel.
Component LODs
You can also set LODs for selected component, which means an individual component can have its own LOD settings.
To set LODs for selected component:
-
Select the components whose LODs you want to set. For information about selecting components, see Selection .
-
In the Details panel, under Landscape Component , adjust the Forced LOD and LODBias settings to obtain the desired result.
![ForcedLOD and LODBias in the Details panel Changing ForcedLOD and LODBias in the Details panel]()
Component Material Overrides
You can set a Material Override for selected components, which means that an individual component can have a different Material assigned to it than its Landscape does.
To set a Material Override for selected components:
-
Select the components that you want to use a different Material for. For information about selecting components, see Selection .
-
In the Content Browser , find and select the Material you want to use.
-
In the Level Editor's Details panel, under Landscape Component , click the Assign arrow icon (
) to assign that Material to the selected components.![Override Material field in the Details panel Override Material field in the Details panel]()


