Choose your operating system:
Windows
macOS
Linux


Vertex Color Painting is a powerful tool, and there are many ways to use it. The Create a Material for 2-Way Texture Blending page gives a basic explanation for how to set up a Material for blending textures with vertex color painting. This page provides a more concrete use case for this technique. This document demonstrates how to create a two-texture Material for vertex color painting, that blends a rock texture and a moss texture. Once you've created this blended texture, you can use Mesh Paint Mode to paint this texture onto any mesh in your level. You can adjust the settings in the Mesh Paint Mode panel to increase coverage or decrease it, so that the texture is variable across the mesh.


Steps
Create the Material
-
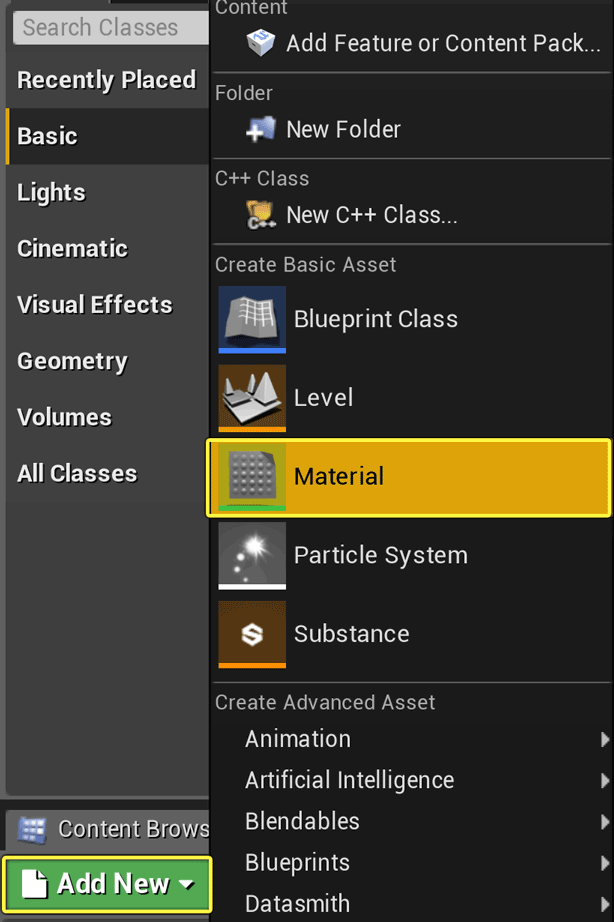
In the Content Browser, click Add New > Material .
![Add New Material]()
Click image for full size.
-
Name your new material. In this example, we are using M_2TextureMoss .
![RenameMaterial.png]()
-
Double-click the new Material to open the Material Editor.

Create and Set Up TextureSample Nodes
-
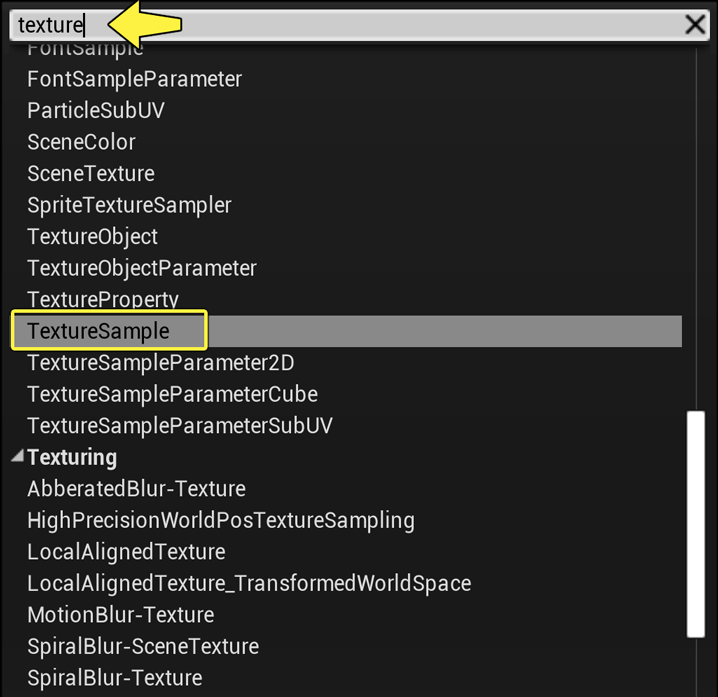
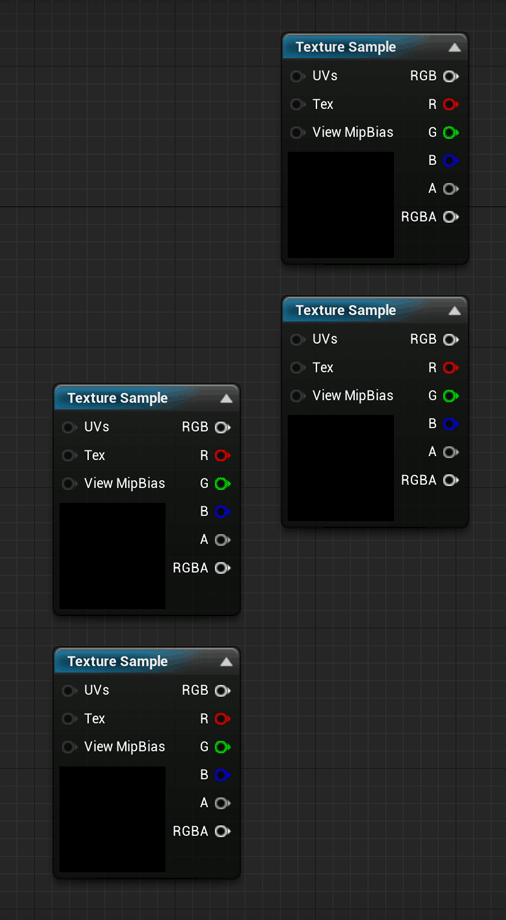
First we need to add a texture. Right-click in the graph, and in the search bar type
texture. In the list of results, select TextureSample . This adds the TextureSample node to the graph.![Create TextureSample Node]()
Click image for full size.
-
We need four for our example, so copy the TextureSample node and paste it three times so that you have a total of four TextureSample nodes.
![4TextureSampleNodes.png]()
Click image for full size.
-
Position the nodes so that two are together near the top of your graph, and two are together toward the bottom of the graph. This will make them easier to distinguish from each other, and make things more organized.
-
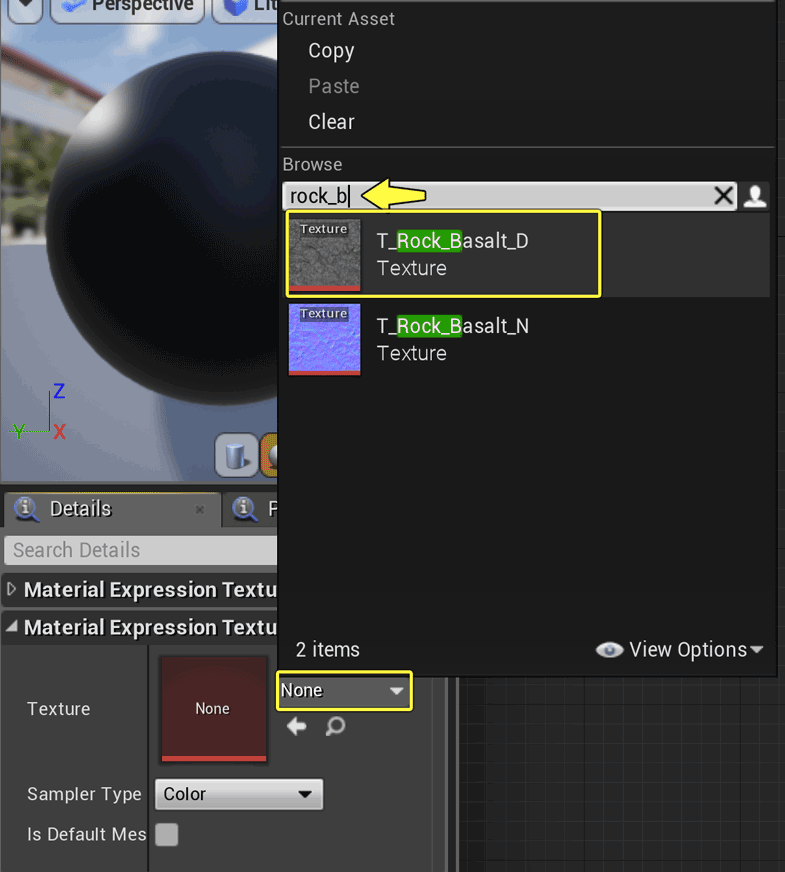
First we'll select our Diffuse textures. Click one of the top TextureSample nodes. In the Details panel on the left, locate the Material Expression Texture Base section. For the Texture property, click the dropdown to select a texture. In the search bar, type in
rock_b. In the results, select T_Rock_Basalt_D .![Rock Diffuse Texture]()
Click image for full size.
-
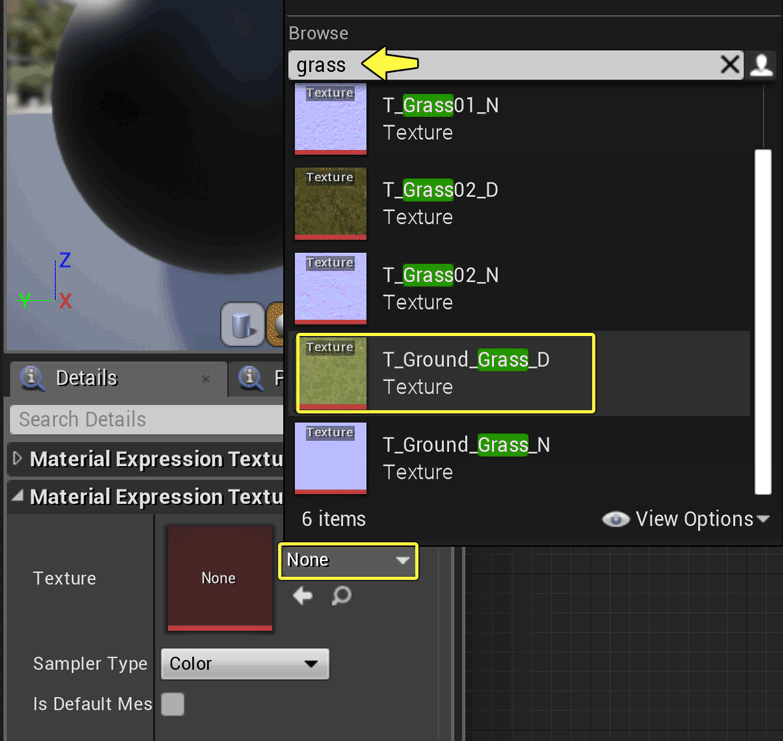
Click on the second of the top TextureSample nodes. In the Details panel, click the Texture dropdown, and in the search bar type
grass. In the results, select T_Ground_Grass_D . This is the second of our Diffuse maps.![Grass Diffuse Texture]()
Click image for full size.
-
Now we need to select our Normal maps. Click the first of the lower TextureSample nodes. In the Details panel, click the Texture dropdown and type in
rock_bagain. This time, select T_Rock_Basalt_N . This is the Normal map that matches the Diffuse map we selected in steps 4 and 5.![Rock Normal Texture]()
Click image for full size.
-
Click the last TextureSample node, and in the Details panel, click the Texture dropdown and type in
grassagain. In the resutls, select T_Ground_Grass_N .![Grass Normal Texture]()
Click image for full size.


Add the Vertex Color and Linear Interpolation Nodes
-
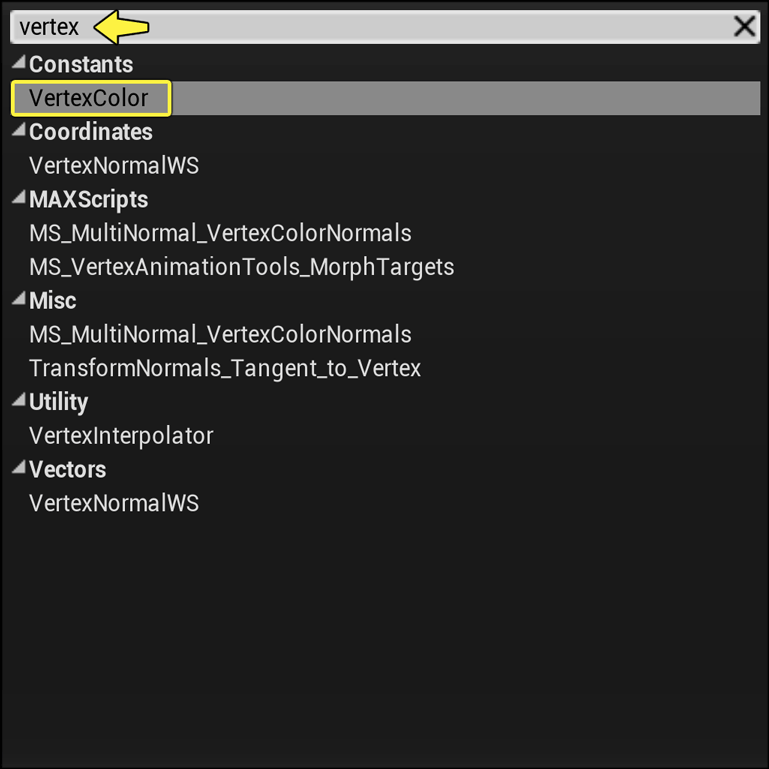
Now we'll add the Vertex Color node. Right-click in the graph, and type
vertexin the search bar. In the results, select VertexColor . When the VertexColor node is added, notice that it is a red Input Data node.![Create Vertex Color Node]()
Click image for full size.
-
The VertexColor node will combine the two Diffuse maps based on a linear interpolation, or lerp . Right-click the graph and type
linearin the search bar. In the results, select LinearInterpolate . This places a Lerp node on the graph.![Create Lerp Node]()
Click image for full size.
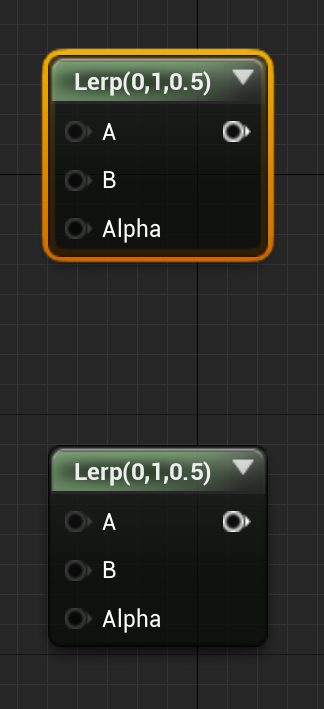
-
We need two, so copy the first Lerp node and paste a second one on the graph. One is for the Diffuse maps, and the other is for the Normal maps, so position the Lerp nodes accordingly.
![Copy Lerp Node]()
Click image for full size.
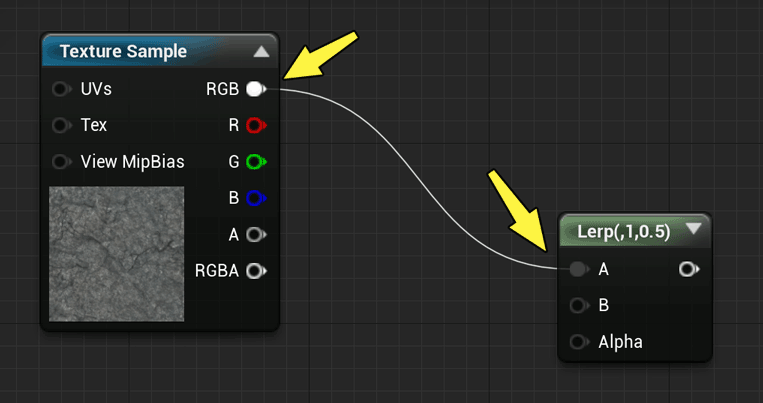
-
On the Rock Diffuse map, drag off the RGB output and connect it to the A input on the first Lerp node.
![Connect Rock Diffuse to Lerp]()
Click image for full size.
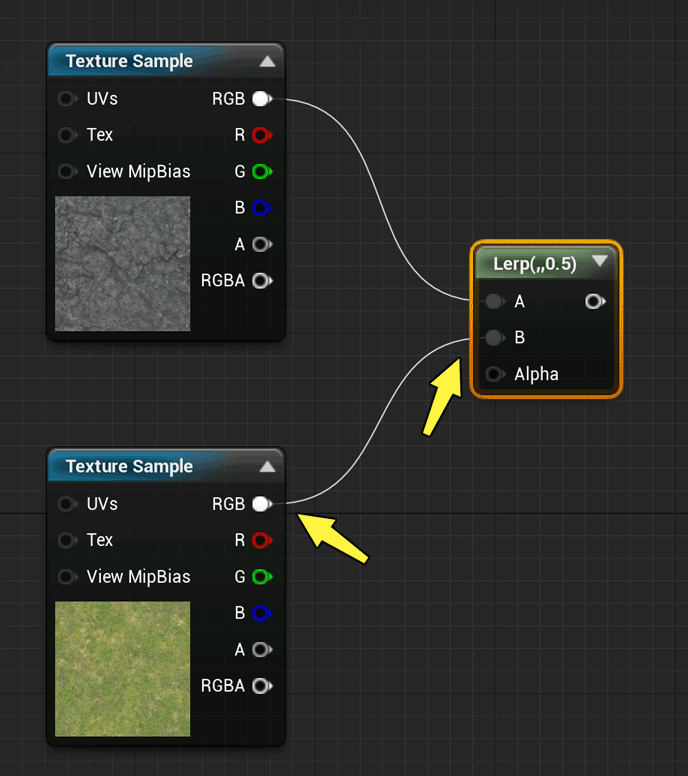
-
On the Grass Diffuse map, drag off the RGB output and connect it to the B input on the first Lerp node. Both your Diffuse maps are now connected.
![Connect Grass Diffuse to Lerp]()
Click image for full size.
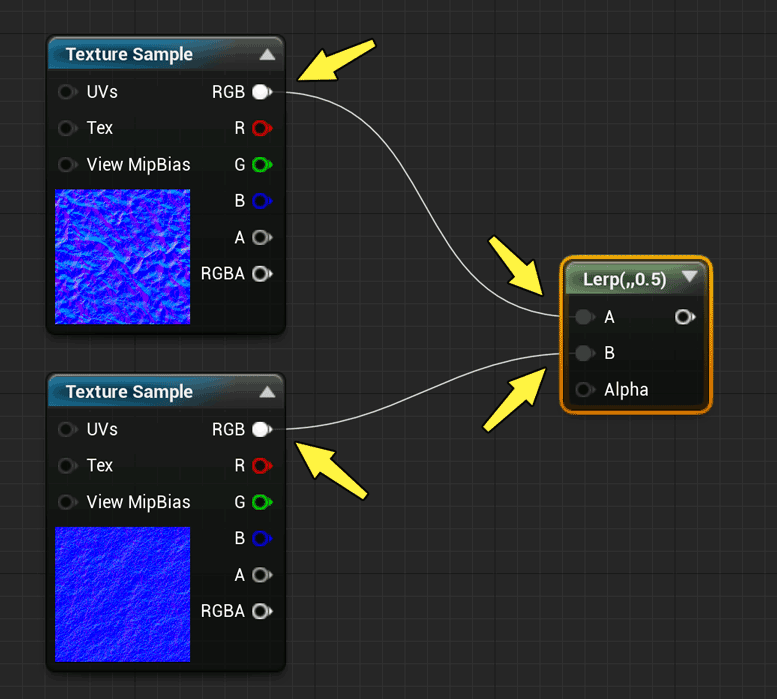
-
On the Rock Normal map, drag off the RGB output and connect it to the A input on the second Lerp. On the Grass Normal map, drag off the RGB output and connect it to the B input on the second Lerp node. Both your Normal maps are now connected.
![Connect Normal Maps to Lerp]()
Click image for full size.
-
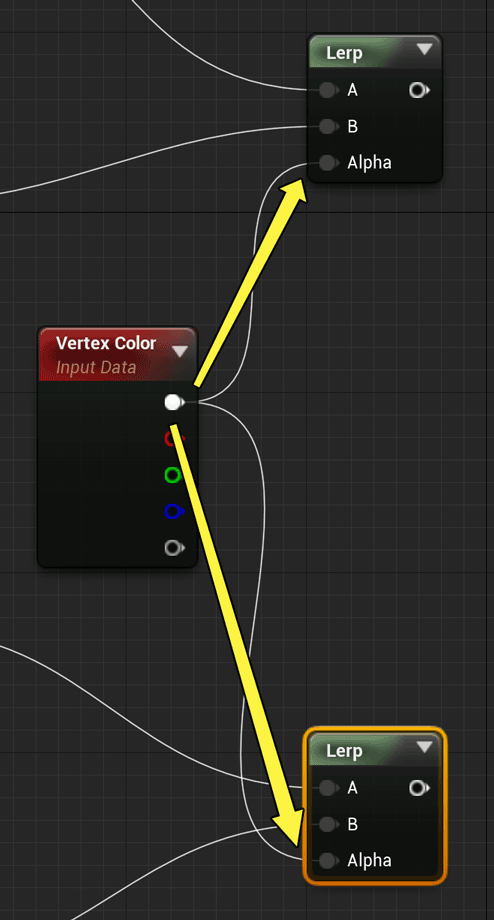
The Alpha input on the Lerp nodes is the variable that controls the mixture of the Rock and Grass textures. The VertexColor node is going to control the Alpha value, so drag off the top output on the VertexColor node and connect it to the Alpha input on the Diffuse Lerp node, then do the same again for the Normal Lerp node.
![Connect Vertex Color to Lerp]()
Click image for full size.
-
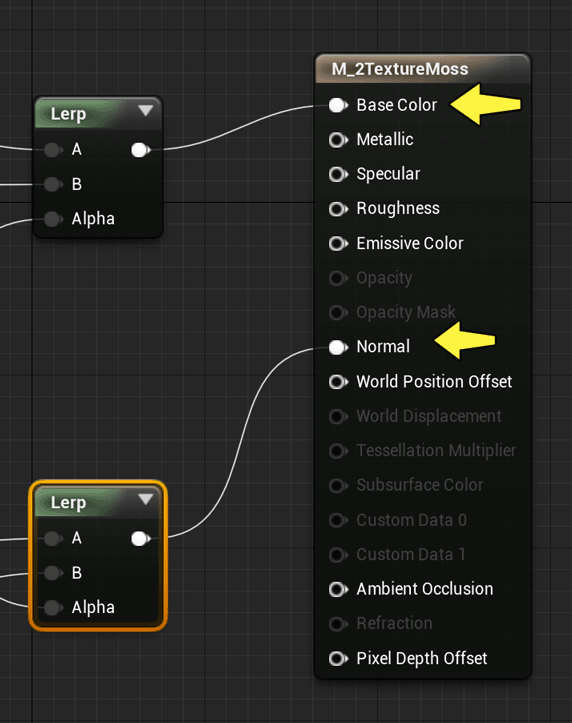
Now drag off the output of the Diffuse Lerp node and connect it to the Base Color input on the Material node. Drag off the output of the Normal Lerp node and connect it to the Normal input on the Material node.
![Connect Lerps to Material Node]()
Click image for full size.

Set Up Remaining Material Properties
-
Now we'll set the remaining properties on the Material node. Drag off the Metallic input on the Material node, and in the search bar type in
constant. Select Constant to add a Constant node. Leave the value at the default of 0 .![Metallic and Specular Constant]()
Click image for full size.
-
We also want the Specular value to be 0, so connect the Specular input on the Material node to the same Constant node we made in step 1.
-
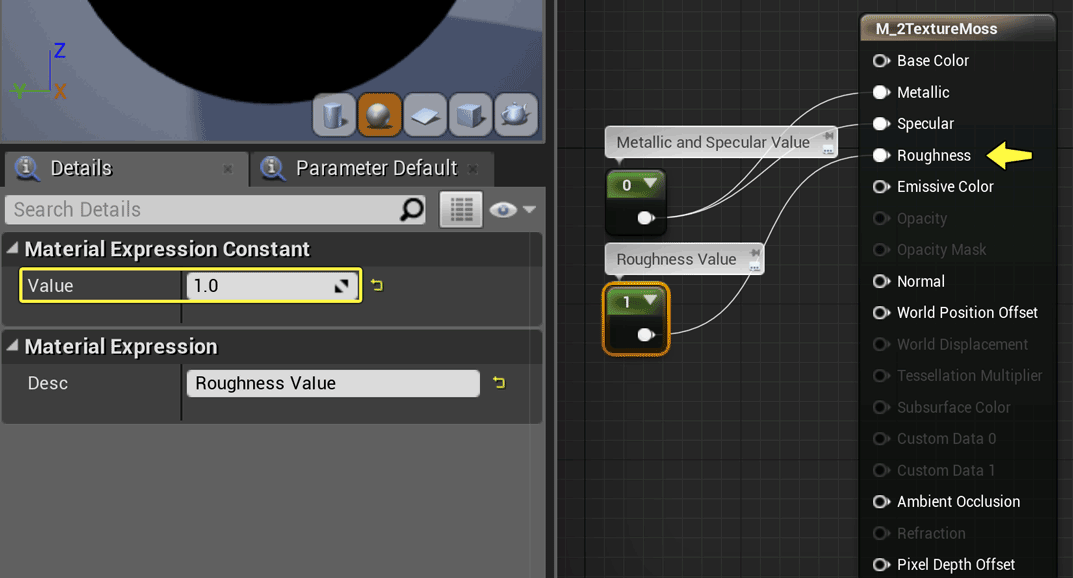
We want the Roughness value to be higher than 0, so copy-paste the original Constant node to create another one. Connect the Roughness input to the second Constant node. Select that Constant node, and in the Details panel, set the value to 1 .
![Roughness Constant Value]()
Click image for full size.

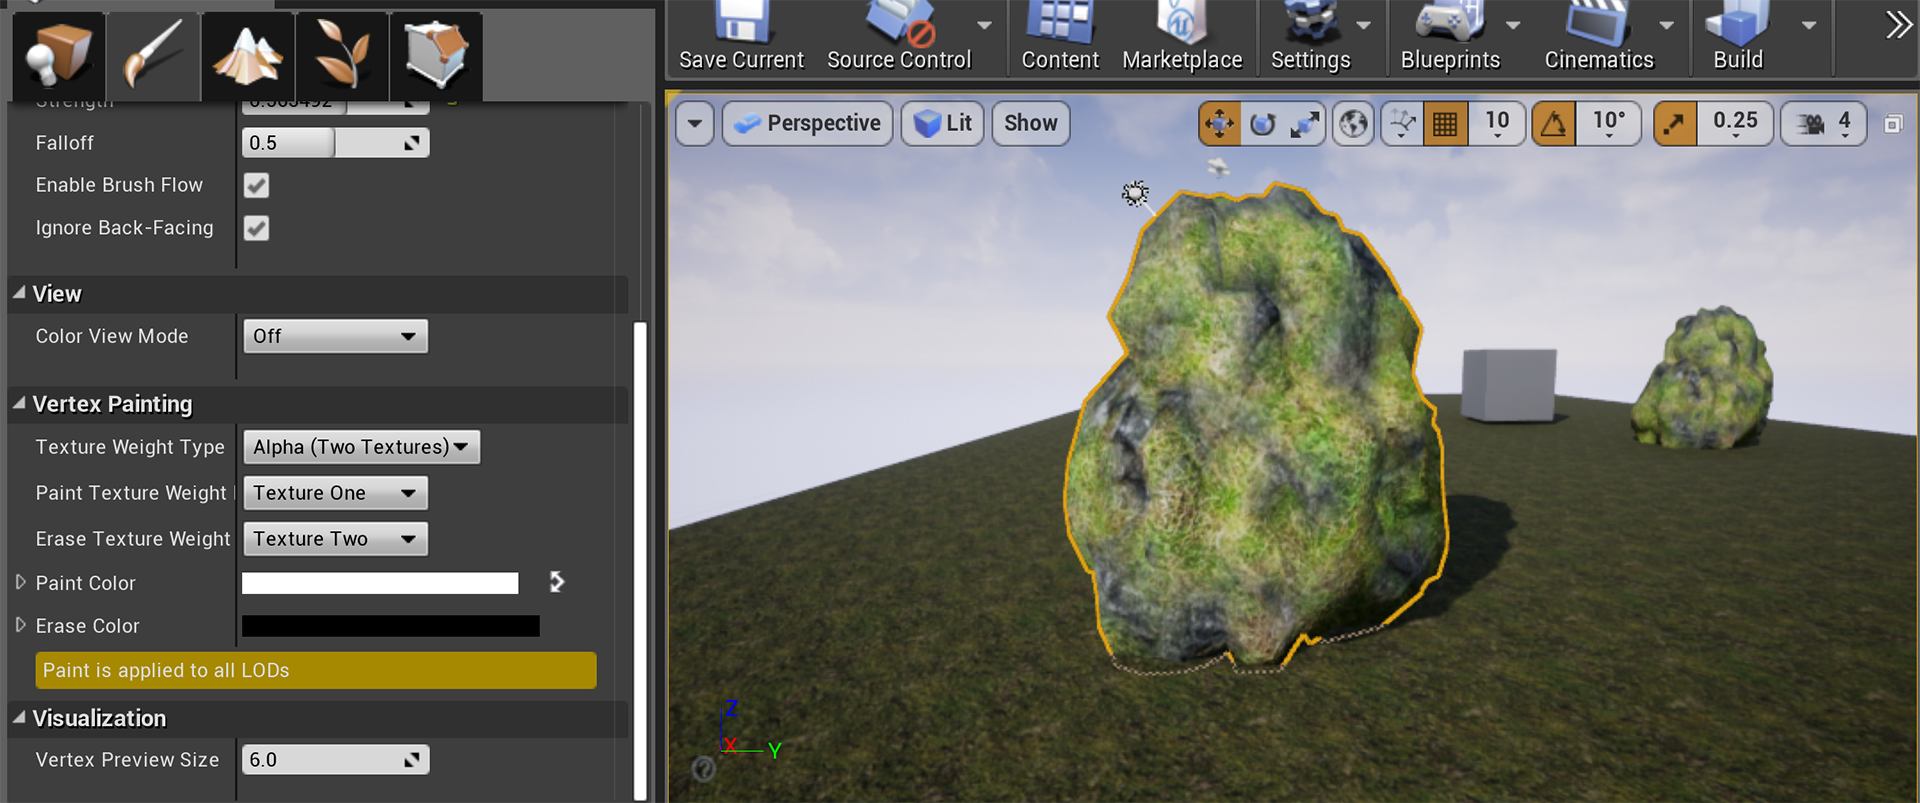
Final Result
Now we have a Material that we can use with Vertex Color painting to paint a texture on our mesh. You can adjust the Strength setting in the Brush section to vary how much of your moss texture is painted onto the mesh. You can adjust the Radius setting up or down, depending on whether you need to paint large sections or small details. You can adjust the Falloff setting to create a hard edge to your texture, or to have it fade out gradually.