Choose your operating system:
Windows
macOS
Linux
The GameMode defines the game's set of rules. The rules can include how players join the game, game pausing, and level transition, as well as any game-specific behavior such as win conditions. The GameMode is set for each level, and GameModes can be reused in multiple levels.
Implementation Guide
This guide covers how to create a GameMode Blueprint and set default values for it, how to assign a Default GameMode for your game, and how to override the Default GameMode through the World Settings and GameMode Override option.
Creating a Game Mode Blueprint
The steps below will guide you in creating and setting up defaults for a Game Mode Blueprint.
For this example, we are using the Blueprint Third Person Template ; however you can use any project you wish.
-
In the Content Browser , click the Add New button.
![ContentBrowserAddNew.png]()
-
Select Blueprint Class from the Create Basic Asset section of the dropdown menu.
![ContentBrowserDropDown.png]()
You can create several different types of Blueprint Assets from the Blueprints option under Create Advanced Asset .
-
Choose a Parent Class for your Blueprint Asset. See Parent Classes for more information.
![Choose a Parent Class]()
In the Pick Parent Class window, select the Game Mode Base Class. This is the parent class for all Game Modes.
Editing the Game Mode Defaults
-
Double-click on the Blueprint to open it, click the Class Defaults
![classDefaults_button.png]()
-
Under the Game Mode are several options that you can set as the game's default settings (default character, HUD, etc.).
![GameMode_5.png]()
Here we are assigning the Character Blueprint called ThirdPersonCharacter as the Default Pawn Class for players to use in the game.
The Game Mode Blueprint points to existing Blueprints of the Character, HUD, PlayerController, Spectator, and Game State Classes. You will need to create these separately then specify them for use in the Game Mode Blueprint in order to actually use them in your game.
Assigning a Default Game Mode
In the previous section, we created a Game Mode Blueprint. Once you have a Game Mode Blueprint, you can assign it as the Default Game Mode to use in your game. The steps below will guide you through assigning the Default Game Mode through the Project Settings option.
-
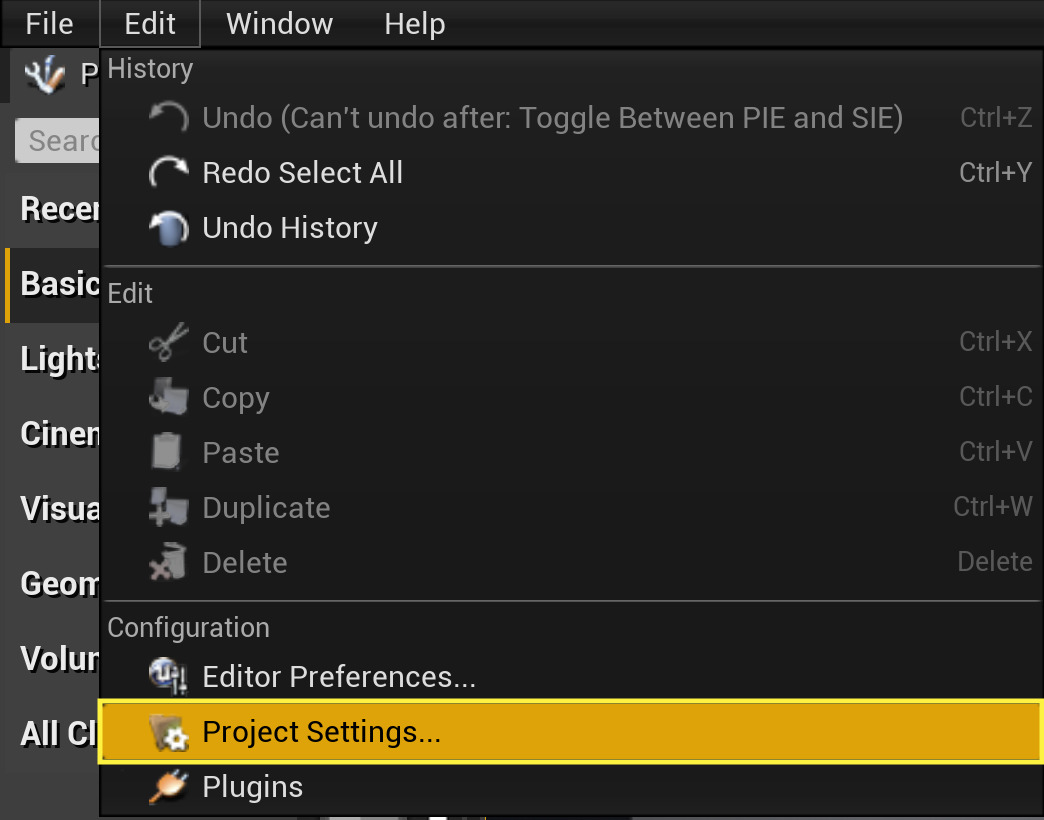
From the Main Editor Window, click the Edit button from the Menu Bar, then select Project Settings .
![GameMode_6.png]()
-
In the Project Settings window, click the Maps & Modes option.
![GameMode_7.png]()
-
In Maps & Modes under Default Modes , click the Default GameMode drop-down box and assign the GameMode you wish to use.
![GameMode_8.png]()
This will assign the GameMode you select as the Default Game Mode whenever the project is loaded.
-
If you click the arrow next to Selected GameMode , you will see the current settings used by the assigned GameMode .
![GameMode_9.png]()
Here we can see that ThirdPersonCharacter is being used as the Default Pawn Class .
Overriding the Default Game Mode
When you have a Default Game Mode assigned, you can overwrite it on a per level basis through the World Settings menu under the GameMode Override section. The steps below will show you how to override the default Game Mode.
-
From the Main Editor Window, click the World Settings button from the Main Toolbar.
![GameMode_10.png]()
-
This will open the World Settings option which will appear in the bottom right window where the Details tab is located.
-
Inside the World Settings , under Game Mode , you can click the GameMode Override drop-down box to change the GameMode used.
![GameMode_11.png]()


