Choose your operating system:
Windows
macOS
Linux
Just as Actors and Functions can be replicated over the network, so can Variables. Variables that are important to gameplay should only be modified on the Network Authority (Server) and then replicated to Remote Machines (Clients) on a need-to-know basis. You do not want to allow Clients to define when variables can be changed, as this could lead to cheating (for example, setting Health, Ammo, or Experience values).
You can set a variable to Replicated, which means the variable produces a one-to-one copy of the variable that is replicated from the Server to Clients. Or you can use the RepNotify variable, which does everything that Replicated does, but also provides a Function that is called that executes on both the Server and Client machines whenever the variable it is attached to updates.
This page covers some sample use cases for both Replicated variables and a RepNotify variable.
Replicated
For this example, we are using the Blueprint Third Person Template with Starter Content .
In this example, we will create a Replicated variable that is used for a countdown timer that both the Server and Clients can see.
-
Inside the Content/StarterContent/Blueprints folder, open the Blueprint_Effect_Fire Blueprint.
-
With Class Defaults selected, in the Details panel Under Replication , check the Replicates option.
![HT_0.png]()
This will ensure that this Blueprint is replicated across the network to all connected machines.
-
In the Components window, click the Add Component button and search for and add a Text Render component.
![HT_1.png]()
-
On the Viewport tab, move the text to a desired location above the fire so that it is more visible.
![HT_2.png]()
-
Click the Event Graph tab, Right-click in the graph and add an Event Begin Play node.
-
Drag off the Event Begin Play pin, search for and add the Switch Has Authority node.
-
Drag off the Authority pin and add a Set Timer node with Time set to 1 and Looping checked.
![HT_3.png]()
Here we used the Switch Has Authority node to call the Set Timer function only on the Authority (Server) when this Blueprint is spawned. We are using this node to ensure that the Timer function is executed by the server only and not by a client. If this script were to be handling game critical data, we would only want the server to execute it then replicate any data to client machines rather than the client run it as to prevent any cheating.
-
In the MyBlueprint window, create a new variable called CountDownTimer .
-
In the Details panel for the variable, change it to an Integer type, Compile and set the Default Value to 10 .
![HT_4.png]()
-
Right-click in the graph and create a new Custom Event and call it Update Timer .
-
Connect Update Timer to a Branch node, then off the True pin, add the Set CountDownTimer node.
-
Right-click in the graph and add the Get CountDownTimer node, then drag off it and use the Int - Int node and enter 1 in the box.
-
Drag off the CountDownTimer node again and use the Int > Int node and connect the nodes as shown below.
![HT_5.png]()
Here we are telling CountDownTimer to subtract 1 from itself each time UpdateTimer is called only if it is greater than 0.
-
On the Set Timer node, under Function Name , add the name of your custom event ( UpdateTimer ).
![HT_6.png]()
This will now call the UpdateTimer event every 1 second until we tell the timer to stop.
-
Right-click in the graph and add the Event Tick node.
-
Hold Control and drag in the TextRender component from the MyBlueprint window, then drag off it and use the Set Text node.
-
Hold Control and drag in the CountDownTimer variable and plug it into the Value of the Set Text node.
![HT_7.png]()
A conversion node will automatically be created and here we are setting the text to the value of our countdown timer.
-
Compile and Save then close the Blueprint.
-
From the Content Browser , drag the Blueprint_Effect_Fire into the level.
![HT_9.png]()
-
On the Main Toolbar, click the down arrow next to the Play button and set the Number of Players to 2.
![NoOfPlayers.png]()
-
Click the Play button to play in the editor.
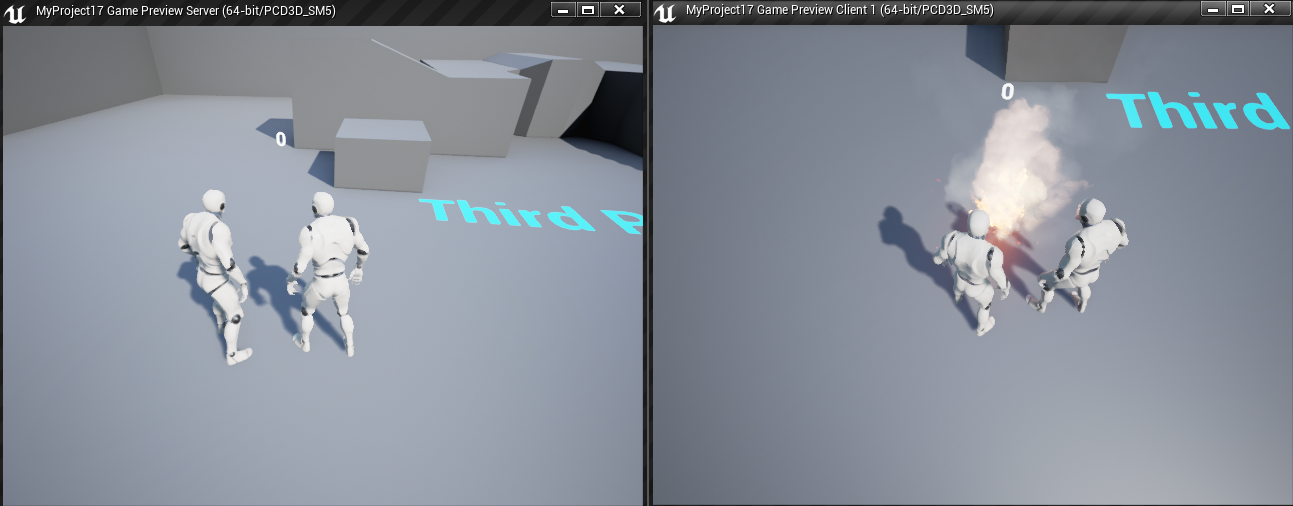
![HT_11.png]()
Click to see full-size image.
When you play in the editor, you should see that the Server counts down to 0 while the Client does not.
-
Return to the Blueprint_Effect_Fire Blueprint.
-
In the Details panel for the CountDownTimer variable, under Replication , set it to Replicated .
![HT_12.png]()
This will enable this property to be replicated to connected machines.
-
The graph will update and each of the instances of the CountDownTimer variable will contain a replicated icon.
![HT_13.png]()
-
Compile and Save then close the Blueprint and play in the editor.
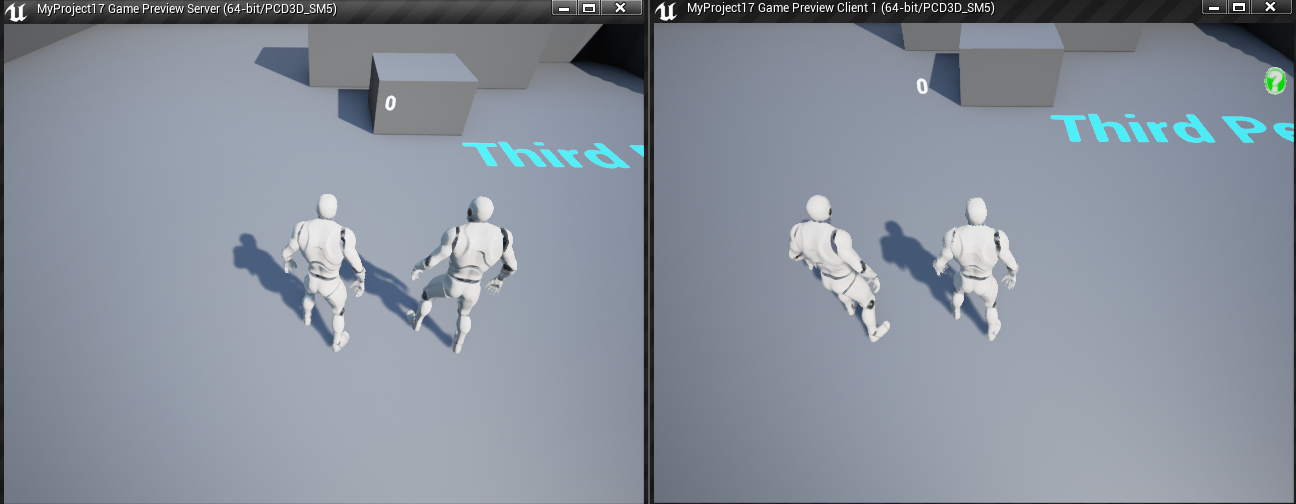
![HT_14.png]()
Click to see full-size image.
You will now see both the server and the client counting down from 10 and displaying the text appropriately. While we are using the integer to update a text render, this variable could just as easily be used to represent a player characters health, ammo, or other gameplay related variable.


RepNotify
For this example, we are continuing from the Replicated example provided above.
In the Replicated example provided above, we created a countdown timer that is displayed on both the Server and Client. In this example, we will use a RepNotify variable to signal when the countdown timer reaches 0 at which point we will deactivate the fire effect on both the server and the client machines.
-
Open the Blueprint_Effect_Fire Blueprint.
-
In the MyBlueprint window, hold Control and drag in the P_Fire effect, then drag off it and use the Deactivate node.
-
Off the False pin of the Branch connected to UpdateTimer , connect the Deactivate node as shown below.
![HT_15.png]()
Here we are stating that when UpdateTimer is called, take CountDownTimer and subtract 1 from itself (so long as it is greater than 0). If it is not greater than 0, then Deactivate the P_Fire particle effect.
-
Compile and Save then close the Blueprint and play in the editor.
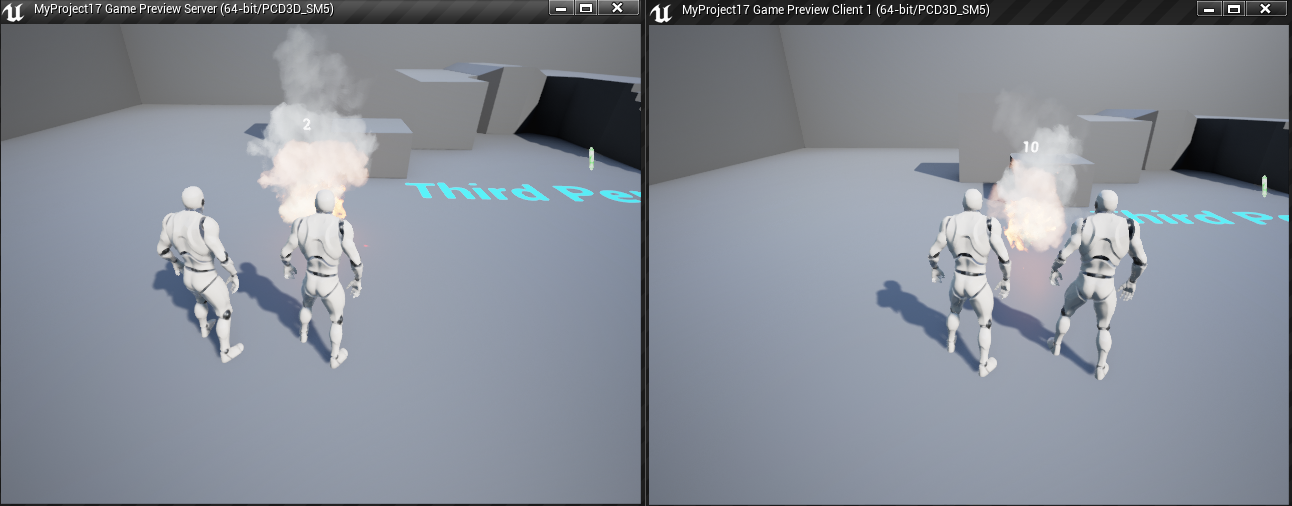
![HT_16.png]()
Click to see full-size image.
When you play in the editor, you will see that the fire effect is deactivated when reaching 0 only on the server.
-
Return to the Blueprint_Effect_Fire Blueprint and create a new variable of the Boolean type called Deactivate .
-
On the Deactivate variable, make sure that the Replication type is set to RepNotify .
![HT_17.png]()
-
After setting the variable to RepNotify , you will see that a new Function has been automatically created.
![HT_18.png]()
This is called whenever the variable we assigned as RepNotify changes and will be executed on both the server and client machines.
-
Double-click on the On Rep Deactivate Function to open it up.
-
Hold Control and drag in the P_Fire component, then off it, add the Deactivate node.
![HT_19.png]()
-
Return to the Event Graph and locate the UpdateTimer event.
-
Off the False of the Branch , add the Set Deactivate node, checked to set it to True .
![HT_20.png]()
You can see that the variable also says Set w/Notify to indicate that the notify function will be called as well.
-
Compile and Save then close the Blueprint and play in the editor.
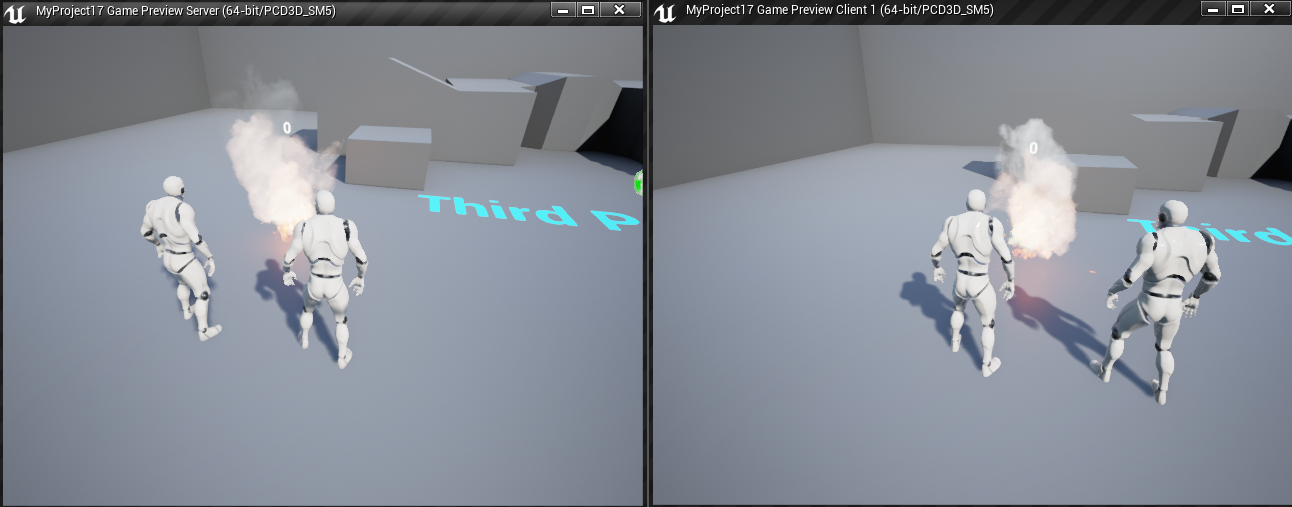
![HT_21.png]()
Click to see full-size image.
When you play in the editor this time, you will see that both client and server deactivate the fire effect when the timer reaches 0.