Choose your operating system:
Windows
macOS
Linux
The Physics Asset Editor provides several different ways in which you can simulate physics bodies including the ability to have kinematic physics bodies with simulated parents. This enables you to define child bodies that can be driven by animation data while the parents of those bodies are driven by physics simulation data. This can be useful if you have a character that you want to perform a physics based reaction while playing a hanging idle or hanging traversal animation.
In this How-to, we use kinematic bodies with simulated parents to generate the effect of a character hanging from a ledge while the rest of the body is simulated with physics.

Steps
For this guide, we are using the Blueprint Third Person Template project with Starter Content enabled.
-
In your project in the Content/Mannequin/Character/Mesh folder, open the SK_Mannequin_PhysicsAsset .
![KinematicHowTo_01.png]()
-
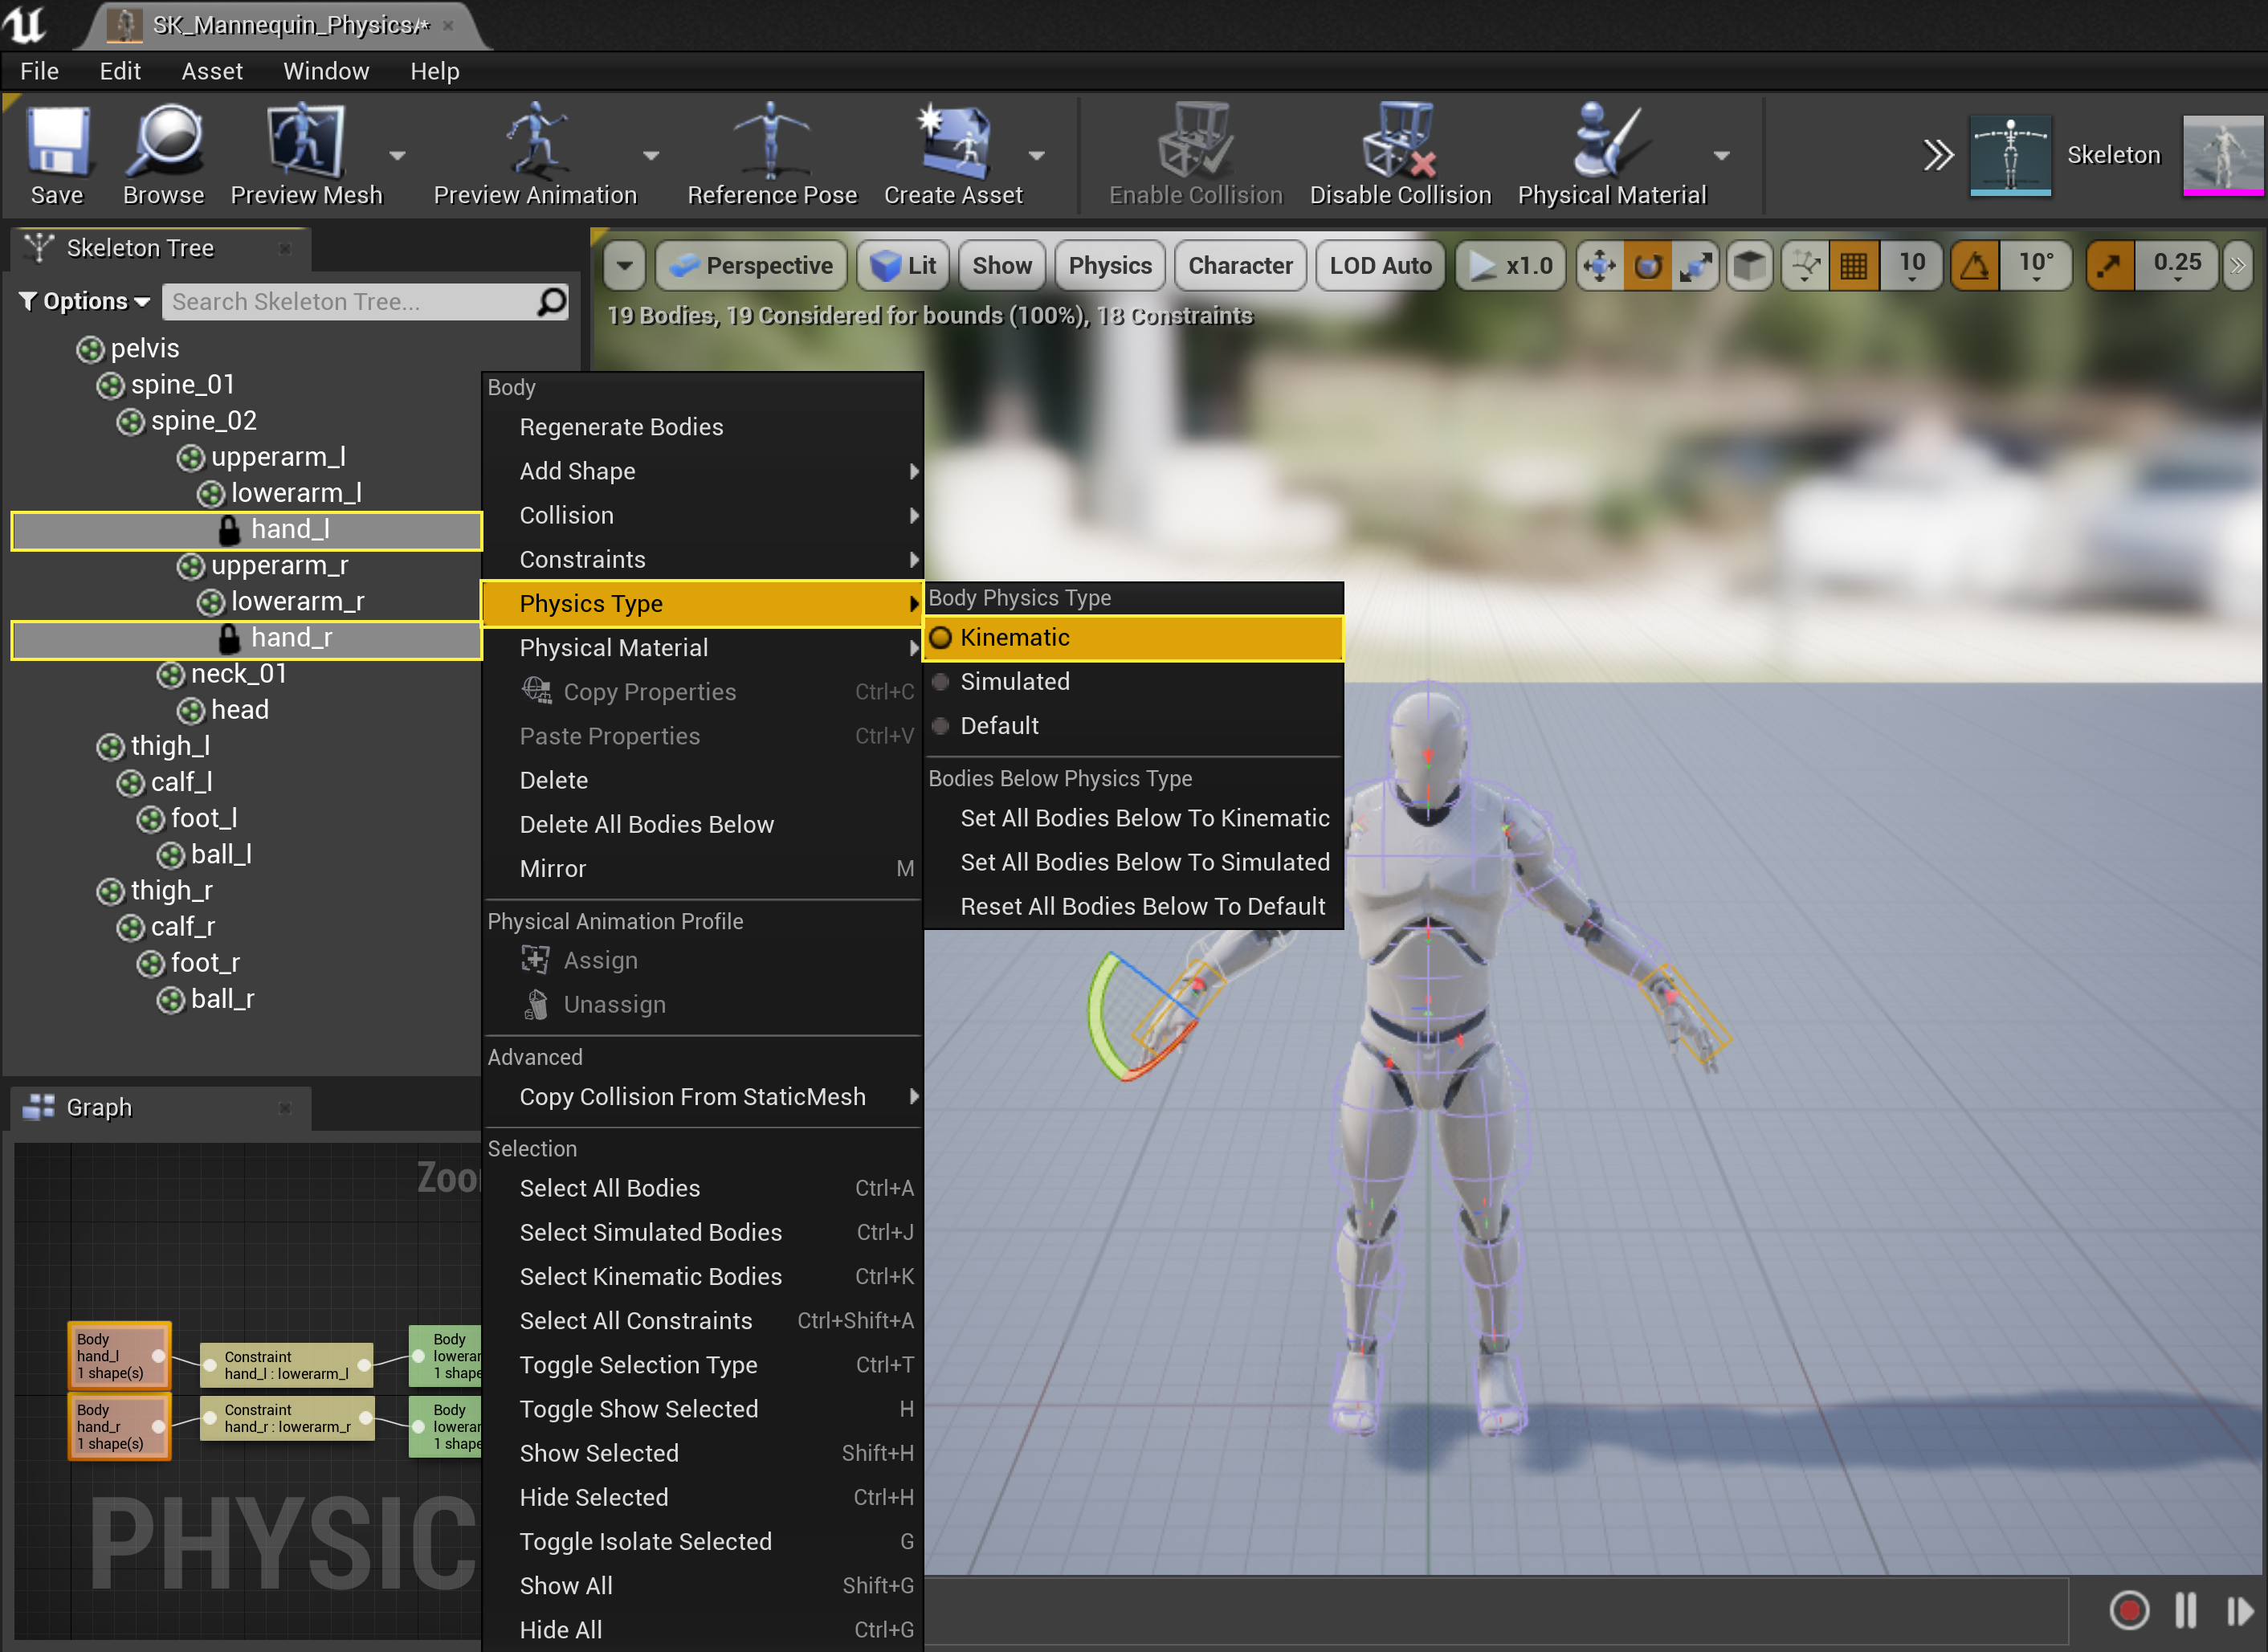
In the Skeleton Tree panel, hold Ctrl and select both the hand_l and hand_r bodies, then in the Details panel, change the Physics Type to Kinematic .
![KinematicHowTo_03.png]()
By setting these bones to Kinematic, they will not simulate physics and will follow any animation data.
Alternatively, you can right-click bones in the hierarchy list and expand Physics Type in the Context Menu, then set their Body Physics Type to Kinematic .
![KinematicHowTo_04.png]()
This option enables you to set the Physics Type property for children bodies below the current bone.
-
Click on an empty space within the viewport to deselect all bones, then in the Details panel, change the Physics Update Mode to Component Transform is Kinematic .
![KinematicHowTo_05.png]()
This option determines whether the simulation of the root body updates component transform or is kinematic.
-
From the toolbar, open the dropdown menu under the arrow icon , and select Simulate .
![KinematicHowTo_06.png]()
The character in the viewport will slump over and appear to be hanging by their hands.
![KinematicHowTo_07.png]()
-
From the toolbar, open the Animation dropdown menu, then select the ThirdPersonJump_Loop animation.
![KinematicHowTo_08.png]()
The hands (because they are set to kinematic) will follow the animation data contained within the ThirdPersonJump_Loop motion.
![KinematicHowTo_09.png]()
-
From the Main Editor window, drag the SK_Mannequin_PhysicsAsset into the level and then, in the Details panel, set Physics Transform Update Mode to Component Transform is Kinematic .
![KinematicHowTo_10.png]()
-
Select the SkeletalMeshComponent , then change Animation Mode to Use Animation Asset and Anim to Play to ThirdPersonJump_Loop .
![KinematicHowTo_11.png]()
-
Click the Play button from the toolbar to play in the editor.


End Result
Below we've placed the character near a ledge when we run and bump into it, it reacts to physics while the hands appear slightly fixed.
While the animation we used above not ideal, below we apply the same concept to an animation of a character hanging and traversing a ledge.
The arms and head are set to Kinematic (denoted below with Gold Boxes) while the rest is being simulated.
