Choose your operating system:
Windows
macOS
Linux
In this How-to we add multiple Camera Actors to our level and switch between them as the player enters Trigger Volumes that we have placed in the level. After completing this tutorial, you will have the ability to set up your own multi-camera based game and define when each camera is used.
For this example, we are using the Blueprint Third Person Template project with Starter Content included.
-
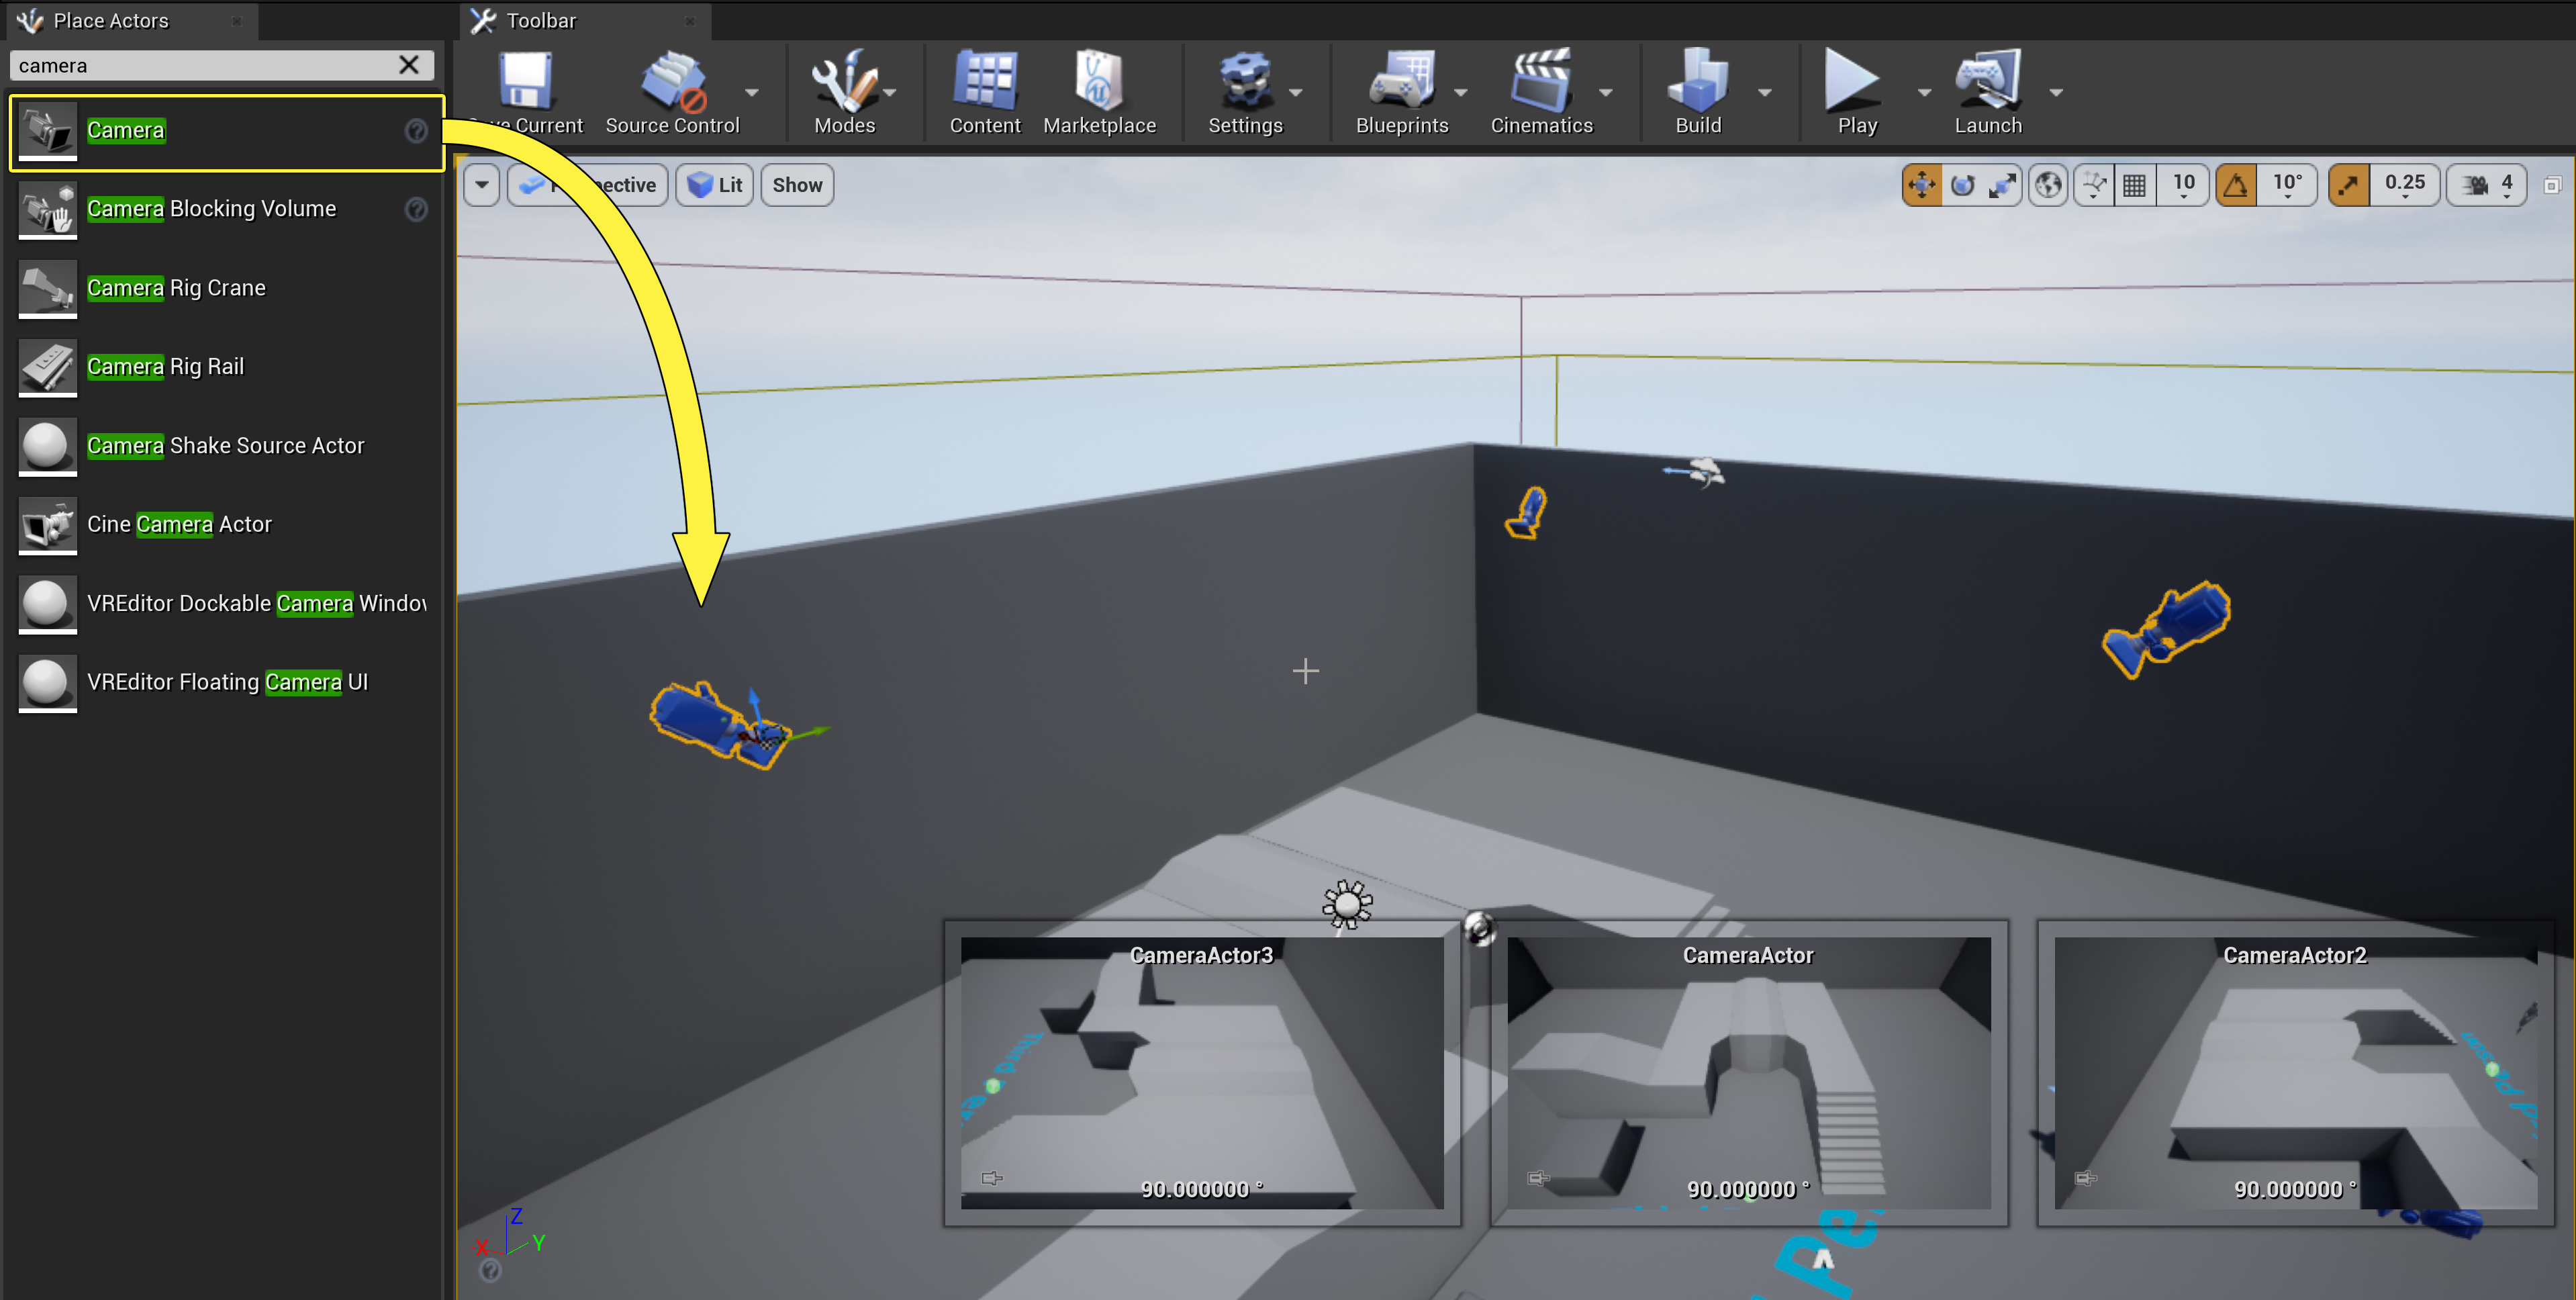
From the Place Actors panel in the All Classes tab, drag in the number of Camera Actors you wish to cycle between.
![camera_1.png]()
Click image for a larger view.
Here we have placed three cameras using different angles.
-
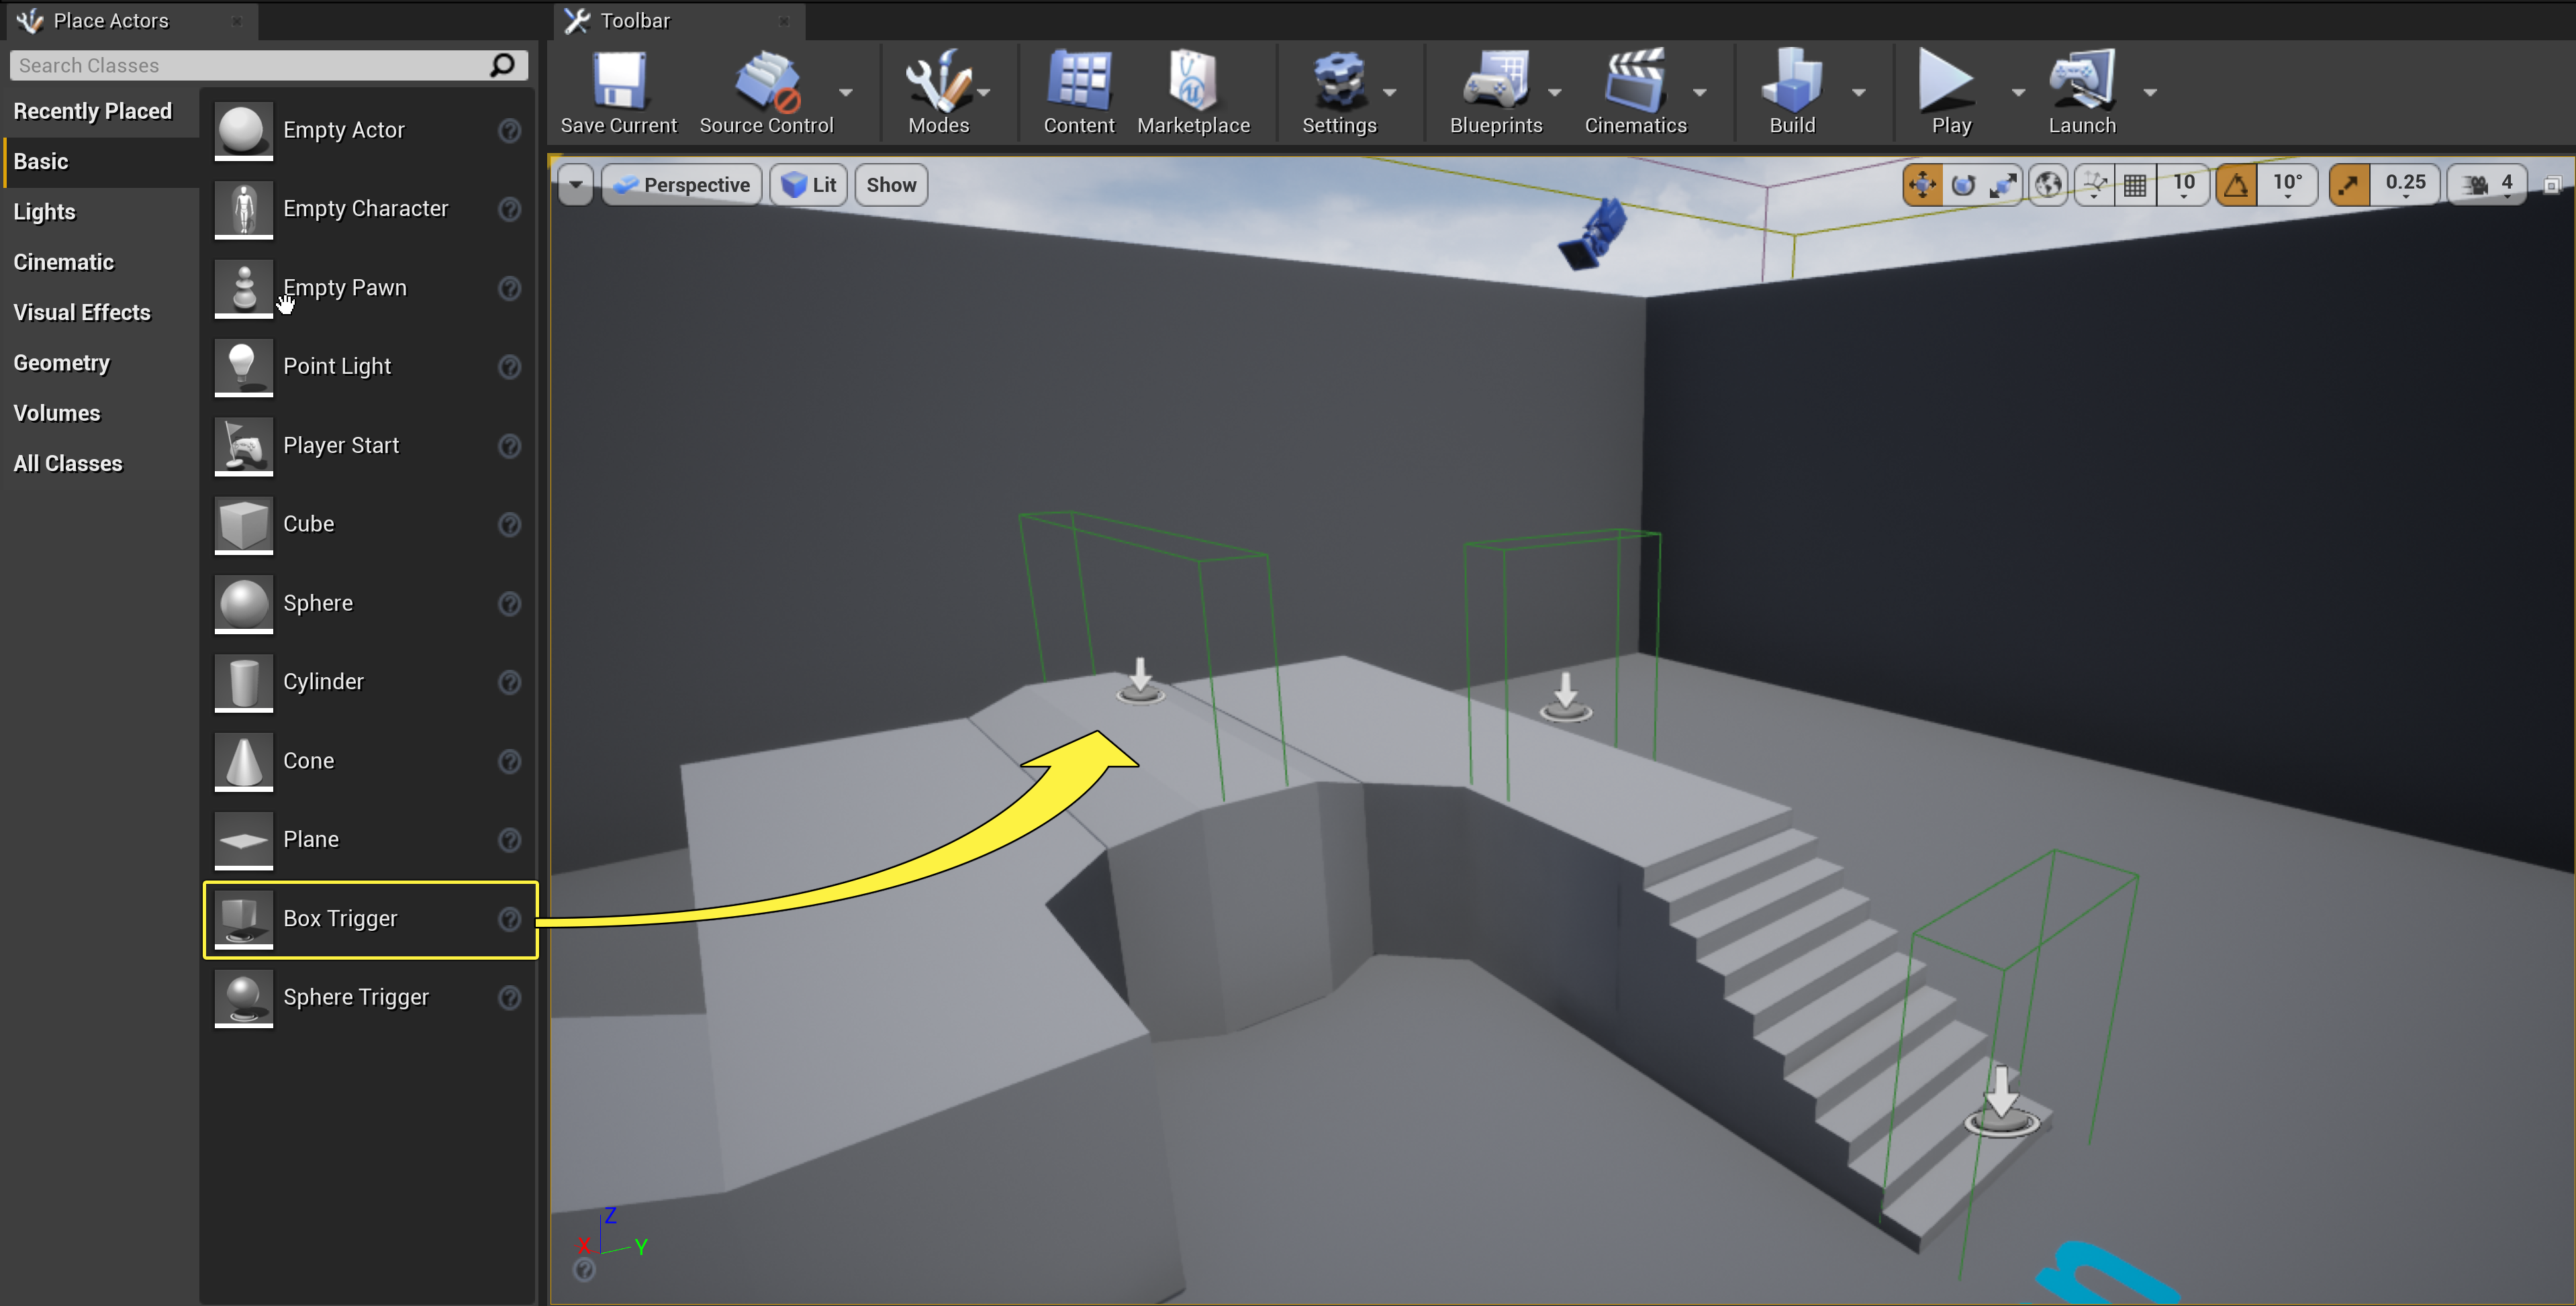
Also in the Place Actors panel in the Basic tab, drag in the number of Box Triggers to match the number of cameras you placed.
![camera_2.png]()
Click image for a larger view.
Move the Box Triggers to where you want the player to trigger the changing of cameras.
With a Box Trigger selected, press W (to enter Translation Mode), E (to enter Rotation Mode) or R (to enter Scale Mode) to manipulate the Actors to your desired location, rotation or scale. Please see Manipulating Actors for more information.
-
With each of your cameras selected, click the Blueprints button then select Open Level Blueprint .
![camera_3.png]()
-
Inside the Level Blueprint , Right-click in the graph and choose Create References to selected Actors .
![camera_4.png]()
This will add references to each of the Camera Actors you have placed in your level.
-
Return to the Level Editor viewport, then in the World Outliner , select each of your Box Triggers and return to the Level Blueprint.
-
Right-click in the graph and under Add Event for Selected Actors and Collision , select AddOnActorBeginOverlap .
![camera_5.png]()
This will add Events for each Box Trigger that will fire off when the player enters them.
-
Right-click in the graph and add the Get Player Controller node.
![camera_6.png]()
-
Right-click in the graph and add the Set View Target with Blend node (un-check Context Sensitive if you do not see it).
![camera_7.png]()
-
Connect the (TriggerBox), Get Player Controller and CameraActor nodes as shown below.
![camera_8.png]()
We have now assigned the first camera to be used when entering the first trigger box.
-
Repeat the process above for the rest of your cameras/trigger boxes.
![camera_9.png]()
Each of our cameras are now set to be switched to when entering their respective trigger boxes.
-
Click Compile then close the Blueprint and click Play to play in the Editor.
![camera_10.png]()


End Result
You will see that when you enter each of the Box Trigger's you have placed, it updates the game view to the Camera Actor you have specified. This a quick example of how you could start working on a multi-camera based game, you would probably want to also account for situations when the player is outside of your camera's viewing angle and adjust player input based on camera relativity.