Choose your operating system:
Windows
macOS
Linux
The instructions on this page provide a step-by-step guide to getting started with the Remote Control API. By the end of this tutorial, you'll know how to set up a Project to listen to incoming requests from web applications, and you'll be ready to start making your own requests.
Prerequisites:
-
The Remote Control API server listens for incoming HTTP requests on port
30010. If this port is not available, you can change the Remote Control HTTP Server Port in the Web Remote Control section of Project Settings . -
You'll need a basic level of knowledge about how to make requests bearing JSON payloads from a web client to an HTTP server endpoint.
-
The steps on this page use a Project set up from the Blueprint Third-Person Template. Substantially the same steps will work in any Project. However, if your Project doesn't use the same sky setup as the Template, the specific object paths and requests in step 3 - Send Requests may not work.
Do not attempt to open the hostname and port of your Unreal Engine application to the open Internet. Doing so may make your Project and your computer vulnerable to malicious actions from third parties.
Expect to use the Web Remote Control system only within your Local Area Network (LAN) or over a secure Virtual Private Network (VPN).
1 - Set up the Project
Before you can start making Web Remote Control requests, you'll need to install the Remote Control Plugin.
Steps
-
Open the Project that you want to use with Web Remote Control in the Unreal Editor.
-
From the main menu, choose Edit > Plugins to open the Plugins window.
-
In the Plugins window, find the Remote Control API plugin in the Messaging category. Check its Enabled checkbox.

-
Click Yes to accept the warning that this Plugin is in Beta status.
-
Click Restart Now to restart the Unreal Editor and reopen your Project.


End Result
Once your Project has re-opened in the Unreal Editor, you'll be ready to start the Web Remote Control server.
2 - Manage the Server
The Web Remote Control system relies on a web server launched and managed by the Unreal Editor process. For your security, this server only runs when you explicitly activate it. To control when the server runs, you use a few simple console commands:
|
Command |
Description |
|---|---|
|
|
Starts the web server and begins listening for incoming requests on port
|
|
|
Stops the web server, preventing any more requests to your Unreal Editor instance from being handled. |
|
|
Starts the web server automatically whenever this Project is opened in the Unreal Engine in any supported mode: in the main Unreal Editor window, in a Play In Editor (PIE) session, or in the
|
For now, we'll simply start up the server in the main Editor window.
Steps
-
From the main menu, choose Window > Developer Tools > Output Log .
-
In the Cmd bar, enter the console command
WebControl.StartServer.
-
You'll see a message that indicates that the server is now running:


End Result
Now that you have the server running, you can begin feeding it with requests.
3 - Send Requests
We suggest starting with the simplest possible use case for making your initial requests.
-
Use a tool dedicated to testing API requests and responses, such as Insomnia or Postman . This makes it easier to be certain that you're constructing the JSON payload for your requests correctly. Once you are comfortable with how the Web Remote Control endpoints work, and the kinds of responses they give, then move on to incorporating calls to those endpoints into your own web applications.
-
Start by making your first requests locally on the same computer that you have running your Project in the Editor. Once you know you have that working, then move on to making requests from clients on other computers or devices connected to your local network.
Steps
-
In your web client app, set up a request with the following body:
{
    "objectPath" : "/Game/ThirdPersonBP/Maps/ThirdPersonExampleMap.ThirdPersonExampleMap:PersistentLevel.LightSource_0.LightComponent0",
    "access":"READ_ACCESS",
    "propertyName":"RelativeRotation"
}
This request asks for the current value of the
RelativeRotationproperty on the Level's main directional light: the Actor with the name Light Source in the World Outliner . -
Send the message as a
PUTrequest to the following endpoint:http://localhost:30010/remote/object/property -
You should see a response in your web client that contains the status code and information you requested:
{ "RelativeRotation": { "Pitch": -66.3094, "Yaw": 7.72808, "Roll": -6.48224 } } -
If you select the Light Source Actor and look in the Details panel, you'll see that the values in the response match the values displayed there:

This illustrates how the Web Remote Control system is capable of breaking down objects — in this case, a Vector — into JSON values to exchange them with your web application.
-
Next, we'll change the light's rotation remotely.
This property is defined in the Engine source code as
BlueprintReadOnly:/** Rotation of the component relative to its parent */ UPROPERTY(EditAnywhere, BlueprintReadOnly, ReplicatedUsing=OnRep_Transform, Category=Transform) FRotator RelativeRotation;That means we'll need to call a
BlueprintCallablefunction exposed by the same object to modify it. You can find this definition in theEngine/Source/Runtime/Engine/Classes/Components/SceneComponent.hfile:/** * Set the rotation of the component relative to its parent * @param NewRotation New rotation of the component relative to its parent * @param SweepHitResult Hit result from any impact if sweep is true. * @param bSweep Whether we sweep to the destination (currently not supported for rotation). * @param bTeleport Whether we teleport the physics state (if physics collision is enabled for this object). * If true, physics velocity for this object is unchanged (so ragdoll parts are not affected by change in location). * If false, physics velocity is updated based on the change in position (affecting ragdoll parts). */ UFUNCTION(BlueprintCallable, Category="Utilities|Transformation", meta=(DisplayName="SetRelativeRotation", ScriptName="SetRelativeRotation", AdvancedDisplay="bSweep,SweepHitResult,bTeleport")) void K2_SetRelativeRotation(FRotator NewRotation, bool bSweep, FHitResult& SweepHitResult, bool bTeleport); void SetRelativeRotation(FRotator NewRotation, bool bSweep=false, FHitResult* OutSweepHitResult=nullptr, ETeleportType Teleport = ETeleportType::None); void SetRelativeRotation(const FQuat& NewRotation, bool bSweep=false, FHitResult* OutSweepHitResult=nullptr, ETeleportType Teleport = ETeleportType::None); -
Set up a request with the following body:
{ "objectPath" : "/Game/ThirdPersonBP/Maps/ThirdPersonExampleMap.ThirdPersonExampleMap:PersistentLevel.LightSource_0.LightComponent0", "functionName":"SetRelativeRotation", "parameters": { "NewRotation": { "Pitch":90, "Yaw":0, "Roll":0 } }, "generateTransaction":true } -
Send the message as a
PUTrequest to the following endpoint:http://localhost:30010/remote/object/callYou should see that the angle of the directional light in your Level has now changed, putting the objects in the scene into shadow.

If you go back and make the same request you made in step 2 above at this point, you'll now receive the updated values that you just set.
-
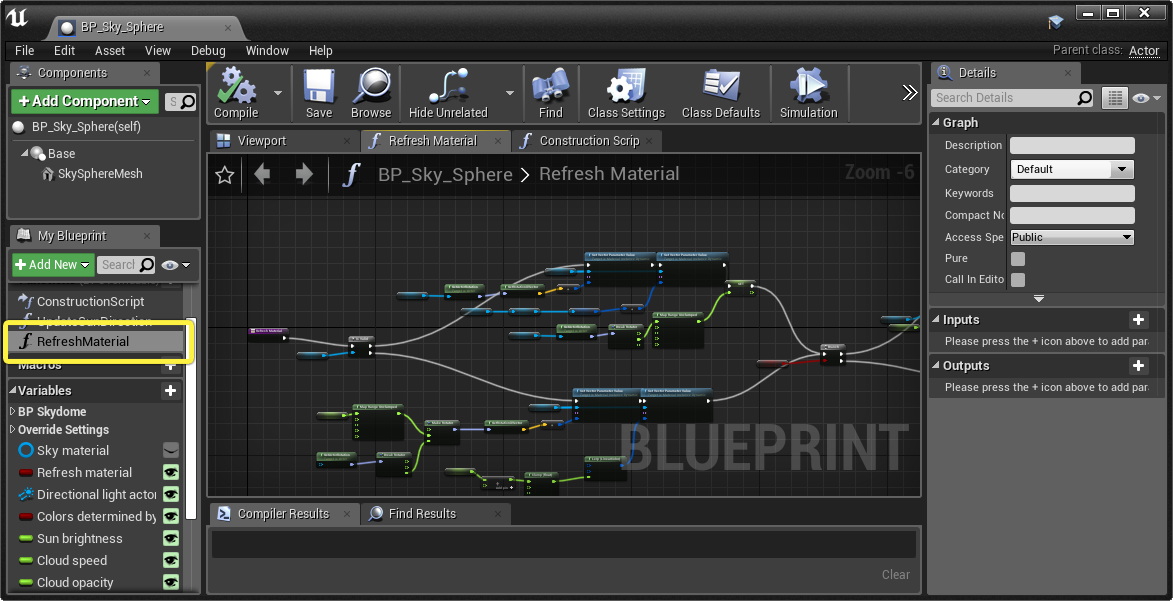
We'll call one more function remotely to update the sky so that it takes the new angle of the sun into account. In this case, we will call a function that is defined in Blueprint within the BP_Sky_Sphere class:
![BP_SkySphere RefreshMaterial function]()
Click for full image.This function has the same effect as checking the Refresh Material box in the Details panel for the SkySphereBlueprint Actor.
-
Send this message to the same endpoint as above:
{
    "objectPath" : "/Game/ThirdPersonBP/Maps/ThirdPersonExampleMap.ThirdPersonExampleMap:PersistentLevel.SkySphereBlueprint",
    "functionName":"RefreshMaterial",
    "generateTransaction":true
}
In this case, the function doesn't require any input parameters, so we can omit the
parametersproperty entirely.You'll see the sky change to night in your Level:


End Result
Following the steps above, you've seen how to get information about the content in a running Unreal Engine Project from a web client. You've also seen how to change the Project content remotely, by issuing requests from the web client to execute functions exposed by objects in the Editor environment: in this case, changing the sky.
Lighting and sky changed by remote control


4 - On Your Own
The same two endpoints you used in the simple procedure above are capable of deep and far-reaching changes in your Project's content. There is a lot more to know about using them, so see the Endpoint Reference for more details and examples.
The web server's address is set to 127.0.0.1 by default, which is only accessible to the computer running the Unreal Engine session. To allow other devices to access your Unreal session through the Remote Control API, change the DefaultBindAddress in your project's DefaultEngine.ini file to your machine's IP address.
[HTTPServer.Listeners]
DefaultBindAddress=0.0.0.0