Choose your operating system:
Windows
macOS
Linux
Choose your implementation method:
C++
This tutorial demonstrates the use of a
Timeline
Blueprint to set up a proximity-based opening door using resources available in the
Creating the Door Actor
-
Begin by creating a New > Games > Blank > Blueprint project with Starter Content enabled named TimelineDoorActor .
-
Click the Add/Import button to create a new Blueprint Actor class named BP_DoorActor.
-
Double-click the BP_Door Actor from the Content Browser to open it in the Blueprint Editor and open the Class Defaults .
![image alt text]()
-
Next, from the Components tab click the Add Component button and select Static Mesh to add a new Static Mesh Component .
![image alt text]()
-
Right-click your static mesh component and select Rename to rename it to DoorFrame .
![image alt text]()
-
Next, from the Components tab click the Add Component button and select Static Mesh to add a new Static Mesh Component . (Repeating step 3)
-
Right-click your static mesh component and select Rename to rename it to Door .
![image alt text]()
-
Click Add Component, select Box Collision from the dropdown menu, and rename it to Box .
![image alt text]()
-
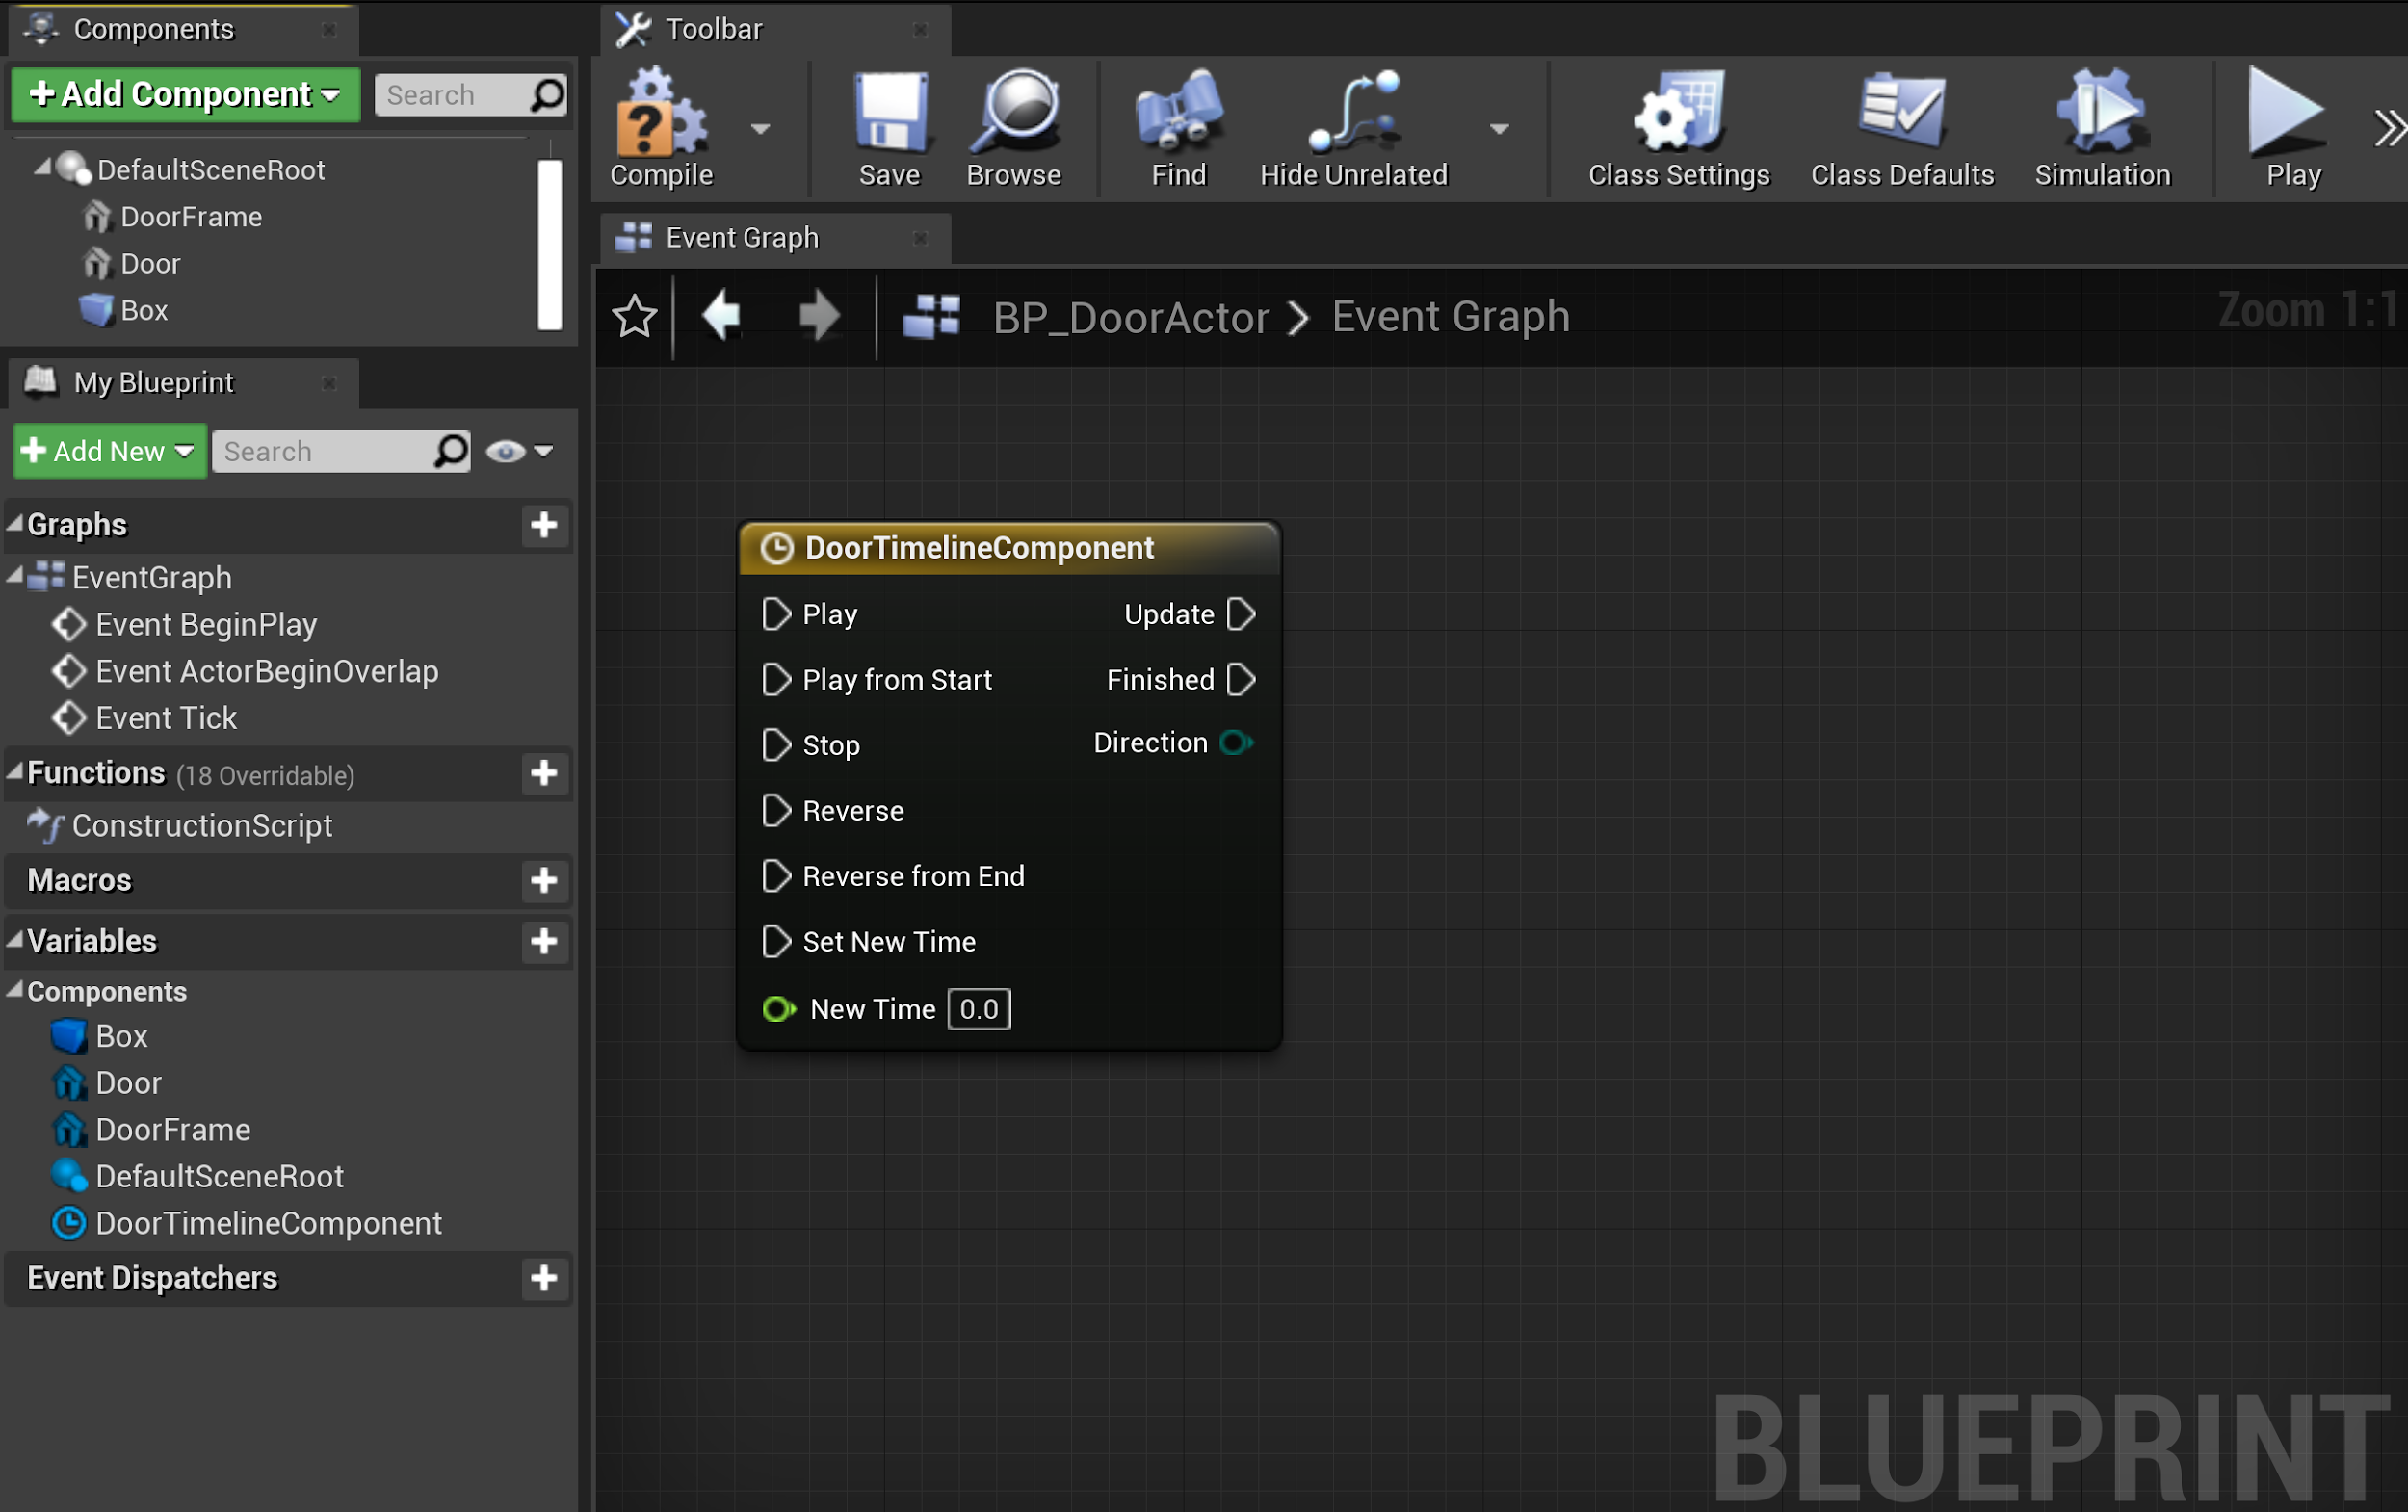
Next, open the Event Graph, right-click the graph, and choose Add Timeline from the Blueprint Context Menu . Name your Timeline DoorTimelineComponent .
![image alt text]()


At this point, the BP_DoorActor's class defaults should now look as they do in the example below:
Setting Up the Door Static Mesh
Next, you will need to set up the attachment hierarchy of your Components tab.
You will also need to set up the Static Mesh assets that will visually represent your DoorFrame and Door Static Mesh components.
-
From the BP_DoorActor 's Components tab, select the DoorFrame static mesh and drag it over the DefaultSceneRoot component to make it the new root component .
![image alt text]()
-
Next, select the DoorFrame static mesh in the Components tab and from the Details panel change the Static Mesh to SM_DoorFrame .
![image alt text]()
-
Next, from the Components panel select the DoorMesh component. Navigate to the Details panel and change the Static Mesh to SM_Door .
![image alt text]()
-
Then navigate to the Transform category and change the Y Location value to 45.0 .
![image alt text]()
-
Click Save and Compile to save these changes to the Bp_DoorActor.


Creating a Timeline Float Track
The Timeline Component requires a Timeline Curve to describe its movement animation. Each curve can contain multiple keys that define a time and value. Curves interpolate these keys to calculate the value at any point during the Timeline.
-
Begin by double-clicking the DoorTimelineComponent in the Event Graph to open the Timeline Editor.
-
Click Add Float Curve to add a new curve to the track and name the curve DoorRotationZ .
![image alt text]()
-
Right-click to add two keys to your float curve track. One with the value (0,0) and another with the value (5,90).
![image alt text]()
-
Shift select both your keys, right-click, and from the Key Interpolation dropdown menu select Auto interpolation.
-
Save your float track.


Update Event Track Logic
You will now need to create the update logic to rotate your Door static mesh.
-
Navigate to the BP_DoorActor's Components tab, drag the Door static mesh onto the Event Graph
![image alt text]()
-
Drag off the Door pin and from the actions context menu, select SetRelativeRotation .
![image alt text]()
-
Right-click the Event Graph, from the context menu select Make Rotator .
![image alt text]()
-
From the DoorTimelineComponent node, drag the Door Rotation Z float pin and connect it to the Z ( Yaw ) pin of the Make Rotator node.
![image alt text]()
-
From the DoorTimelineComponent node, drag off of the Update pin , and connect it to the input execution pin of the SetRelativeRotation node.
-
From the Make Rotator node, connect the Return Value pin to the SetRelativeRotation node's New Rotation pin.
![image alt text]()
-
Compile and Save.


Creating Binding Box Collision Overlap Events
The Box component requires the ability to react when an Actor enters or leaves its collision bounds.
-
Navigate to the Components tab of your BP_DoorActor and select the Box component.
-
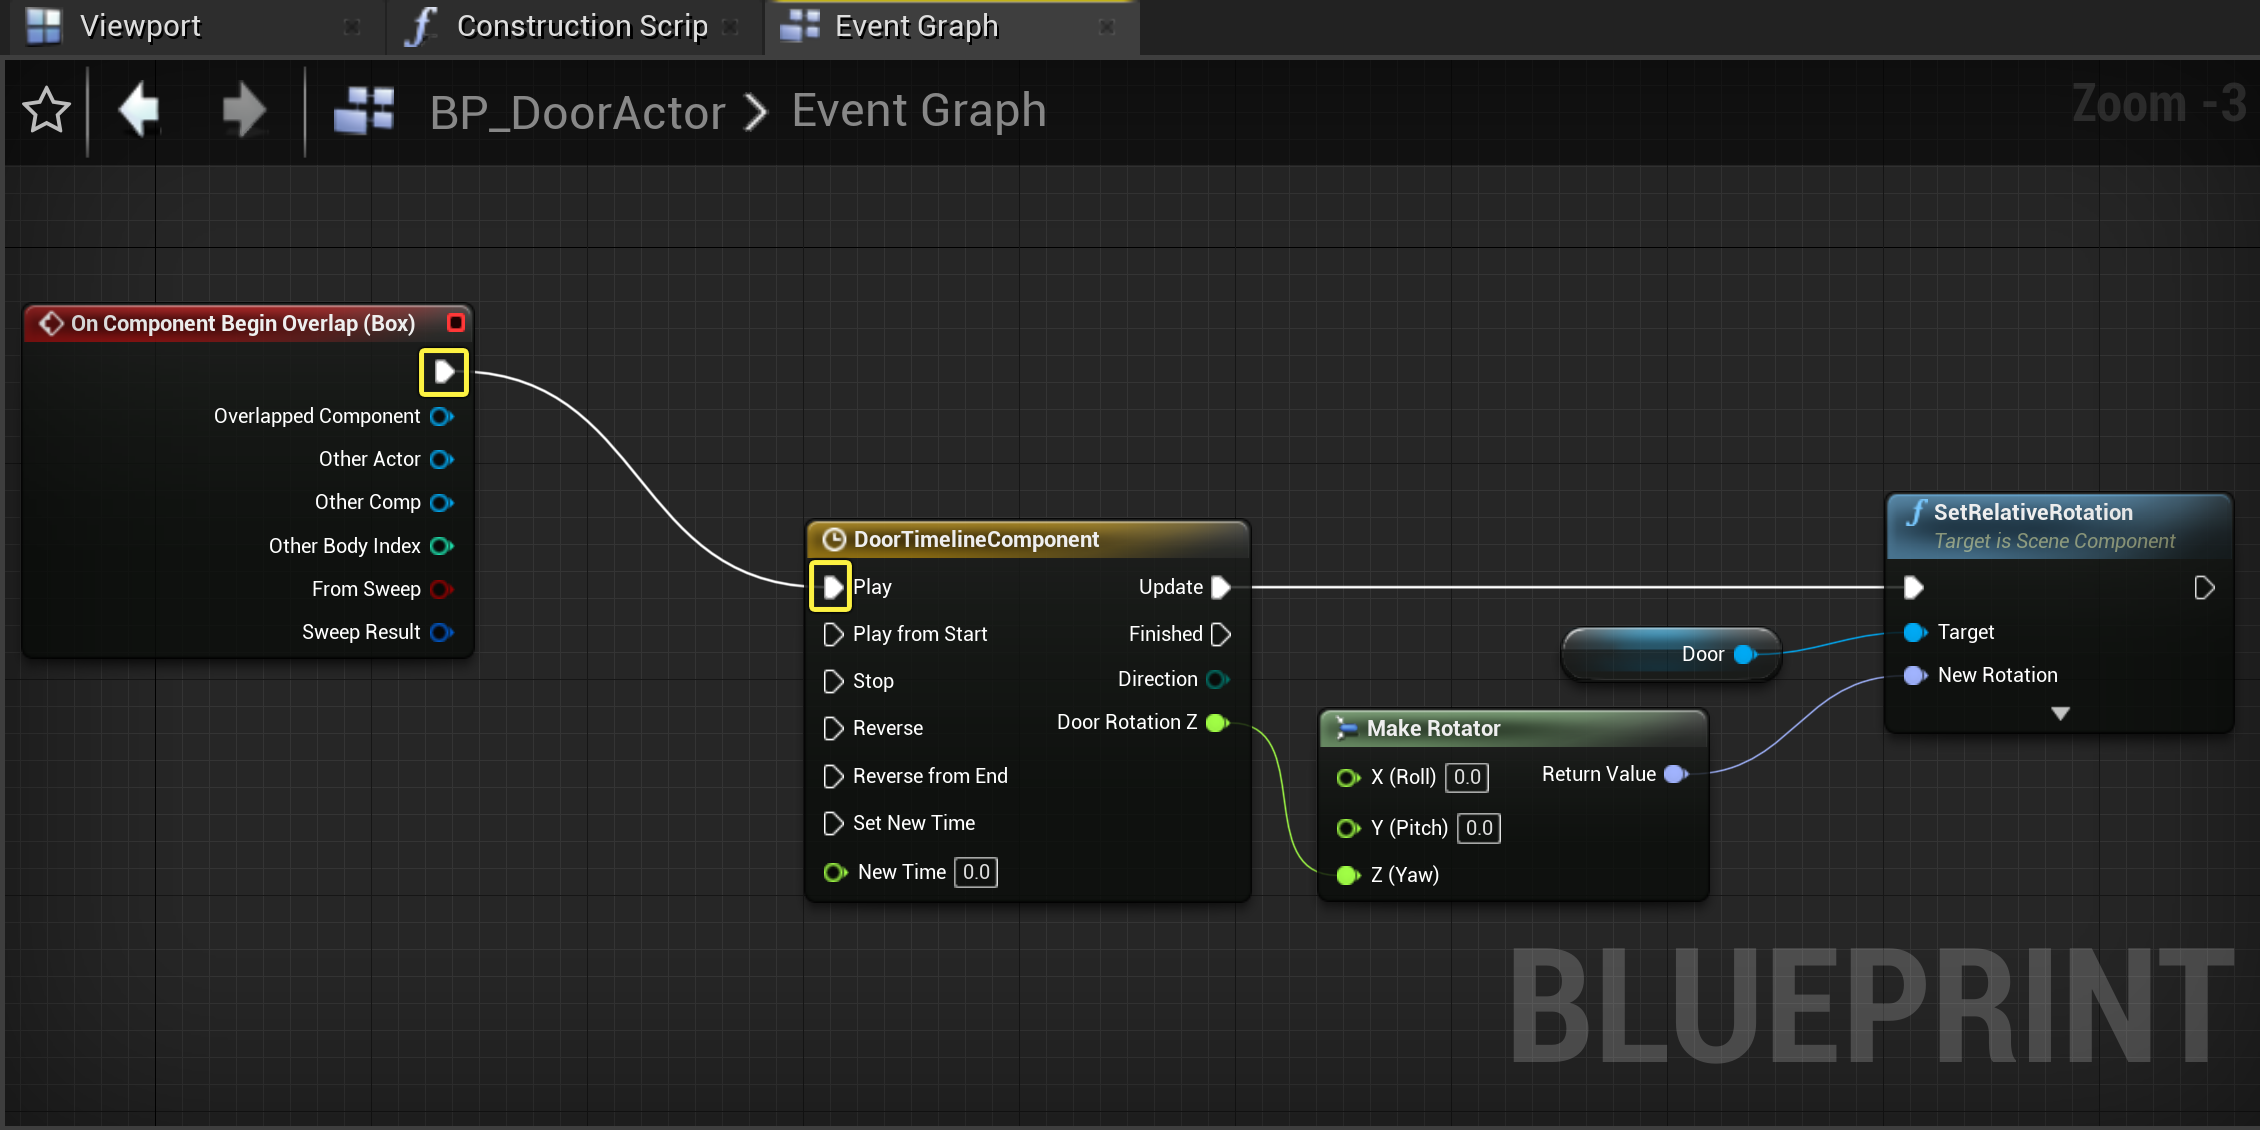
From the Details panel, scroll down to the Events category and click the + icon next to the On Component Begin Overlap event.
![image alt text]()
-
From the On Component Begin Overlap(Box) node, drag off the execution pin and connect it into the Play pin of the DoorTimelineComponent node.
![image alt text]()
-
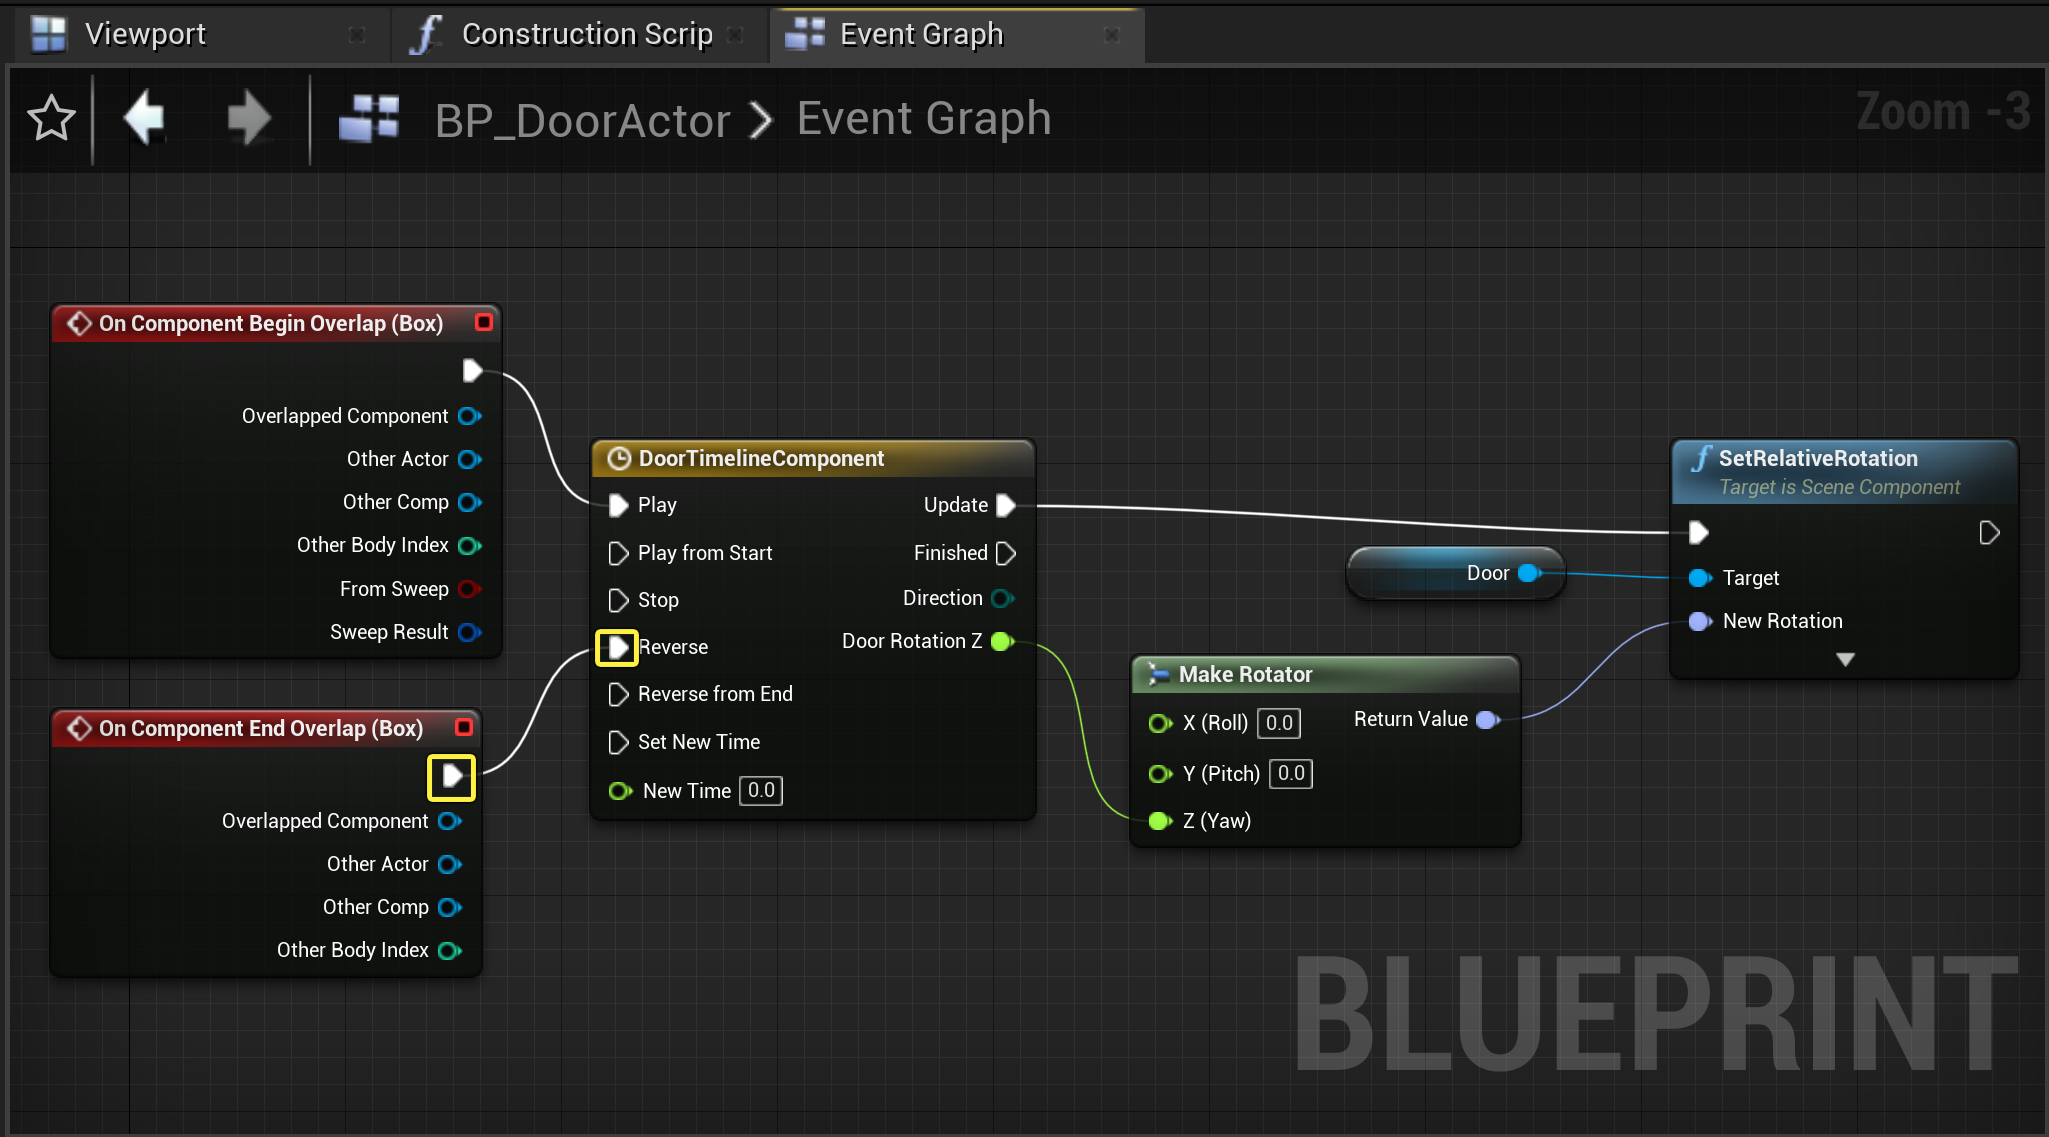
Navigate to the Components tab of theBP_DoorActor and select the Box component. Then from the Details panel, scroll down to the Events category and click + icon next to the On Component End Overlap event.
![image alt text]()
-
From the On Component End Overlap(Box) node, drag off the execution pin and connect it into the Reverse pin of the TimelineComponent node.
![image alt text]()
-
Compile and Save .


Placing Your Actor into the Level
-
From the Content Browser, select your BP_DoorActor and drag it into the viewport.
![image alt text]()
-
Press PIE
![image alt text]()
Using the WASD keys, we can control our spectator Pawn. Upon navigating to the collision bounds of our DoorActor, we can observe the timeline play as the door opens. Upon exiting the bounds, we can observe it play in reverse.


Finished Blueprint
BP_DoorActor
