Choose your operating system:
Windows
macOS
Linux


When creating 3D assets, you might find that you need the ability to define different surfaces types within the same Material. A simple and cheap way to achieve this is to use a Texture Mask that defines which surface should be affected by which section of the Material. In the following How-to, we will cover how you can use Texture Masking inside of your Unreal Engine 4 (UE4) Materials.
Texture Masks
A Texture Mask is a grayscale texture, or a single channel (R, G, B, or A) of a texture, used to limit the area of an effect inside of a Material . Quite often, a mask will be contained within a single channel of another texture, such as the Alpha Channel of the Diffuse or Normal map. This is a good way to make use of unused channels and keep the number of textures being sampled in the Material to a minimum. Technically, any channel of any texture can be thought of and used as a texture mask.
Here is an example of what the Texture Mask for the SM_Chair Static Mesh from the Starter Content looks like.

Creating a Texture Mask
Creating a Texture Mask is something that can be accomplished in any 2D image manipulation program. To accomplish this, all you have to do is paint the areas that you want to Mask with the color White leaving all the other areas Black. In the following image, we can see this in action.

On the right hand side, outlined in green, is what the Mask Texture looks like. Notice how only a few areas are painted White while all other areas are painted Black. This is because we only want to affect the areas that are in White. On the left hand side, you can see what areas this Mask Texture will mask out when applied to the chair mesh.
When creating a Texture Mask you should always use either Black or White and never color information. Using any other type of color could result in strange artifacts when using the Mask inside UE4.
Exporting a Texture Mask
When you are done painting your Mask Texture, you can either export it as a single image or you can pack multiple masks together into the R, G, B, and A channels of a single image and export that. This is commonly referred to as RGB Mask packing and is the preferred method when creating Mask Textures as it offers great performance and memory savings with very little extra work.
If do you pack something into the Alpha Channel of a texture, make sure that you remember to enable Alpha exporting in whatever 2D image manipulation software you use. If not, you run the risk of the Alpha Channel not being exported when the texture is.
Using Texture Masks
Mask Textures can be used a number of different ways inside the UE4 Material Editor. This can range from defining an emissive light source to being used as a Roughness texture. In the following section, we will cover some of the most common ways to use Texture masking in UE4.
Emissive Mask
One of the most common things to do with a Mask Texture is to use it to control the Emissive sections of a Material. This is usually done by first creating a Emissive Mask texture that uses White to define what sections of the Material should be Emissive and then multiplying that Mask texture by a color inside the Material Editor. This is generally done so that you have more control over the look and intensity of the Emissive effect. In the following example, we can see Emissive Texture Masking in action.

In the above example, the Mask Texture is being used to help define which sections of the Material should be Emissive. The color that is used for the Emissive comes from multiplying the Mask Texture by a Vector 3 Parameter. The intensity of the Emissive is being controlled by a Scalar value. The main advantage of using Emissive masking in this way is that whenever you need to change something related to the Emissive look or feel, all you have to do is change the parameters inside of the Material instead of updating and re-importing a Texture.
Material Masking
The other most common thing to do with a Mask Texture is to store different kinds of Texture information into the individual R, G, B, and Alpha channels. A perfect example of this technique can be found by looking at the SM_Chair Static Mesh that comes with the Starter Content.
You can find SM_Chair and all the content that goes with it by first selecting the Starter Content folder in the Content Browser and then entering "chair" into the search box. This will display all the content that is related to the chair. If you do not see the chair, it probably means that you did not include the Starter Content with your project. To fix this, you will need to either create a new project or try the
Opening up the chair Material, M_Chair, we can see a perfect example of Texture Mapping in action.

In this Material, the Mask Texture, T_Chair_M , is used to control every aspect of how the chair looks. From what sections should be metal or non-metal to what color those sections should have, the Mask Texture helps to define all of this. In the following image, you can see a breakdown of how each channel of the Mask Texture for SM_Chair works. On the Left-Hand side is what the Mask looks like as a Texture. The smaller images that you see on the Right-Hand side show each of the individual channels and what area those channels will affect on the chair Static Mesh.

Here is a breakdown of what type of information is stored inside each channel of the chair Mask texture.
-
Red Channel : Ambient Occlusion information. In the Material, this is used to help add some surface variation to the base color.
![TM_Red_Channel.png]()
-
Green Channel : Metallic Mask. In the Material, this is used to define which parts are supposed to be metal. This is also used to help define what color the metal should be.
![TM_Green_Channel.png]()
-
Blue Channel : Non-Metallic Mask. In the Material, this is used to define which parts are non-metal. This mask also helps to define the color of the non-metal parts.
![TM_Blue_Channel.png]()
-
Alpha Channel : Whole object Mask. This is not currently used by the Material.


When all put together, the chair looks like the following inside a UE4 level:

Masking Tips & Tricks
Texture Masking can become a very powerful tool especially when combined with other tools inside UE4. In the following section, we will be going over some Tips & Trick for unleashing the full power of Texture Masking in your work.
Texture Masking and Material separate
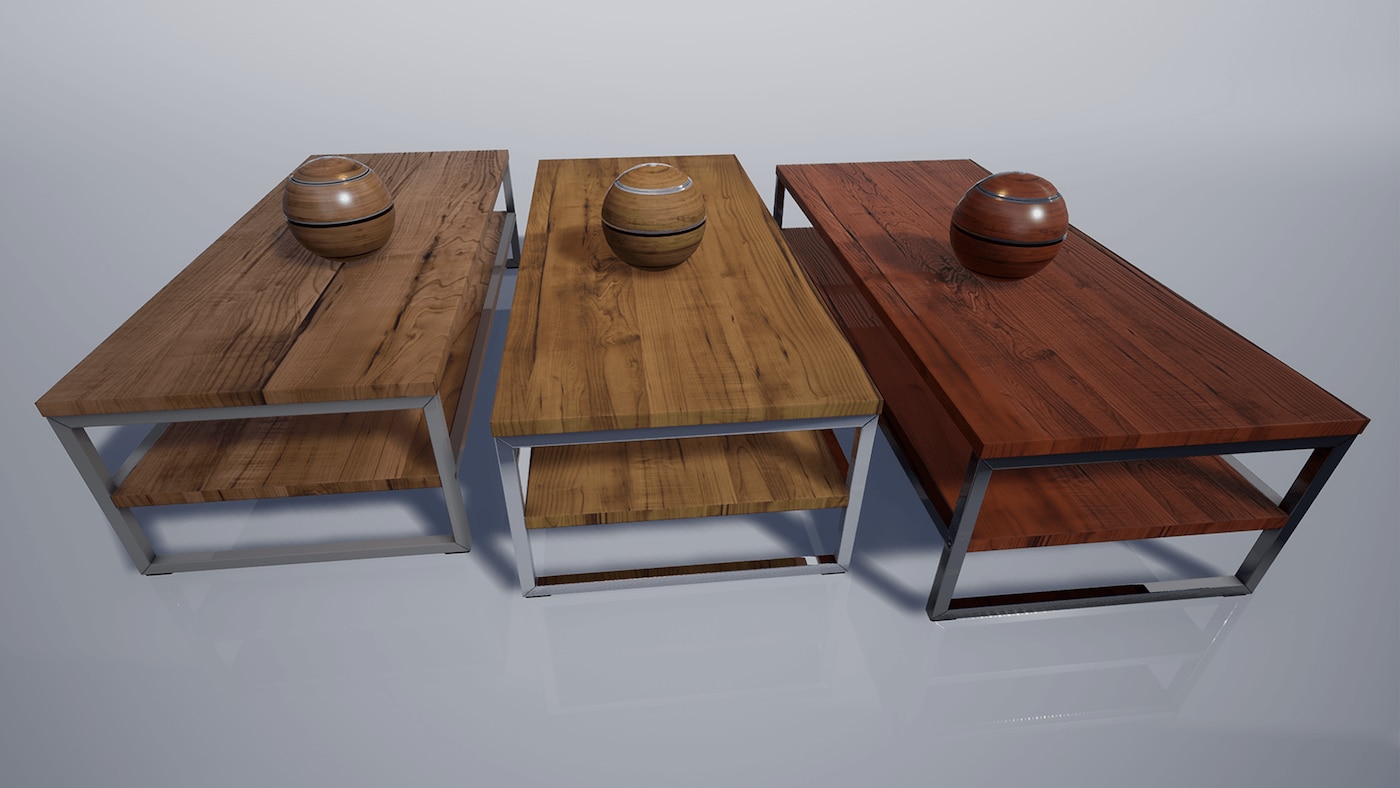
Using Texture Masking and Material Instancing together is a great way to add an almost endless amount of variety to any assets. For example, you can use the Texture Mask to define which areas should have certain properties, like color, and then use different Material Instances to change each of these properties giving you an almost endless variety of options.

For example, if we make a Material Instance out of the SM_Chair Material, we can then adjust the color and other values giving us an almost endless supply of different looking chairs like in the image above.
Masking and Channel Artifacts
Because of a quirk with DirectX, the Green Channel of a texture will often offer the best compression. If any of your masks suffer greatly from compression artifacts, first try placing the information into the Green Channel to see if that helps. If that does not fix the issue, then try using the Alpha channel to store the information.
Be careful when trying to use the Alpha channel of a texture to store Mask Textures. Adding an Alpha channel to a texture will greatly increase the memory footprint of that texture and if you do this enough, you could lose all the saving you gained by packing different Mask Textures in to the RGB channels of a textures.
sRGB and Mask Textures
When packing multiple Mask Textures into a single texture, you should Disable sRGB as your masks should not be Gamma corrected.

However when you do this, you need to make sure that you adjust your 2D Texture Samplers node type as they expect the textures you are inputting to have sRGB enabled. If you do not change the Sampler Type, your Material will fail to compile and the following message will be displayed in the Stats log.

To fix this error, all you need to do is to change the Sampler Type from the default of Color to Linear Color and the warning will go away.
However, for good measure, re-compile the Material to make sure that the changes took. Once completed, the warning will go away and the Material will now be ready to be used.
Conclusion
Texture Masking is a very powerful concept that once mastered will allow you to create an almost endless amount of variation with very little source content. Remember that you only have 4 available channels to use with one Mask Texture so use the channels wisely. Also do not forget to disable sRGB on your Mask Textures as it can greatly help to increase the Mask's sharpness.