Choose your operating system:
Windows
macOS
Linux


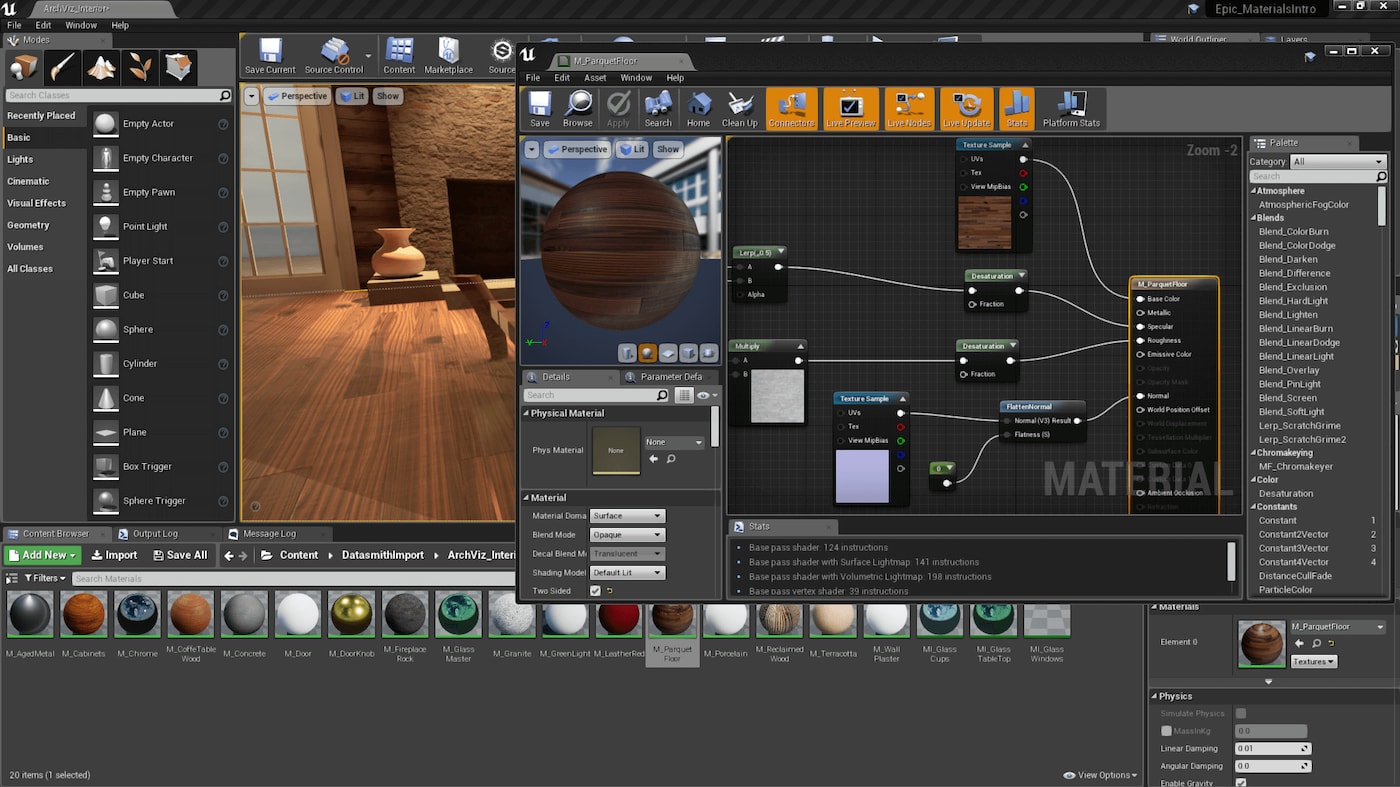


Blend Modes describe how the output of the current Material will blend over what is already being drawn in the background. Put more technically, it allows you to control how the engine will combine this Material ( Source color ) with what is already in the frame buffer ( Destination color ) when rendered this Material is rendered in front of other pixels.
To demonstrate this, we have set up a simple scene with a camera and two objects. We will look at (or through) the first object and see how it affects the background as we change Blend Modes.

Opaque
The Opaque Blend Mode is easily the most straightforward, and probably the one you will use most often. It defines a surface through which light neither passes nor penetrates. This is perfect for most plastics, metals, stone, and the larger percentage of other surface types.
|
|
|
|---|---|
|
Scene Setup |
Camera's View |

Masked
Masked Blend Mode is used for objects in which you will need to selectively control visibility in a binary (on/off) fashion. For example, consider a Material that simulates a chain link fence or grate. You will have some areas that look solid while others are invisible. Such Materials are perfect for the Masked Blend Mode.

It is important to keep in mind the difference between transparent and not rendered . A transparent surface, such as glass, still interacts with light in the form of reflections (specularity). Pixels that are culled in Masked mode simply do not draw ; you will not see any reflections in those areas. If you want to retain reflections or specular aspects, you would do well to use the Translucent Blend Mode, or consider making a Layered Material.
Further, since these features don't render in the masked area, they aren't calculated at all, leading to performance savings on the GPU.
|
|
|
|---|---|
|
Scene Setup |
Camera's View |


When using Masked Blend Mode, you need to pay special attention to the Opacity Mask Clip Value property. This property holds a 0-1 scalar value which controls what value of the opacity mask texture will be used as a cutoff point, beyond which all darker pixels will not render.
|
|
|
|---|---|
|
Opacity Mask Clip Value (Drag the slider to preview) |
Material Network |


In the example above, the Material has its Two Sided property set to True (checked) , which is why you can see the inside of the box.
Also, despite the interactive example shown here, the Opacity Mask Clip Value property is not designed to be changed at runtime.
Translucent
The Translucent Blend Mode is used for objects that require some form of transparency.

This Blend Mode works by taking in an Opacity value or texture and applying it to the surface such that black areas are completely transparent, white areas are completely opaque, and the varying shades of gradation between result in corresponding transparency levels. This means that with a gray Opacity texture, you can have objects that appear to be translucent, letting only some of the background through.
|
|
|
|---|---|
|
Scene Setup |
Camera's View |


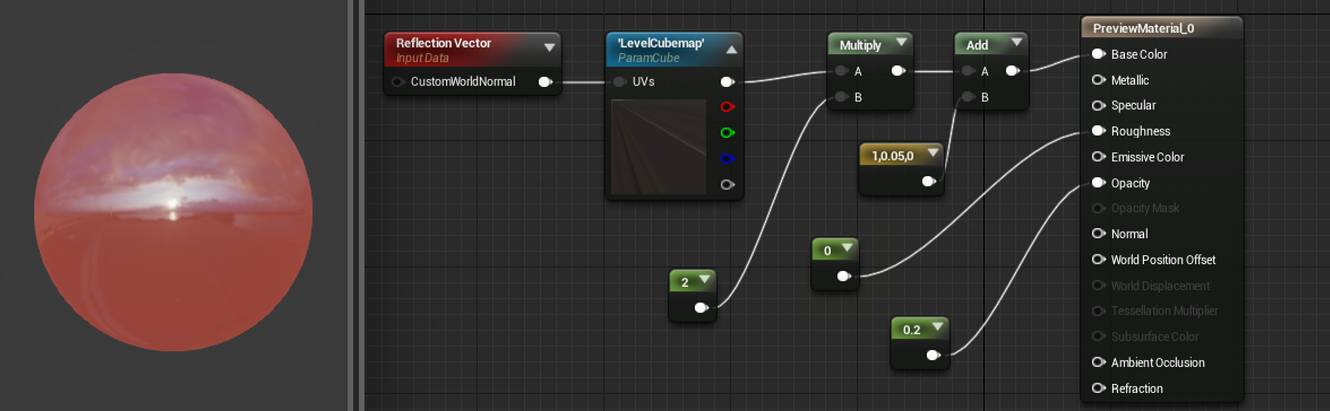
An important consideration when using Translucent Materials is that they do not currently support specularity. This means that you will see no reflections along the surface. However, such reflections can be faked using a Cubemap via a network similar to this:
Additive
The Additive Blend Mode simply takes the pixels of the Material and adds them to the pixels of the background. This is very similar to the Linear Dodge (Add) Blend Mode in Photoshop. This means that there is no darkening; since all pixel values are added together, blacks will just render as transparent. This Blend Mode is useful for various special effects such as fire, steam, or holograms.

As with the Translucent Blend Mode, this Blend Mode does not respect specularity (i.e. reflections). The additive nature of the blending probably means you will not use it anyway, but it is possible to simulate a reflection-like effect using the Cubemap method shown above in the Translucent section.
|
|
|
|---|---|
|
Scene Setup |
Camera's View |


Modulate
The Modulate Blend Mode simply multiplies the value of the Material against the pixels of the background. The behavior is very similar to the Multiply Blend Mode in Photoshop.

In the graph above, the material has been set to a Blend Mode of Modulate with a Shading Model of Unlit .
|
|
|
|---|---|
|
Scene Setup |
Camera's View |


The Modulate blend mode is best suited for certain particle effects. But care must be taken as it does not support lighting or Separate Translucency.
|
Mode |
Description |
|---|---|
|
BLEND_Opaque |
Final color = Source color. This means that the Material will draw on top of the background. This blend mode is compatible with lighting. |
|
BLEND_Masked |
Final color = Source color if OpacityMask > OpacityMaskClipValue, otherwise the pixel is discarded. This blend mode is compatible with lighting. |
|
BLEND_Translucent |
Final color = Source color * Opacity + Dest color * (1 - Opacity). This blend mode is NOT compatible with dynamic lighting. |
|
BLEND_Additive |
Final color = Source color + Dest color. This blend mode is NOT compatible with dynamic lighting. |
|
BLEND_Modulate |
Final color = Source color x Dest color. This blend mode is NOT compatible with dynamic lighting, or fog, unless this is a decal material. |