Choose your operating system:
Windows
macOS
Linux
Similar to what happens with real-world cameras, Depth of Field (DOF) applies a blur to a scene based on the distance in front of, or behind, a focal point. The effect can be used to draw the viewer's attention to a specific subject of the shot based on depth and adds an aesthetic to make the rendering appear more like a photograph, or film.
Depth of Field Types
There are several methods of performing depth of field effects in Unreal Engine 4 (UE4) that you can use. These have been broken into two categories:
-
Cinematic: This method provides a cinematic and filmic look to depth of field effects. Adjustments for this method align more with common camera options available in photography and cinematography. This option works for Desktop and Console platforms.
-
Mobile: This method provides optimized and lower-cost DOF options that work for Mobile platforms.
Select from the methods below to learn more about their features:
[DIR(output:"topic" Parent: RenderingAndGraphics/PostProcessEffects
Implementation
Depth of Field is broken up into three layers (or region); Near, Far, and the Focal Region. Each of these is processed separately and then later composited together to achieve the final image effect. Objects in the Near and Far layers are always fully blurred. They are blended with the non-blurred scene to achieve the final result.

-
Objects within the Focal Region (Black) use the non-blurred scene layer. This layer can be very narrow—like here, where it is only focused on the character— or very wide, encompassing more of the scene's foreground and background.
-
Objects in the Near (Green) or Far (Blue) that are outside any transition areas between the Focal Region and the Near or Far regions is fully blended to the blurred layer meaning they are out-of-focus.
-
Objects within the transition area—like the area to the left of the car—are blended linearly between the non-blurred scene layer (for Near and Far) and their blurred layer based on their position within the transition of the Focal Region.
Visualizing Depth of Field
These layers, including transition regions, can be visualized using the Depth of Field Layers showflag in the Level Viewport under Show > Visualize .


Visualizing the Depth of Field Layers also includes useful information relevant to the DOF method being used, such as values that are currently set or when moving the mouse around the scene, the distance from the camera to the Actor is displayed next to the mouse cursor.

Using Depth of Field in the Editor
Using Depth of Field in Unreal Editor can be done in a few different ways; by placing a
Post Process Volume
, using a
Camera Actor
, or a
Cine Camera Actor
. Each of these has access to DOF properties via the
Post Process Volume and Camera
. For
Cine Camera
, there are some additional industry standard settings for cameras and lenses.
The majority of settings used can be accessed under the Lens tab in the Camera and Depth of Field sections.

Click image for full size.
When using a Cine Camera Actor , replacing properties that affect depth of field can be found under the Current Camera Settings in the Lens Settings section.
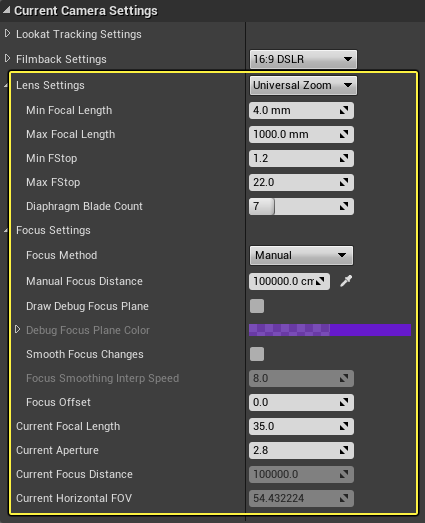
Click image for full size.
If you're using a Camera or Cine Camera Actor, you can inhabit them using Actor Piloting in the Level Viewport by selecting the Perspective and choosing from one of the placed Cameras in the scene.
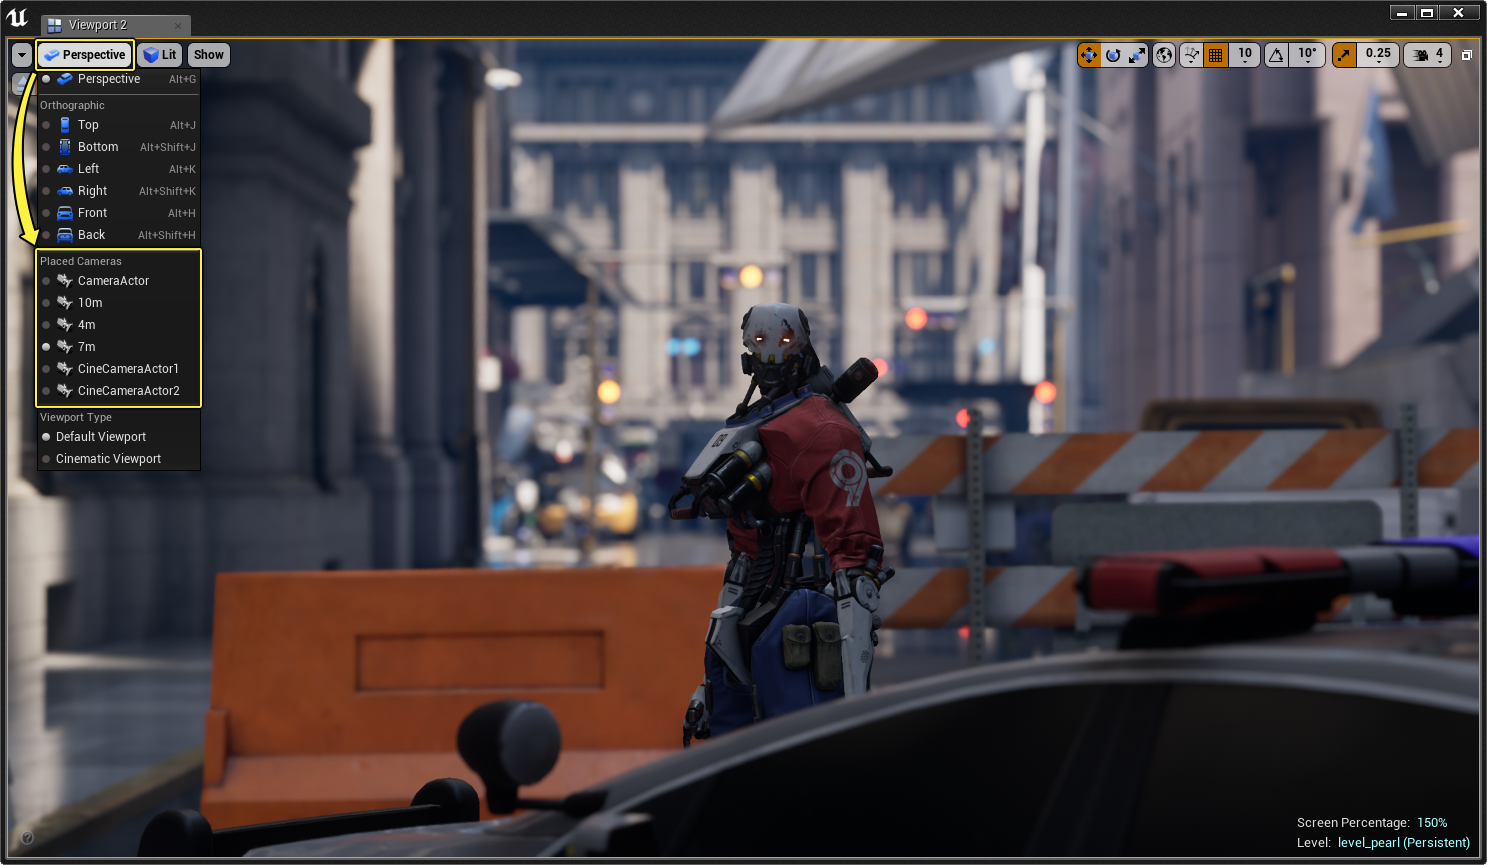
Click image for full size.
The Level Viewport will snap to the camera's view and indicate that you are piloting and viewing what that camera sees.

Any properties that are changed in the Camera or Post Process Volume (if the Camera is within it) will immediately take effect in the viewport.
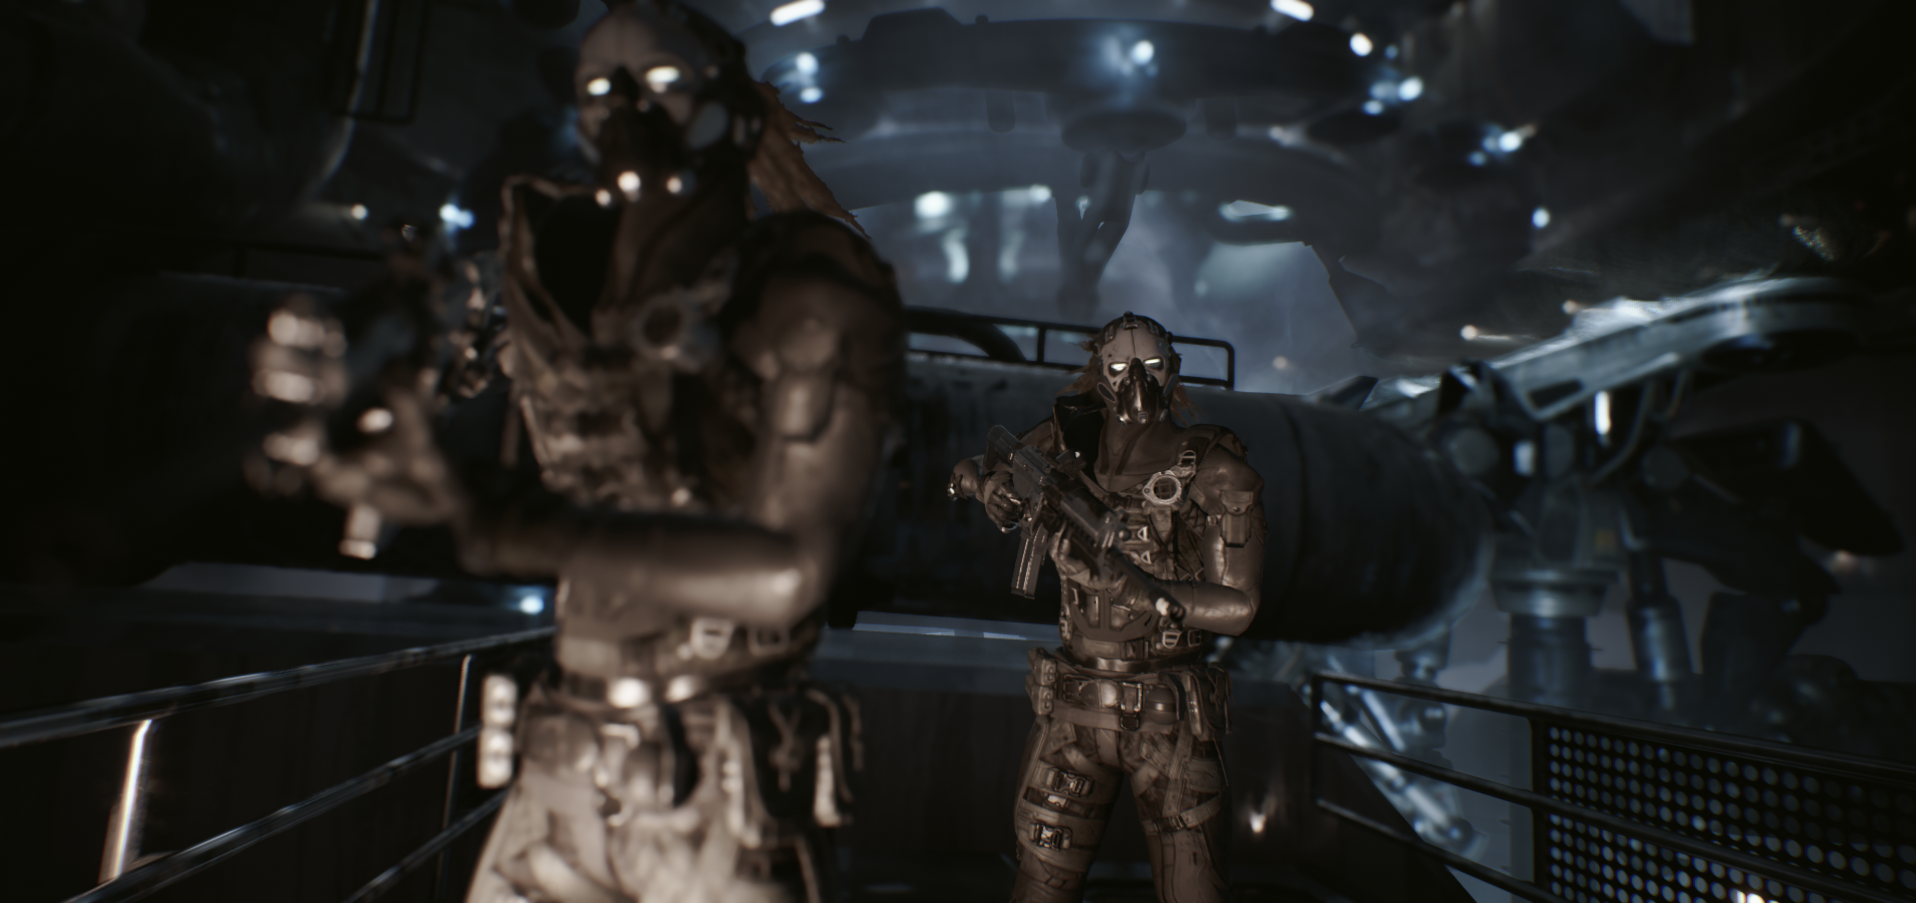
To achieve similar results as the shot above, the key is to use a low Aperture (F-stop ) to get a large Bokeh shape, move the camera or viewport position closer to an object and change the Field of View (FOV) to be lower. Then, adjust the Focus Distance to get some scene content to be out of focus in front and behind the focus plane.
Using Cinematic Camera's Debug Focus Plane
While using the Cine Camera Actor , enable Draw Debug Focus Plane to see where focus is placed in your level.
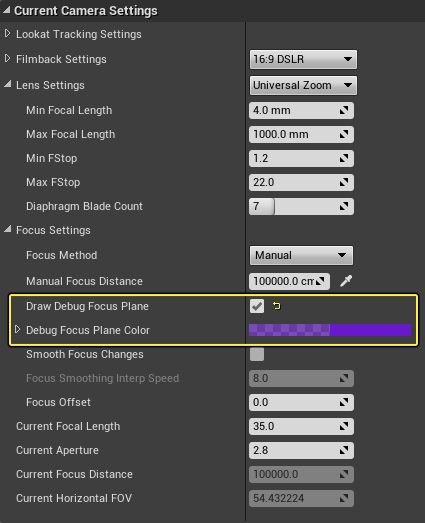
Click image for full size.
When enabled, the focus plane will be drawn at the currently set Manual Focus Distance from the camera. In this case, the character is the focal point where everything is sharp and in focus. Anything in front or behind the focus plane will be out of focus.


Use Debug Focus Plane Color to customize the RGBA color values for the focus plane being drawn. This is helpful in scenes where it may be hard to see the focus plane being drawn.