Choose your operating system:
Windows
macOS
Linux
This document goes over how to export cubemaps out of Photoshop using the NVIDIA Texture Tools plug-in.
Exporting Cubemaps (Photoshop)
Once you have a series of images laid out in Photoshop and ready to use as a cubemap, then you are ready for export. In this example, we will use the NVIDIA Texture Tools plug-in for Photoshop CS6. If you have not yet installed this plug-in, you can get it here .
-
First, make sure your textures for the cubemap are lined up in a single document, and that they are all the same size. This size should also be a power of 2. Be sure that the frames are rotated as described here .
![ExportCubemap.png]()
-
Under the File menu, choose Save As .
![PhotoshopSaveAs.png]()
-
In the Save As window, choose D3D/DDS ( .DDS; .DDS) and name your file.
![PhotoshopSaveAsDialog.png]()
-
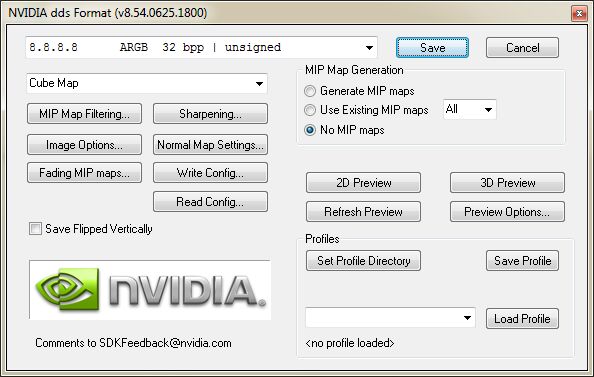
In the NVIDIA dds Format window, choose 8.8.8.8 ARGB 32 bpp | unsigned from the combobox at the top. Set the combobox underneath to Cube Map . Set MIP Map Generation group to No MIP maps .
![PhotoshopDDSDialog.png]()
-
Click Save .
Images used here are derived from light probes originally from Paul Debevec's website http://www.pauldebevec.com .


