Choose your operating system:
Windows
macOS
Linux
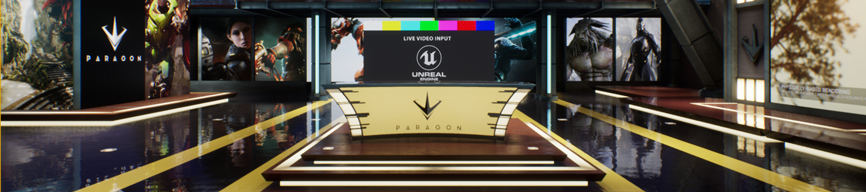
The Virtual Studio showcases the Unreal Engine's ability to integrate with professional quality video cards from AJA Video Systems and Blackmagic Design. If you have a supported card, you can use this Project to get started integrating the Unreal Engine into your video production pipeline.
This showcase is set up to feature a real-life presenter, composited on the fly behind a virtual desk inside a virtual soundstage. You can leverage the same concept and setup to support other use cases for bringing live video into an Unreal Engine Level and capturing the rendered results to an output feed.
For background information on the video configurations set up in this showcase, see the Quick Start guides for AJA Video and Blackmagic Design , and the page on Supporting Multiple Media Configurations .
Getting Started with the Video I/O Setup
The Virtual Studio showcase is set up with three different media configuration, each one defined by a separate Media Profile Asset.
-
AJAMediaProfile_24fps_10bit exchanges SDI input video feeds and output captures with a device from AJA Video Systems.
It's set up by default to get input from ports 1 and 2 on a Corvid 44 card, at 24 frames per second, using a 10-bit stream. -
BlackmagicMediaProfile_24fps_10bit exchanges SDI input video feeds and output captures with a device from Blackmagic Design.
It's set up by default to get input from ports 1 and 2 on a DeckLink Duo 2 card, at 24 frames per second, using a 10-bit stream. -
FileMediaProfile is set up by default to get input from an .mp4 file on disk.
This is the default configuration that will be active when you start your Project, so that you can immediately see some video playing even if you don't have a supported AJA or Blackmagic card installed.
This configuration is not set up to capture any video from the Unreal Engine or Unreal Editor — it has no media outputs configured at all. So, while this configuration is active, you'll have video feeds coming in to the Level, but not going out.
To switch between these different configurations, press the down arrow in the Toolbar next to the current Media Profile, choose
Select Profile
from the drop-down menu, then choose the Media Profile you want to activate:

If you need to change the default port assignments or media settings (like frames per second, image resolution or color depth) to match the media setup you're working with on your computer, you can double-click any of these Media Profile Assets to open them up and edit their properties. You'll find the Media Profile Assets under the VirtualSet/MediaProfiles folder:

For more information on how Media Profiles work, see Supporting Multiple Media Configurations .
Media Sources and Playback
The Virtual Studio showcase uses two Media Bundles to bring in input video feeds and make them appear in the Level Viewport.
-
Only one is set up to be visible by default. This feed appears composited into the scene behind the presenter's desk.

-
The second video feed is hidden in the Unreal Editor, so you won't see it by default until you switch cameras — either in the Media Capture panel, or using the on-screen capture controls at runtime. For details, see Onscreen Capture Controls below. To force this second feed to show up in the Viewport in the Unreal Editor:
-
Select the VirtualSetMediaInput2 Actor in the World Outliner .

-
in the Details panel, enable the Plate > Show Plate in Editor option.

This second feed is also composited behind the presenter's desk, but at an angle designed to be viewed from a camera to the presenter's right.

-


Media Bundle Setup
Each of the two video input planes behind the presenter's desk is set up using a Media Bundle:
VirtualSet/Media/VideoBundle_01
and
VirtualSet/Media/VideoBundle_02
. Each of these bundles has a corresponding folder that holds its Media Framework Assets, named with the
_InnerAssets
suffix.

To learn how to set up Media Bundles from scratch, see the AJA Media I/O Quick Start Guide or Blackmagic Media I/O Quick Start Guide .
One thing to note about the Media Bundles in the Virtual Studio showcase is that they don't use the default Blueprint class that is used by most Media Bundle Assets.
Typically, when you drop a Media Bundle Asset into a Level, a new BP_MediaBundle_Plane_16-9 Actor is automatically spawned to represent the video in the 3D space of the Level. This default Blueprint contains a Plane Component, which is automatically set up to refer to the Media Texture created in the bundle's _InnerAssets folder. It also contains a MediaSound component that handles playing back the audio from the associated media source.
In the Virtual Studio, the Media Bundle Assets are instead represented in the Level by a custom subclass of the BP_MediaBundle_Plane_16-9 Blueprint Actor: VirtualSet/Blueprints/VirtualSetMediaInput . This subclass acts just like its parent, except that it also expects to have a specific camera Actor assigned to it as a child in the World Outliner . You'll notice that each of the two video planes in the Level has a camera as a child:

This custom VirtualSetMediaInput subclass adds the ability to show and hide the plate in the Editor viewport, and to configure the distance between the plate and its assigned camera. When you select either the VirtualSetMediaInput1 or VirtualSetMediaInput2 Actor, you can set these options in the Plate category of the Details panel:

Double-click the Blueprint class to see its Construction Script and other functions if you want to see how these settings are implemented.
Proxy Media Sources
Each of the two Media Bundles in the Level is configured to pick up its video feed from a different Proxy Media Source Asset. For example, if you double-click
VideoBundle_01
, you'll see that it is set up to use the
MediaProxySource_01
Asset as its source:

Similarly, VideoBundle_02 is set up to use the MediaProxySource_02 Asset as its source.
If you open the
Project Settings
panel (select
Edit > Project Settings
from the main menu), and find the
Plugins > Media Profile
section, you'll see that each of those two Proxy Media Source Assets is also referenced in the
Media Source Proxy
list:

Click for full image.
The order of slots in this list corresponds to the order of the slots in the current Media Profile. For example, the BlackmagicMediaProfile_24fps_10bit is set up with two input Media Sources. Slot 0 reads an input feed from port 1 on the card, while slot 1 reads the input feed from port 2 on the card:

The result of this configuration is that while the Blackmagic Media Profile is active, the VideoBundle_01 draws its input feed from port 1 on the card through one proxy, while the VideoBundle_02 draws its input feed from port 2 on the card through a different proxy. When you change Media Profiles, those proxies automatically re-map the input feeds to the first two input sources defined in the new Media Profile, instantly changing the video feeds that you see in the Level.
For more information on how Media Proxies work, see Supporting Multiple Media Configurations .
Keying and Compositing
The Media Bundles are placed behind the central desk with the intention of putting a seated presenter into the virtual 3D Level. In order to make this effect work, you'll need to remove the background behind the presenter in your input video stream. To do this, you typically record the presenter seated in front of a green screen (or blue screen), and remove the background through chroma-keying or luminance filtering.
Media Bundles, like the ones used in this showcase, are automatically set up to use a Material Instance that can perform this chroma-keying and luminance filtering for you live in the Unreal Engine.
To set this up:
-
In the Content Browser , find and open the Media Bundle you want to set up.
-
In the Toolbar of the Media Bundle Editor, click the Open Material Editor button to edit the Material Instance that the Media Bundle uses to draw the video feed on to an object in the Level.

-
In the Details panel of the Material Instance Editor, find the Keyer_00 - Setup section, and enable the EnableKeyer property.

-
With the EnableKeyer property activated, the Material Instance makes new properties visible in the other Keyer sections in the Details panel. You can use these properties to configure the color that you want to remove from the video stream, filter the stream based on the luminance of the pixels, crop, and color correct the stream.


Capturing Output Video
In order to capture video from the Unreal Engine using the instructions in this section, you need to have a supported SDI card from AJA Video Systems or Blackmagic Design.
To start sending video from the Unreal Editor to your AJA or Blackmagic card:
-
From the main menu, select Window > Media Capture . You can use the tools in this window to identify which Media Outputs you want to receive output from the Unreal Engine. You can also specify which cameras in the Level or which Render Targets you want to send video to each of those outputs.
In the image below, the Media Capture window is set up to broadcast from the two cameras in the Level to the MediaOutput_01 Proxy Media Output Asset.

The Project Settings for the Virtual Studio sample are set up to redirect the video sent to MediaOutput_01 to the first output source configured in the active Media Profile. If you're using either the AjaMediaProfile_24fps_10bit or BlackmagicMediaProfile_24fps_10bit Media Profile, this will end up sending the output to the fourth port on the card. -
Click the Capture icon at the top of the window to start capturing.

-
At the bottom of the window, you'll see a preview that shows the viewpoint of the first camera in the Locked Camera Actors list. If you have a video device attached to the fourth port on your card, you should see the same video being sent out over that port.

The Media Capture window places a button above the preview for each camera that appears in the Locked Camera Actors list. Use these buttons to switch the output between the different viewpoints.


The showcase is also set up to send captures to the video card at runtime, using an on-screen control UI. To get started:
-
Click the arrow next to the Play button in the toolbar, and choose either the New Editor Window (PIE) or Standalone Game options.
Video capture from the Editor will only work when you play your Project in a New Editor Window (PIE) or a Standalone Game . It won't work in the default Selected Viewport mode, or in Simulate mode.
In addition, the viewport resolution of your Project (that is, the size of the rendered image the Unreal Engine generates each frame) must match the output resolution set in the active Media Profile, so that it will be the right size for the output video feed. -
You'll start with the front view of the presenter's desk, some controls on the top left, and a thumbnail image for each camera in the Level.

Click for full image.-
To change the current camera view, you can click any camera thumbnail, or you can click the Next Camera button (1) to cycle through the cameras.
-
Toggle the Enable Video Output checkbox (2) to start and stop sending the current viewport to the video card.
-

The on-screen runtime capture controls are also set up to send the selected camera feed to the MediaOutputProxy_01 Asset, which the Project Settings forward on to the first output configured in the current Media Profile. For details on how this is set up, see the On-screen Capture Controls section below.
On-screen Capture Controls
You'll find the Assets for the on-screen camera control UI in the Virtual Set/Blueprints folder:

-
The CameraSwitcherUI UMG widget contains the main on-screen elements, including the Next Camera button and the checkbox for toggling the capture of the current view.
-
Behind the scenes, all the work that happens when you click in the UI is handled by the CameraSwitcher Blueprint class. You can look in its event graphs to see the implementation of all the camera switching logic. The logic that relates to starting and stopping the video capture is in two main places:
-
In the Event Graph, the Create Media Capture node creates a new Media Capture object from the MediaOutputProxy_01 Asset that is set up in the VideoOutputSettings variable, and stores it in a variable called Media Capture .

Click for full image. -
In the Enable Video Output function, that Media Capture variable is used to start and stop capturing the viewport.

Click for full image.
-
-
The CameraSwitcher needs to be set up with a list of all the VirtualSetMediaInput objects that should be managed by the UI. When the Level is loaded, the CameraSwitcherUI automatically creates a new thumbnail for each input in this list.


One instance of the
CameraSwitcher
Blueprint class is added to the Level. If you select this Actor in the viewport or in the
World Outliner
, you can use the settings in the
Details
panel to control its behavior.

|
Property |
Description |
|---|---|
|
Video Output |
|
|
Enable Output by Default |
Enable this setting to have the CameraSwitcher immediately start capturing video output and sending it to the Media Output set in the Video Output Settings when you run the Project. |
|
Video Output Settings |
Sets the Media Output Asset that the CameraSwitcher uses to create a Media Capture and send video output to the SDI device. The settings for this Asset determines which device, and which port on that device, receives the captured video stream. By default, this uses the VirtualSet/Media/MediaOutputProxy_01 Asset, which is set up in the Project Settings to send its output to the first output port defined in the active Media Profile (if any). |
|
Cameras |
|
|
Camera List |
Lists all the VirtualSetMediaInput Actors that the CameraSwitcher can manage at runtime.
|
|
User Interface |
|
|
Show UI |
Determines whether the on-screen CameraSwitcher UI is visible when you run the Project. |
Video Wall
The large video wall to the presenter's left doesn't rely on any input from any of the Media Profiles. It's mostly built using the basic building blocks provided by the Media Framework.

Click for full image.
You'll find the Media Framework Assets used for the video wall inside the
Virtual_Studio_Kit/Textures/Video
folder.

-
EngineFeatures is a File Media Source that is set up to read video from an .mp4 file, which you can find in the Project's Movies folder. WallMediaPlayer controls the playback of the video from that EngineFeatures file source. And when that WallMediaPlayer Asset was created, it automatically created a corresponding MediaTexture Asset, T_WallMediaPlayer , to receive the frames read from the video source.
For a step-by-step guide to creating these kinds of Assets to play back your own video files, see the Play a Video File how-to page. -
The M_WallVideoPlayer Material samples the pixels from the T_WallMediaPlayer Media Texture and sends them to the Emissive output. This gives the video a little extra glow when it is rendered on the screen.

-
Finally, WallPlayerSetup is a Blueprint whose construction script starts the video wall playing back in a loop. An instance of this class is already placed in the Level, so the video begins playing on the wall each time the Level is loaded and the class is spawned. That way, the video wall is always playing in the background, regardless of whether you're in the Unreal Editor or running your Project.

Click for full image.


Modular Studio Kit
The Virtual Studio sample contains a library of modular Assets that includes Static Meshes, Materials, Textures, and more. You can use these Assets to create your own studio layouts similar to the one you see in the default Level described in the sections above.
You'll find this Asset library in the Content Browser, under the Virtual_Studio_Kit folder:

Click for full image.
There are also several Levels in the Maps folder that contain prebuilt studios:

Click for full image.
You can open these up in the Unreal Editor to see examples of the kind of virtual studio layouts you can construct using only the Assets in the kit.
Drag the slider to see sample studio layouts


Unlike the default TrackerlessStudio Level that opens when you start working in the Virtual Studio sample, the other sample studio Levels in the Maps folder are not set up with cameras and media plates by default. If you want to bring SDI video feeds into one of these sample Levels, you'll have to set it up with new CineCamera Actors and VirtualSetMediaInput Actors. Follow through the sections above to understand the way the default Level is set up, and use this as a model that you apply in your own Level.