Choose your operating system:
Windows
macOS
Linux
The HoloLens Viewer Template is an adaptation of the Collab Viewer Template that works on the Microsoft HoloLens 2. You can use it to see your 3D content overlaid on your actual surroundings in the HoloLens viewer. You can also interact with your models, moving them around and annotating them in real-world space.
Prerequisites - Before you try to get the HoloLens Viewer Template working, we strongly recommend that you first get comfortable with both of the following:
-
Streaming content from Unreal Engine to the HoloLens 2. See the HoloLens Streaming Quick Start . You will need to have completed all the configuration steps described in this Quick Start.
-
The basic features of the Collab Viewer Template on Windows.
The HoloLens Viewer Template has the same restrictions on supported hardware and operating systems as all other use of Unreal Engine with HoloLens 2. In particular, it requires Windows update 1903 or greater. For more details, see the HoloLens 2 Prerequisites .
Getting Started
The HoloLens Viewer Template comes with some basic Assets drawn from the Collab Viewer and Product Viewer Templates:

Unlike the Collab Viewer and Product Viewer Templates, the engine model in the HoloLens Viewer Template has no surroundings: no skydome, no buildings. Because you'll be superimposing the virtual world on top of your real surroundings in the HoloLens, you'll typically want the models you work with to be on their own in an empty environment.
The engine model gives you a simple set of 3D objects that you can use to get started. At any time, you can remove it from the Level and replace it with your own 3D content.
When you have the 3D content in your Level set up the way you want it, you can start streaming your Project content to the HoloLens by selecting the VR Preview option in the Unreal Editor Toolbar, as described in the HoloLens Streaming Quick Start .
The HoloLens Viewer Template only streams to the HoloLens 2 device from the Unreal Editor, not from a packaged .exe .
Working with the Interaction Menu
Like the Collab Viewer Template, you'll use a menu to choose different modes of interaction with your models.
To summon the Interaction Menu in the HoloLens Template, use the "watch" gesture: point the index finger from one hand at the wrist of the other hand, as shown below:

Click for full image.
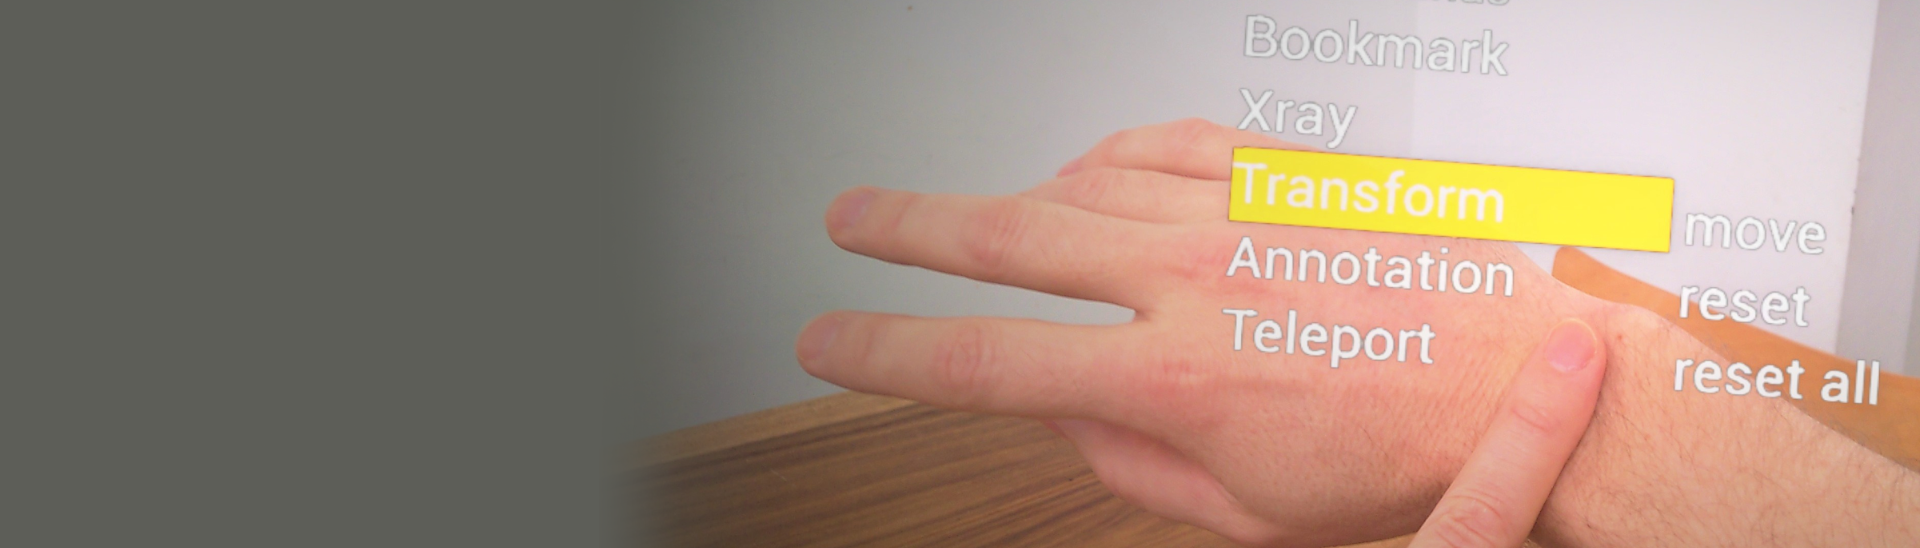
As you move your index finger, a small dot cursor tracks the item you're pointing to. Move your index finger to highlight menu items and open sub-menus. To select an item, highlight it with your dot cursor and tap forward with your index finger.

Click for full image.
The menu fades away after a few seconds with no interaction, or when you're working in an interaction mode. You can call it back at any time by repeating the watch gesture.
Teleporting Content
You can place your virtual 3D content anywhere you want it in real-world space.
-
Open the Interaction Menu and select the Teleport > To Location option.

Click for full image. -
Gaze at the location in real-world space where you want to move your virtual 3D content. A marker will show the current location:

Click for full image. -
When you have the gaze marker at the desired location, pinch your fingers to confirm the new location.

Click for full image.


Interacting with Your 3D Content
The Interaction Menu of the HoloLens Viewer offers a subset of the interactions that you can carry out in the Collab Viewer, summarized in the table below.
In all interaction modes, you select objects by hovering over them with your dot cursor and making the "pinch" gesture.
|
Command |
Description |
|---|---|
|
Xray |
Use the options in the Xray sub-menu to apply and remove a see-through Material to selected objects in the scene. |
|
Xray > Apply |
Activates the Xray Apply mode. While this mode is active, any object you select in the scene with your dot cursor gets the see-through Material applied to it. |
|
Xray > Isolate |
Activates the Xray Isolate mode. While this mode is active, and you select an item in the scene with your dot cursor, the see-through Material is applied to all other Actors in the same hierarchy as the one you select. |
|
Xray > Reset All |
Instantly removes the see-through Material from all objects in the Level, returning them to their original Materials. |
|
Transform |
Use the options in the Transform sub-menu to move selected objects around in the scene. |
|
Transform > Move |
Activates the Transform Move mode. When you select an object in the scene with your dot cursor, you can keep your fingers pinched and drag the selected object around in 3D space. Release the pinch to stop moving the object. |
|
Transform > Reset |
Activates the Transform Reset mode. When you select an object in the scene with your dot cursor, you instantly reset the selected object to its original position and rotation. |
|
Transform > Reset All |
Instantly returns all objects in the scene to their original positions and rotations. |
|
Annotation |
Use the options in the Annotation sub-menu to add and remove annotations. |
|
Annotation > Paint |
Activates the Annotation Paint mode. While this mode is active, you can draw lines in mid-air by pinching your fingers and moving your hand in real-world space. Release your pinch to stop drawing the line. |
|
Annotation > Delete Stroke |
Activates the Annotation Delete Stroke mode. While this mode is active, you can select a paint stroke with your dot cursor to delete it. |
|
Teleport |
Teleports the origin of virtual space to a new position in real-world space. See Teleporting Content above. |
The HoloLens Template doesn't currently offer the ability to connect live to other viewers, save and load object positions, take screenshots, or measure distances.