Choose your operating system:
Windows
macOS
Linux

The Product Configurator template in Unreal Engine 4 (UE4) presents 3D visualization artists with a starting point for the creation of a customizable product configurator and user interface. The template utilizes Level Variant Sets, custom UMG interface elements, and a purpose-built configuration Blueprint with the following features:
-
Geometry variation using Actor switching.
-
Material and Visibility options.
-
Camera position and setting variation.
-
Lighting and environment variation.
-
Procedurally generated interface that presents users with options.
-
Ability to add new variations without using Blueprint code.
Overview
Using the Variant Manager , you can define Actor Variants and Variant Sets within a LevelVariantSet Actor. The information is then passed to the BP_Configurator Blueprint; which uses the information to dynamically create the user interface and display all of the variant options, complete with user-defined thumbnail images:

Controling the Template
|
Control |
Description |
|---|---|
|
Alt + LMB |
Rotate camera around the product. |
|
Alt + RMB |
Zoom in/out |
|
G |
Hide/Show Interface |
|
Escape |
Exit the Configurator |
Template Features
The template uses the Variant Manager, a specialized UI panel that organizes different configurations of properties for Actors in your level and stores them in a LevelVariantSet Actor.

|
Number |
Description |
|---|---|
|
1 |
Variants |
|
2 |
Actors |
|
3 |
Properties |
|
4 |
Values |
|
5 |
Enable auto-capture properties |
|
6 |
Record the value of this property |
The Variants column contains all of your Actor configurations, known as variants, organized into Variant Sets. Each Variant represents an option in the configurator and can contain one or more Actors with a variety of property changes. These are represented by a thumbnail image set by the user. All Variants are translated into buttons in the interface at runtime via the BP_Configurator.
For information on using the Variant Manger, please see the
Using the BP_Configurator
The BP_Configurator Blueprint takes in data from a specified Level Variant Set and dynamically creates the user interface for your configurator:
-
The BP_Configurator takes in data from the specified Level Variant Set.
-
Each Variant Set is translated into an icon on the main UI toolbar.
-
Each Variant becomes an option in that Variant Set's sub menu.
-
The Variant is visually represented by the thumbnail set in the Variant Manager.
-
Variant Sets are represented by the icon of the currently active Variant.
How to Import Your Data
Customizing the Product Configurator template begins with importing your 3d artwork and textures. Unreal Engine 4 supports the use of Datasmith , as well as the FBX Content Pipeline for importing from your favorite 3D applications such as Maya, 3ds Max, and Blender.
Once your 3D and 2D assets have been imported into the Content Browser, you will need to remove the sample guitar from the level and build your Variant and Variant Sets using the Variant Manager. The final step will be to connect your level variant set to the BP_Configurator to create the custom user interface at runtime.
Adding Your Artwork into the Main Level
When your assets have been imported into UE4 and setup in the Content Browser, the example guitar will need to be removed and the new art added to the level:

The Product Configurator uses one or more root Actors to provide standard placement for your static meshes:
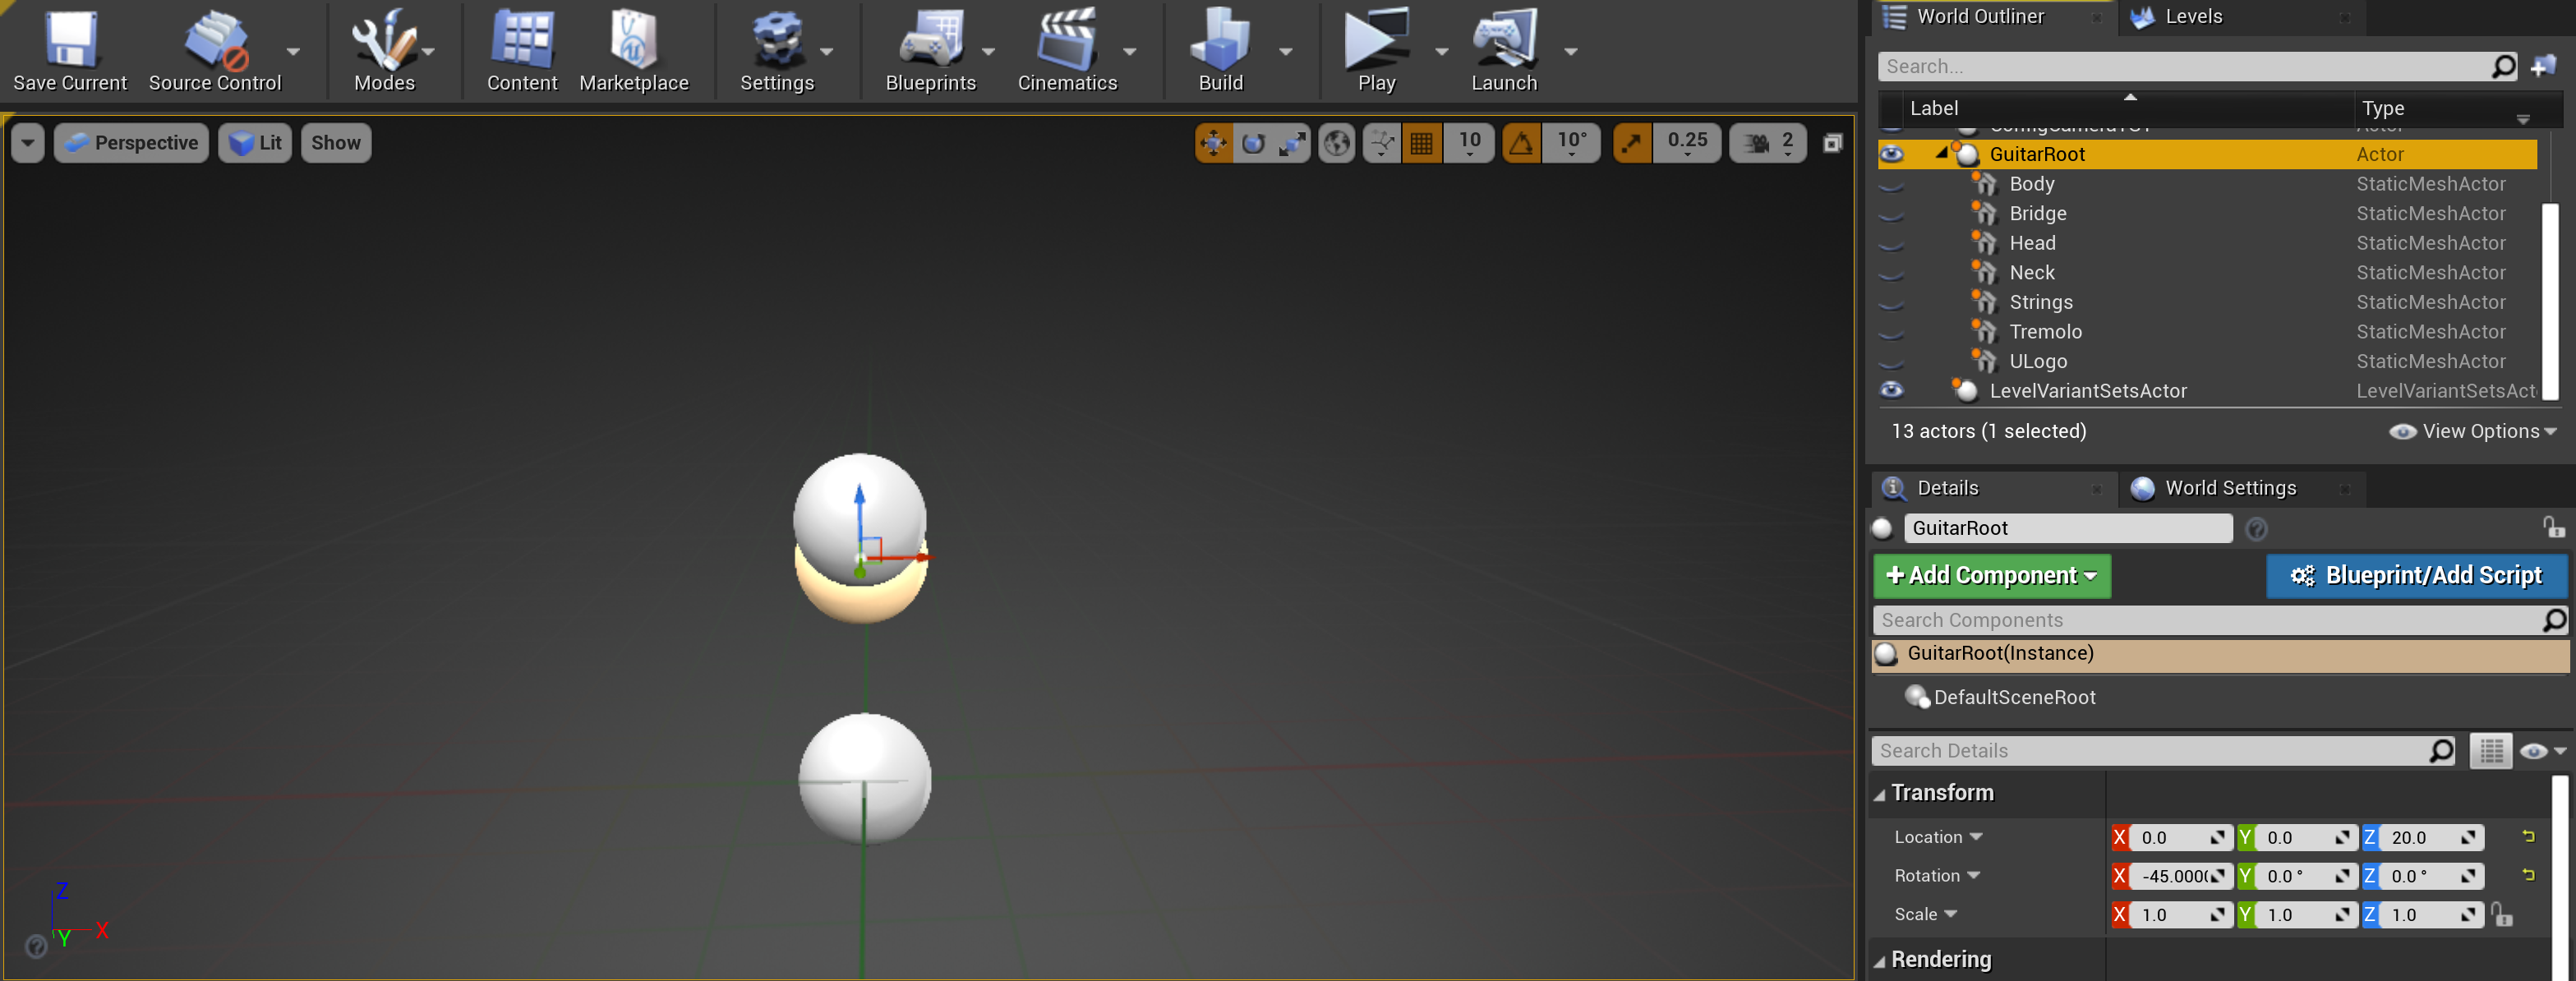
To remove the example model, delete the GuitarRoot object and all of its child objects.
Next, place a new Empty Actor into the level to serve as your new root object. Center its location at the level origin (X=0, Y=0, Z=0):

This will place your product in front of the existing camera setup.
Now, place the pieces of your product in the level as children of the root object:

Creating Your Variants in the Variant Manager
With the artwork set up in the level, you can begin to create Variants and Variant Sets using a LevelVariantSet Actor and the Variant Manager.
For the dynamic UI created by the BP_Configurator to work, the first and second Variant Sets must be the Environment and the Camera.
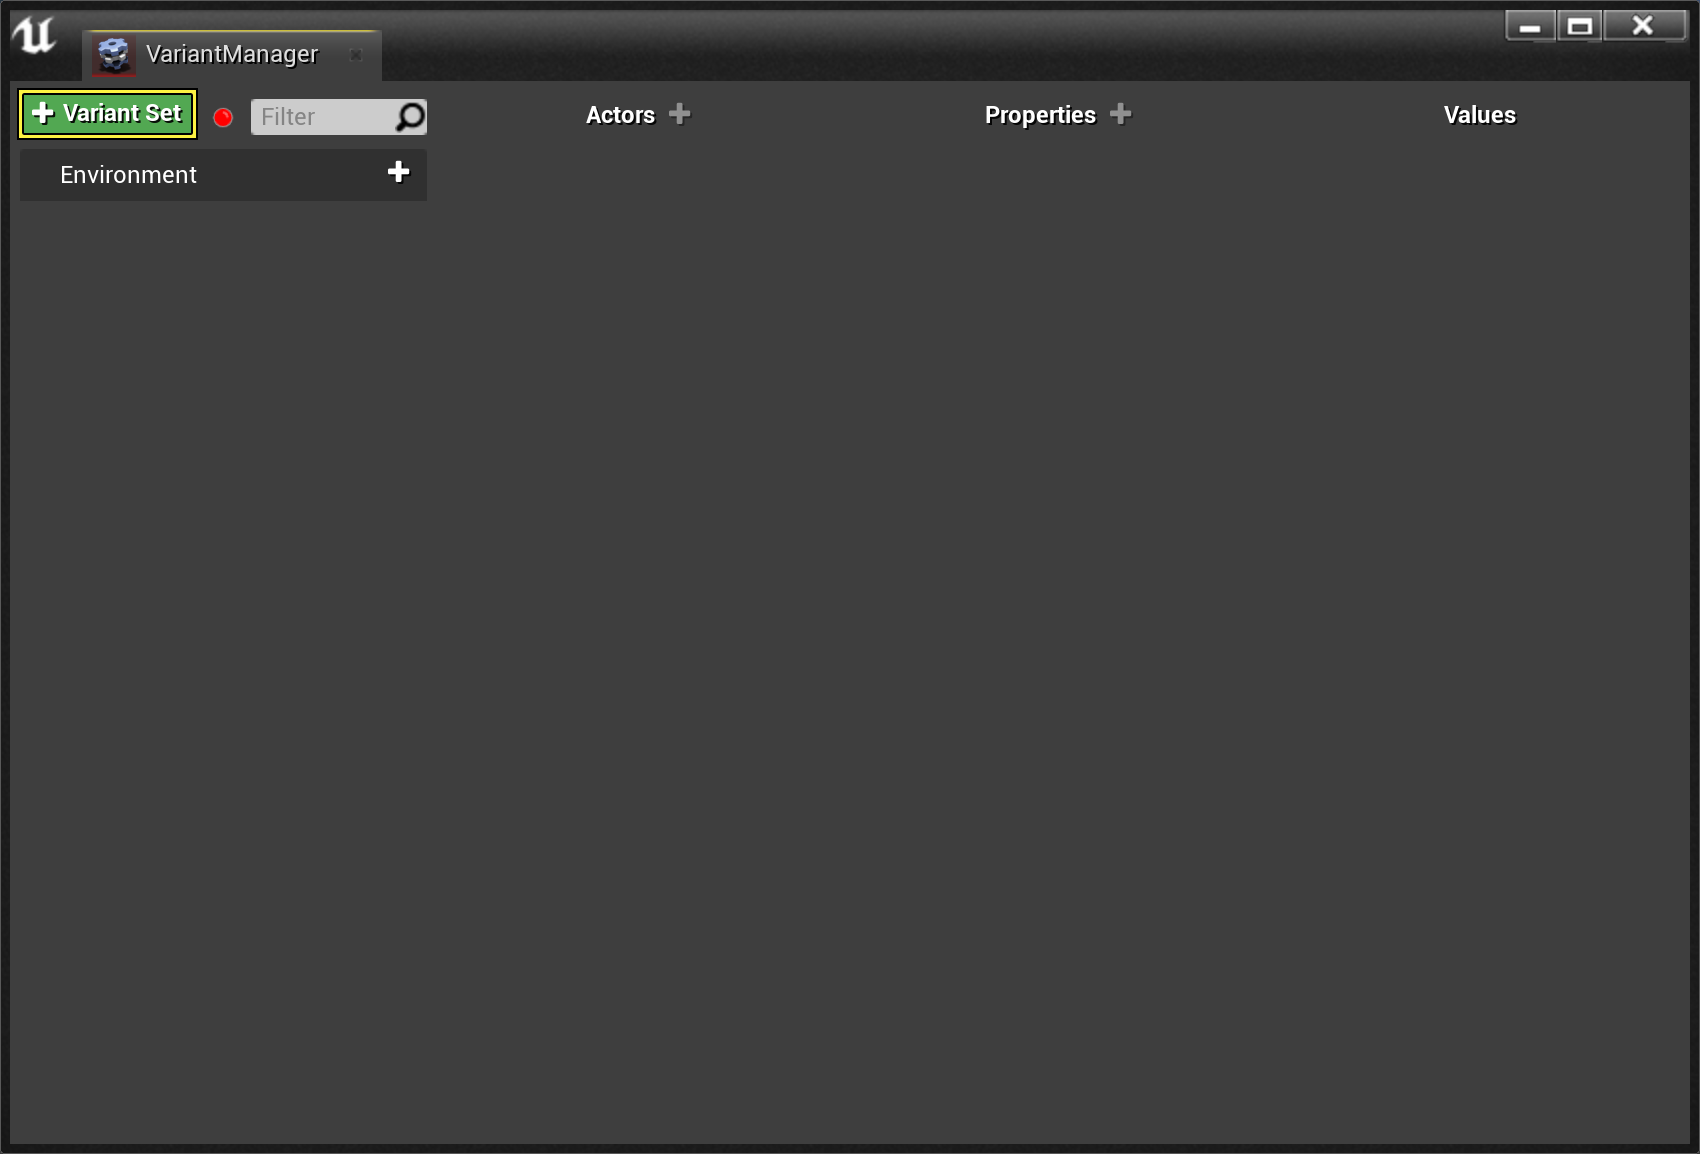
Create a LevelVariantSet Actor by right clicking in the content browser, navigating to the Miscellaneous sub menu and choosing the Level Variant Sets option:

Give it a unique name and double click to open the Variant Manager.
Start by creating a custom Variant Set. Click the + Variant Set button and name the new set:
Once the Variant Set is created, click the Add (+) button next to its name to create a Variant. This represents the Actors and properties that you want to change when the user selects this preset:

Click on the new Variant to highlight it and then click the + button in the Actors column. This will open a new window listing all of the Actors in your scene. Select the Actor that you want to change when the user selects this Variant. Repeat the process for each Actor that will be part of this preset:

Next, highlight the Actor that you would like to work with and click the Add (+) button in the Properties column. This will create a new window listing all the properties of the Actor that can be changed as part of the variant. Select the checkbox for each property that will be changed when the variant is selected:
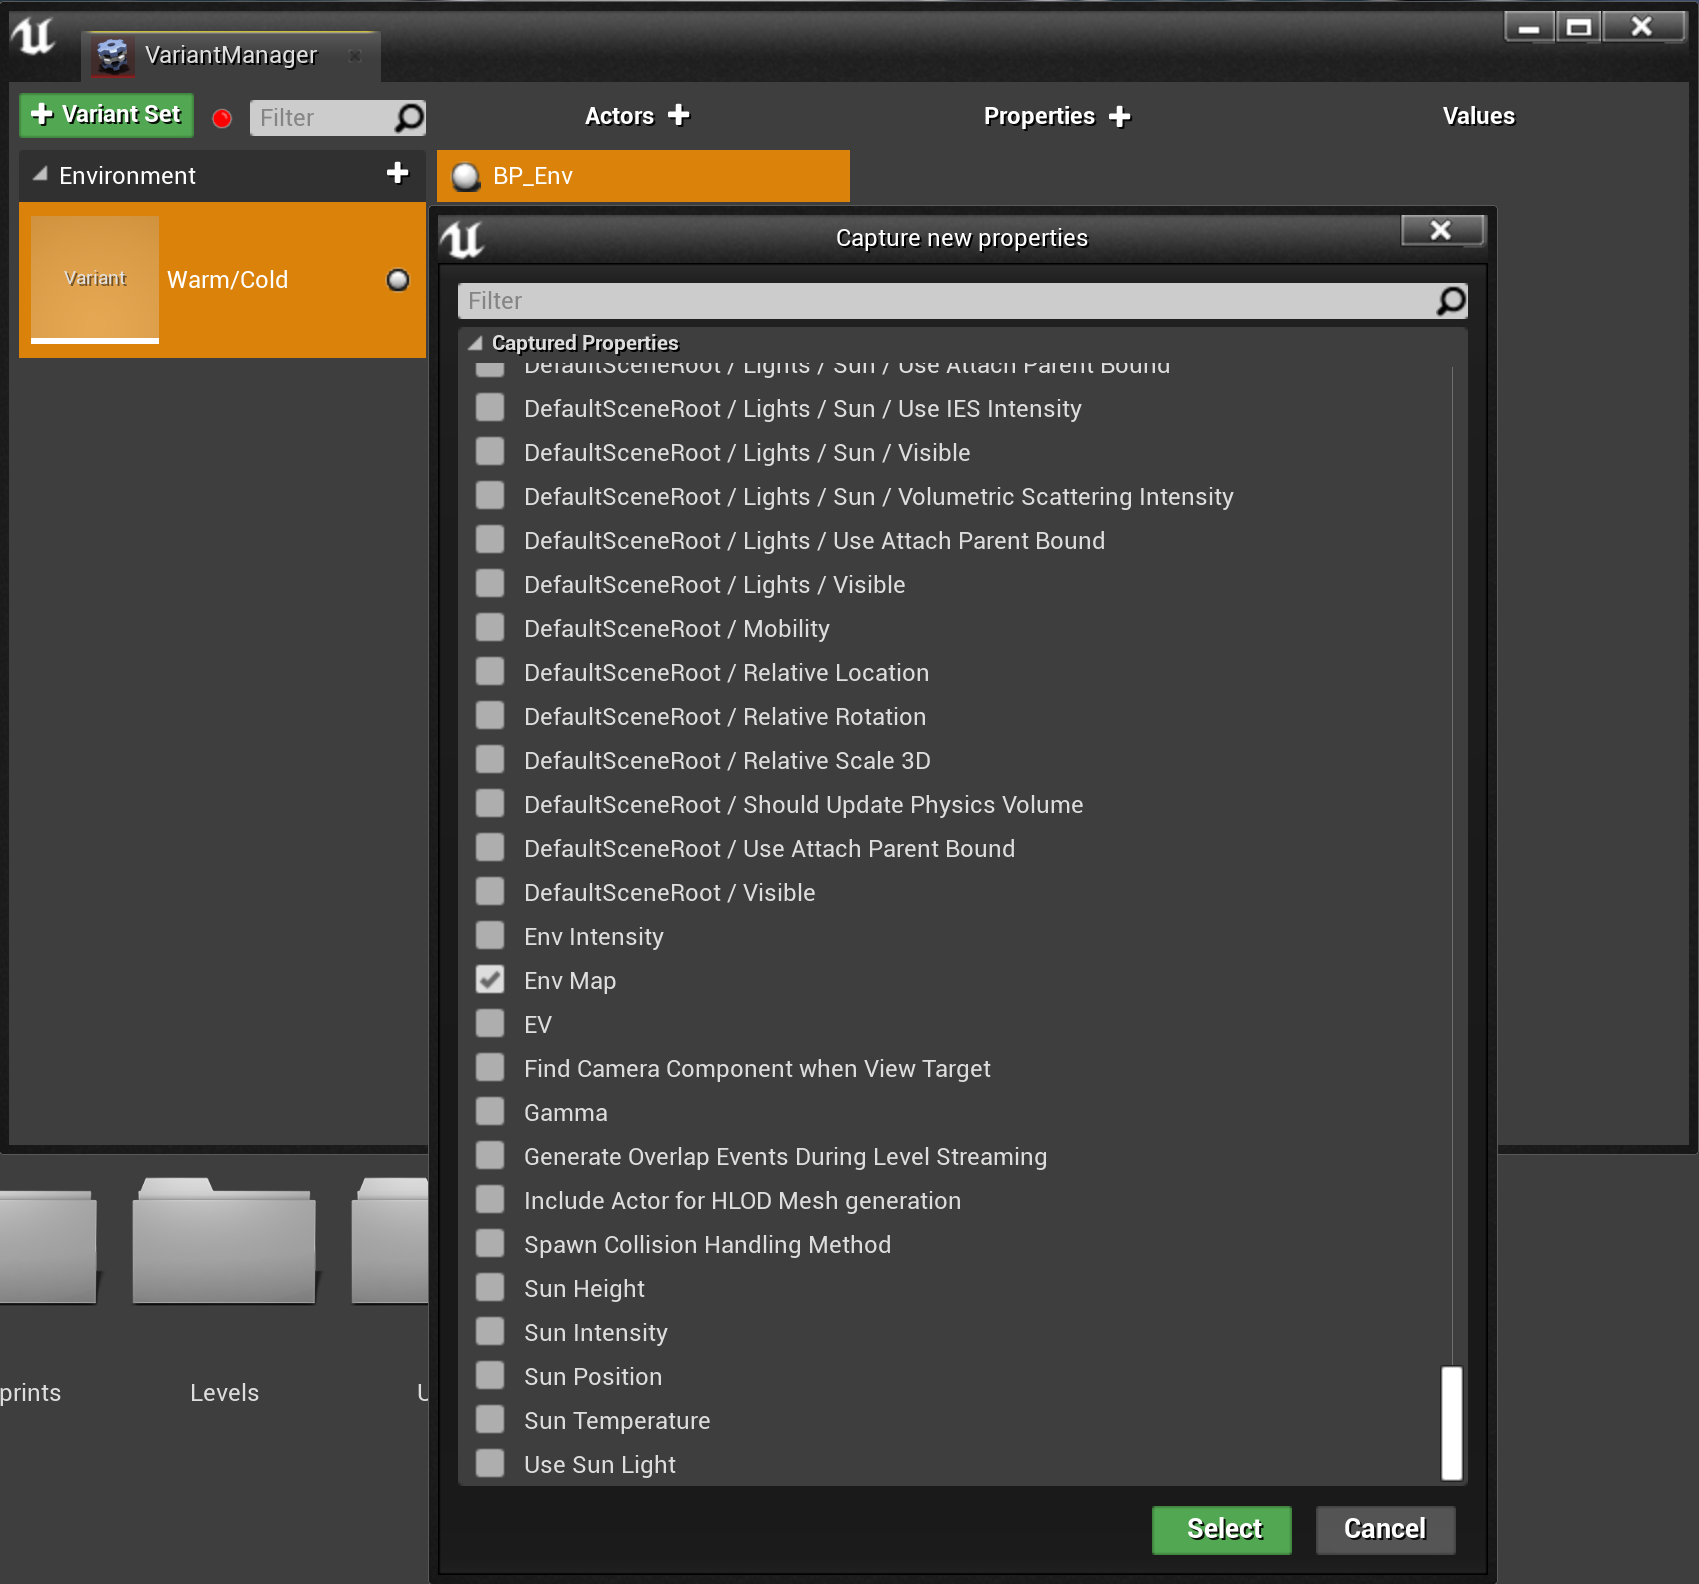
This list includes both the default and any user defined properties. In the example above, the Env Map property has been selected. Changing this property will allow you to change the environment in the product configurator during runtime.
The last step is to set the value of the property. This can be completed one of two ways. The first is to manually set the value using the Values column:
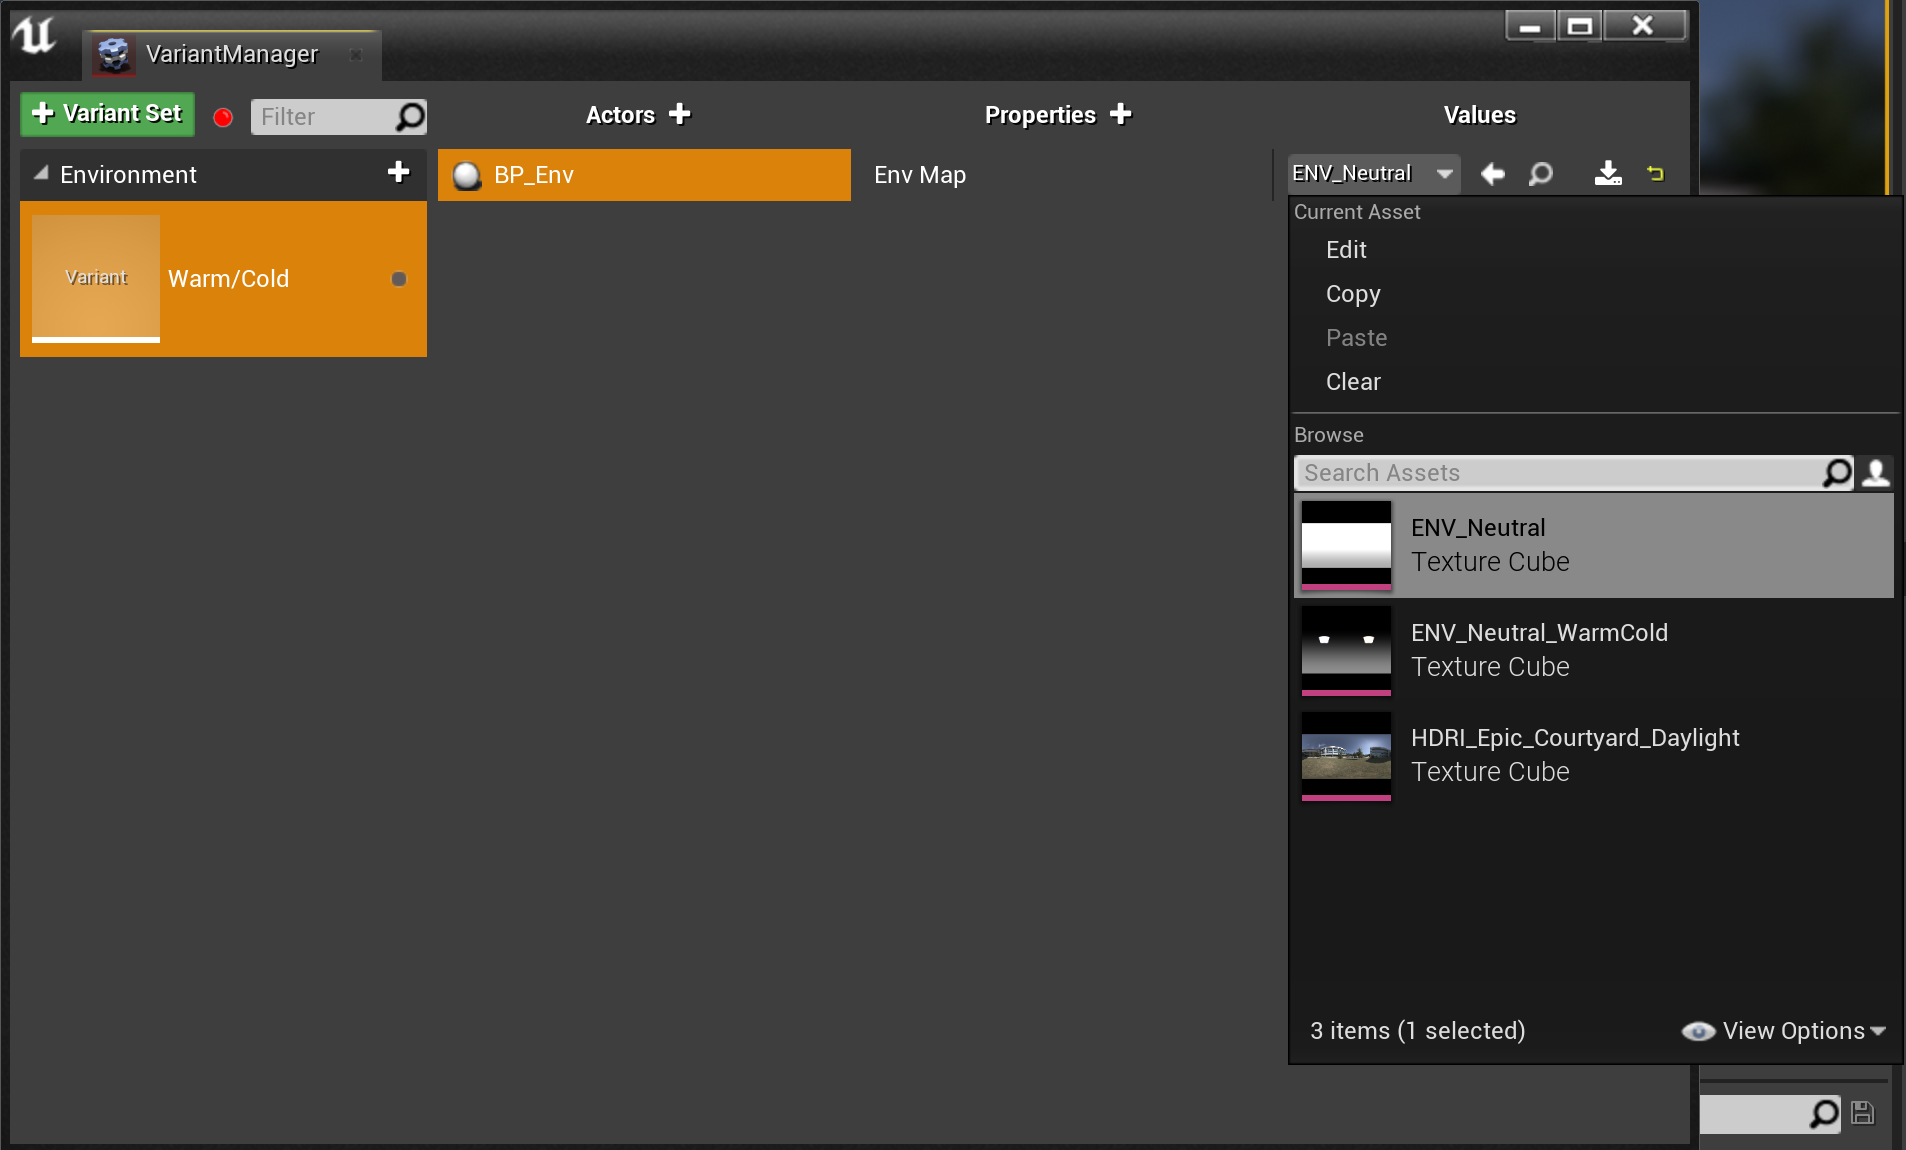
You can also set the property using the value set in the level by using the

As an alternative, pressing the

Each Variant in a Variant Set also needs a thumbnail. These thumbnails are used as the button icon in the user interface and can be a texture image that is imported into the engine or captured from the UE4 viewport. Right click on a variant to open the menu:

Repeat this process for all Variants and Variant Sets.
Below is an example of a configurator built to display car seat upholstery options:

Connecting to the BP_Configurator
To complete the process of customizing the template, your Level Variant Set needs to be connected to the BP_Configurator. Start by deleting the existing LevelVariantSet Actor from the level and replacing it with your own. The Actor must be in the level to be seen by the BP_Configurator:
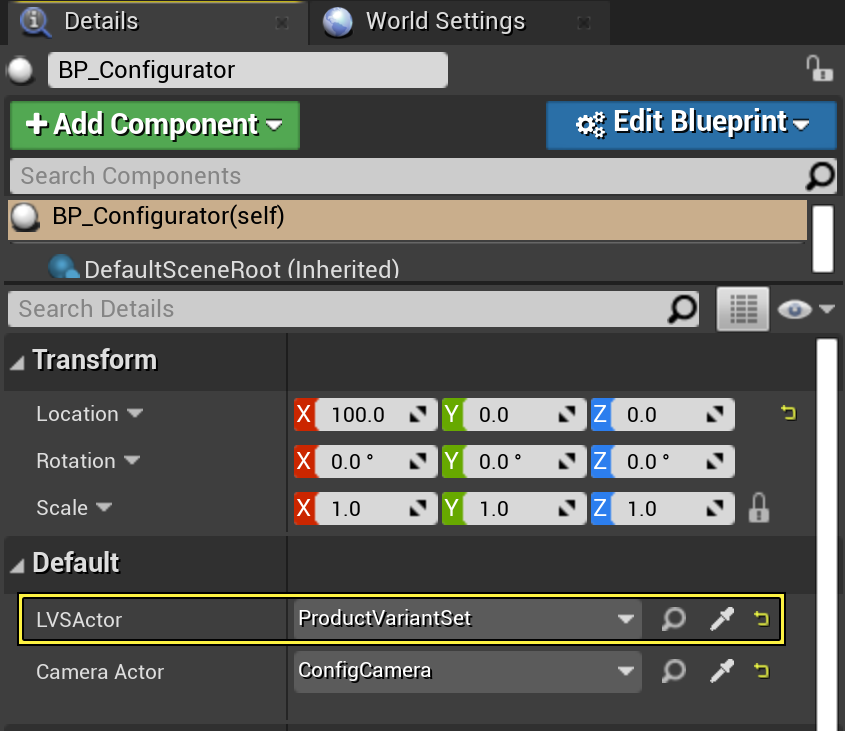
In the Details panel, find the LVSActor option in the Default section of the menu and change the setting to your Level Variant Set using the drop down menu.
Finally, test you configurator:
