Choose your operating system:
Windows
macOS
Linux
In the following section we will go over all you need to know to set up your Android device so that it can be used to run your Unreal Engine project.
1. Installing Android USB Drivers to Your Computer
-
Connect your Android device to your development PC via USB.
-
Your device driver software should automatically install. If not, visit Android's OEM USB Drivers page to find more driver installation links and additional information.
-
Disconnect your Android device from USB and then immediately plug it back in. After the device is recognized by the PC, the following message will appear on your Android device asking you if you want to allow this PC to talk to your device. A message box will ask what you want the USB connection to do. Tap the checkmark box that says Always allow this computer and then tap the OK button.
2. Enabling Developer Mode on Your Android Device
-
Open the Settings Application on your Android device.
-
Scroll down and select About Phone . Depending on your Android device, you may have an About Device, About Tablet, or About Shield option instead.
This may be in a More section on newer Android versions.
-
Tap the Build Number 7 times to activate developer mode.
![Enable_Dev_Mode.png]()
-
Once developer mode has been activated, a success message will display on the screen similar to the one below.
![Dev_Mode_Active.png]()


3. Enabling USB Debugging
-
Open the Settings Application on your Android device.
-
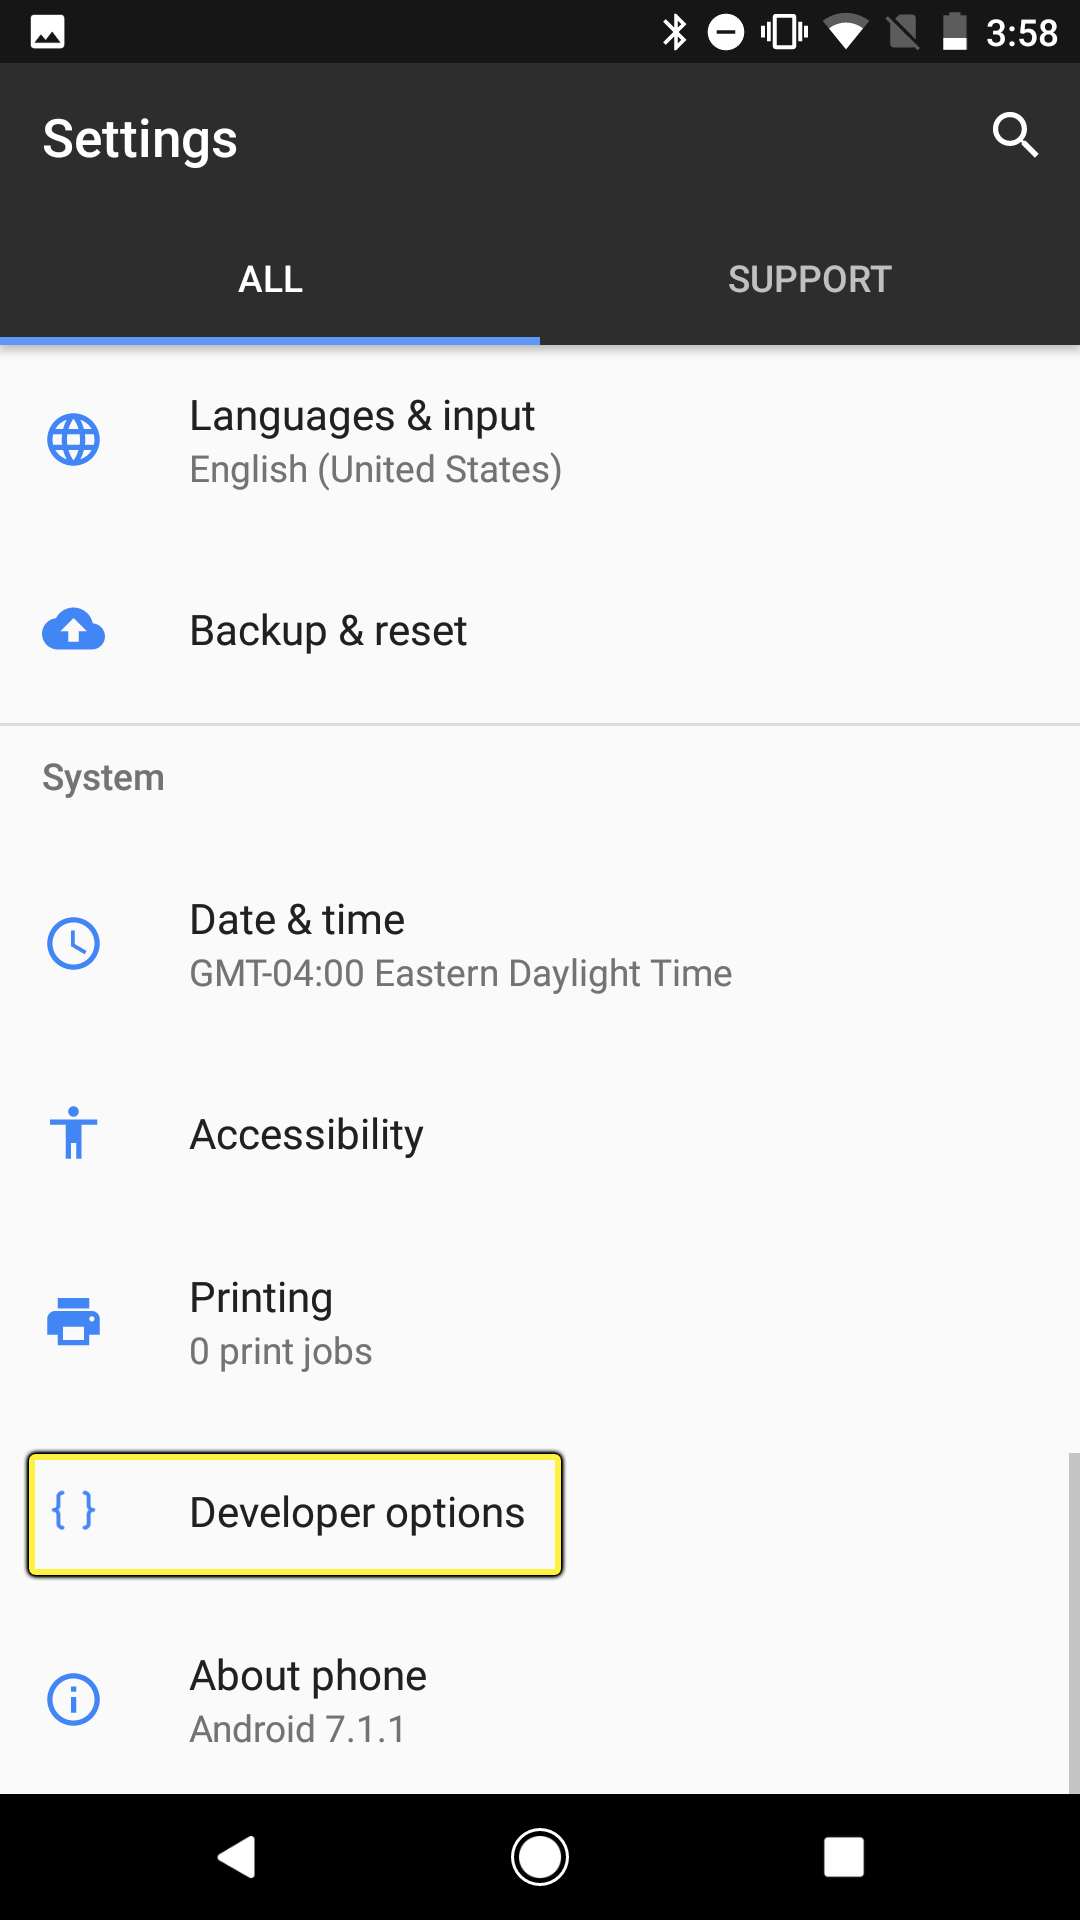
Navigate back to the Settings menu and select Developer Options which should now available.
![Dev_Options_Enabled.png]()
-
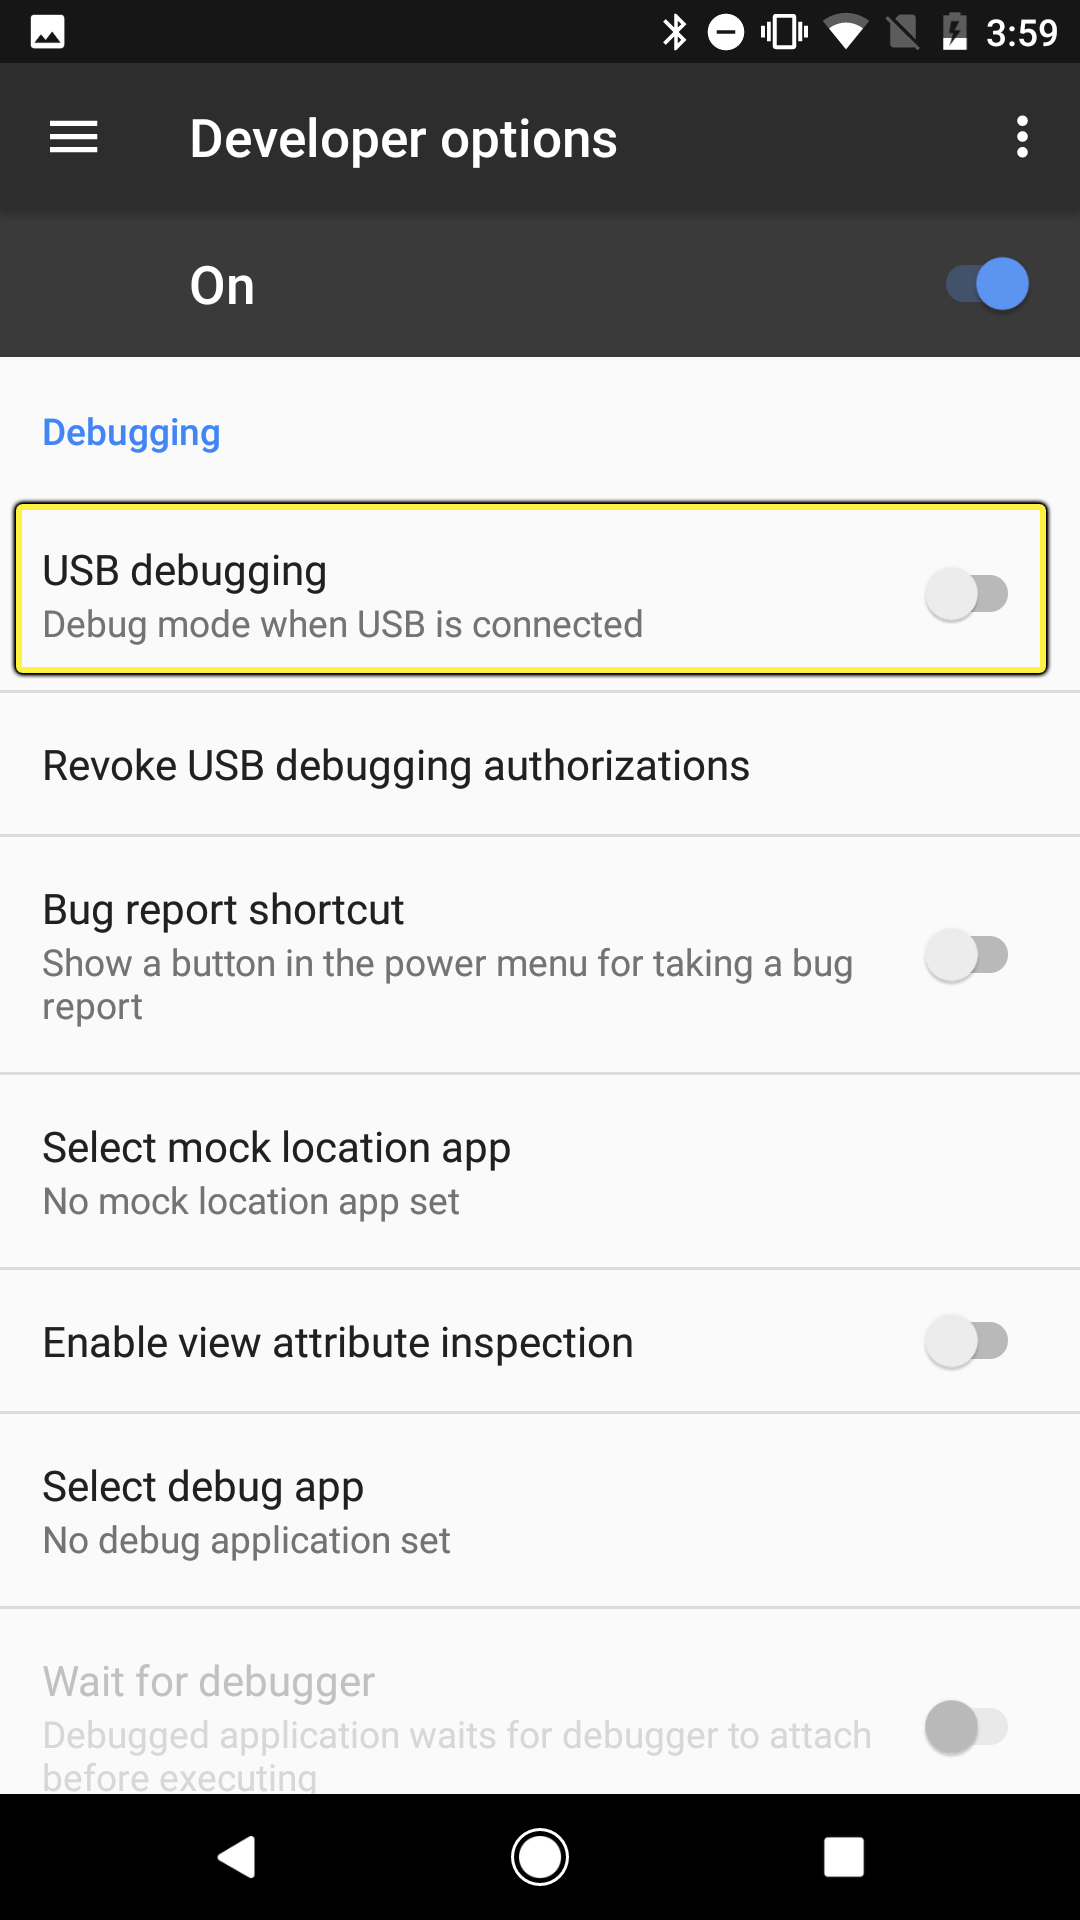
In the Developer Options menu, enable USB debugging by tapping it.
![Enable_USB_Debugging.png]()
-
When prompted, tap the OK button.
![Enable_USB_Debugging_Warning.png]()

4. Verifying That Your Device is Connected
To verify that everything has been setup correctly and that your Android device is ready for UE4 development, you can do the following:
-
Open a Windows Command Prompt by pressing the Windows + R keys to open up the Run command dialogue box.
-
Inside of the Open input, type cmd and the press the OK button to open the Windows Command Prompt.
![Windows_Run_Command.png]()
-
Inside of the Windows Command Prompt, input adb devices and then press the Enter key to display all connected Android devices.
![ADB_Devices.png]()


-
Open the Terminal app from /Applications/Utilities.
![MAC_Terminal_Activate.png]()
-
Type adb devices in the command prompt and you should see all devices that are connected to your Mac.
![MAC_Checking_ADB_Devices.png]()


If you still do not see your device after you input the adb devices command you can try the following items:
-
If the device is listed but shows Unauthorized next to the name, that indicates that you did not accept your development PC's computer's RSA key fingerprint.
-
If your device does not show up despite it being plugged in and setup, input the following commands in the following order into the Windows Command Prompt to restart the Android Debug Bridge or (ADB) service:
Property Name
Description
ADB kill - server
This will stop the ADB service.
ADB start - server
This will start the ADB service.
-
In some cases, a correctly configured Android device might not show up if it is connected as a Media Device (MTP) . If this happens, try connecting as Camera (PTP) by selecting the Camera (PTP) option in your Use USB to options.
End Result
Once you have completed the above sections, your Android device will be ready for deployment and debugging. For further reading, we recommend that you refer to the Android Quick Start Guide to learn about configuring your project for Android in the Unreal Editor .