Choose your operating system:
Windows
macOS
Linux
The focus of the iOS Provisioning Quick Start guide is to walk you through the basics of getting your Apple Developer certificates setup to work with your Unreal Engine 4 (UE4) project. After completing this quick start developers will understand how to do the following tasks inside UE4:
-
Create a new UE4 project.
-
Generate an iOS Signing Certificate.
-
Add devices to your iOS Provisioning Profile.
-
Create an App ID.
-
Create and import your Provisioning profile.
1 - Create Your Project
In the following section, we will go over setting up a new Unreal Engine 4 (UE4) project so that you can generate the needed Apple provisioning files.
-
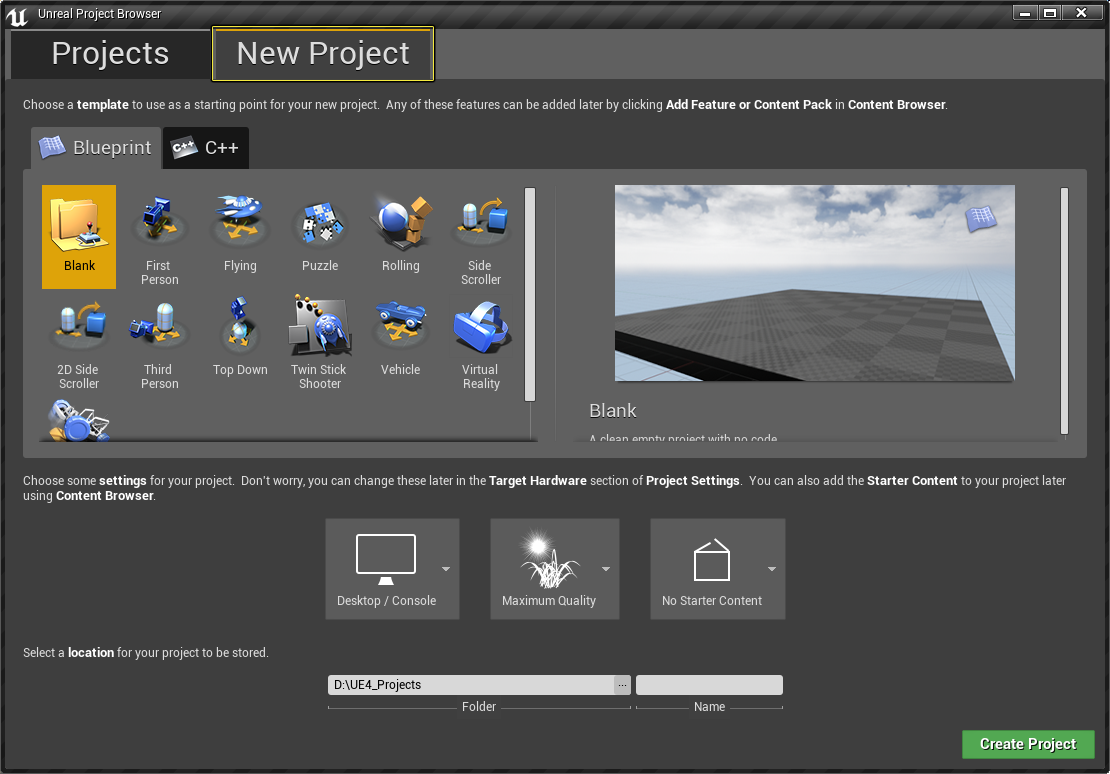
First open the Unreal Project Browser to the New Project tab.
![iOSQS_New_Project.png]()
Click for full view.
-
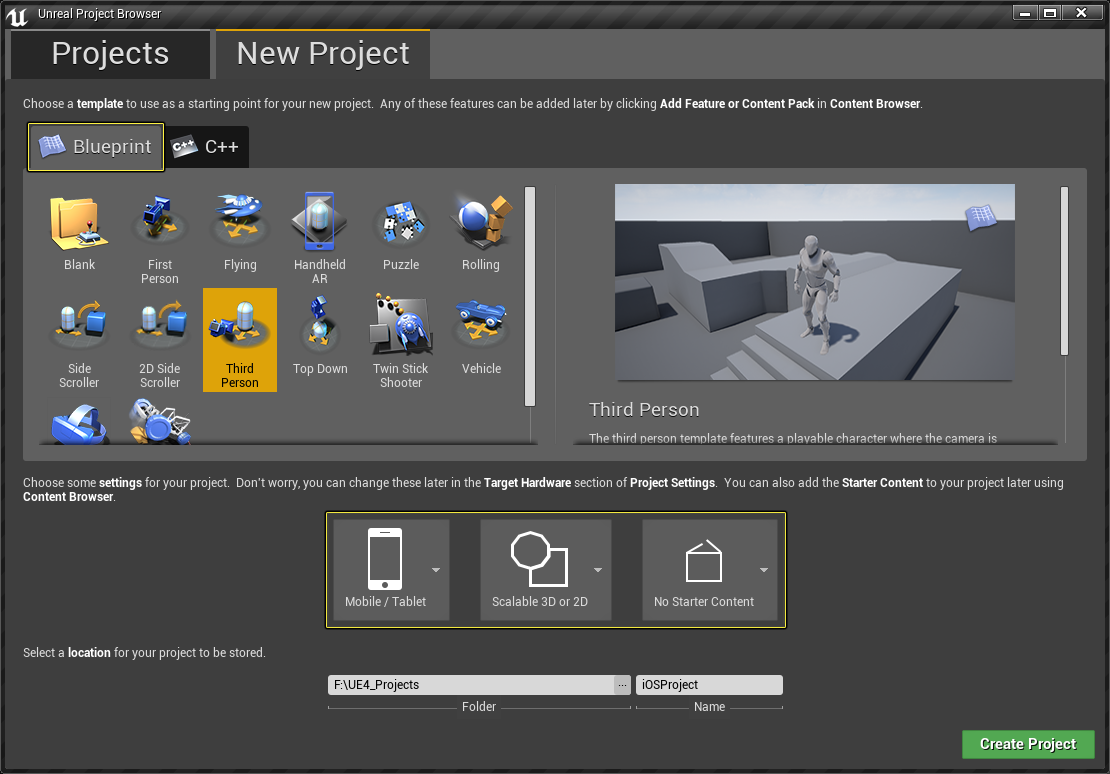
Next, select a Blueprint based Third Person as the template with the following project settings:
-
Mobile/Tablet
-
Scalable 3D or 2D
-
No Starter Content
-
Give the project a name of iOSQuickStart
![New_iOS_Project.png]()
Click for full view.
-
-
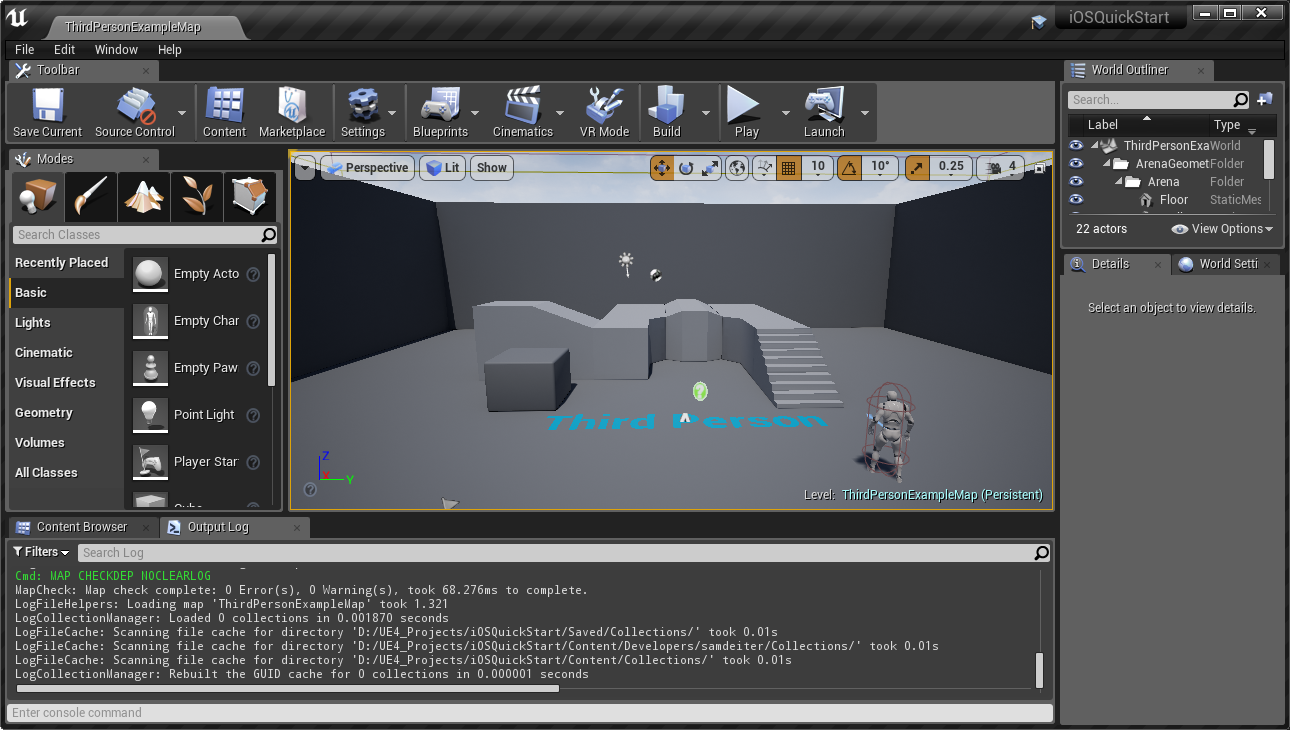
When completed the UE4 Editor will launch, loading the newly created project like in the image below. Once the project has loaded, you can close it down.
![iOSQS_Loaded_Project.png]()
Click for full view.
2 - Generate Signing Certificate
To deploy and use your UE4 project on your iOS device you will need special certificates from Apple. Generating a signing certificate for iOS development on Windows is done using a combination of Apple's Developer site and the Unreal iOS Configuration Wizard (iPhonePackager) application that are provided with Unreal Engine, and in the following section, we will go over how you do this.
-
First, navigate to your
Engine\Binaries\DotNET\IOS\directory and run iPhonePackager.exe . -
Since provisioning is project-specific when the iPhonePackager.exe is opened, it will first ask you to locate your project's
.uprojectfile. Once you have located your project's.uprojectfile, click the Open button to open it up.
![select_uproject.jpg]()
This must be done each time you run the iPhonePackager application. However, it will remember the location of the last project you selected.
-
Select the New User tab and click the Create certificate request and a key pair... button.
![create_certificate.png]()
-
When you click the button, the Generate Certificate Request dialog opens. Inside this box, enter the required information: your Apple ID , email address , and name (or company name) .
![developer_info.png]()
-
Click Generate a key pair and choose a location to save the .key file.
![generate_key.png]()
-
Click Generate Certificate Request and choose a location to save the .csr file. When that is completed, the Generate Certificate Request dialog closes, returning you to the main iPhonePackager window.
![Generate_Cert_Request.png]()
-
Now, go to the iOS Certificates page on the Apple iOS Developer site and log in.
-
Click the Add (+) button to generate a new certificate.
-
Select iOS App Development and click Continue .
![cert_development.png]()
-
Click Continue .
-
Click Choose File and select the certificate signing request (
.csr) file you generated previously and click Generate .
![cert_csr.png]()
-
Download the certificate (
.cer) file to your computer.
![cert_download.png]()


To deploy and use your UE4 project on your iOS device you will need special certificates from Apple, and in the following section, we will go over how you do this.
-
In the Xcode drop-down menu, select Preferences .
![MAC_Xcode_Preferences.png]()
-
Select the Accounts tab.
![Accounts_Tab.png]()
-
Click the Add (+) button in the lower left corner, and select Add Apple ID . Then click Continue .
![Account_Sign_In.png]()
-
Enter your Apple ID information and click Sign In .
![Account_Sign_In_EP.png]()
-
Select the Apple ID in the left pane and then click Manage Certificates .
![Manage_Certs.png]()
-
Click the Add (+) button and select iOS Development to complete the certificate generating process.
![iOS_Development.png]()


3 - Add Devices
You must add all of the devices you want to be able to install your UE4 project on during development through the Apple iOS Developer site . Unreal Engine 4 can only launch and install your project to devices associated with your mobile provision profile (created later in this guide).
-
Go to the iOS Devices page on the Apple iOS Developer site.
-
Click the Add (+) button to add a new device.
-
Select Register Device , enter a name and the UDID for the device and click Continue .
-
Review the information you have entered, and click Register .
Repeat these steps for all devices you want to be able to launch your game on for testing.
4 - Create App ID
App IDs are created and configured through the Apple iOS Developer site . An App ID is a two-part string used to identify one or more apps from a single development team. You will need one in order to create your mobile provisioning profile in the next step.
-
Go to the iOS App IDs page on the Apple iOS Developer site.
-
Click the Add (+) button to add a new App ID .
-
Enter a name for the App ID .
![app_name.png]()
-
Select the App ID Prefix for your App ID .
![app_prefix.png]()
-
Select Wildcard for the type of App ID to create and set the Bundle ID .
![app_bundle_id.png]()
-
Click Continue .
-
Review the information and click Register .


5 - Create and Import Provisioning
You must have a provisioning profile in order to install apps onto your iOS devices. These are created and downloaded through the Apple iOS Developer site . Your provisioning profile includes your signing certificate, devices, and an App ID. There are two types of provisioning profiles. The first type is the development provisioning profile , which is used to build and install your game during the development cycle. And the second type is the distribution provisioning profile , which is used to submit your game to the App Store.
-
Go to the iOS Provisioning Profiles page on the Apple iOS Developer site.
-
Click the Add (+) button to add a new profile.
-
Under Development , select iOS App Development and click Continue .
![provision_development.png]()
-
Choose the App ID you created previously and click Continue .
![provision_app_id.png]()
-
Select the certificate you created previously and click Continue .
![provision_certificate.png]()
If you create a new certificate make sure to add it to your existing mobileprovision file.
-
Select all of the devices you want associated with the profile. Only devices selected here will be able to have your game launch on them.
![provision_device.png]()
-
Enter a name for the profile and click Generate .
![provision_name.png]()
-
Download the profile (
.mobileprovisionfile) to your computer.
![provision_download.png]()


