Choose your operating system:
Windows
macOS
Linux
This page describes each of the Operations blocks that you can use in the Visual Dataprep system to modify your Assets and scene elements.
Each type of Operations block encapsulates a specific kind of modification that the Unreal Editor can make to 3D data. When the Visual Dataprep system carries out each action in your Dataprep graph, it performs each operation you've defined in that action on all the Assets or Actors that match the criteria set by the Select By blocks above it. For more background information, see the Visual Dataprep Overview .
On Actor
On Actor operations apply only to Actors that match the Select By criteria you set for their steps. That means only items that you see listed in the World Outliner Preview panel on the right of the Dataprep preview UI. If your Select By criteria match other scene elements, like the Texture, Material, and Static Mesh Assets that are listed in the Content Browser Preview panel on the left of the Dataprep preview UI, the On Actor operation will have no effect on those elements.
Add Tags
This operation adds the array of tags you specify to each Actor that matches the Select By criteria you set for this step.

After this block has completed, you can find the list of tags by selecting your Actor in the World Outliner Preview and looking in the Details panel. Under the Actor category, expand the advanced options and look for the Tags setting.

Add To Layer
This operation takes each Static Mesh Actor that matches the Select By criteria you set for this step and adds it to the Layer you specify.

Compact Scene Graph
For each Static Mesh Actor that matches the Select By criteria you set for this step, this operation deletes the Actor if it doesn't have any visual result on the scene, and if none of its descendants in the scene hierarchy have visual results on the scene. The effect is to tidy unnecessary elements from the scene hierarchy without compromising the visual objects in the scene.

Create Proxy Mesh
This operation collects the geometry from all Static Mesh Actors that matches the Select By criteria you set for this step, and merges the geometry into a single new mesh using the Proxy Geometry Tool .

|
Setting |
Description |
|---|---|
|
New Actor Label |
Specifies the name of the new Actor created from the merged geometry. |
|
Quality |
The level of quality for the geometry of the generated proxy mesh. Lower values are less detailed but may render more efficiently. Higher values are more detailed and faithful to the original geometry but may not be as efficient to render. |
Merge
This operation collects the geometry from all Static Mesh Actors that matches the Select By criteria you set and merges the geometry into a single new mesh.

|
Setting |
Description |
|---|---|
|
New Actor Label |
Specifies the name of the new Actor created from the merged geometry. |
|
Pivot Point at Zero |
Enable this setting if you want the merged mesh to have its pivot point set at the world origin. If left disabled, the pivot will be located at the first merged component. |
Random Offset Transform
For each Actor that matches the Select By criteria you set for this step, this operation applies a random offset to the 3D position, rotation, or scale of the Actor. If you have placeholder elements in your scene, you can use this operation to scatter those elements around, or to give them varied sizes and rotations.
For example, an external architectural scene may contain placeholder objects for scene entourage like trees or bushes. In your Dataprep graph, you may want to replace all of those placeholders with other custom 3D Assets that you've already imported into your Project. However, this might result in a line of trees that are unnaturally identical. By applying random offsets to the position, rotation, and scale of the trees, you can quickly create a more varied and lifelike result without having to adjust the objects manually.

|
Setting |
Description |
|---|---|
|
Transform Type |
Each Random Offset Transform block can apply offsets to only one of the following:
|
|
Reference Frame |
Determines what frame of reference is used to interpret the axes in the Min and Max settings:
|
|
Min and Max |
Sets a range for the random offsets along each of the three axes of 3D space. For each Actor this block treats, it generates a different random number in between the Min and Max values. |
Set Mesh
For each Static Mesh Actor that matches the Select By criteria you set for this step, this operation changes all Static Mesh Assets referred to by the Actor to a different Static Mesh Asset that you specify in the settings.

|
Setting |
Description |
|---|---|
|
Static Mesh |
The Static Mesh Asset that you want the Actor to instance in place of its existing Static Mesh. This replacement may be any Static Mesh in the Content Browser Preview panel of the Dataprep Editor, or any Static Mesh Asset that already exists in your project. |
This operation has no effect on Actors that don't already refer to a Static Mesh Asset. For example, if you have an empty Actor in the scene hierarchy that doesn't already have a Static Mesh, you won't be able to use this operation to add a new Static Mesh to that Actor.
Set Metadata
This operation adds an array of keys and values to the Datasmith Metadata maintained by each Actor that matches the Select By criteria you set for this step.

After this block has completed, you can find the list of metadata by selecting your Actor in the World Outliner Preview and looking in the Details panel under the Asset User Data category.
For more information, see Using Datasmith Metadata .
Set Mobility
For each Actor that matches the Select By criteria you set for this step, this operation sets the value of the Actor's Mobility setting.
The Mobility setting has slightly different implications for Light Actors than it does for Static Mesh Actors. For details on how it is interpreted, see Actor Mobility .

|
Setting |
Description |
|---|---|
|
Mobility Type |
The value you want to set for the Actor's Mobility setting. |
Find the Mobility setting in the Details panel:

Spawn Actors at Location
For each Actor that matches the Select By criteria you set for this step, this operation spawns a new Actor at the same 3D coordinates. The newly spawned Actor is an instance of the Asset you specify in the Selected Asset setting.

|
Setting |
Description |
|---|---|
|
Selected Asset |
The Asset in your Project that you want to spawn new instances of. |
On Asset
On Asset operations apply only to Assets that match the Select By criteria you set for their steps. That means only items that you see listed in the Content Browser Preview panel on the left of the Dataprep preview UI. If your Select By criteria match other scene elements, like the Actors that are listed in the World Outliner Preview panel on the right of the Dataprep preview UI, the On Asset operation will have no effect on those elements.
Output to Folder
This operation moves each Asset that matches the Select By criteria you set for this step into a subfolder with the name that you specify. You can use this block to customize the way the imported Assets are organized in your Project's Content Browser after you commit the results of your Dataprep graph.
The results of the Output to Folder block are not shown in the Content Browser Preview panel of the Dataprep Editor when you execute your Dataprep graph. You'll only see the results in your Project's Content Browser after you commit the Dataprep graph.

|
Setting |
Description |
|---|---|
|
Folder Name |
The name of the subfolder that you want the selected Assets to be placed in when you commit your Dataprep graph. |
You can use as many Output to Folder blocks as you want in your Dataprep graph. If you use the same Folder Name setting for different blocks, the Assets treated by those different blocks will be gathered together into a single folder. This allows you to redirect the Assets that result from several different filters in different Actions to the same folder in the Content Browser. By pairing multiple Output to Folder blocks with different filters, you can distribute your Assets into whatever organization you want to end up with in your Content Browser .
For example, in this case the main folder set in the settings panel at the top right of the Dataprep Editor is /Content/Motorbike . The first Action in this graph takes all Static Mesh Assets that have fewer than 1000 triangles and moves them to a subfolder named LowPoly . The second Action takes all other Static Meshes with more than 1000 triangles and moves them to a subfolder named HighPoly . Finally, the last two Actions take all Materials and all Material Instances and move them to a subfolder named Surfaces .

After you commit the Dataprep graph, the Content Browser has the following folder structure:

The Geometries and Materials subfolders normally created by the default Datasmith import process are still created, but in this case they are empty. All Assets have been redistributed to the new HighPoly , LowPoly , and Surfaces subfolders.
Replace Asset References
This block identifies the first Asset in the list of objects passed in. It then attempts to replace all references to the other Assets in the input list with references to the first Asset instead.
For example, suppose that the first object in the input list is a Static Mesh Asset named Chair . This block will look through all other objects in the input list to find other Static Mesh Assets—say, Table , Bench , and Dresser . It will then replace all references to Table , Bench , and Dresser with references to Chair anywhere they are found in the imported scene, and it will delete the Table , Bench , and Dresser Assets entirely.

On Mesh
On Mesh operations apply only to Static Mesh Assets.
-
If your Select By criteria match any Static Mesh Assets that you see listed under the Geometries folder in the Content Browser Preview panel, the operation will apply to those Assets.
-
If your Select By criteria match any Actors in the World Outliner Preview that refer to Static Mesh Assets, the operation will also apply to those Static Mesh Assets.
-
If your Select By criteria match any other kinds of scene elements, like Actors, Textures, or Materials, the On Mesh operation will have no effect on those elements.
Bake Transform
For each Static Mesh Actor that matches the Select By criteria you set for this step, this operation creates a new mesh by baking the transform of the Static Mesh Actor directly into the mesh it refers to and replaces the Static Mesh Actor's mesh with this new mesh. This operation comes with several options:

|
Setting |
Description |
|---|---|
|
Bake Rotation |
Bakes the current rotation as part of the operation. Enabled by default. |
|
Bake Scale |
Determines how the operation handles baking scale and includes the following options:
|
|
Recenter Pivot |
Translates the geometry of the new mesh so that the Static Mesh Actor's translation is positioned at its center. |
Flip Faces
For each Static Mesh that matches the Select By criteria you set up for this step, this operation flips the facing direction of all triangles in the mesh.

This block can be helpful to reverse the orientation of meshes that were originally modeled in source applications that have different conventions for the visibility of backward-facing triangles. However, note that it is not selective: it reverses the facing direction of all triangles. If the facing direction of the triangles in your Static Mesh is mixed, so that some are visible and some are not, you may still need to make additional changes such as flipping faces by hand in the Static Mesh Editor, or using a Material with the Two Sided option enabled.
Generate Unwrapped UVs
For each Static Mesh that matches the Select By criteria you set up for this step, this operation unwraps the mesh geometry into a 2D UV map and saves the mapping in the specified UV channel on the Static Mesh Asset.

|
Setting |
Description |
|---|---|
|
Channel Selection |
Determines what UV channel the generated UV mapping is saved to. First Empty Channel saves the unwrapped UV in the first empty UV channel. Specify Channel saves the unwrapped UV in the channel identified by the UV Channel setting. |
|
UV Channel |
When Channel Selection is set to Specify Channel , use this setting to determine the index of the UV channel that the unwrapped UV is saved to. |
|
Angle Threshold |
Determines the maximum angle between two adjacent faces for those faces to remain connected after unwrapping. Raising this value minimizes the number of separate UV "islands", keeping more triangles connected to their neighbors and reducing the number of seams that may cause breaks in texture mapping. However, this may also introduce more distortion in the wrapped textures, as triangles may need to be more aggressively resized in 2D space to remain connected to their neighbors. |
Remesh
For each Static Mesh that matches the Select By criteria you set for this step, this operation uses isotropic remeshing to reach a triangle count matching the target value you specify. This operation comes with several options:

|
Setting |
Description |
|---|---|
|
Target Triangle Count |
Specifies the target triangle count of the new mesh. |
|
Smoothing Rate |
Applies the specified amount of Vertex Smoothing during the remeshing process. Range from 0-1. |
|
Discard Attributes |
If set to True, discards existing UVs and Normals. |
|
Remesh Type |
Determines how many passes are applied during the remesh process:
|
|
Mesh Boundary |
Determines how the boundary edges of an open mesh are preserved:
|
|
Group Boundary |
Determines how the boundary edges of a polygroup are preserved:
|
|
Material Boundary |
Determines how the boundary edges of a material region are preserved:
|
Set Convex Collision
For each Static Mesh that matches the Select By criteria you set up for this step, this operation replaces the Static Mesh's collision with a new convex decomposition made up of multiple volumes, or hulls .

|
Setting |
Description |
|---|---|
|
Hull Count |
The maximum number of convex volumes to create. |
|
Max Hull Verts |
The maximum number of vertices that are allowed for any generated convex hull. |
|
Hull Precision |
The number of voxels to use when generating the collision volumes. |
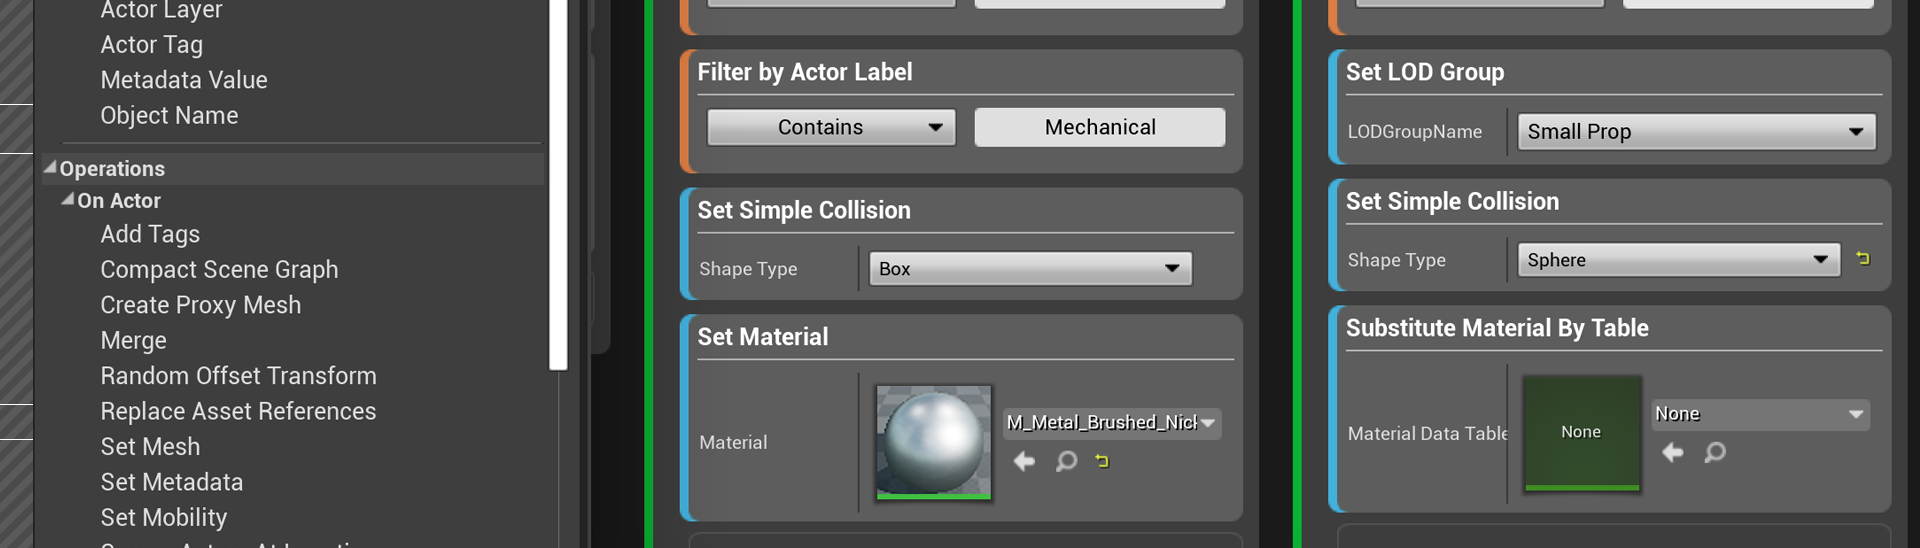
Set LOD Group
For each Static Mesh that matches the Select By criteria you set up for this step, this operation replaces the existing LODs for the Static Mesh with new ones that are based on the settings for the group you specify.
These LOD groups are the same ones you can set when you enable automatic LOD generation in the Static Mesh Editor UI. For more information, see Setting Up Automatic LOD Generation .

|
Setting |
Description |
|---|---|
|
LOGGroupName |
The name of the LOD group that defines the settings you want to use for this Static Mesh. |
Set LODs
For each Static Mesh that matches the Select By criteria you set up for this step, this operation replaces the existing LODs for the Static Mesh with new ones that are based on the reduction settings you specify.
These reduction settings are the same ones you can set when you enable automatic LOD generation in the Static Mesh Editor UI. For more information, see Setting Up Automatic LOD Generation .

|
Setting |
Description |
|---|---|
|
Auto Screen Size |
When enabled, the screen sizes at which LODs swap are automatically computed. |
|
Reduction Settings |
An array of reduction settings that defines how many Levels of Detail to create, and the percentage of triangles each should contain. |
Set Simple Collision
For each Static Mesh that matches the Select By criteria you set up for this step, this operation replaces the existing collisions for the Static Mesh with a simple collision volume of the shape you specify.

|
Setting |
Description |
|---|---|
|
Shape Type |
Defines the shape of the collision volume that you want to set for the Static Mesh. |
Setup Static Lighting
For each Static Mesh that matches the Select By criteria you set up for this step, this operation sets up options that control how the Static Mesh interacts with baked lighting.

|
Setting |
Description |
|---|---|
|
Enable Lightmap UV Generation |
When enabled, the operation generates lightmap UVs for the Static Mesh. |
|
Resolution Ideal Ratio |
A ratio between the scale of the Static Mesh geometry and the lightmap resolution to use for the Static Mesh. Raise this value to make your objects use higher resolution lightmaps. This may increase the quality of baked lighting, but also increases memory requirements. |
Simplify Mesh
For each Static Mesh that matches the Select By criteria you set for this step, this operation simplifies the static mesh to a set percentage of its original triangle count. This operation comes with several options:
|
Setting |
Description |
|---|---|
|
Target Percentage |
Target percentage of original triangle count |
|
Discard Attributes |
If set to True, discards existing UVs and Normals. |
|
Mesh Boundary |
Determines how the boundary edges of an open mesh are preserved:
|
|
Group Boundary |
Determines how the boundary edges of a polygroup are preserved:
|
|
Material Boundary |
Determines how the boundary edges of a material region are preserved:
|
Weld Edges
For each Static Mesh that matches the Select By criteria you set for this step, this operation welds vertex pairs within a specified tolerance. If Only Unique is enabled, this operation only merges pairs of equivalent edges.

On Object
On Object operations apply to potentially any kind of scene element matched by your Select By criteria.
Delete Objects
This operation deletes all objects that match the Select By criteria you set up for this step.

Delete Unused Assets
This operation deletes all Assets that match the Select By criteria you set up for this step and that aren't referenced by any other Assets or Actors.

Set Material
For each Static Mesh or Static Mesh Actor that matches the Select By criteria you set up for this step, this operation replaces all existing Materials with the Material you specify.

|
Setting |
Description |
|---|---|
|
Material |
The Material you want to use as a substitute for all existing Materials. |
Substitute Material
For each Static Mesh or Static Mesh Actor that matches the Select By criteria you set up for this step, this operation replaces any Material that matches the criteria with the substitute Material you specify.

|
Setting |
Description |
|---|---|
|
Material Search |
The name or partial name of the Material or Materials you want to replace. |
|
String Match |
Defines the type of matching that you want to perform on the Material Search string. These options are interpreted the same way as when you use a string filter in a Select By block. For details, see the Visual Dataprep Selection Reference . |
|
Material Substitute |
The Material you want to use as a substitute for the Materials that match the criteria above. |
Substitute Material By Table
For each Static Mesh or Static Mesh Actor that matches the Select By criteria you set up for this step, this operation replaces Materials according to a substitution table that you provide in a DataTable Asset.

|
Setting |
Description |
|---|---|
|
Material Data Table |
The Data Table Asset that determines what Materials are replaced by what other Materials. |
The Data Table that you provide in the Material Data Table setting must use the MaterialSubstitutionDataTable row structure. You typically set this row format in the Pick Row Structure dialog box at the time you create your Data Table Asset. For example:

With this row structure, each row in the Data Table defines one Material substitution operation that will be executed on each of the Static Mesh Actors and Assets.
-
The first value in the row, Row Name , provides a name for the substitution. You can set this value freely.
-
The second value, Search String , is the name or partial name of the Material or Materials you want to replace in this operation.
-
The third value, String Match , is the type of string comparison you want to make between the Materials in the Static Mesh Assets and Actors and the search string you set in the second value of this row. You can use any of the values accepted by the Substitute Material operation: Exact Match , Contains , or Matches Wildcard . These options are interpreted the same way as when you use a string filter in a Select By block. For details, see the Visual Dataprep Selection Reference .
-
The fourth value, Material Replacement , is the full name of the Material Asset you want to use to replace any Materials that match the search string.
You can get this value by right-clicking a Material in the Content Browser and selecting Copy Reference from the context menu.
For example:

Click for full image.