Choose your operating system:
Windows
macOS
Linux
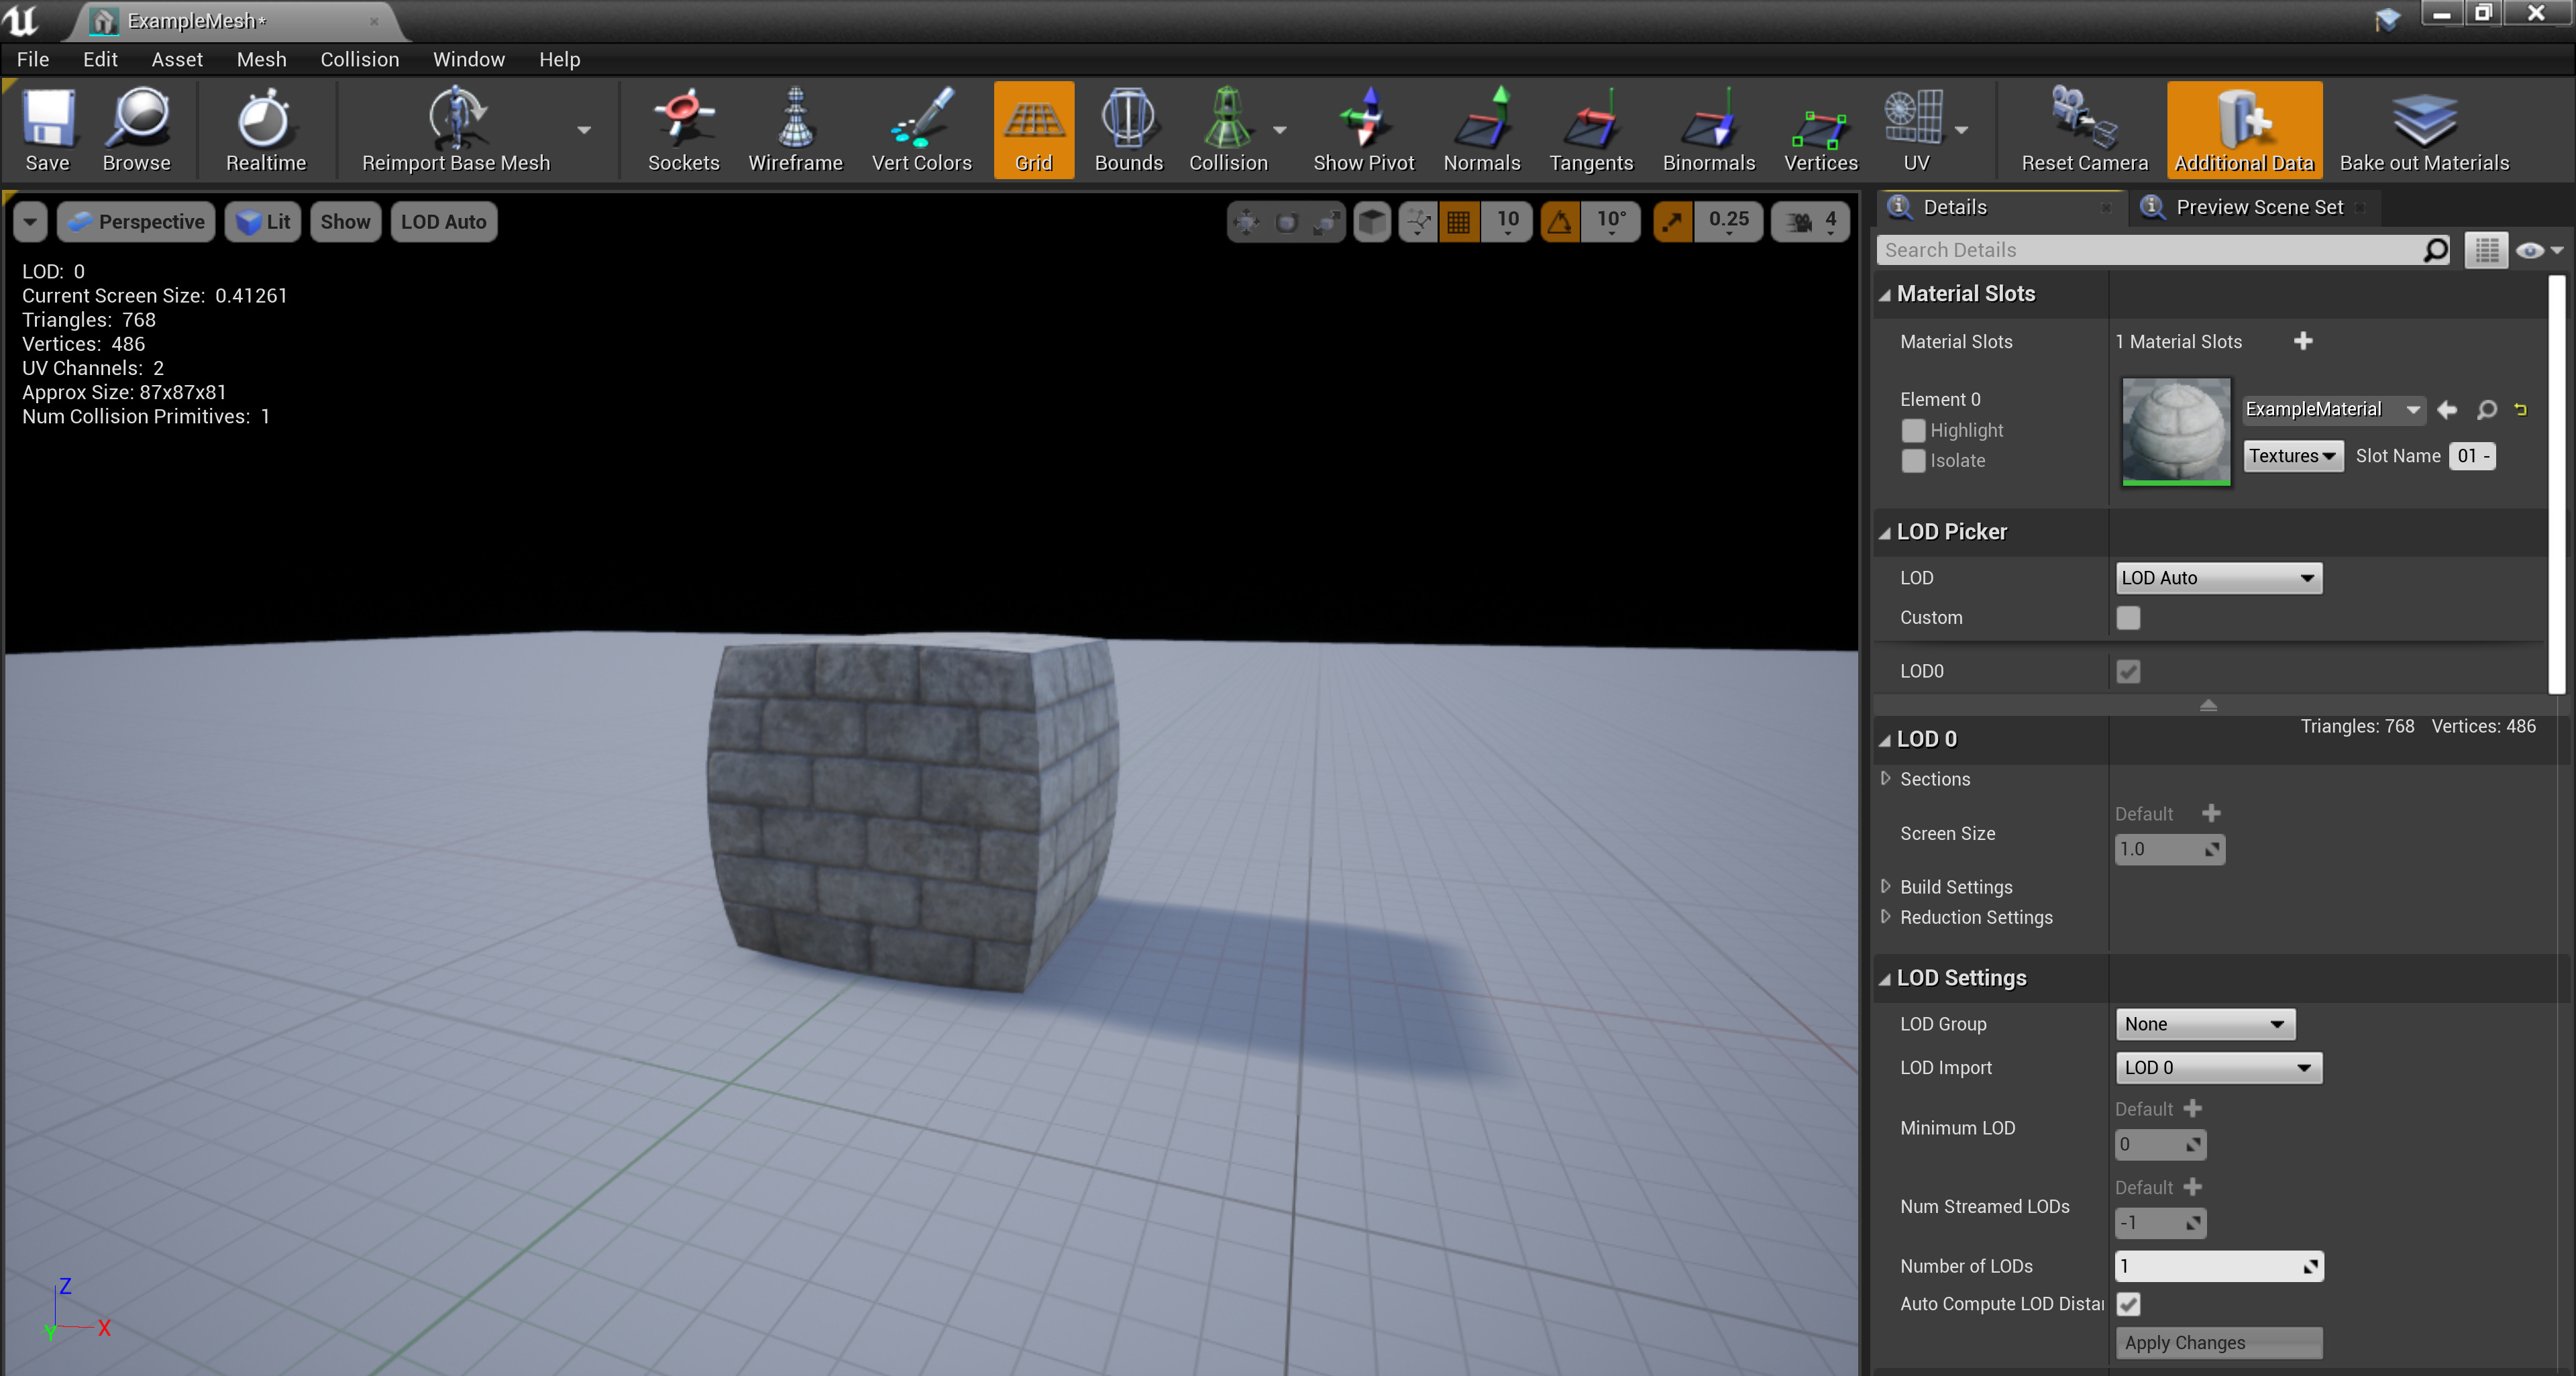
The StaticMesh support in the FBX import pipeline makes getting meshes from 3D applications into Unreal Engine 4 a simple, painless task. When meshes are imported, the textures used in the materials applied to those meshes in their respective 3D application (diffuse and normal map only) are also imported and, in turn, used to generate the materials applied to the mesh in UE4.
Features supported for importing Static Meshes using FBX:
-
Smoothing groups
-
Multiple separate Static Meshes (can also be combined into a single mesh at import)
Currently, when importing multiple meshes with custom collision in a single file, only the first mesh's collision will be imported.
The UE4 FBX import pipeline uses FBX 2018 . Using a different version during export may result in incompatibilities.
General Setup
In general, you are free to create Static Meshes using any tools and methods you want. There are some stipulations as far as setting up UVs, placement of the mesh, etc. that you need to account for in order for the exporting and importing to go smoothly and for the mesh to work properly in Unreal Editor.
Pivot Point
The pivot point of the mesh in Unreal Engine determines the point around which any transformations (translation, rotation, scale) will be performed.
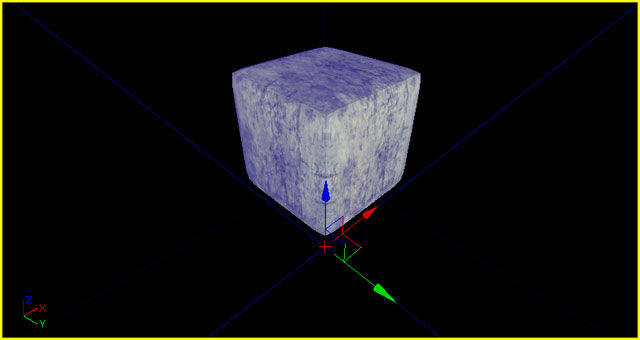
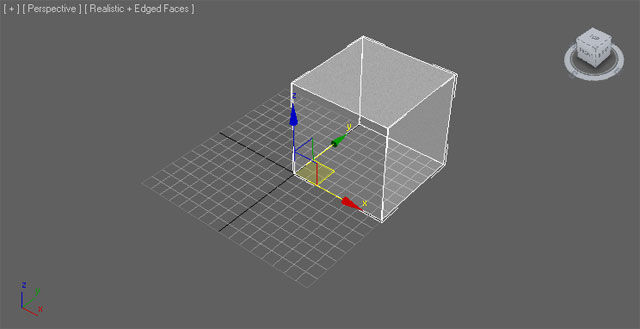
The pivot point is always located at the origin (0,0,0) when exporting from a 3D modeling application. Because of this, it is best to create your meshes at the origin, with the origin generally being located at one corner of the mesh to allow for proper alignment when snapping to the grid inside of Unreal Editor.
Triangulation
Meshes in Unreal Engine must be triangulated as the graphics hardware only deals with triangles.
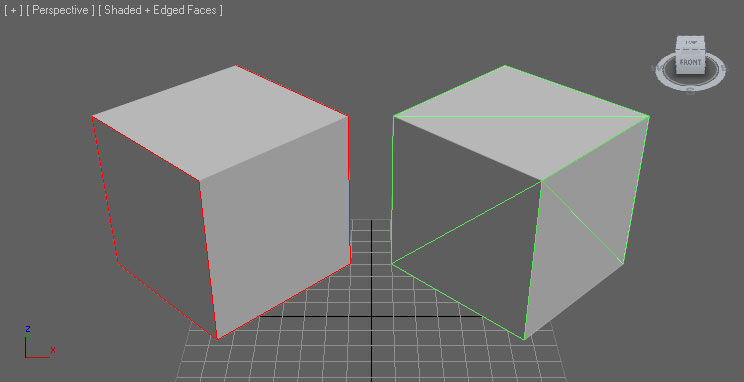
There are several ways you can ensure your mesh is triangulated.
-
Model the mesh with only tris - best solution, provides the most control over the end result.
-
Triangulate the mesh in the 3D app - good solution, allows cleanup and modification before export.
-
Allow the FBX exporter to triangulate the mesh - okay solution, allows no cleanup but can work for simple meshes.
-
Allow the importer to triangulate the mesh - okay solution, allows no cleanup but can work for simple meshes.
It will always be best to manually triangulate the mesh in the 3D application, controlling the direction and placement of edges. Automatic triangulation can lead to undesirable results.
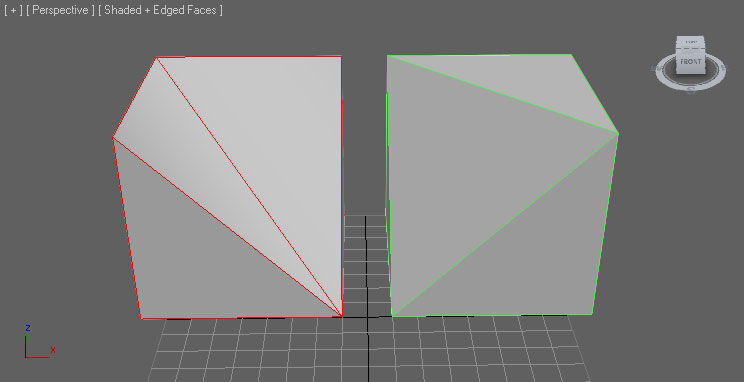
UV Texture Coordinates
The import of multiple UV sets is supported by the FBX pipeline in Unreal Engine 4. For Static Meshes , this is generally used to handle one set of UVs for the diffuse. There are no special requirements for setting up the UVs for Static Meshes using the FBX pipeline.
Creating Normal Maps
Normal maps can be created for your meshes directly inside of most modeling applications by creating both a low-res render mesh and a high-res detail mesh.
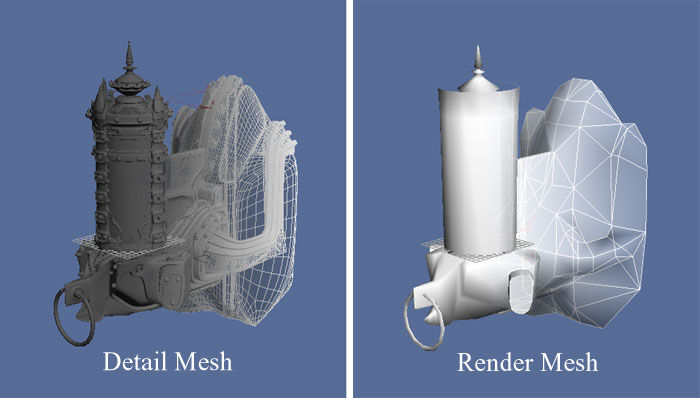
The geometry of the high-res detail mesh is used to generate the normals for the normal map. Epic uses a workflow internally that introduces XNormal into the process and generally results in much better normals when rendering inside of Unreal Engine 4. For details on this process, see the Normal Map Creation Guide .
Materials
The materials applied to meshes modeled in external applications will be exported along with the mesh and then imported into Unreal. This streamlines the process as textures do not need to be imported separately in Unreal, materials do not need to be created and applied, etc. The import process is capable of performing all of these actions when using the FBX pipeline.
These materials also need to be set up in a specific way, especially when the mesh has multiple materials or the order of the materials on the mesh is important (i.e. for character models where material 0 needs to be the body and material 1 needs to be the head).
For complete details of setting up materials for export, see the FBX Material Pipeline page.
Collision
Simplified collision geometry is important for optimizing collision detection in-game. Unreal Engine 4 provides basic tools for creating collision geometry within the Static Mesh Editor . Some circumstances, though, are best handled by creating custom collision geometry within your 3D modeling application and exporting it with the render mesh. Generally, this is true for any mesh with an opening or concave area that objects need to not collide with.
For instance:
-
Doorway meshes
-
Walls with window cutouts
-
Oddly shaped meshes
Collision meshes are identified by the importer based on their name. The collision naming syntax should be:
|
Mesh Prefix and Name |
Description |
|---|---|
|
UBX_[RenderMeshName]_## |
A Box must be created using a regular rectangular 3D object. You cannot move the vertices around or deform it in any way to make it something other than a rectangular prism, or else it will not work. |
|
UCP_[RenderMeshName]_## |
A Capsule must be a cylindrical object capped with hemispheres. It does not need to have many segments (8 is a good number) at all because it is converted into a true capsule for collision. Like boxes, you should not move the individual vertices around. |
|
USP_[RenderMeshName]_## |
A Sphere does not need to have many segments (8 is a good number) at all because it is converted into a true sphere for collision. Like boxes, you should not move the individual vertices around. |
|
UCX_[RenderMeshName]_## |
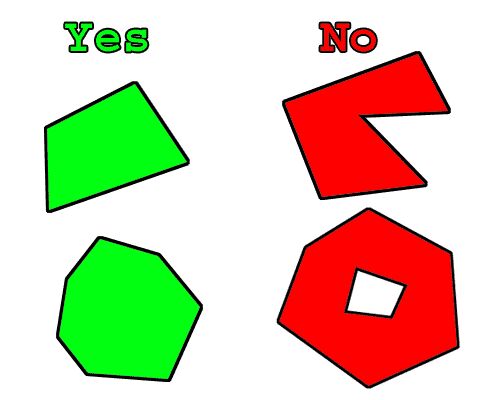
A Convex object can be any completely closed convex 3D shape. For example, a box can also be a convex object. The diagram below illustrates what is convex and what is not:
|
Caveats and Considerations
-
RenderMeshNamemust be identical to the name of the render mesh the collision mesh is associated with in the 3D application. So if you have a render mesh namedTree_01in your 3D application, your collision mesh should be in the scene with that mesh and namedUCX_Tree_01, and then exported along with the render mesh to the same FBX file. If you need more than one collision object for a mesh, you can extend their names with further identifiers, such as:UCX_Tree_01_00,UCX_Tree_01_01,UCX_Tree_01_02, etc... and they all will be associated as collision for that mesh. -
Currently, spheres are only used for rigid-body collision and Unreal's zero-extent traces (e.g. weapons), not non-zero extent traces (e.g. Player movement). Also, spheres and boxes do not work if the StaticMesh is non-uniformly scaled. In general you probably want to create UCX primitives.
-
Once your collision objects are set up, you can export both the render and collision mesh in the same .FBX file. When you import the .FBX file into Unreal Editor, it will find the collision mesh, remove it from the render mesh, and turn it into the collision model.
-
Breaking up a non-convex mesh into convex primitives is a complex operation, and can give unpredictable results. Another approach is to break the collision model into convex pieces yourself in Max or Maya.
-
In the case of an object whose collision is defined by multiple convex hulls, results are best when the hulls do not intersect with one another. For example, if the collision for a lollipop were defined by two convex hulls, one for the candy and one for the stick, a gap should be left between the two as in the following illustration:

-
UCX_Candy
-
Small gap between collision surfaces
-
UCX_Stick
Sockets
Sockets are commonly used in games to attach an object to another object, whether this be for a Skeletal or Static mesh. Unreal Engine 4 provides tools for creating sockets inside the Static Mesh Editor. Sometimes it may be necessary to set these up within your 3D modeling application and export it with your render mesh. These sockets can be Translated, Rotated, and scaled relative to the bone on a Skeletal mesh or or the size of the Static Mesh.
To use a socket in your modeling application you will need to use a Dummy or Helper object with the
SOCKET_
Prefix.
|
Mesh Prefix and Name |
Description |
|---|---|
|
SOCKET_[RenderMeshName]_## |
Use this on any Dummy or Helper objects in your modeling application to assign a socket to your mesh. |
Caveats and Considerations
-
RenderMeshNamemust be identical to the name of the render mesh the socket object is associated with in the 3D application. So if you have a render mesh namedObject_01in your 3D application, your socket object should be in the scene with that mesh and named SOCKET_Object_01, and then exported along with the render mesh to the same FBX file. If you need more than one socket object for a mesh, you can extend their names with further identifiers, such as: SOCKET_Object_01_00, SOCKET_Object_01_01, SOCKET_Object_01_02, etc... and they all will be associated as sockets for that mesh. -
When creating sockets for your mesh, you can only have a single mesh FBX setup with sockets that can be imported into Unreal Engine 4. For instance, if you have two render meshes that you want to be separate assets will need to be imported as separate FBX files. This means that you cannot import multiple meshes and assign the sockets to each separate mesh, and that if you have two sets of render meshes with their own sockets they will not import correctly. As an example, if I have Object_01 with SOCKET_Object_01_00, and another render mesh Box_01 with SOCKET_Box_01_00 I cannot export both of these meshes with their sockets together. They would need to be exported as separate FBX files.
Vertex Colors
Vertex colors for Static Meshes can be transferred using the FBX pipeline. No special setup is necessary

Export Mesh
Static Meshes can be exported individually or multiple meshes can be exported to a single FBX file. The import pipeline will separate multiple Static Meshes into multiple assets within the destination package unless specified to combine the meshes by enabling the Combine Meshes setting at the time of import. Refer to the documentation for exporting FBX files for your 3rd party DCC tool of choice, remembering to adhere to the guidelines presented earlier for the creation of your meshes.
The UE4 FBX import pipeline uses FBX 2018 . Using a different version during export may result in incompatibilities.
Import Mesh
-
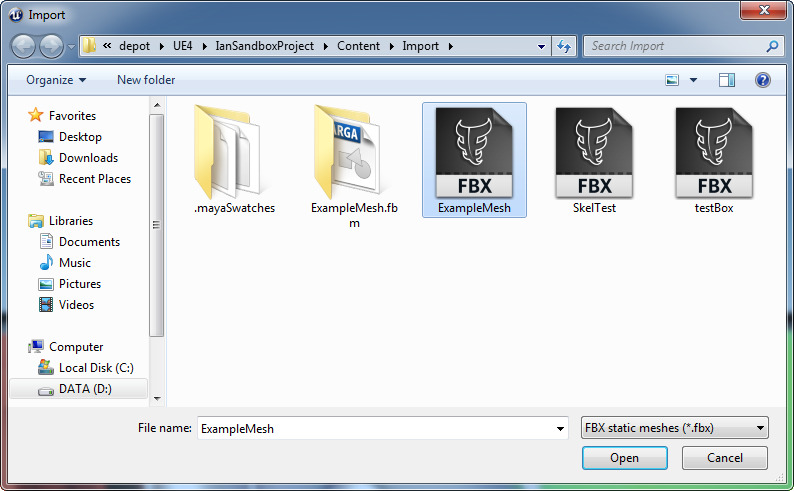
Click the Add/Import button in the Content Browser and choose Import . Navigate to and select the FBX file you want to import in the file browser that opens.
You may want to select
![FBX file extension]()
![File window showing FBX files for import]()
The path of the imported asset depends on the current location within the Content Browser . Make sure to navigate to the appropriate folder prior to performing the import. You may also drag the imported assets into a new folder once import is complete.
-
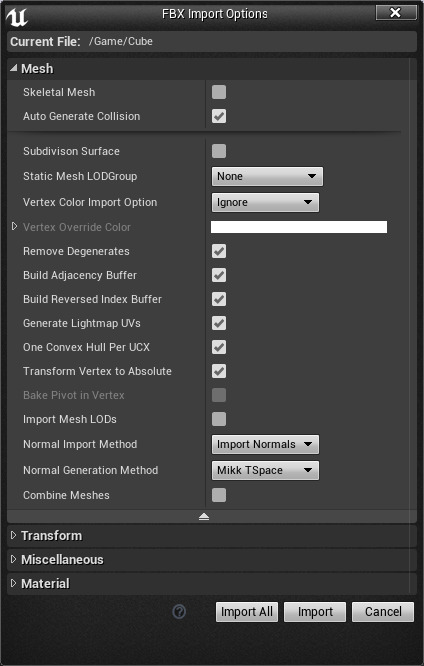
Choose the appropriate settings in the Import dialog. The defaults should be sufficient in most cases. See the FBX Import Dialog section for complete details of all of the settings.
![Static mesh import options]()
-
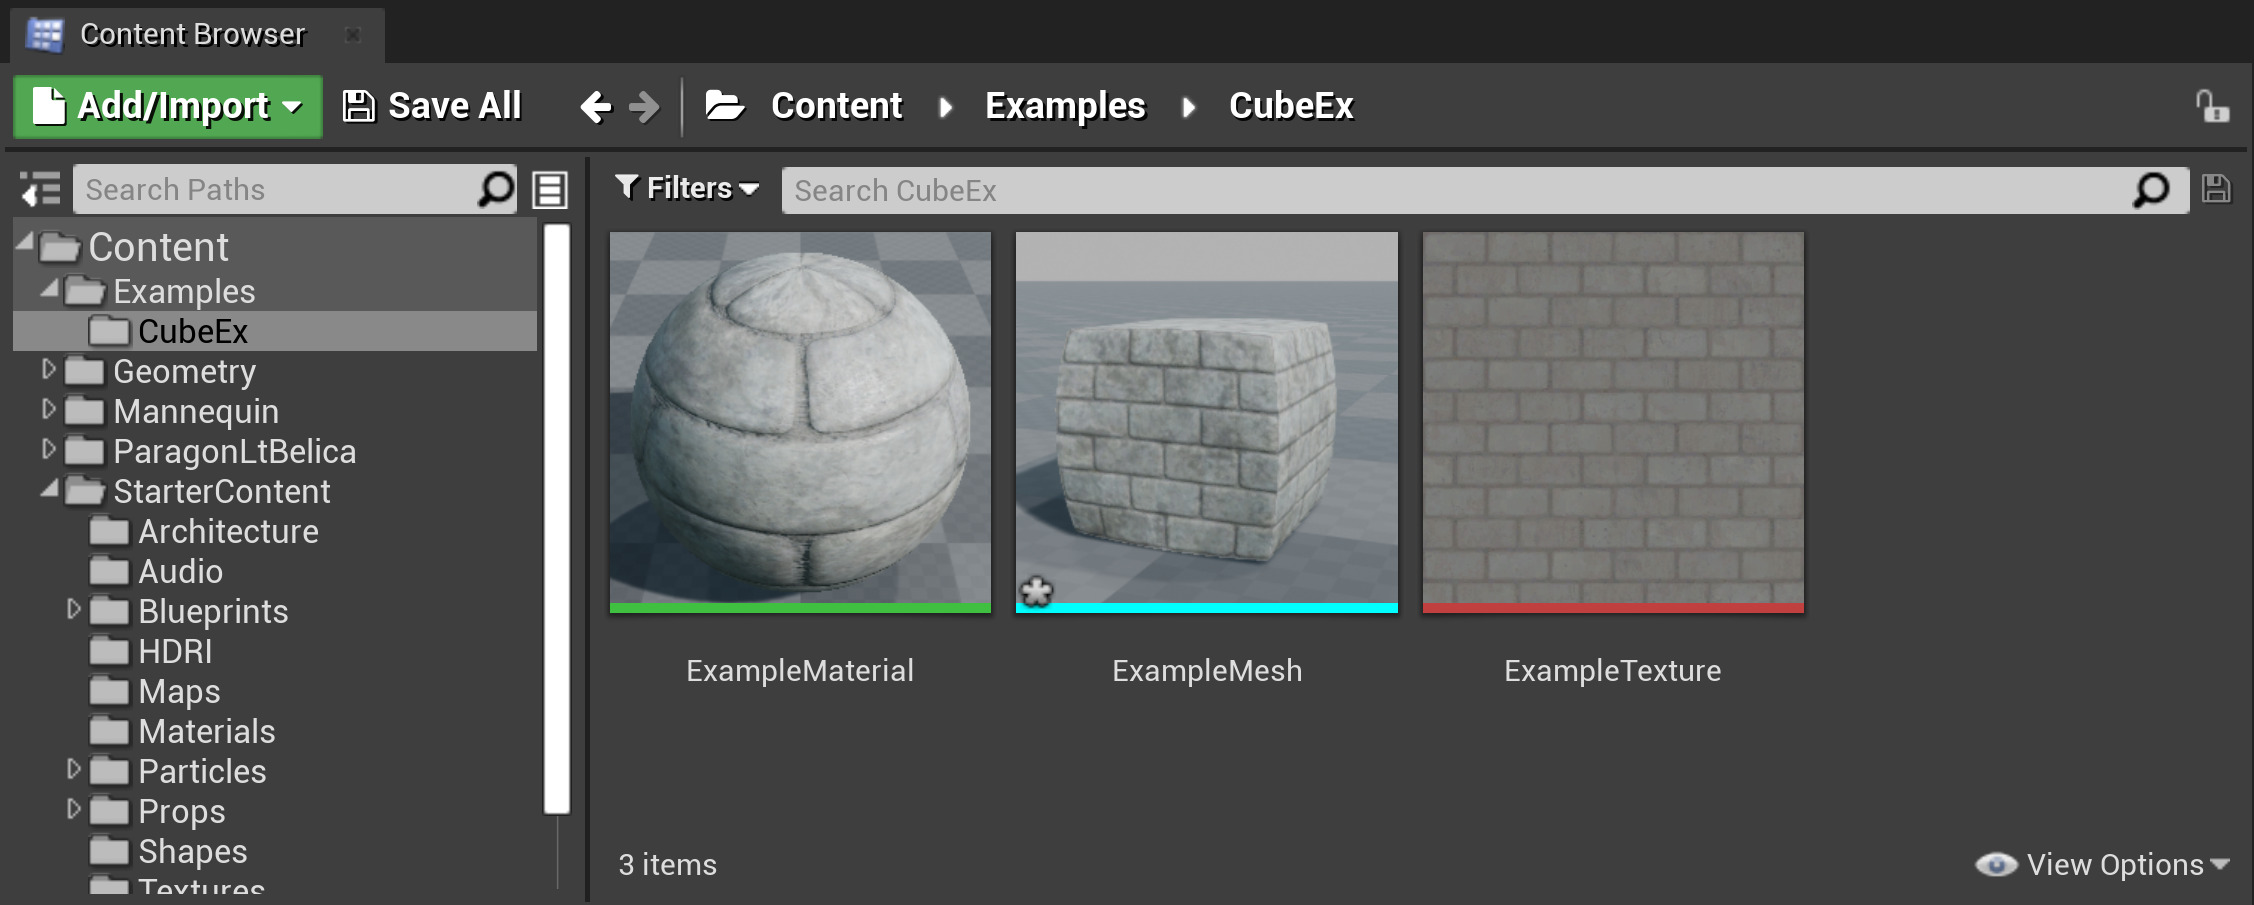
Click the Import button to import the mesh(es). The resulting mesh, material(s), and texture(s) will be displayed in the Content Browser if the process was successful.
![An imported material, mesh, and texture in the content browser]()
Although textures and materials can be imported with a Static Mesh, only Color and Normal will automatically be connected (assuming a supported material was used ), Specular maps will be imported but not connected, other maps, for example an Ambient Occlusion map in the Diffuse slot of a Maya material, will not even be imported; it is best to check your materials and connect any unconnected maps and check which maps did not import. Simply double-click the new material and connect the available textures with their appropriate inputs.
By viewing the imported mesh in the Static Mesh Editor and enabling the display of collision, you can determine that the process worked as expected.
Alternatively, you can actually just click and drag an FBX file from Windows into the Content Browser and it will bring up the import dialog for you.
Static Mesh LODs
Static Meshes can make use of levels of detail (LODs) in-game in order to limit the impact of meshes as they get farther from the camera. Generally, this means each level of detail will have a reduced number of tris and, perhaps, a simpler material (or materials) applied to it.

The FBX pipeline can be used to import LOD meshes created using DCC tools, or LODs can be created for imported static meshes directly inside UE.
LOD Setup
In general, LODs are handled by creating models of varying complexity going from the full-detail base mesh to the lowest-detail LOD mesh. These should all be aligned and occupying the same space with the same pivot point. Each LOD mesh can have completely different materials assigned, including different amounts of materials. This means the base mesh could use multiple materials to give the desired amount of detail up close, but the lower-detail meshes could use a single material since details will be less noticeable.
Each DCC tool will have its own workflow for creating LODs for static meshes, so refer to the documentation for your tool of choice for specifics about how to create and include them in your FBX exports.
Import LODs
Static Mesh LODs can be imported along with the base mesh in the Content Browser or they can be imported individually through the Static Mesh Editor.
-
Click the Add/Import button in the Content Browser and choose Import . Navigate to and select the FBX file you want to import in the file browser that opens.
You may want to select
![FBX file extension]()
The path of the imported asset depends on the current location within the Content Browser . Make sure to navigate to the appropriate folder prior to performing the import. You may also drag the imported assets into a new folder once import is complete.
-
Choose the appropriate settings in the Import dialog. The defaults should be sufficient, but also make sure that Import LODs is enabled. Note: When importing LODs, the name of the imported mesh will follow the default naming rules . See the FBX Import Dialog section for complete details of all of the settings.
![ImportOptions_LOD.png]()
-
Click the Import button to import the mesh and LODs. The resulting mesh, material(s), and texture(s) will be displayed in the Content Browser if the process was successful.
![An imported material, mesh, and texture in the content browser]()
Although textures and materials can be imported with a Static Mesh, only Color and Normal will automatically be connected (assuming a supported material was used ), Specular maps will be imported but not connected, other maps, for example an Ambient Occlusion map in the Diffuse slot of a Maya material, will not even be imported; it is best to check your materials and connect any unconnected maps and check which maps did not import. Simply double-click the new material and connect the available textures into their appropriate inputs.
By viewing the imported mesh in the Static Mesh Editor, you can cycle through the LODs using the LOD Picker in the Details panel.

Create LODs for Imported Static Meshes
Once a static mesh has been imported, you can either create LODs for it manually , which is longer but will get the best results, especially for complex meshes, or you can use UE's LOD autogeneration tool , which is faster for when you need to generate LODs for multiple simple meshes.
