Choose your operating system:
Windows
macOS
Linux
In order to understand and use the content on this page, make sure you are familiar with the following topics:
We can import textures into Unreal Engine from external image editing applications, such as Photoshop or GIMP . Although we're using Photoshop to illustrate this lesson's goal, you can import textures into Unreal Engine from any image editing application with a save feature.
Before getting started: Make sure you have access to an image editing application.
Goals
The focus of this guide is to show you how to import textures from external image editing applications.
Objectives
After going through this guide, you'll know:
-
How to import textures into Unreal Editor from external image editing applications.
Importing from an Image Editing Application
-
Inside your image editor, click File and Save As .
![photoshop_export1.png]()
Please visit the Texture Import Guide to learn more about our supported image formats.
-
In the dialog box, locate your UE4 Project Directory and Content folder (1), enter your image name, select a supported format (2), then click Save (3).
![photoshop_export2.png]()
-
On your hard disk, browse to your project's 'Content' folder to find that your textures have been added.
![photoshop_export6.png]()
-
If Unreal Editor is open, a 'Processing outstanding content changes' message will appear.
![photoshop_export4.png]()
-
After Unreal Editor imports your content, your textures are ready for use.
![photoshop_export5.png]()
UE4 batch imports supported image files for you.
If you see the following pop-up message:
![TextureImportMessage.png]()
UE4 just prevented you from importing an unsupported image file.
Also, if you see the following pop-up message:
![nonpoweoftwowarning.png]()
UE4 is telling you that odd-sized images aren't streamed or mipmapped.
-
Unsaved assets are marked with an asterisk.
![UnsavedAssets.png]()
-
Click the Save All button to save your imported textures.
![SaveAllButton_UI.png]()
-
After the Save Content dialog box appears, go ahead and click Save Selected to save your imported asset.
![SaveSelectedButton_UI.png]()
-
After clicking on the Save Selected buton, UE4 removes the asterisk, indicating that the assets have been successfully saved.
![SavedAssets.png]()
Verifying Imported Assets
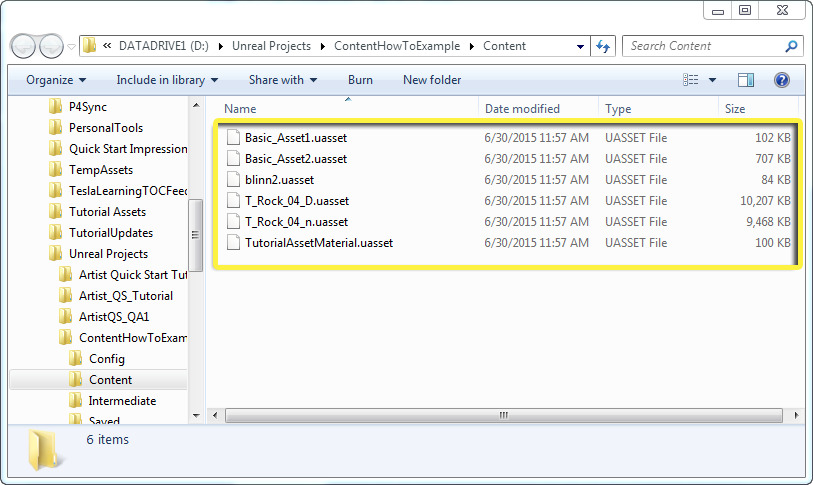
If you're new to UE4, it's generally a good practice to verify that .uasset files were imported properly onto the hard disk.
-
In the Content Browser , right-click the 'Content' folder to open the Folder Options dialog box (pictured below).
![FolderDialogBox_UI.png]()
-
Under Folder Options , click 'Show In Explorer' (pictured below).
![ShowInExplorer_Selection.png]()
-
With Explorer open, verify that UE4 created the corresponding .uasset files for your project (pictured below).
![ImportedAssets_Explorer.png]()
Now that we've reached the end of this guide, you've learned:
✓ How to import textures into Unreal Editor from external image editing applications.


