Choose your operating system:
Windows
macOS
Linux
Having the ability to pose your project's characters and save those poses for later use, can be a huge time saver when it comes to taking screenshots for marketing or promotional material. In the following document, we will go over how you can pose your Unreal Engine 4 (UE4) project's characters and then save those poses as Static Meshes for later use.
For this example, we will be using the SK_Mannequin that comes with the Third Person Template project. If you have not done so already, create or open a project that makes use of this template.
Posing Skeletal Meshes
In the following section, we will go over what needs to be done so that a Skeletal Mesh can be posed.
-
First, inside of the Content Browser , locate and then open the SK_Mannequin Skeletal Mesh asset by double-clicking on it.
![SMC_00.png]()
-
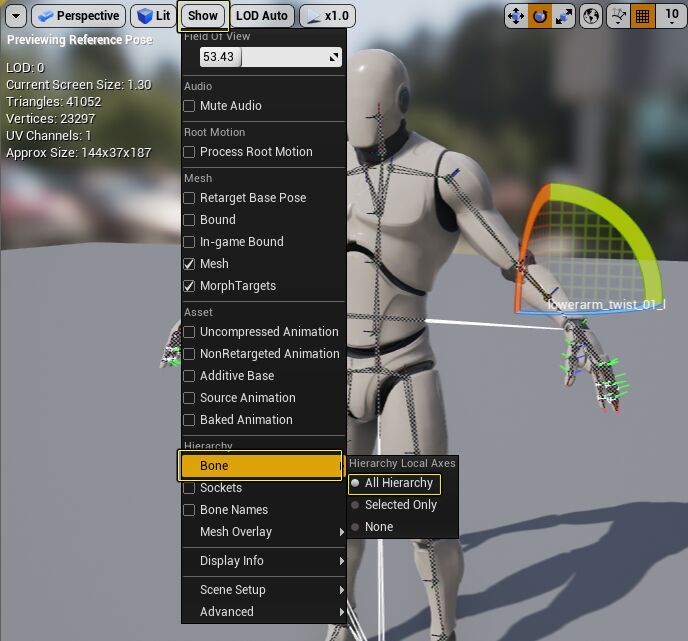
Once the SK_Mannequin Skeletal Mesh has opened, go to Show > Bone > All Hierarchy to display all of the bones in the viewport.
![SMC_01.png]()
-
Select a bone to adjust by clicking on it, and then use the Move , Rotate , and Scale tools, to move, rotate, and scale the various bones until you have a pose that you want.
![SMC_02.png]()
Saving Skeletal Mesh Poses
Now that we have a Skeletal Mesh posed, we will take a look at how to go about saving those poses as Static Meshes in the following section.
-
When you are happy with your pose, press the Make Static Mesh button that is on the Main Toolbar of the Skeletal Mesh Editor.
![SMC_03.png]()
-
After the Make Static Mesh button has been pushed, you will be prompted to specify a location and name for the newly created Static Mesh asset. Click on the folder you want the Static Mesh to be placed into, input a name for the Static Mesh in the Name box, and then press the OK button to create and save the Static Mesh.
![SMC_04.png]()
-
When the conversion process has finished, there should be a new Static Mesh placed in the location that you specified.
![SMC_05.png]()
Using Skeletal Mesh Poses
With the Skeletal Mesh now posed and saved as a Static Mesh, we will look at how you can use them in your projects.
-
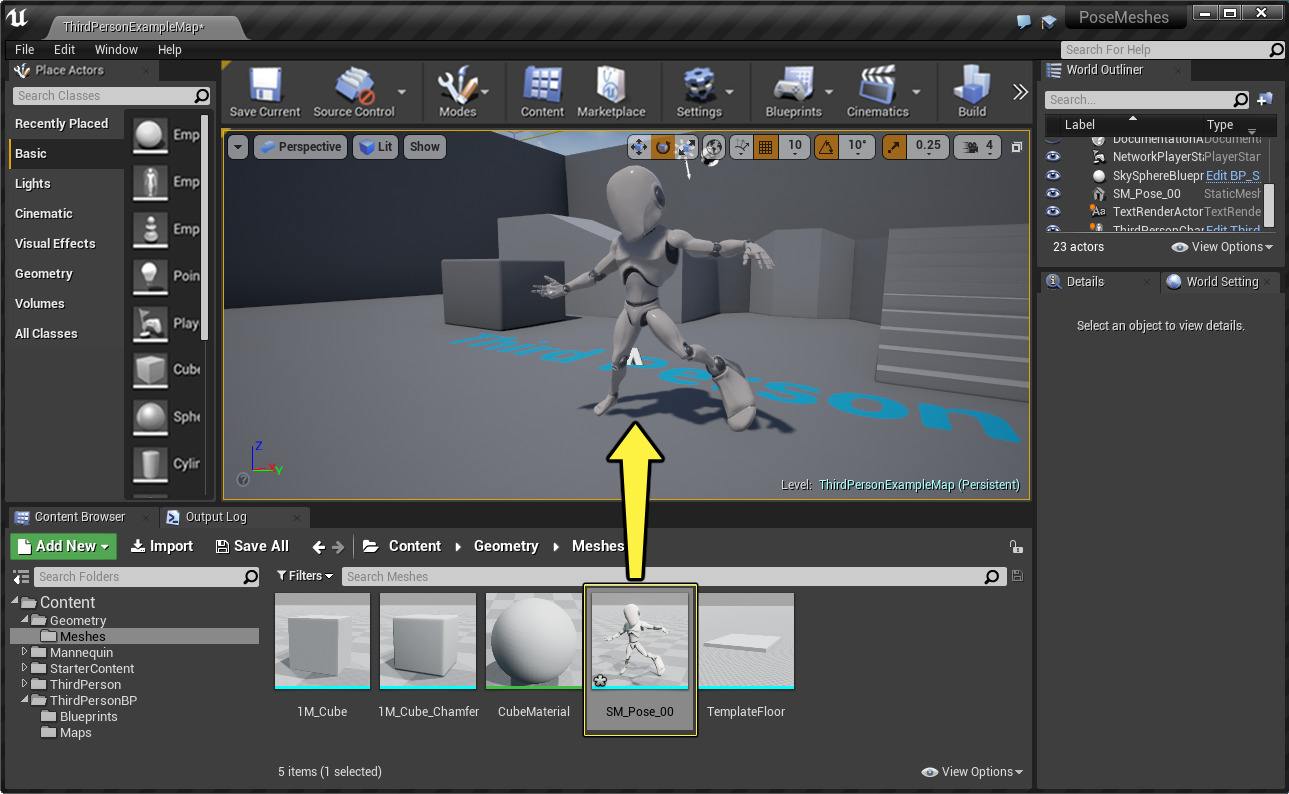
To use the newly-created (and posed) Static Mesh, select the posed Static Mesh in the Content Browser , and then drag it from the Content Browser into the level like with any other type of Static Mesh asset.
![SMC_06.png]()
When the posed Static Mesh has been placed in the level, you can then use it like any other Static Mesh in your project.
Converting Multiple Placed Skeletal & Static Meshes
One of the other benefits this tool offers, is that it will allow you to convert Static or Skeletal meshes that have been placed into a level. In the following section, we will take a look at how you go about doing this.
This process will only work with Static or Skeletal meshes. If you try to add BSP to this process, the BSP brush will not convert to a Static Mesh.
-
Inside of your level, select the assets you want to convert into Static Meshes.
![SMC_07.png]()
-
With all of the meshes selected, right-click on one of the meshes. From the context menu that is displayed, select the Convert Actors To Static Mesh option.
![SMC_08.png]()
-
From the dialogue box that is displayed, select a name and location for the newly created Static Mesh to be saved, and then press the OK button to start the conversion process.
![SMC_09.png]()
-
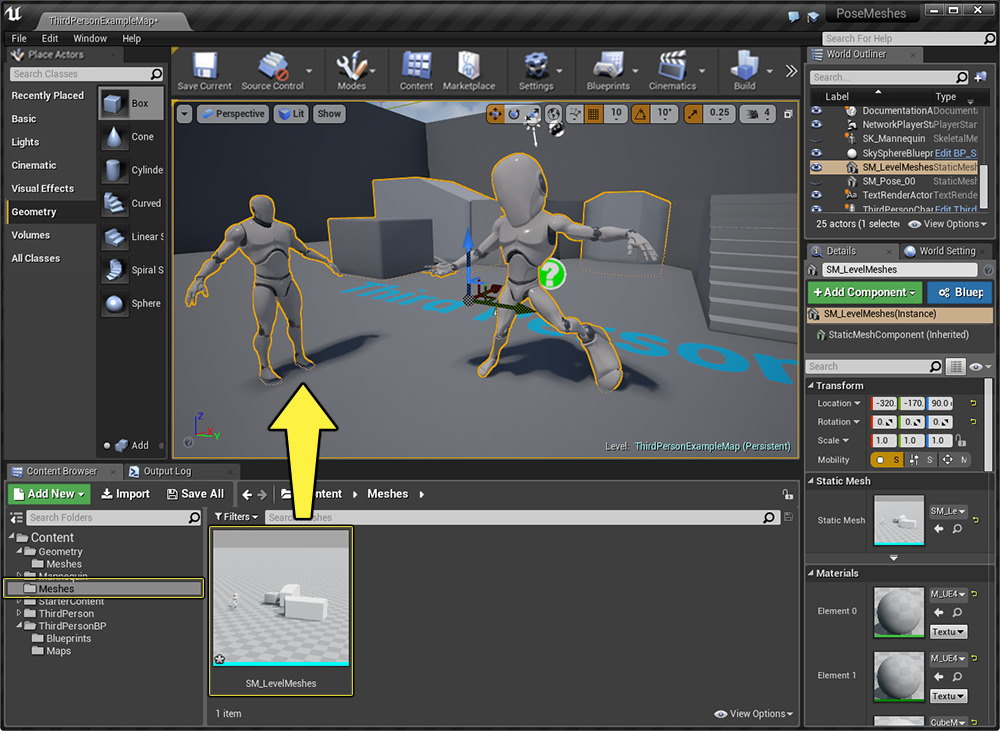
Once the conversion process has been completed, you should have a new Static Mesh that is composed of the Static and Skeletal Meshes that you selected in the level. You can then use this Static Mesh (as you would any other asset) inside of UE4.
![SMC_10.png]()


