Choose your operating system:
Windows
macOS
Linux

The Automatic LOD generation system allows you to automatically reduce the polygon count of your Static Meshes to create LODs with the Unreal Engine 4 (UE4) Editor. Automatic LOD generation uses what is called quadratic mesh simplification to help generate the LODs for Static Meshes. Quadratic mesh simplification works by calculating the amount of visual difference that collapsing an edge (by merging two vertices) would generate. It then picks the edge with the least amount of visual impact and collapses it. When this happens, the tool will pick the best place to put the newly merged vertex, removing any triangles that have also collapsed along with the edge. It will continue to collapse edges until it reaches the requested target number of triangles. In the following guide, we'll show you how-to setup and use the automatic LOD generation system in your UE4 projects.
Setup
In the following section, we will create a new project that has Starter Content, and then open up a Static Mesh asset to work with.
For this part of the how-to guide, we will use the SM_Rock Static Mesh that comes with the Starter Content. However, feel free to use any Static Mesh of your choosing to follow along.
-
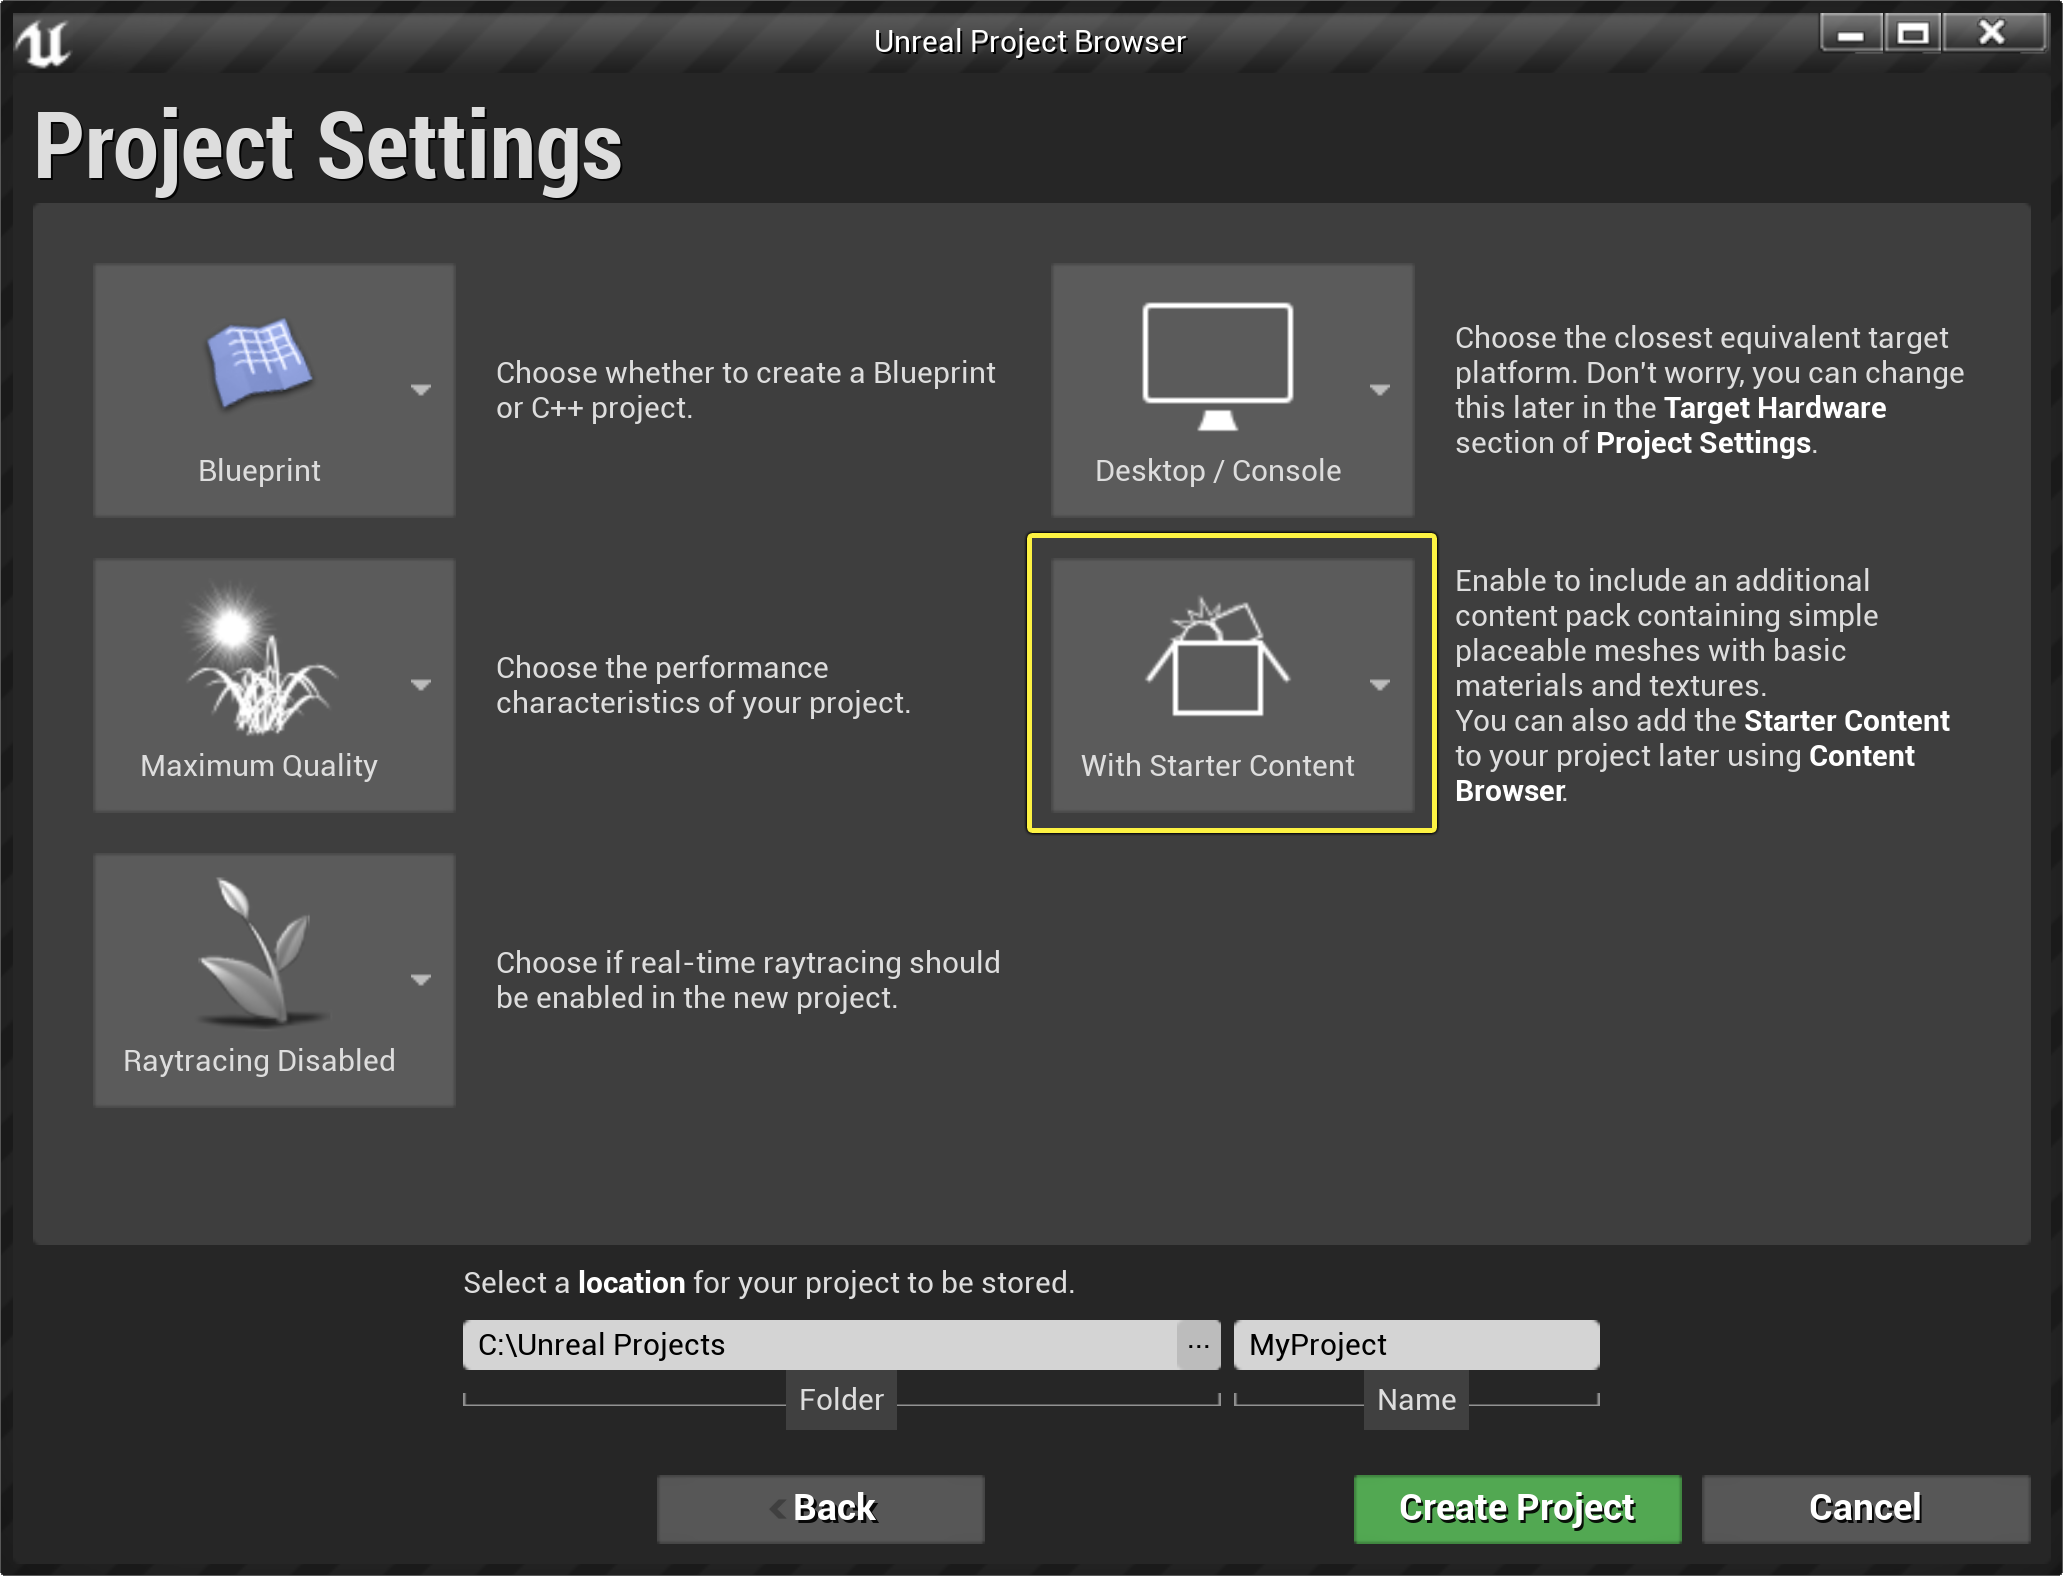
If you have not done so already, open, or create a new UE4 project, making sure that the With Starter Content setting is enabled.
![ALC_Project_Setup.png]()
Click for full image.
-
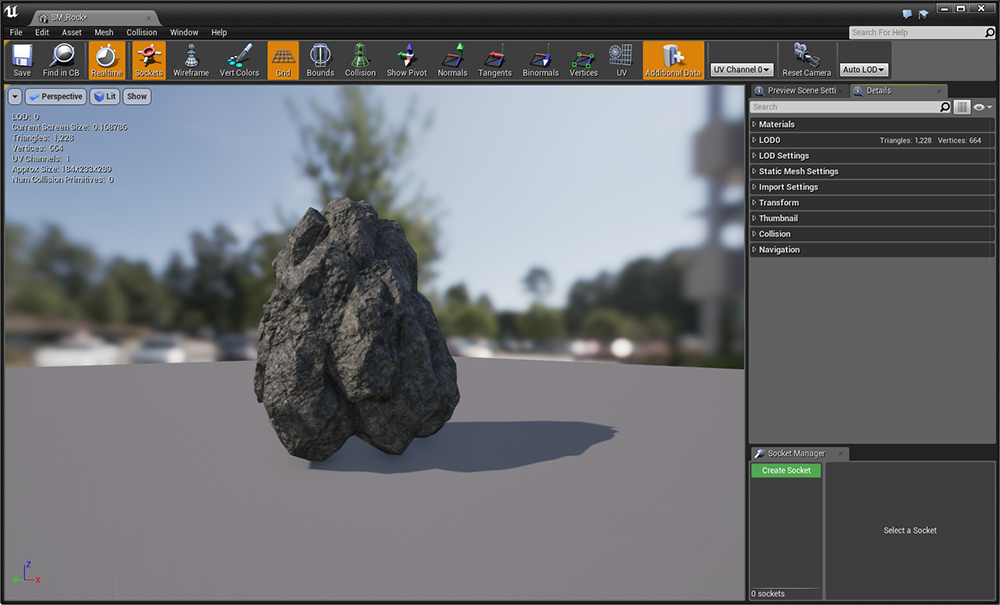
Once the project has loaded, locate the SM_Rock Static Mesh, and double-click on it to open it up in the Static Mesh Editor .
![ALC_SM_Rock.png]()
Click for full image.
Creating LODs
There are two different ways in which LODs can be generated. The first method, which is the method Epic recommends, is to use the LOD Group presets, which automatically creates LODs based on pre-configured settings. The second method involves setting up the LODs yourself. Below, you will find detailed descriptions on how to use each LOD creation method.
Using LOD Groups
Using LOD Groups is the preferred way to create LODs inside UE4 with the Automatic LOD tool. In the following section, we will go over how you go about setting up and using LOD groups in your UE4 projects.
-
First, locate your project's BaseEngine.ini file and open it up inside of a Text editor. Now, look for the
[StaticMeshLODSettings]section. If you do not see this entry in your BaseEngine.ini file, copy and paste the following code into your BaseEngine.ini file.[StaticMeshLODSettings] LevelArchitecture=(NumLODs=4,LightMapResolution=32,LODPercentTriangles=50,PixelError=12,SilhouetteImportance=4,Name=LOCTEXT("LevelArchitectureLOD","Level Architecture")) SmallProp=(NumLODs=4,LODPercentTriangles=50,PixelError=10,Name=LOCTEXT("SmallPropLOD","Small Prop")) LargeProp=(NumLODs=4,LODPercentTriangles=50,PixelError=10,Name=LOCTEXT("LargePropLOD","Large Prop")) Deco=(NumLODs=4,LODPercentTriangles=50,PixelError=10,Name=LOCTEXT("DecoLOD","Deco")) Vista=(NumLODs=1,Name=LOCTEXT("VistaLOD","Vista")) Foliage=(NumLODs=1,Name=LOCTEXT("FoliageLOD","Foliage")) HighDetail=(NumLODs=6,LODPercentTriangles=50,PixelError=6,Name=LOCTEXT("HighDetailLOD","High Detail"))Adding, removing, or adjusting entries from this section will add, remove, or adjust how the LOD groups function when they're used.
-
Now, open the UE4 Editor and then open up a Static Mesh you want to generate LODs for by double-clicking on it in the Content Browser . For this example, we will be using SM_Rock , which comes with the Starter Content.
-
With the Static Mesh now open in the Static Mesh Editor, go to the Details panel and expand the LOD Settings section.
![ALC_PM_00.png]()
Click for full image.
-
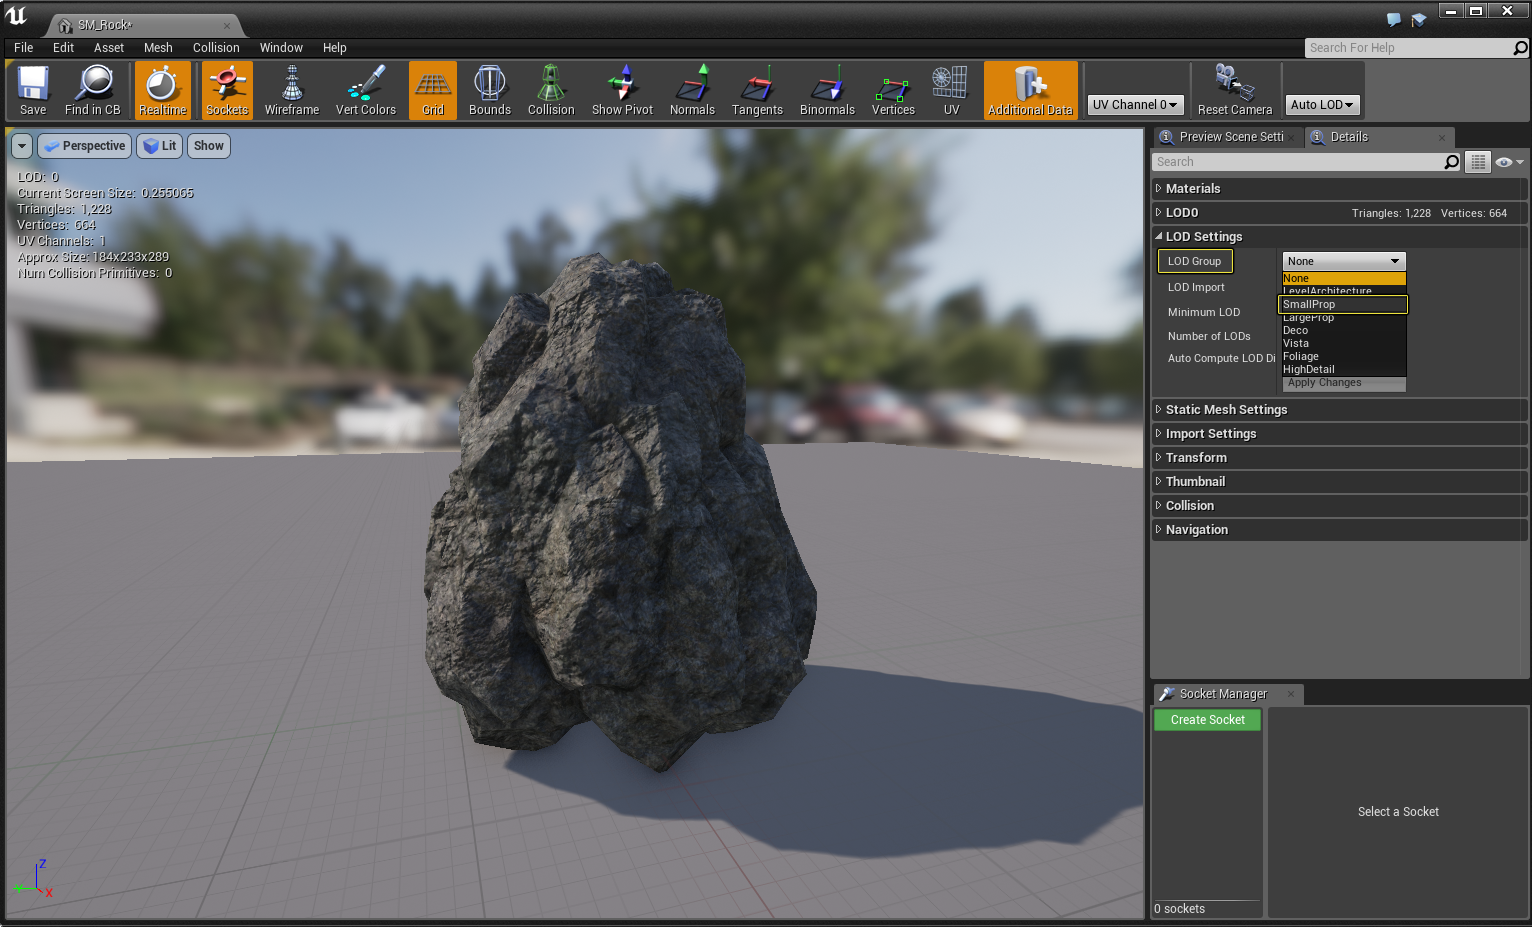
In the LOD Settings section, click on the LOD Group button, and from the displayed list, select the SmallProp option.
![ALC_PM_01.png]()
Click for full image.
-
You will then be notified that what you are doing will overwrite your current settings with the new setting from SmallProp. Press the Yes button to continue.
![ALC_PM_02.png]()
-
The Static Mesh Editor should now have four new LOD entries (LOD0, LOD1, LOD2, and LOD3) added to the Details panel. If you click on each LOD entry, you will notice that the settings correspond to the settings that were defined in the
StaticMeshLODSettingsin your project's BaseEngine.ini file.![ALC_PM_03.png]()
Click for full image.
Make sure Auto Compute LOD Distances is checked, as it will help in determining which screen size to use for the LOD. Because the algorithm knows how much visual difference every edge collapse is adding, it can use this information to determine what distance that amount of error is acceptable. Turning this off, means that the screen size for each LOD needs to be set by hand, which could lead to errors.


Now, experiment with the different LOD Group settings to see how they will create LODs for your objects. In the next section, we will go over how to manually create LODs.
Manually Creating LODs
In this section, we will go over how to manually setup and create LODs for your project's assets.
While the following will create LODs for you, Epic recommends using the LOD Groups method that was described in the previous section.
-
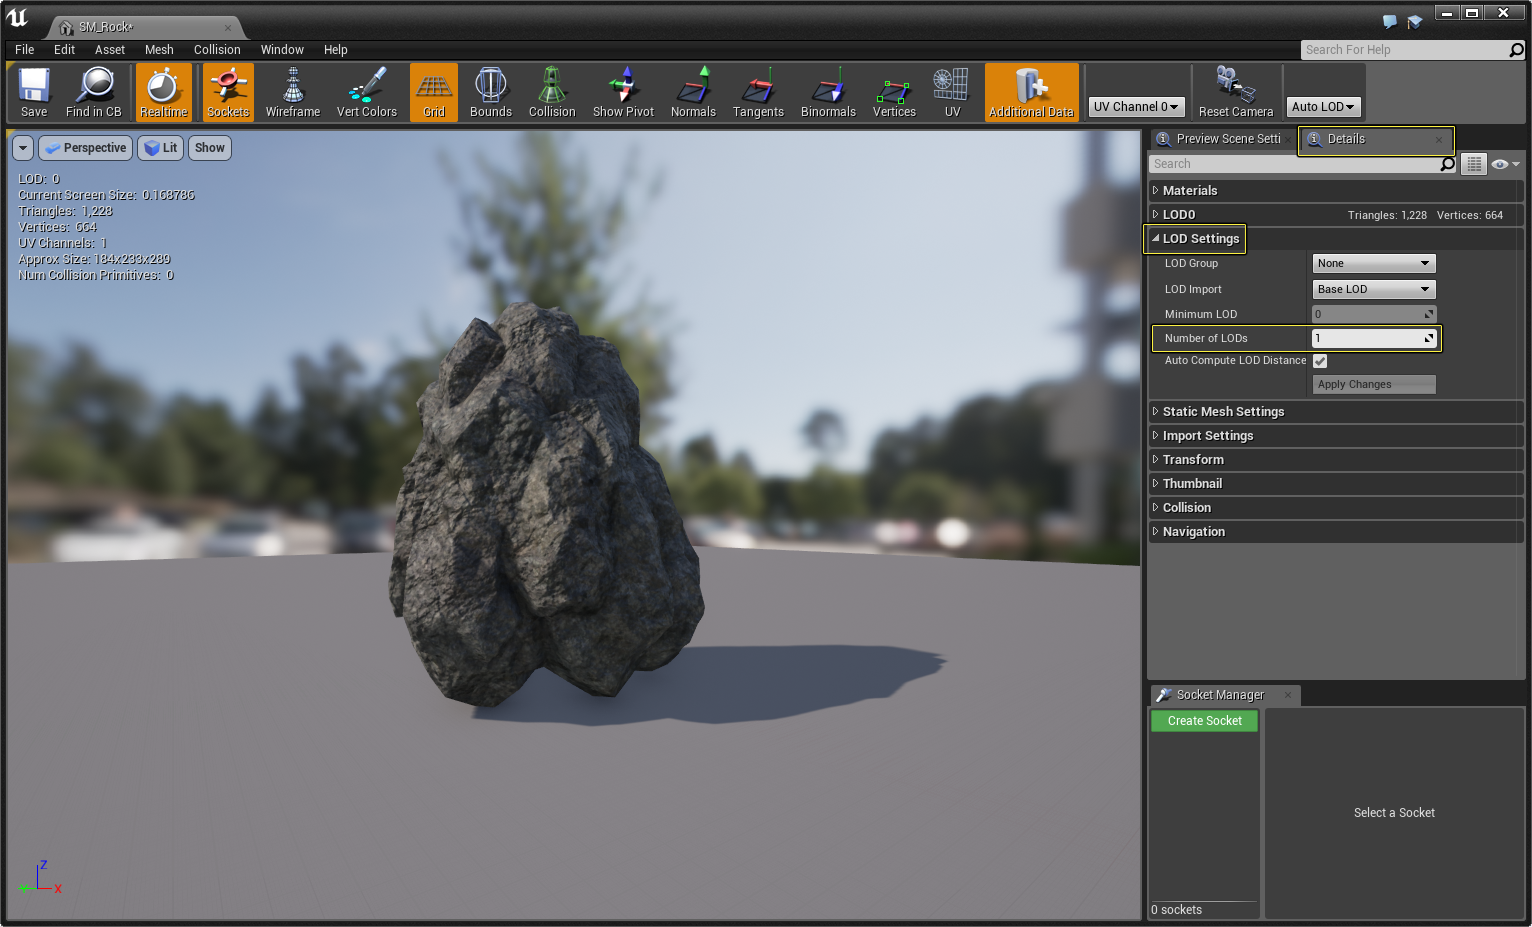
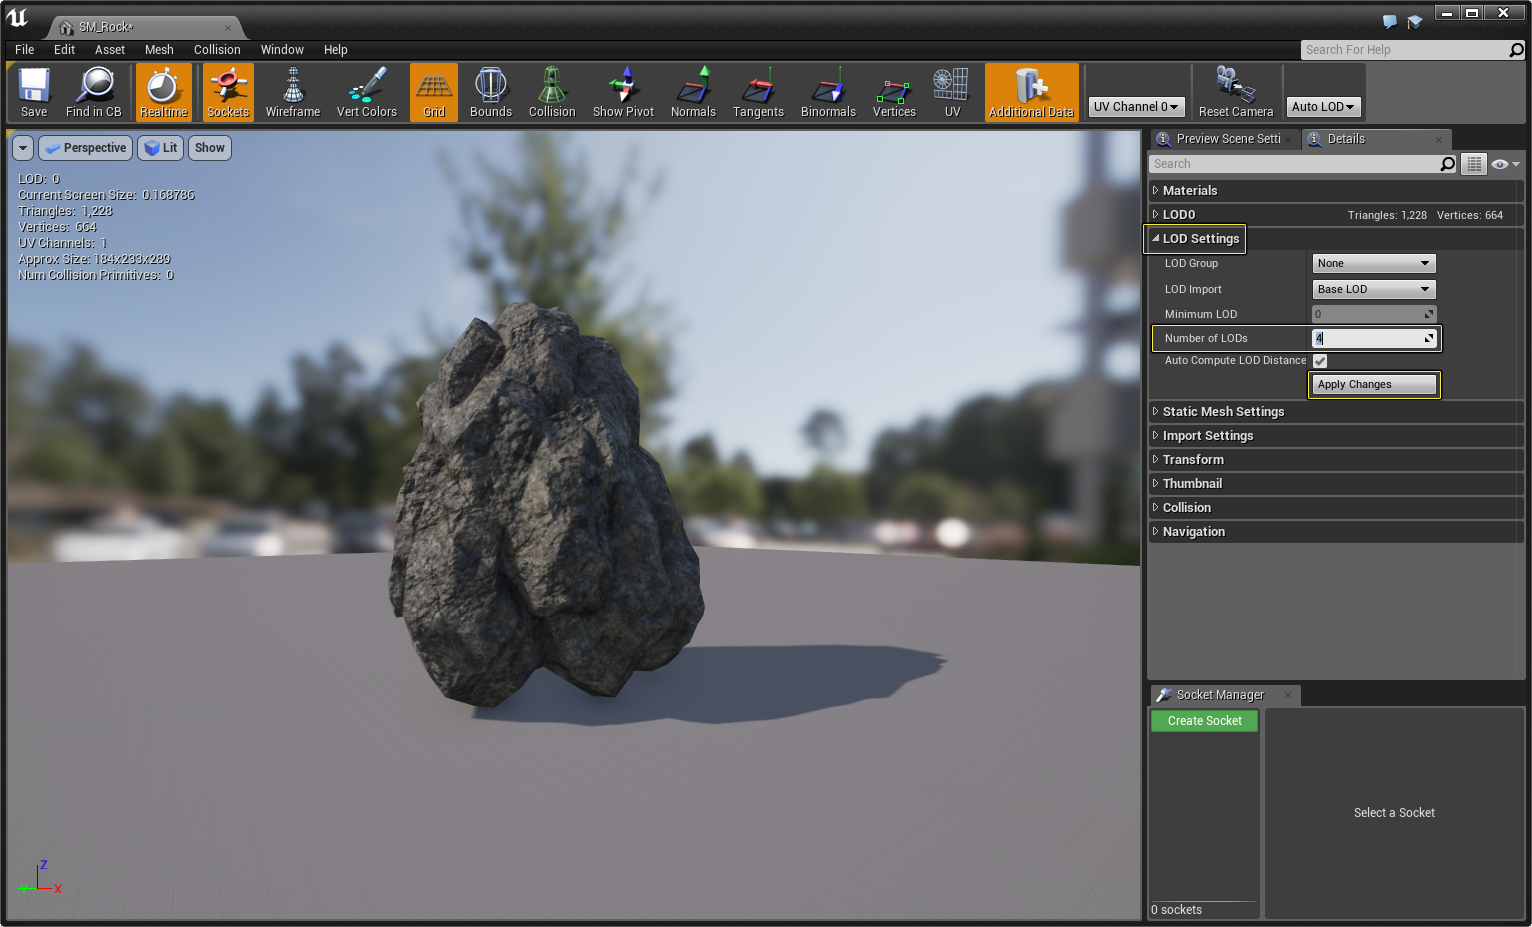
In the Details panel of the Static Mesh Editor, expand the LOD Settings section, and look for the Number of LODs option.
![ALC_LOD_Settings.png]()
Click for full image.
The LOD Group provides a list of presets to quickly choose the right LOD settings for your project. These can be changed per project in BaseEngine.ini under
[StaticMeshLODSettings]. We encourage you to set up good categories for your project, primarily using LOD groups, instead of controlling the details of every LOD. -
Set the Number of LODs to four , and then press the Apply Changes button to add the four (new) LODs to the mesh.
![ALC_Create_LODs.png]()
Click for full image.
Make sure Auto Compute LOD Distances is checked, as it will help in determining which screen size to use for the LOD. Because the algorithm knows how much visual difference every edge collapse is adding, it can use this information to determine what distance that amount of error is acceptable. Turning this off, means that the screen size for each LOD needs to be set by hand, which could lead to errors.
-
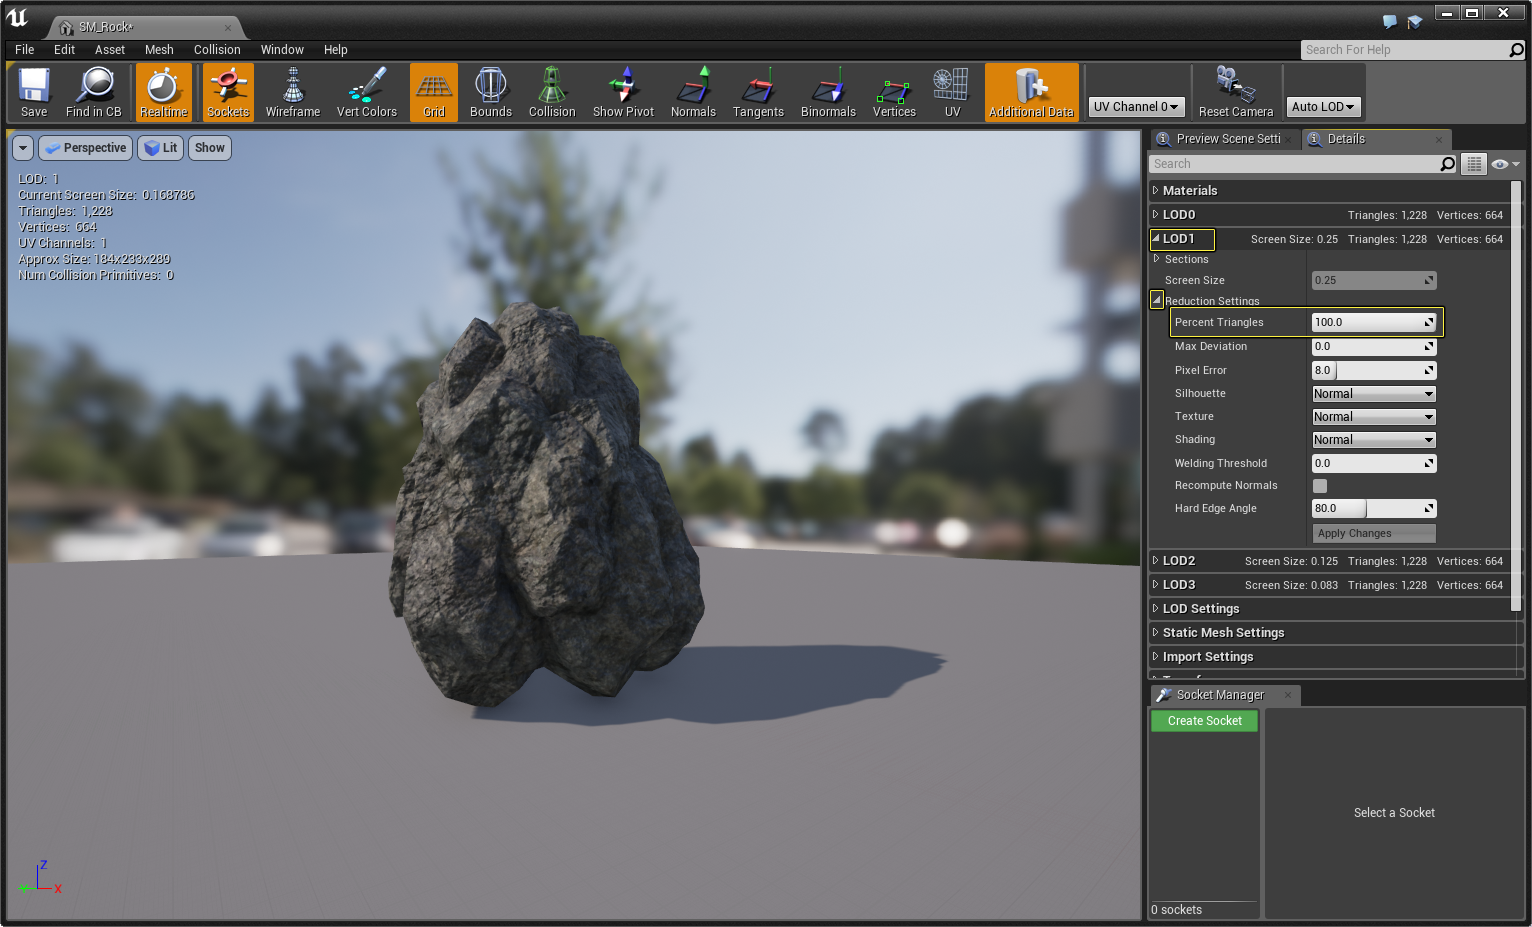
Press the small, white, triangle next to LOD1 to expand that section, and then press the small, white, triangle next to Reduction Settings .
![ALC_Reduction_Settings.png]()
Click for full image.
-
Under Reduction Settings , locate the Percent Triangle section, and set it to a value of 75 before pressing the Apply Changes button.
![ALC_LOD1_Reduction.png]()
Click for full image.
-
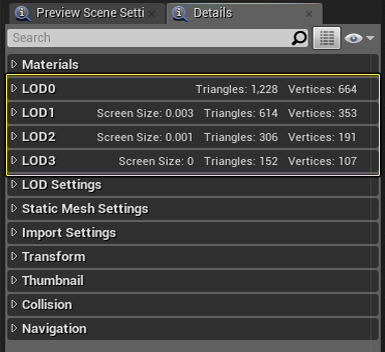
Now, expand LOD2 and LOD3 , setting the Percent Triangles for LOD2 to 25 percent, and setting the Percent Triangle for LOD3 to 12 percent. When completed, you will see a number of triangles each LOD uses next to the LOD name (like in the image below).
![ALC_LOD_FINSHED.png]()
Click for full image.
-
Now, as you move your camera closer and further away from the object in the Static Mesh Editor, you will be able to see the LODs change. If the visual change in the LODs is too hard to notice, information about the LOD change is displayed on the left side of the screen.
![ALC_Viewing_LODS.png]()
Click for full image.


With the LODs now setup for this Static Mesh, when this Static Mesh is placed in a level, it will automatically choose which LOD to display based on how far the camera is away from it.
End Result
In the following document we took a look at two different ways to use the automatic LOD generation tools UE4 has to offer. Remember that when using the automatic LOD tools, it is best to first setup and define different LOD groups that meet your project's needs and then select those various setting using the LOD Group drop down that can be found under LOD Settings.