Choose your operating system:
Windows
macOS
Linux
No matter what type of Static Mesh you put into your level, chances are that when the player looks at that object, you want it to have some type of material. This How To will cover a couple of different ways that you can apply a material to your Static Mesh.
Setup
The first thing we are going to do is set up a project and a level for us to work with. If you already have a project that you are working on, you can use that project to follow along as well. If you do not, you can start out by launching UE4 and creating a new project. In this example, we used the Blueprint First Person template, but for the purposes of this tutorial, which template you use does not matter. The important thing to point out is to make sure that if you are creating a new project, you include the Starter Content . If you do not, you will not have the assets that will be used later on in this How To and it might be more difficult to follow along. Once you have ensured that the Starter Content is included, choose a path and name for your project and click the Create Project button.
Once your project has been loaded, go ahead and locate your Content Browser . If you enabled Starter Content , you should have a folder in your Content Browser labeled Starter Content . It should look something like this:

Applying a Material via the Details Panel
The easiest way to switch the material of one copy of your Static Mesh is by highlighting that particular instance of the mesh and changing the material in the Details panel. The following section will go over how you can do that.
Inside of the Starter Content folder, there should be a folder labeled Props . Open that folder and within that folder, find the Static Mesh labeled SM_Chair .

Click on SM_Chair with the left mouse button and with the left mouse button still held down, drag your mouse into the Viewport and let go. If done correctly, this should have added a copy of the Static Mesh into your level. If you have not clicked anywhere else, the Static Mesh should still be highlighted, but if the Static Mesh is not selected, you can either click on it in the Viewport or search for SM_Chair and select it from the World Outliner . With the Static Mesh selected, the Details panel should be populated. One of the sections in the Details panel is labeled Materials . Within that section, there should be a thumbnail of the material used and a drop down menu beside it with the name of the material. By selecting the drop down menu and selecting another material, you can change the material applied to that instance of the mesh, and it will be reflected in your Viewport, as demonstrated below:
|
|
|
|---|---|
|
Normal Chair with Details |
Brick Chair with Details |
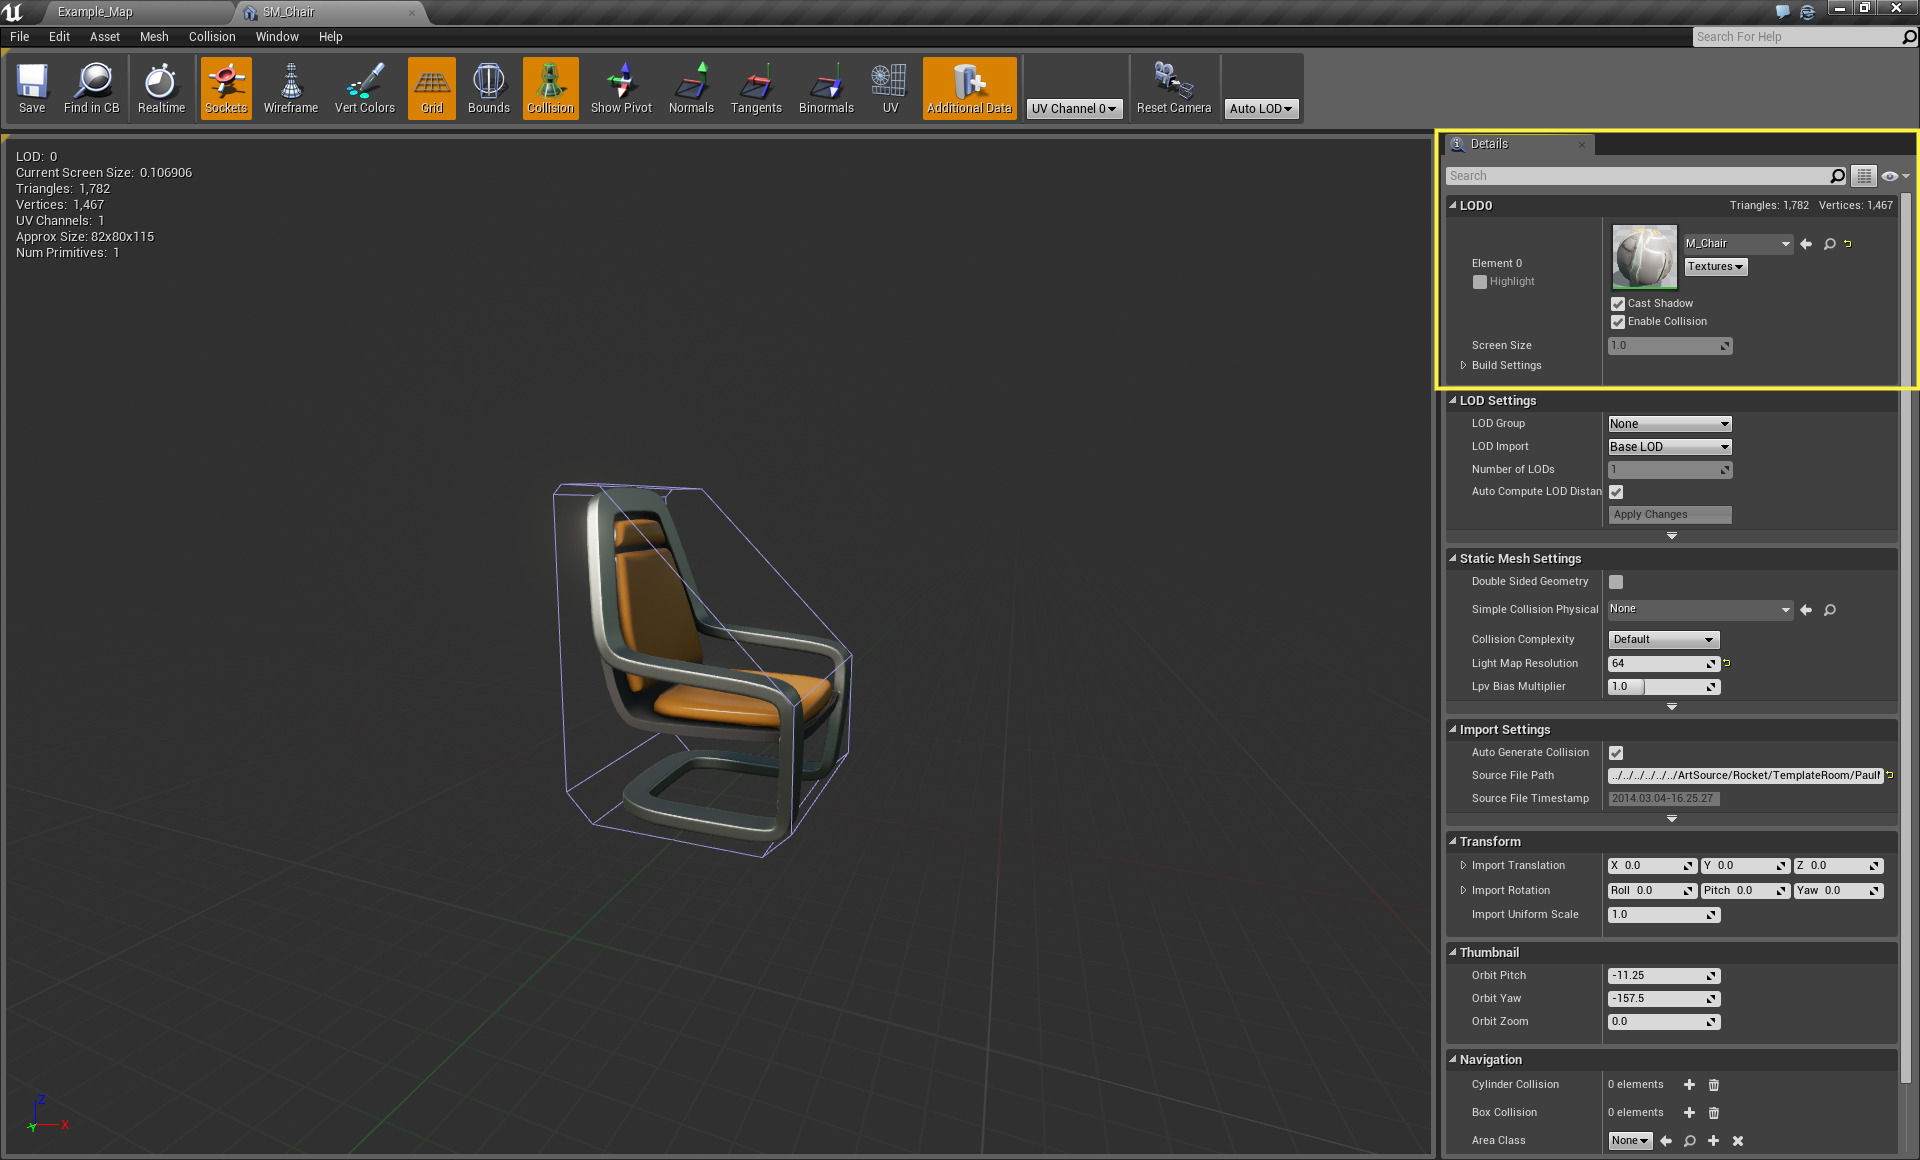
Now you can change the material of one instance of a Static Mesh in your level, but what if you wanted to change the default material of the Static Mesh itself. Well, you can actually do that from within the Static Mesh Editor. Go ahead and get back to SM_Chair within the Props folder in your Content Browser . Once you have it selected, you can access the Static Mesh Editor in two easy ways. The first way is to double-click on the mesh inside the Content Browser , the same way you can access most assets' respective editor. You can also right-click on the mesh, which will open on a context menu. From within that menu, select Edit .

After either double-clicking on the asset inside the Content Browser or selecting Edit from the right-click context menu of the asset, the Static Mesh Editor should open, and you should see something similar to what is shown below.

On the right hand side of the editor by default, is the Details panel and at the top of the Details panel, highlighted in the image above, you can see a thumbnail of the material used on the Static Mesh and a drop down menu beside it with the name of the material. By clicking on the drop down menu and selecting another material, it will change the material applied to the Static Mesh, as shown below.


After clicking Save in the Toolbar at the top of the Static Mesh Editor, the new material applied will now be the default material of the Static Mesh and any instance of the mesh that is dragged into your level will have that material applied to it unless that instance of the mesh has its default material changed like we did earlier or the default material is changed inside the Static Mesh Editor.


