Choose your operating system:
Windows
macOS
Linux
With the Audio Volume Actor , you can define areas within a Blueprint map that can be used to process sounds, then use these settings to apply reverb effects, set volumes, define the zones affected, emulate occlusion on a sound, and define the shape of the sound volume.
Transform
The Transform settings change the location, rotation and scale. Use these settings to ensure that the audio volume encompasses the area in which you want sound to be processed.

Transform properties for audio volume
-
Location: Determines the location of the origin of the audio volume.
-
Rotation: Determines the rotation of the audio volume.
-
Scale: Determines the scale (size) of the audio volume.
Audio Volume
The Audio Volume settings define which volume's settings are used when there are overlapping volumes.

Audio Volume properties
-
Priority: Determines the priority of the audio volume, which is used to ensure that in the case of overlapping or nested volumes, the correct volume is applied. The higher the number used, the higher the priority. When two overlapping volumes have the same priority, no priority is used.
-
Enabled: Toggles audio volume on or off.
In the image below, a small area is nested inside a larger one. Each space has its own audio volume (note the yellow volume outlines around the two spaces) for defining the different reverbs and ambient zone settings.
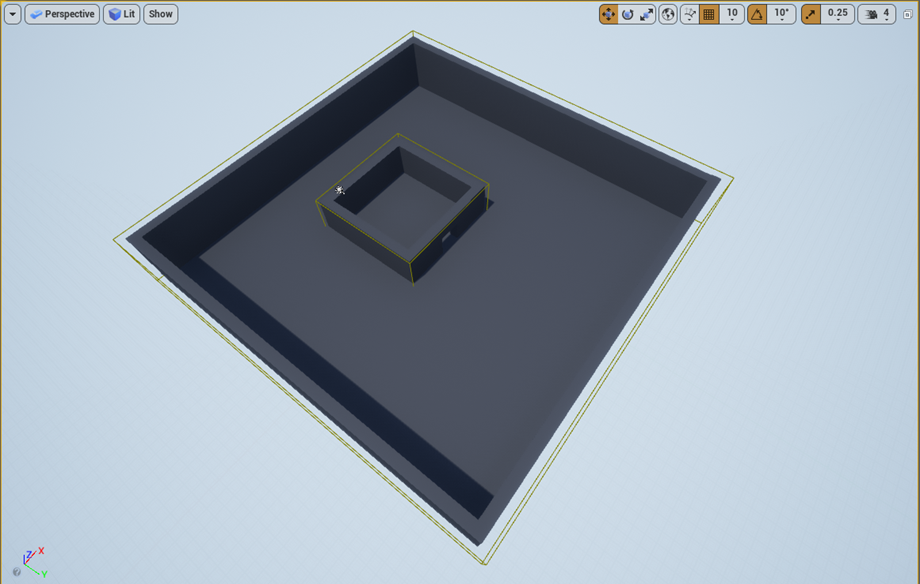
Nested audio volumes. Click to enlarge image.
If the listener is within the smaller space, they are inside both of the audio volumes, so it's necessary to define how the audio engine chooses which audio volume to use. When audio volumes overlap, the one with the higher priority is used by the audio engine.
In this case, it would make sense to set the larger audio volume to 1, and the smaller to 2. This way, when inside of the smaller space, the appropriate reverb and ambient zone settings are used.
Reverb
You can use the Reverb settings to turn audio volume on or off, select a reverb preset for use when activated, and define the volume of the reverb signal and the fade time between reverb settings.

Audio volume Reverb settings
-
Apply Reverb: Enables or disables the reverb effect assigned below.
-
Reverb Effect: Determines the Reverb Effect asset that will be used. There are a number of reverb presets included within the engine content, or you can create your own reverb effect assets within the Content Browser.
-
Reverb Plugin Effect: Determines the Reverb Plugin Effect that will be used. If you're using a third-party audio plugin (such as Google Resonance), select the reverb effect that the plugin will use from the dropdown menu options.
-
Volume: Set the volume level for the reverb effect. The default setting is 0.5.
-
Fade Time: The time (in seconds) it takes to interpolate from the current reverb settings to the new ones as you enter and leave audio volumes. Determines the transition times between areas within a Level—there is a balance to be struck between how responsive the system is and how much movement the settings have to make to reach the new values. For example, if you were moving from a space with very little reverb to one with very long reverb times, then you might want to use longer transition times to avoid abrupt changes when moving between spaces. A move between spaces with similar reverb settings could transition more quickly.
Brush Settings
Brush settings define the overall shape of the audio volume, and set the initial size of the volume (before the scaling values from above are applied).

Audio volume Brush settings
Select the Brush Shape for the audio volume that would provide best coverage for the area. The remaining settings below Brush Shape change based on the shape chosen.
You can use Geometry Editing mode to alter any of the shapes provided to create bespoke (customized) shapes that better fit specific areas within your Level. Some brush shapes can be set to hollow, and while this can work (for instance, when the audio volume only has an effect between the interior and exterior walls), it is not recommended for general audio use. The Brush Editor was primarily designed to build geometry for level designers, so some of the available shapes may be impractical for audio use.
Brush Shapes
Click the Brush Shape dropdown menu to display and select from a list of built-in shapes:

Each brush shape has its own settings.
Box (CubeBuilder)
The default shape, this shows up as CubeBuilder in the dropdown menu. This shape produces a cube-shaped audio volume.
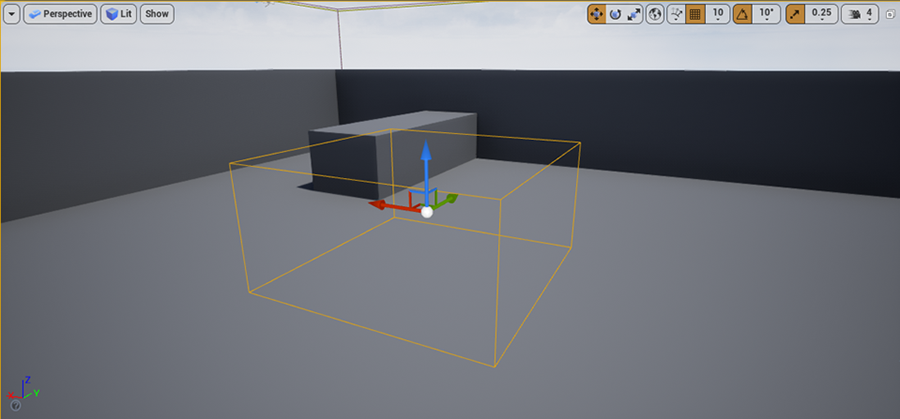
Audio volume with a box shape (CubeBuilder). Click image to expand.
For the Box Brush shape, the following options are available:
-
X, Y, Z: Determines the initial size of the box-shaped audio volume when it is first created. These values are then scaled according to the values of the Scale property above.
-
Wall Thickness: Only active when the Hollow option is enabled, and determines the thickness of the walls if the audio volume is set to be hollow.
-
Hollow: Determines whether the audio volume is hollow. This is an inherited feature from the parent volume class and is not recommended for general audio use.
Cone (ConeBuilder)
Select ConeBuilder in the dropdown menu to produce a cone-shaped audio volume.
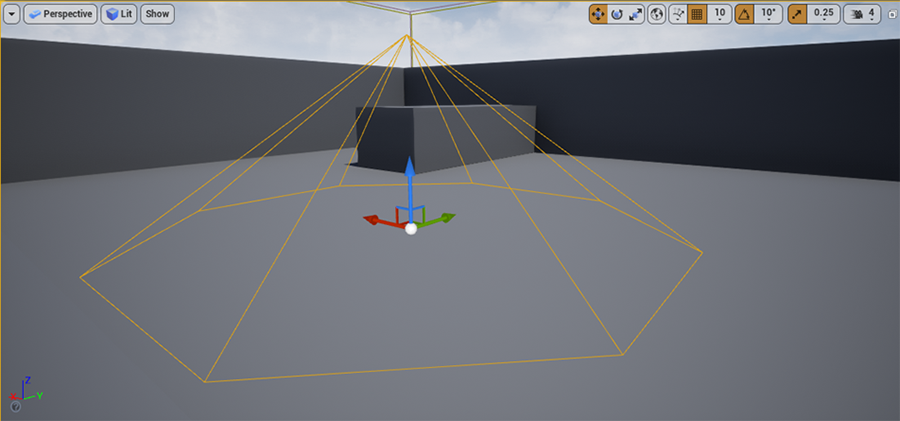
Audio volume with a cone shape (ConeBuilder). Click image to expand.
The following options are available for this shape:
-
Z: Determines the initial height of the cone, from base to tip. It is then scaled according to the Z value within the Scale property under Transform settings.
-
Cap Z: Only active when the Hollow option is enabled. It determines the height of the inner cone.
-
Outer Radius: The initial radius of the cone-shaped audio volume, which is then scaled according to the X and Y values of the Scale property under Transform settings. This allows you to produce non-symmetrical cones.
-
Inner Radius: Only active when the Hollow option is enabled. It determines the radius of the inner cone.
-
Sides: Determines the number of sides of the cone, which in turn affects how closely the base approximates a circle.
-
Hollow: Determines whether the audio volume is hollow. This is an inherited feature from the parent volume class and is not recommended for general audio use.
Curved Stair (CurvedStairBuilder)
Select CurvedStairBuilder in the dropdown menu to produce a curved-stair-shaped audio volume. This shape is inherited from the parent volume Class. While it can be used for audio, it may not be practical.
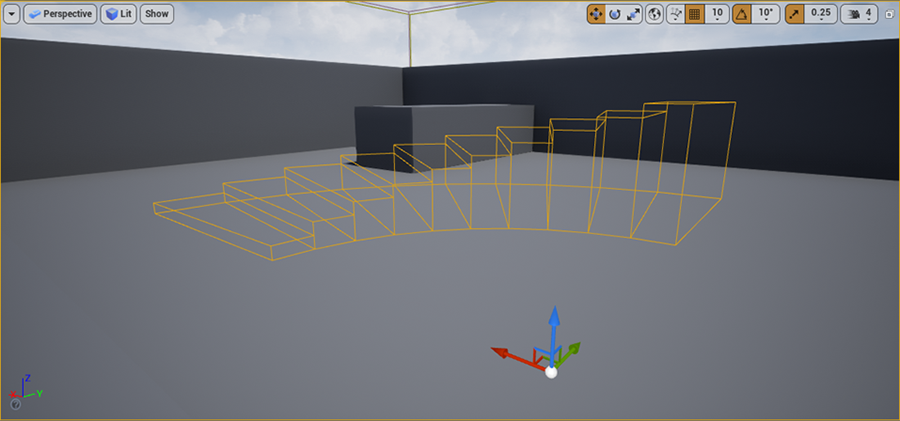
Audio volume with a curved-stair shape (CurvedStairBuilder). Click image to expand.
The following options are available for this shape:
-
Inner Radius: Determines the initial inner radius of the curved-stair audio volume. This value is scaled according to the X and Y values of the Scale property above.
-
Step Height: Sets the initial height of the steps within the curved-stair audio volume. This value is scaled according to the Z value of the Scale property above.
-
Step Width: Determines the width of the steps within the curved stair audio volume.
-
Angle of Curve: The angle of the total curve of the curved stair audio volume.
-
Num Steps: The number of steps within the curved stair audio volume.
-
Add to First Step: The amount the volume should drop below the level of the first step.
Cylinder (CylinderBuilder)
Select CylinderBuilder in the dropdown menu to produce a cylinder-shaped audio volume.
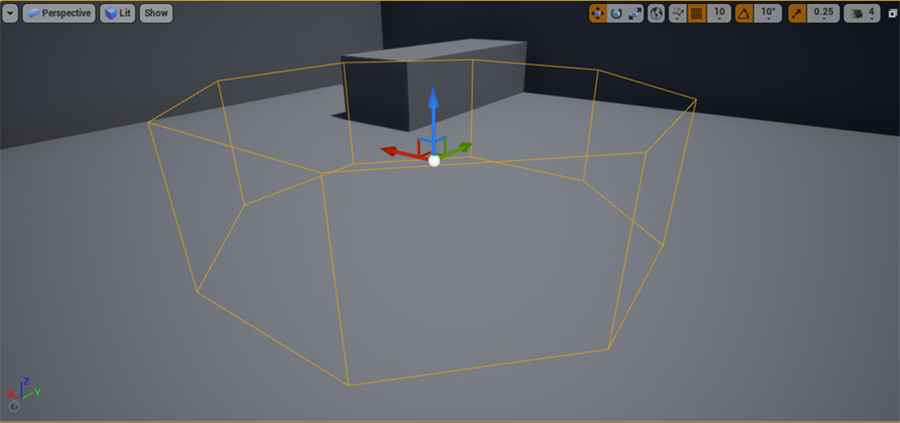
Audio volume with a cylinder shape (CylinderBuilder). Click image to expand.
The following options are available for this shape:
-
Z: Determines the initial height of the cylinder. It is then scaled according to the Z value within the Scale property under Transform settings.
-
Outer Radius: The initial radius of the cylinder-shaped audio volume, which is then scaled according to the X and Y values of the Scale property under Transform settings. This allows you to produce non-symmetrical cylinders.
-
Inner Radius: Only active when the Hollow option is enabled. It determines the radius of the inner cylinder.
-
Sides: Determines the number of sides the cone has, which in turn affects how closely the base approximates a circle.
-
Hollow: Determines whether the audio volume is hollow. This is an inherited feature from the parent volume class and is not recommended for general use.
Linear Stair (LinearStairBuilder)
Select LinearStairBuilder in the dropdown menu to produce a linear-stair-shaped audio volume.
This shape is inherited from the parent volume Class. While it can be used for audio, it may not be practical.
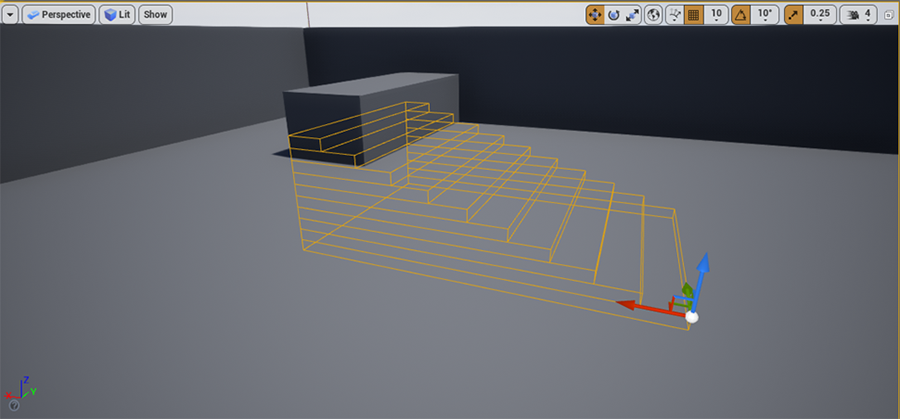
Audio volume with a linear-stair shape (LinearStairBuilder). Click image to expand.
The following options are available for this shape:
-
Step Length: Determines the initial length (depth) of the steps within the linear-stair audio volume. This value is scaled according to the X value of the Scale property above.
-
Step Height: Determines the initial height of the steps within the linear-stair audio volume. This value is scaled according to the Z value of the Scale property above.
-
Step Width: The width of the steps within the curved stair audio volume. This value is scaled according to the Y value of the Scale property above.
-
Num Steps: The number of steps within the curved stair audio volume.
-
Add to First Step: The amount the volume should drop below the level of the first step.
Sphere (TetrahedronBuilder)
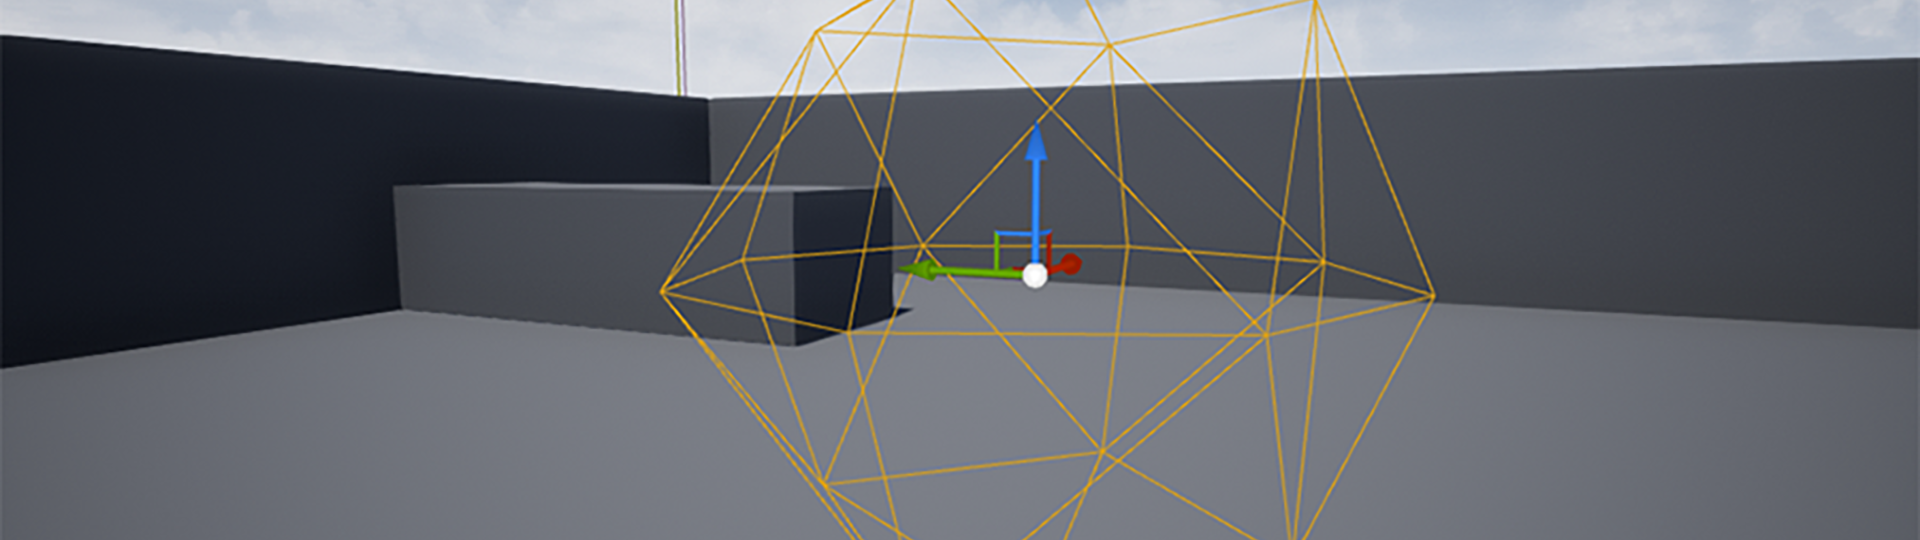
Select TetrahedronBuilder in the dropdown menu to produce a spherical audio volume.
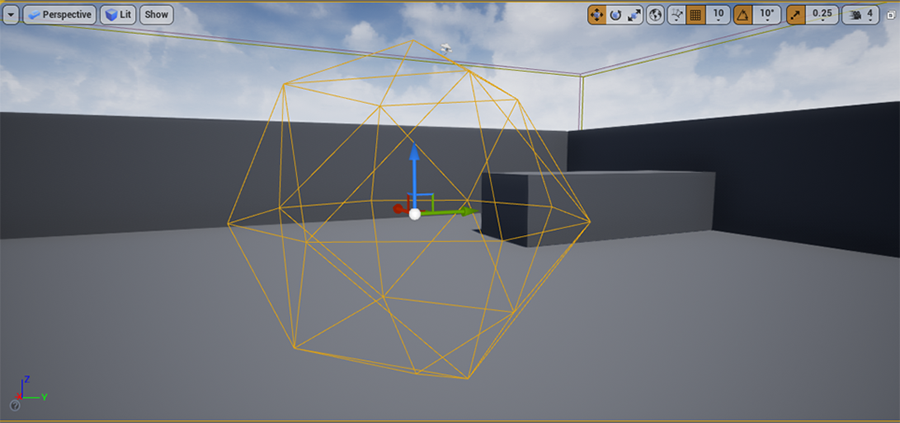
Audio volume with spherical shape (CylinderBuilder). Click image to expand.
The following options are available for this shape:
-
Radius: Determines the initial radius of the sphere. It is then scaled according to the X, Y, and Z values within the Scale property under Transform settings. This allows you to produce non-symmetrical spheres.
-
Tessellation: Sets the number of iterations the audio volume will use to calculate the sphere shape, which influences how closely the base approximates a sphere.