Choose your operating system:
Windows
macOS
Linux
Along with playing videos inside your Unreal Engine 4 based projects, you can enable players to control the playback of your videos with a series of Blueprint nodes.
In this how-to, we provide a way for the Player to control playback of a video by creating the ability to pause, rewind, fast-forward, and resume playback of a video in progress.

Not all player Plug-ins may support fast forward and/or reverse playback. Please refer to the Media Framework Technical Reference page for more information.
Initial Setup
First, we'll locate our media and set up a folder in the Content Browser. This will lay a foundation we can later build upon in Blueprints.
For this how-to we are using the Blueprint Third Person Template project with Starter Content enabled. You will also need a video for playback, you can use your own or right-click and download this Sample Video.
-
In the Content Browser expand the Sources panel and create a folder called Movies. Then, right-click on the new folder and select Show in Explorer .
![ControllingPlayback_01.png]()
-
Drag the Sample Video (or your supported video) into the Content>Movies folder of your project on your computer.
![ControllingPlayback_02.png]()
To ensure that your video content is packaged and deployed with your project, your content must reside in the Content>Movies folder of your project.
-
Inside your project, create a Media Player and associated Media Texture asset called MediaPlayer and MediaPlayer_Video respectively.
-
Create a File Media Source asset called Video and inside it, point the File Path to the video added in Step 2 .
![ControllingPlayback_03.png]()
-
Open your Media Player asset and disable the Play on Open option.
![ControllingPlayback_04.png]()
In this example, we are going to give playback control to the Player, rather than automatically start playback once we open our Media Source.
-
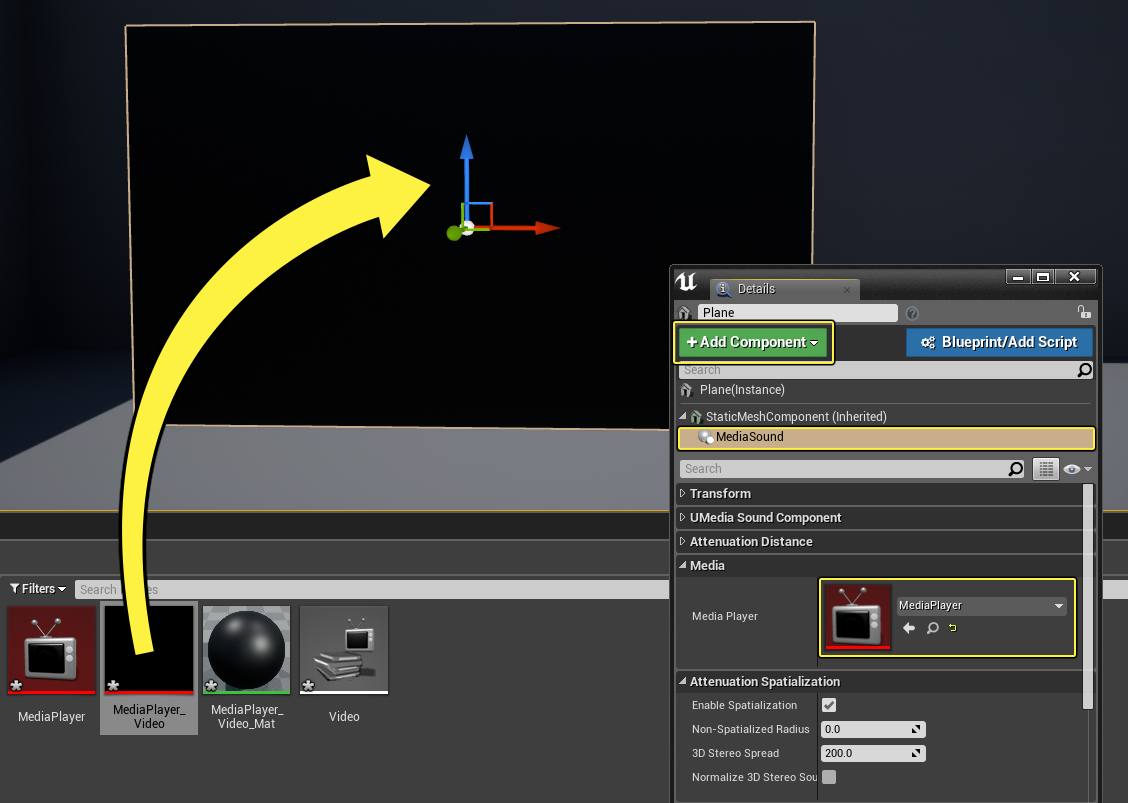
In the Place Actors panel under Basic, drag a Plane into the level and resize as desired (Place Actors can be found under the Window tab if it's not already enabled).
-
Drag the MediaPlayer_Video texture onto the Plane , then in the Details panel for the Plane, add a Media Sound Component set to use your Media Player asset.
![ControllingPlayback_05.png]()
Click for full image.


Blueprint Setup
Next, we want to set up our initial Blueprint, so later we can add functions to it.
-
From the Main Toolbar, click the Blueprints button then select Open Level Blueprint .
![ControllingPlayback_06.png]()
-
In the Level Blueprint , create a variable called MediaPlayer (of the Media Player Object Reference type) and set it to point to your MediaPlayer asset.
-
Hold Ctrl and drag the MediaPlayer variable into the graph and use Open Source and Event Begin Play to open your Video File Media Source asset.
![ControllingPlayback_07.png]()
Alternatively, you can use the Open Source Latent node (instead of the Open Source node) to open the specified media source with options and will delay the execution of the Completed output pin until after the source file has been opened.
![Open_Source_Latent.PNG]()
This can be useful when you'd like to do something like set the play rate of the source.


Play/Pause - Up
-
Add an Up keyboard event connected to a Flip Flop and off your Media Player variable, use Play and Pause as shown below.
![ControllingPlayback_08.png]()
When the Player presses the Up arrow keyboard key, the Media Source will start playing while pressing a second time will pause the video.
Pausing corresponds to setting the Play Rate to 0.0, however not all Media Sources support pausing (for example, Web Cam and other video capture hardware sources. You can use the Can Pause Blueprint node to determine if a Media Source supports pausing.

Rewind/Fast-Forward - Left/Right
-
Add Left and Right keyboard events, then off your Media Player variable use Set Rate with the left key at -2 and the right key at 2 .
![ControllingPlayback_09.png]()
This will enable the Player to press the left arrow keyboard key to set the Play Rate of the video to -2 (playing the video in reverse at double speed as a value of 1.0 is normal forward playback).
When pressing the right arrow keyboard key, the video will fast forward at double the normal playback speed.
You could add additional Blueprint logic to determine the number of times the Player presses the rewind or fast-forward keys and increase or decrease the Play Rate from 2x to 4x or 6x speeds or higher.
Even if the Player Plug-in supports Play Rates other than 1.0, the actual playback rates that can be selected will depend on the Media Source in use. You can check supported rates with the Get Supported Rates function.
![SupportRates.jpg]()
Keep in mind there is a distinction between Thinned and Unthinned rates. Thinned means that some frames will be skipped at this rate, while Unthinned means that all frames will be decoded at this rate.


Close/Resume - Down
-
Add a Down keyboard event connected to a Flip Flop , then off a Media Player reference, use the Get Time function call.
![ControllingPlayback_10.png]()
The Get Time function call will return the current playback time which we will store and use when we want to reopen and resume playback of our video.
-
Right-click on the Return Value of the Get Time node and promote it to a variable called Stop Time , then connect all nodes to a Close function call as shown.
![ControllingPlayback_11.png]()
This will close the Media Player when pressing the down arrow keyboard key, but store the current time in which the Media Player was stopped to a variable.
-
Off the B pin of the Flip Flop use the Open Source node and set the Media Source to your Video Media Source.
![ControllingPlayback_12.png]()
This will re-open your video but will open it from the beginning of the video which we will address in the next few steps.
-
Drag off the Media Player reference and use the Assign On Media Opened Event Dispatcher and connect as shown.
![ControllingPlayback_13.png]()
This will create an Event Dispatcher that will call the connected Event only when the Media Source has been fully opened. When issuing commands to a Media Player, it's a good practice to do so in this manner as it ensures that the Media Source has been opened before attempting to tell it to do something. If we were to issue a command to the Media Player directly after opening it, there is no guarantee that the Media Source has been opened fully and can receive commands which may cause the command to fail.
-
Off your Media Player reference, call the Seek function followed by the Play function.
-
Create a Stop Time variable and connect it to the Time pin on the Seek node. Then connect the Seek and Play nodes to the OnMediaOpened event as shown.
![ControllingPlayback_14.png]()
Now when the Player presses the down arrow key, the current time is stored before closing the Media Player. When pressing down again, the Video Media Source is opened and when it becomes fully opened, the video moves to the specified Stop Time before playing the video (resuming playback).
-
Close the Level Blueprint and click the Play button from the Main Toolbar to play in the Editor.


End Result
You will now be able to use the Up , Down , Left , and Right arrow keys to control the playback of the video.
Pressing Up will play/pause the video, pressing Down will close/resume the video, pressing Left will rewind, and pressing Right will fast forward.