Choose your operating system:
Windows
macOS
Linux
Take Recorder enables the fast iteration of recording performances and quickly reviewing previous takes for virtual production workflows. You can easily record animations from motion capture linked to characters in the level, as well as actual Live Link data for future playback. By recording takes and adding them to Sequencer, productions of all sizes and any number of takes can easily be accommodated.

The most common usage of Take Recorder will be with projects using Live Link . Because Take Recorder enables you to quickly record performances, using Live Link is an easy way to update and iterate on previous takes.
For this how-to, we use Live Link with the Face AR Sample. If you would like to follow along, see the Face AR Sample documentation for how-to set up Editor and Live Link.
Using Take Recorder
With the connection established, we can now use Take Recorder to capture a sequence.
Make sure you enable the Take Recorder plugin. You can do this by navigating to Edit > Plugins and searching for Take Recorder.
-
In your UE4 project, navigate to Window > Take Recorder .
-
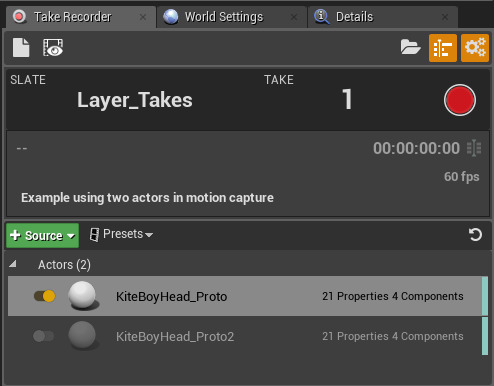
Select your Actor from the World Outliner. In Take Recorder, select + Source > From Actor > Add 'Actor Name' .
![adding_a_source_from_actor]()
-
Select the Actor from the list. Under the Actor settings, make sure to change Record Type to the appropriate setting.
-
Select Play and then select the red record button in Take Recorder. The recording displays data in real-time in Sequencer, and you can see the motion capture live in the viewport.
![record_button_callout]()
-
When you are finished recording, click the Stop button in Take Recorder.
You can record as many takes as you need by repeating this process.
Organizing and Reviewing Your Takes
After you finished recording, there are two ways to view your takes in Sequencer. First, you can view the take you just recorded by selecting the Review the Last Recording icon (floppy disk with an eye). This allows you to review recorded tracks in Sequencer. If you decide you do not like the take and want to record again, you can switch back to record mode by selecting the Return Back to the Pending Take arrow icon.

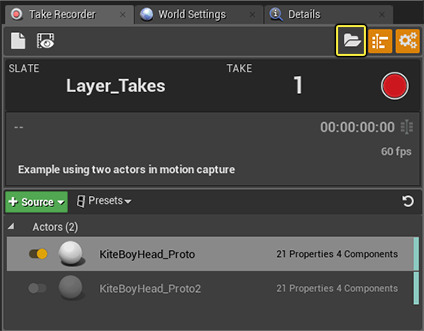
To view your takes, select the Take Browser icon in Take Recorder. A separate window tab will appear with the folders of all your takes in the Content Browser. The Take Browser uses the location saved in the Take Recorder User Settings.


The default save location is under
Cinematics > Takes
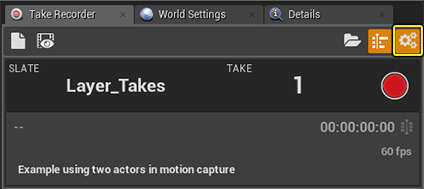
To change the default save location in Content Browser, select the Take Recorder
Settings
icon. Under
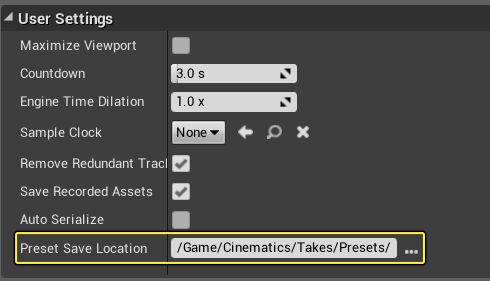
User Settings
, change the
Preset Save Location
to the new location.


To review the sequence, double-click the file from the Content Browser. You can playback the sequence the same way as any other sequence.

There is also assigned metadata for each sequence that you can see by hovering over a sequence in the Content Browser. You can also see the metadata by using the Column View Type.

Using Layered Take Recording
Layered Take Recording allows you to add additional recorded tracks to an existing sequence. This is particularly helpful when using motion capture for multiple actors in a sequence.
-
Record your first take with "Actor A" as many times as you need. Then, choose the last or best take, and select Review the Last Recording to switch into review mode.
-
In review mode, select the clapboard icon Start a new recording using this Take as base .
![Clapboard_icon_callout]()
The mode switches back to record, and you can see the take from Actor A in Sequencer.
-
Add a new Source for the second actor, "Actor B". Click the toggle button to disable "Actor A".
![disable_actor]()
-
Record the take with Actor B. Once you are finished recording, select Review the Last Recording to playback the recordings simultaneously and preview the takes together. In this example, we hid Actor A from the viewport to record Actor B. You may or may not want to do this depending on what you are recording.
You can record and stack as many takes into a single sequence as you want. When you are finished, your entire sequence is saved as a single file, and each individual take is saved into a subfolder.


