Choose your operating system:
Windows
macOS
Linux
When you launch Unreal Engine (UE4), the Unreal Project Browser automatically displays.
Select a Category and Template
-
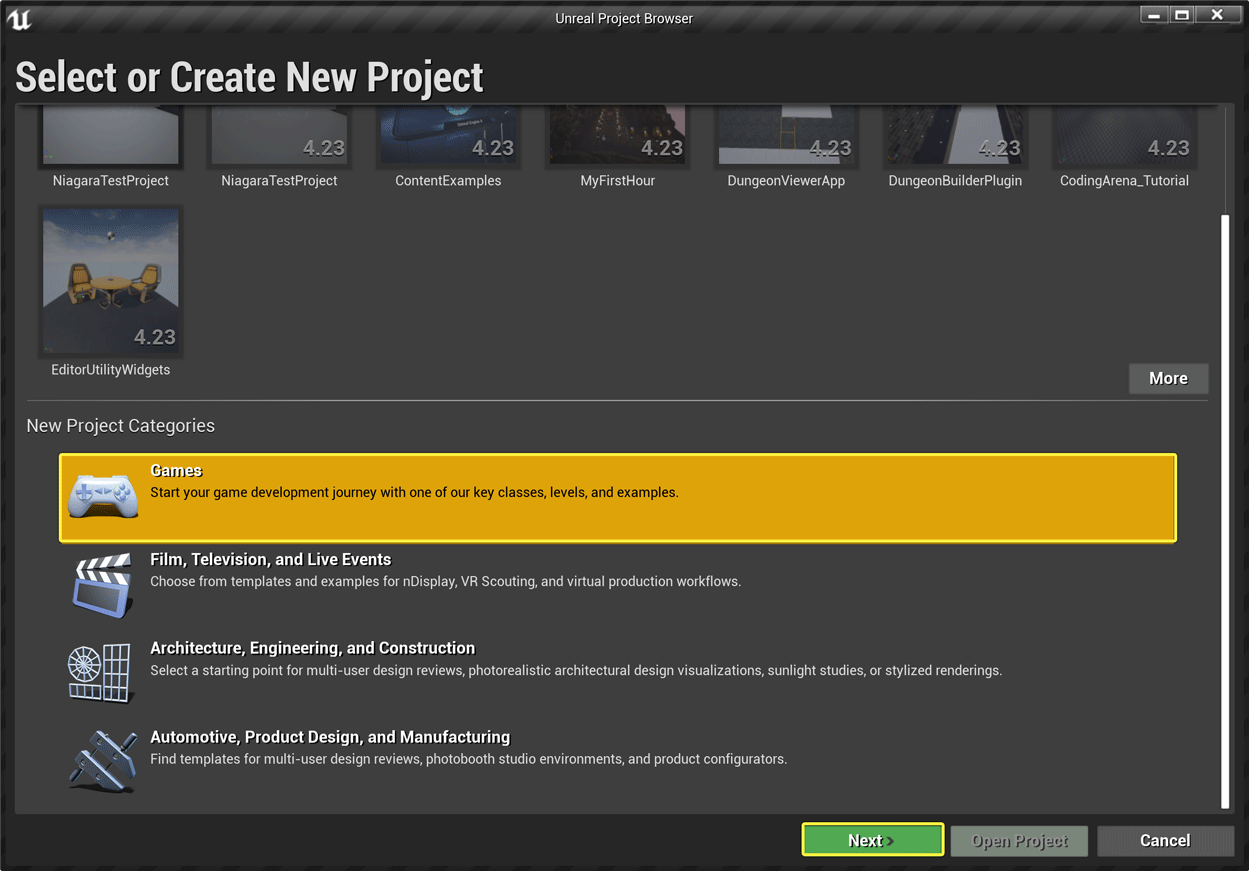
Under New Project Categories , select the development category that best matches your industry. In the example below, Games is selected. You can also select Film, Television, and Live Events ; Architecture, Engineering, and Construction (AEC) ; or Automotive, Product Design, and Manufacturing (APM) .
![Select Category]()
Click image for full size.
-
Select a template for your project, then click Next . The Project Settings page displays.
![Select Template]()
Click image for full size.
The templates shown are for the Games category. For other industries, the following templates are available:
-
Film, Television and Live Events
![Film, TV and Live Events Templates]()
-
Automotive, Product Design, and Manufacturing
![APM Templates]()
-
Architecture, Engineering, and Construction
![AEC Templates]()
-


Select Project Settings
-
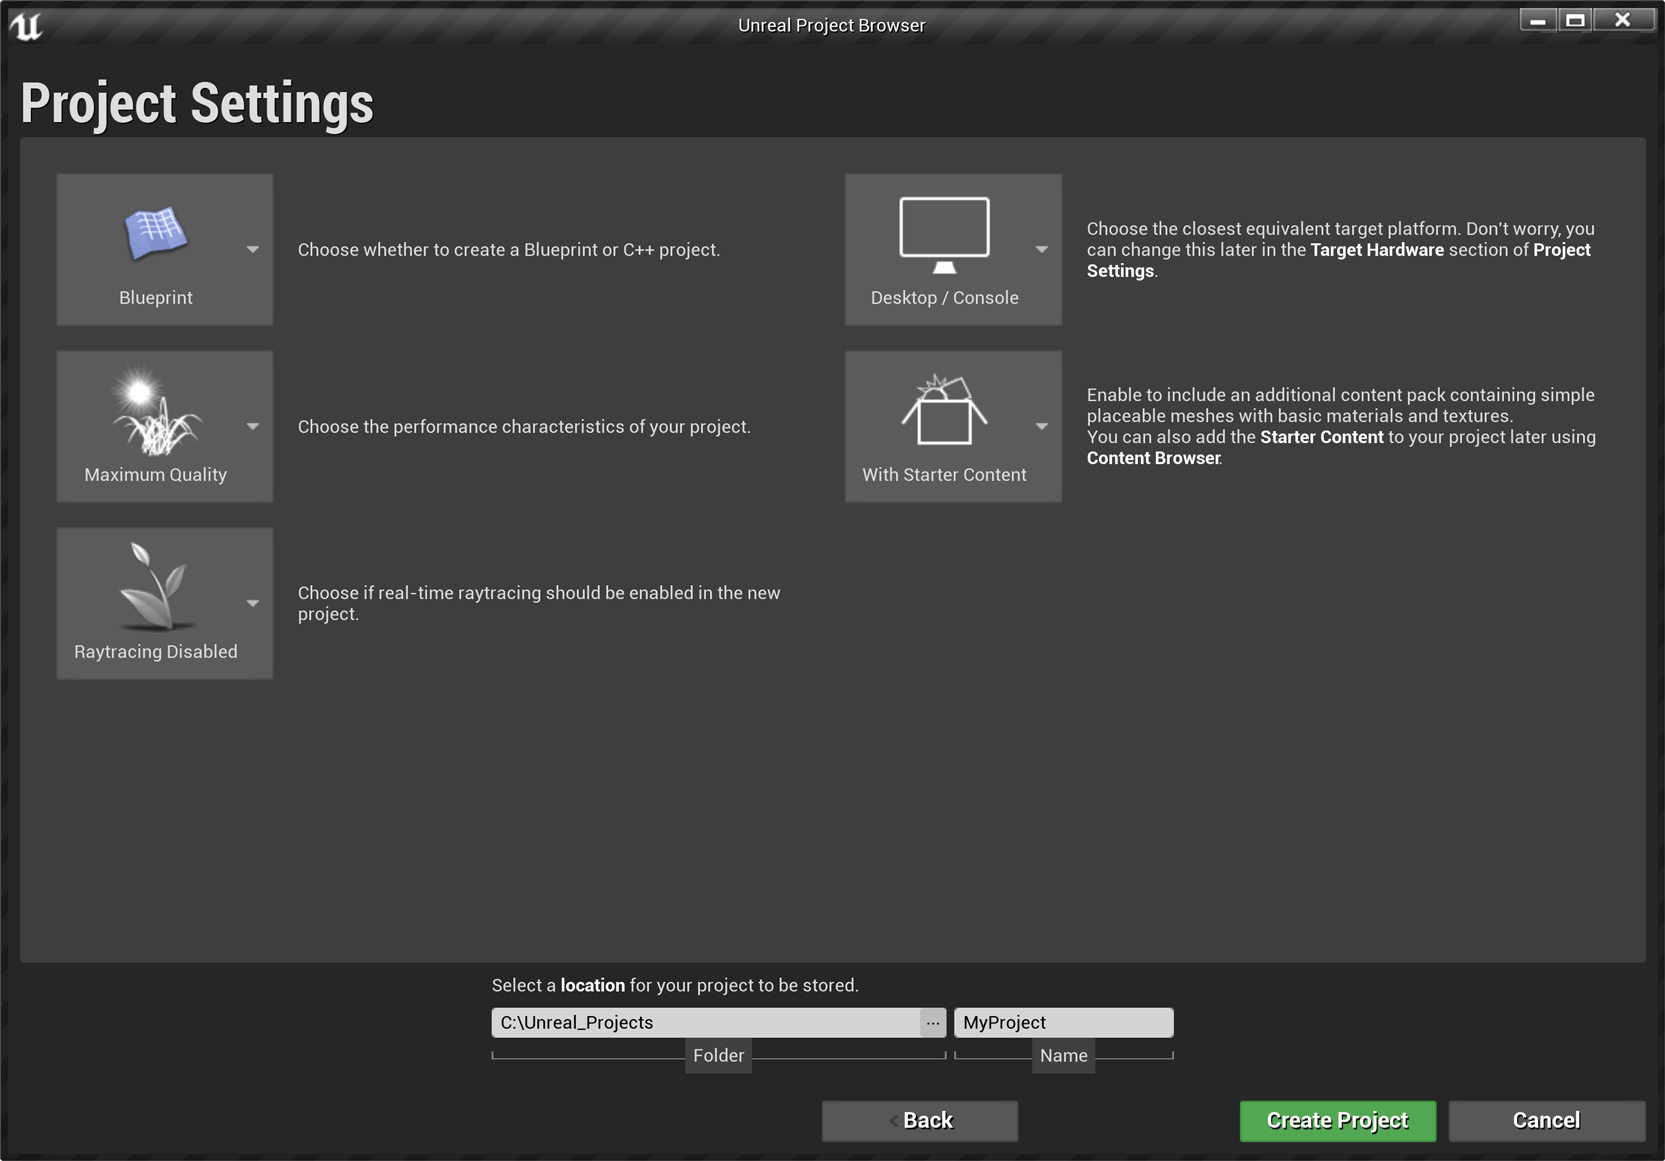
On the Project Settings page, you can choose the quality/performance level, target platform, whether to include Starter Content, and more.
![Project Settings Fullscreen]()
Click image for full size.
-
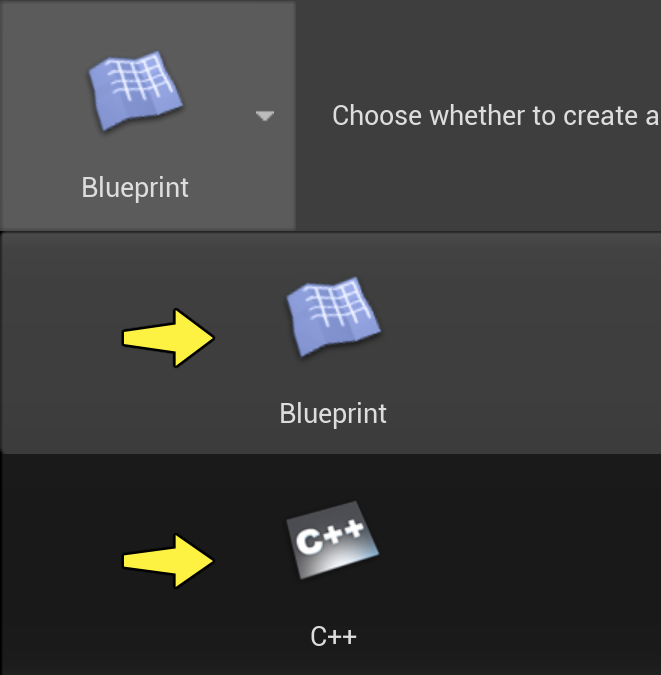
First, click the Blueprint dropdown. Select either Blueprint , or C++ . Choose Blueprint if you want to build your project in the Unreal Editor, and use the Blueprint Visual Scripting system to create interactions and behavior. Choose C++ if you want to build your project by programming with C++ in Visual Studio.
![Blueprint or Code]()
Click image for full size.
-
Next, click the Maximum Quality dropdown. If you are developing your project to be viewed on a computer or game console, choose Maximum Quality . If you are developing your project to be viewed on a mobile device, choose Scalable 3D or 2D .
![Quality]()
Click image for full size.
-
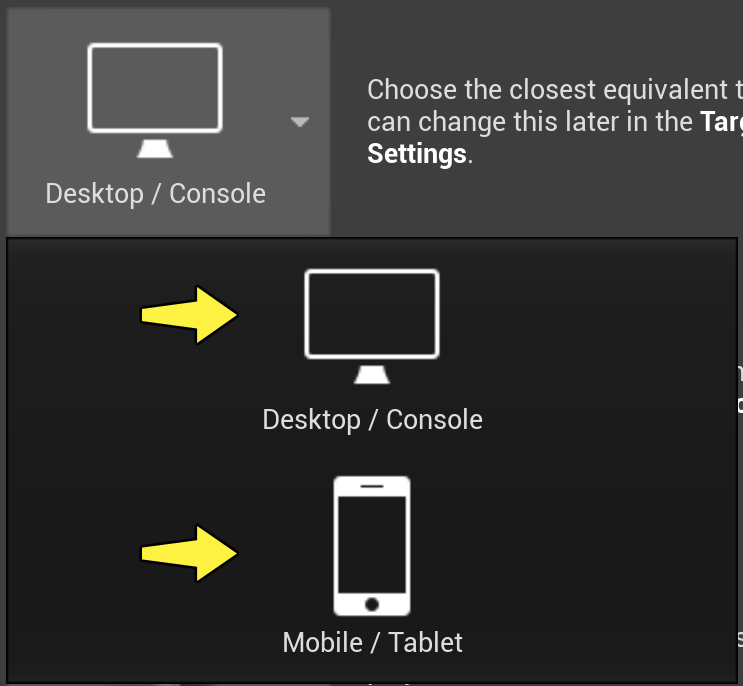
Next, click the Desktop/Console dropdown. If you are developing your project to be viewed on a mobile device, choose Mobile/Tablet . Otherwise, leave it set to Desktop/Console .
![Platform]()
Click image for full size.
-
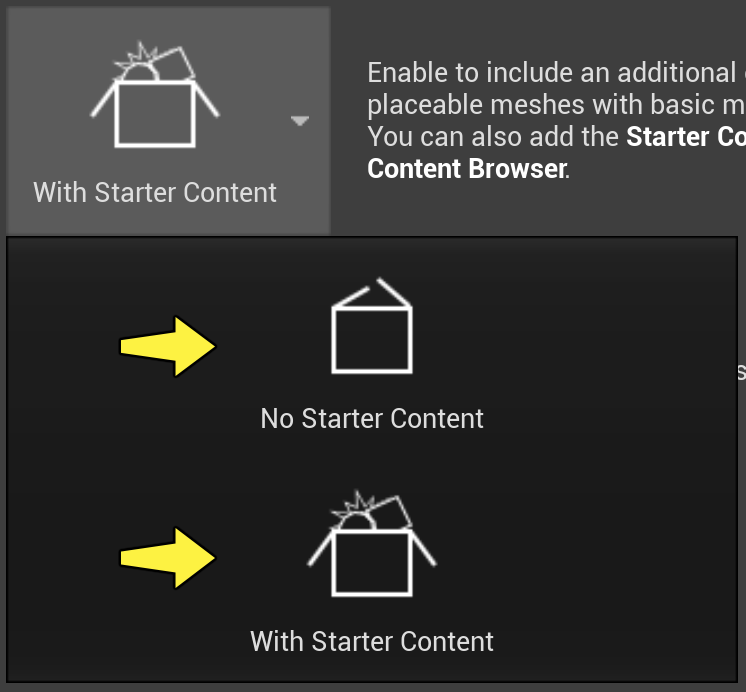
Next, click the With Starter Content dropdown. If you have your own assets and do not need the Starter Content, choose No Starter Content . If you would like some basic assets to start with, choose With Starter Content .
![Starter Content]()
Click image for full size.
-
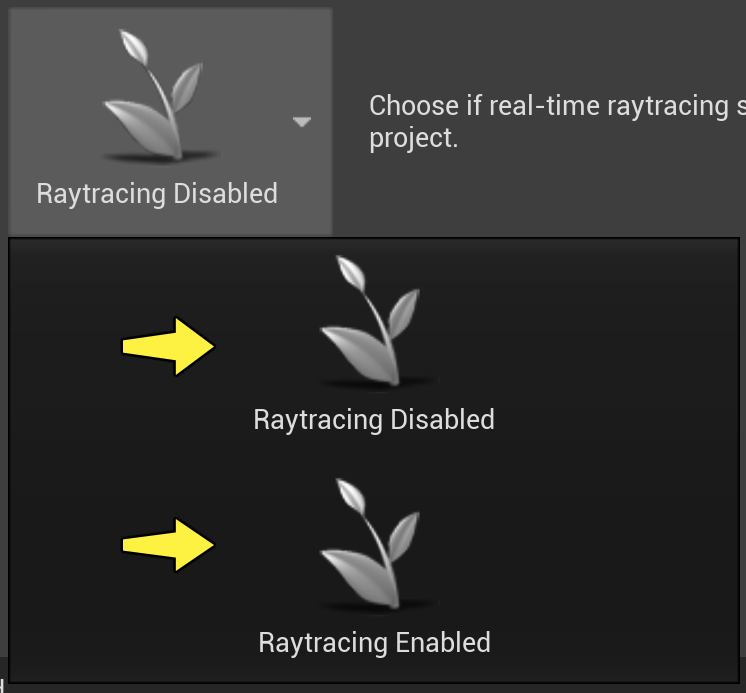
Next, locate the Raytracing Disabled dropdown. If your project needs to be viewed with real-time raytracing, choose Raytracing Enabled . If not, leave it set to Raytracing Disabled .
![Raytracing]()
Click image for full size.
-
Finally, choose where you want to store your project, and give your project a name. Click Create Project to finish.
![Name and Location]()
Click image for full size.