Choose your operating system:
Windows
macOS
Linux
When you want to play an audio effect in Niagara, such as in a particle simulation when a particle collides with something else, there are several ways to do this directly from within Niagara.
Each method has its pros and cons. Following is a brief overview of each.
You can find samples of these methods in the Content Examples project on the Epic Games Launcher: Unreal Engine > Learn > Engine Feature Samples > Content Examples .
Using the Play Audio Module
For a one-shot sound effect , the Play Audio module is the simplest way to play sound effects from Niagara. It is useful for event-driven effects, such as a reaction to a particle collision. It is also the cheapest solution.
-
Add the Play Audio module to your emitter.
![From the Play Audio module, you can set up play conditions.]()
-
From Sound to Play , select a sound from the dropdown.
-
Set up the PlayAudio condition.

This fires a one-shot, fire-and-forget effect using the configured values for pitch, volume, and so on. Once an effect is triggered, it cannot be changed or stopped, and continues to play even if the particle simulation is stopped.
|
Play Audio Module |
|
|---|---|
|
Pros |
Cons |
|
|
|
|
Audio Module Example
-
Download the Content Example project , then open it.
-
In the Content Browser, use Filters to search for Play Audio .
![Set play audio in the Content Browser filter to find the audio content examples.]()
-
Double-click PlayAudio Example to open the Niagara System example.


Click to enlarge.

The system in the content examples contains different emitters . (1) Shows how to use the Play Audio module ( Play_Sound_on_Collision ). (2) Uses Persistent Audio ( Mesh_Rotational_Velocity ) where it creates the audio player data interface in the emitter stack (described below).
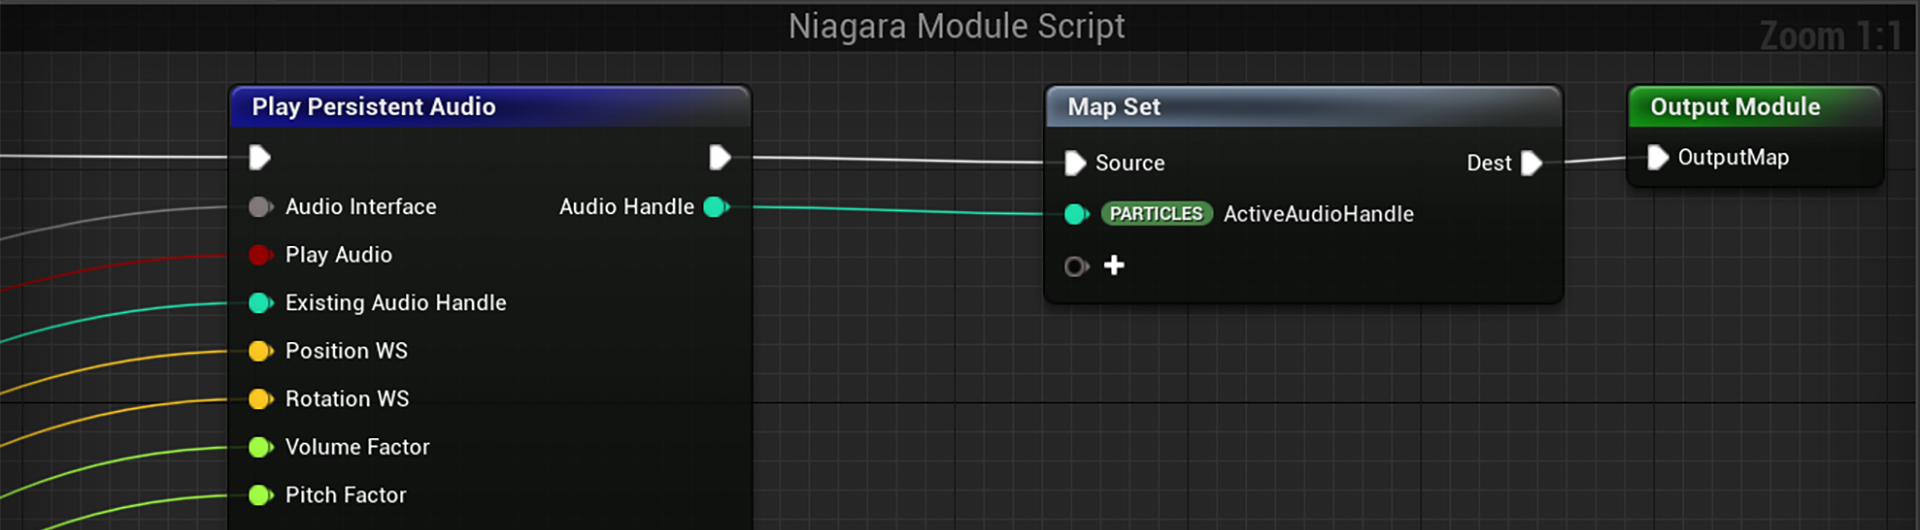
Using the Play Persistent Audio Module
This module is similar to Play Audio, but keeps a reference to each spawned sound effect so it can be updated over time.

This module also allows for some advanced features, like fading or setting sound cue parameters. However, is a bit trickier to set up than the first method because to work, it requires two modules— Play Persistent Audio and Update Persistent Audio .
Use the same audio player reference in both modules!
You can create an audio player data interface as an emitter attribute and bind it to the modules. In the screenshot above, the Emitter.CustomPlayer reference is in both modules.

The chain symbol to the left of EMITTER indicates that they are referencing an existing attribute.
By default, each module creates its own object that cannot be shared with other modules. If you want the modules to use the same object, you must create it in the emitter or system spawn script, then reference it in the modules.
To see how the Play Persistent Audio module works, in the Content sample file, use Filters to search for Play Audio , then double-click PlayAudio Example to open.

Double-click Play Persistent Audio to open the Node Graph .

Click to enlarge.
This method is useful when sound properties need to change during the simulation, such as when a sound needs to travel with the particle position.
|
Play Persistent Audio Module |
|
|---|---|
|
Pros |
Cons |
|
|
|
|
|
Using the Audio Component Renderer
The Audio Component Renderer is experimental. Use it as you would any experimental feature in Unreal Engine.
The Audio Component Renderer can be used to spawn audio components.

This is a very flexible approach, since it gives full control over the audio component, but you would need to reimplement any features from the Play Audio modules in the particle simulation (such as fading or distance-based filtering). It also does not support setting sound cues without first creating a custom audio component subclass.
Aside from special use cases where the modules do not provide enough control, the component renderer is not recommFended.
|
Audio Component Renderer |
|
|---|---|
|
Pros |
Cons |
|
|
|
|
|
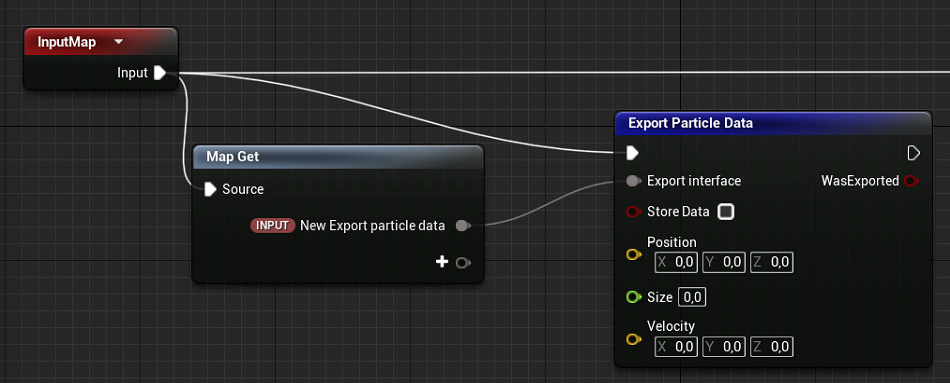
Exporting Particle Data to Blueprint
If none of the other approaches are flexible enough for your needs, you can export particle data to Blueprint or C++ and implement your audio logic there.
Click to enlarge.
To do this, use the Export Particle Data interface. To see an example in the Content Example project, search for export particle in the Content Browser.

Double-click ExportParticleDataExample for a detailed explanation on how to export data from your particle simulation.

This sample provides explanations of each event in the graph.
One advantage of the export data interface is that it also works on GPU emitters (with some added latency). And once you have the data you need in Blueprint, you can use it not only to play audio, but also to drive any number of components, such as post processing or user interface (UI) widgets.
Although this is the most flexible way to play audio, it is also the slowest and most complex to set up. You are also somewhat limited by the amount of data you can export, and need to do any mapping between audio component and particle data yourself.
|
Export Particle Data to BP |
|
|---|---|
|
Pros |
Cons |
|
*Most flexible approach |
|
|
|
|