Choose your operating system:
Windows
macOS
Linux
Most computer graphic productions (films, games, or other forms) typically generate, store, and transmit a great deal of 3D data. That data may come from various sources (animators, lighting or shading artists, modelers, fx artists, and more) who use a wide range of applications (Unreal Engine, Maya, Houdini, Blender) in the pipeline and has historically had its own special form of scene description tailored to the specific needs and workflows of the task/application, which may not be readable or editable by any other application.
The Universal Scene Description (USD) format was developed by Pixar to address the need to robustly and scalably interchange and augment arbitrary 3D scenes that may be composed of many elemental assets. USD not only provides a rich toolset for reading, writing, editing, and rapidly previewing 3D geometry and shading; but it also provides for the interchange of elemental assets (for example, models) or animations.
Unlike other interchange packages, however, USD also enables assembly and organization of any number of assets into virtual sets, scenes, and shots, which you can then transmit them from application to application, and non-destructively edit them (as overrides), with a single, consistent API, in a single scenegraph.
USD in Unreal Engine 4
Prior to the 4.24 release, there were two ways to work with USD files in Unreal Engine, but each had significant drawbacks:
-
Import USD Plugin (C++) : This provided the ability to import objects from USD files into Unreal Assets and to spawn Actors in the Level. However, you could only import Static Meshes (no animations, cameras, materials or lights). This was more of an interexchange format than an efficient workflow.
-
Python USD Import/Export : The bi-directional Python workdlow offered similar capabilities to C++, with the added ability to export objects back out to USD files. However, because this method was implemented as Python script, its overall performance was slower. The implementation also had limited support for importing and exporting.
The 4.24 Engine release adds a new way to work with USD files: the USD Stage Actor and USD Stage Editor .
Instead of converting USD data into native Unreal Engine Assets like Static Meshes and Materials, you can work natively with your USD data using the new USD Stage Actor and the USD Stage Editor window. This makes it faster to get your USD data into Unreal, gives you a clearer view of how your USD content was originally structured, and handles live updates as you make changes to the source USD file on disk.
This workflow also offers a host of other improvements:
-
The ability to load
.usd,.usda(ASCII) and.usdc(binary) formats. -
You can visualize the USD Scenegraph and Layers hierarchy.
-
Support for Static Meshes, Cameras, Skeletal Meshes, Variants, and Animations.
-
Support for Materials (PreviewSurface and DisplayColor).
-
Support for Textures in USD Preview Surface.
-
The ability to enable or disable payloads (to load and unload content).
-
The ability to export Static Mesh Assets as USD Geom Mesh, supporting vertices, normals, and UVs.
-
Support for USD plugins, such as Alembic or Custom Path Resolver.
Although currently in Beta, we recommend this approach for most users who need USD support. The following sections describe how to use this method to interact with your USD content.
Enabling the USD Import Plugin
Before you can work with a USD file in the Unreal Editor, you will need to enable the USD Importer Plugin from the Plugins menu:
-
From the Edit menu, select Plugins .
![PluginsOption.png]()
-
Search for USD in the search bar, then enable the USD Importer Plugin and restart the editor.
![USDImporter.png]()


When the Editor restarts, you'll see a new USD Stage Editor option listed under the Window menu:

The Modes panel also lists some new USD Actors that you can add to your Level:

Live USD Stage Workflow
To work with your USD content inside the editor, follow the steps below:
-
From the Window menu, select USD Stage Editor .
![OpenUSDEditor.png]()
Click for full image. -
From the menu in the USD Stage Editor panel, choose File > Open and browse to your USD file.
![USDEditorLoadUSD.png]()
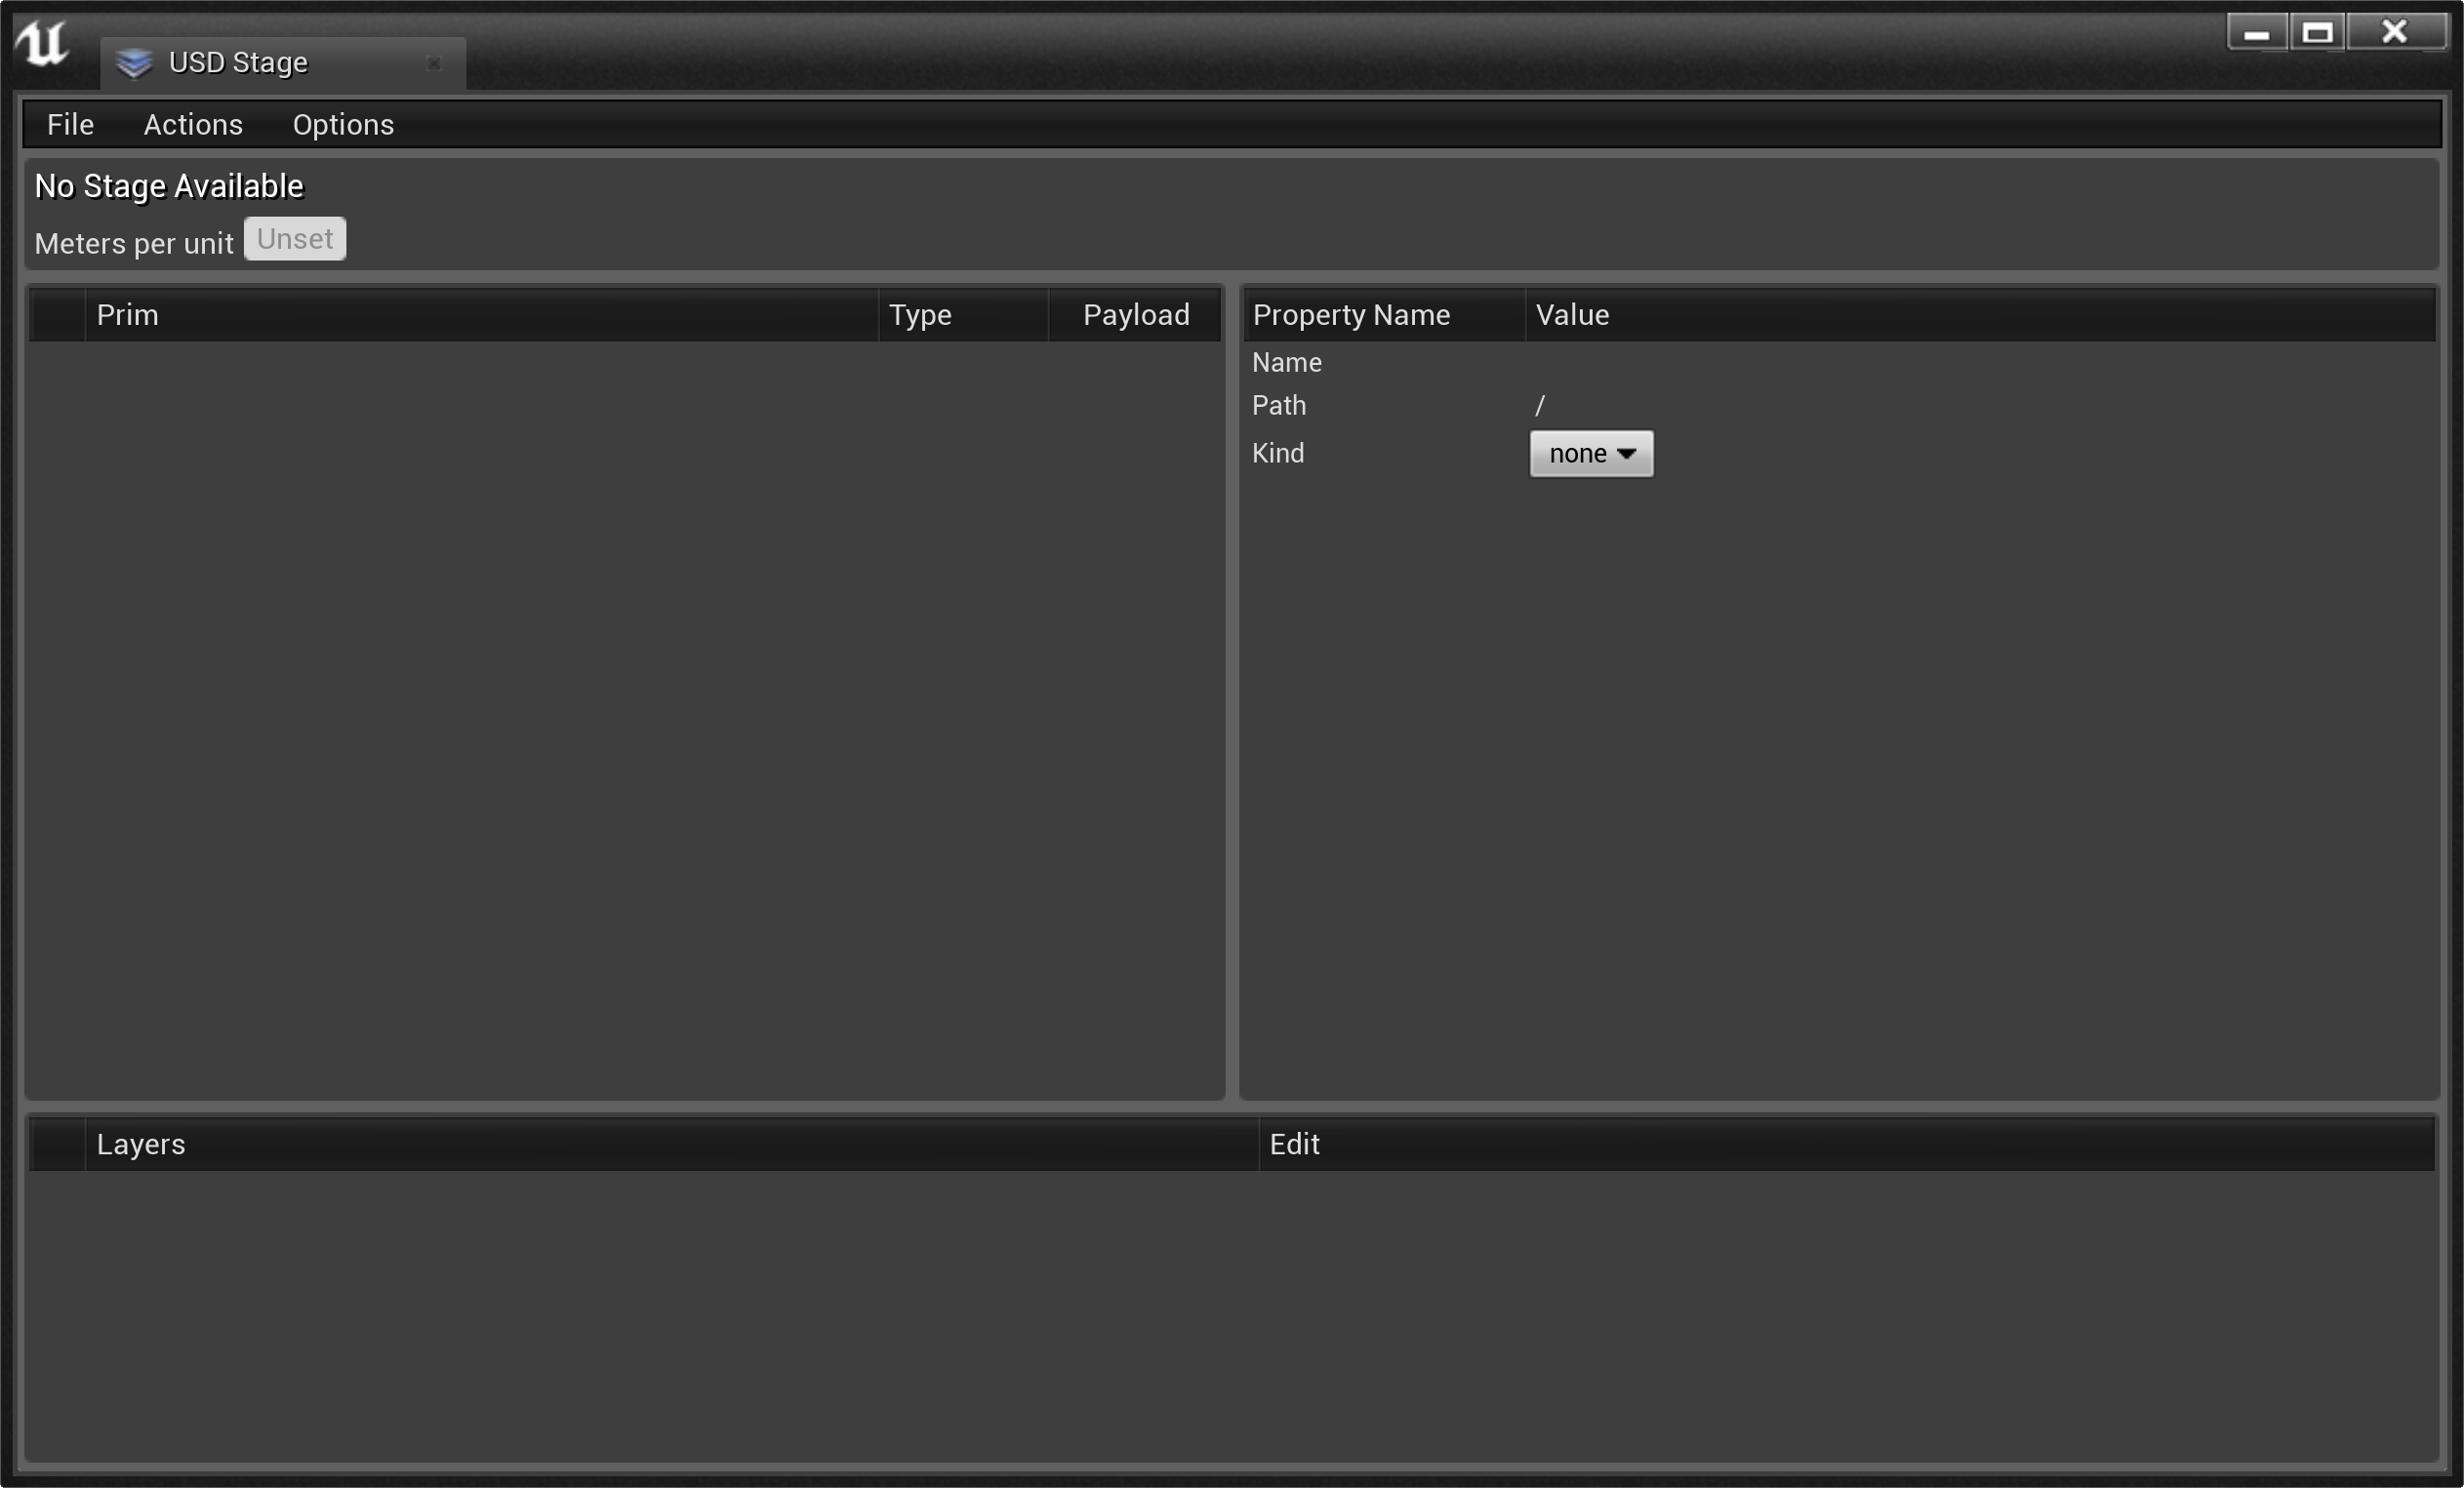

The panel will be populated with the scene hierarchy read from the USD file you selected.
Click for full image.
Depending on the complexity of your USD data, loading times may vary. If you have larger scenes, you can set up a USD Stage Actor to not load any data from the USD file initially, then load only individual payloads as needed. See USD Stage Actor Properties below.
A USD Stage Actor will also be added to your Level. This Actor is a container for the USD data read from the file, and provides a location for that data in the Level.
The 3D scene objects that are loaded from the USD file and that you see in the viewport are fully compatible with most other Unreal Engine features, and for the most part you can treat them exactly like other Actors you'd work with in Unreal Engine. For example, you can add lights, other Static Meshes, Materials, Blueprint classes, and so on. You can also select individual objects from the USD scene in the Viewport and manipulate them like any other Actor.
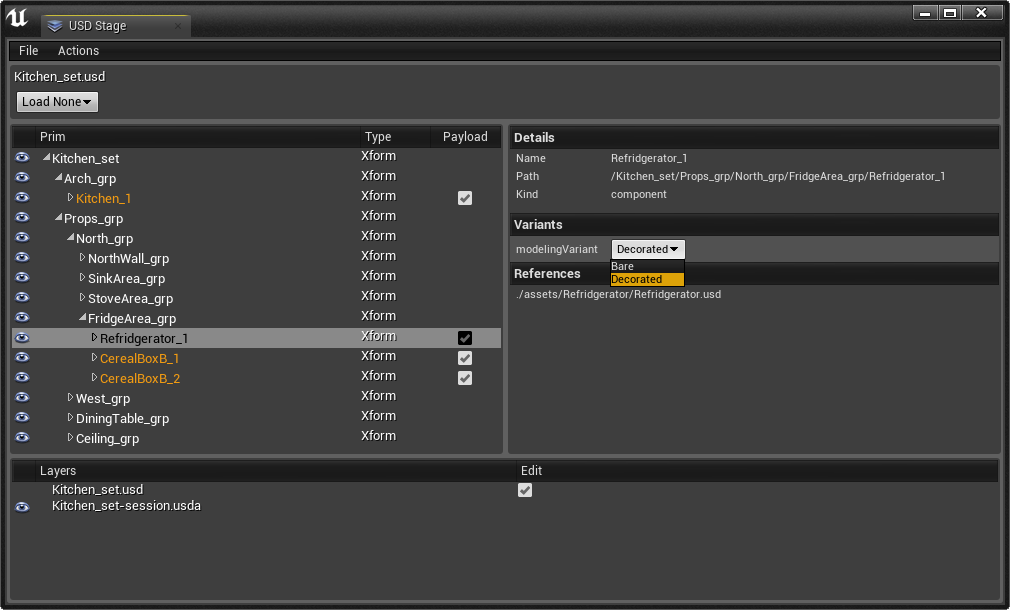
From the USD Stage Editor , you can also switch between any variants defined in the USD file and see the scene reflect those changes immediately. You can add additional USD Stage Actors to the Level, including Animated Skeletal Meshes. Animations in the USD file are associated with a Level Sequence, which you can use to scrub or play back the animation.
If you make changes to your USD Stage in the USD Stage Editor , you can write those changes back out to the USD file.
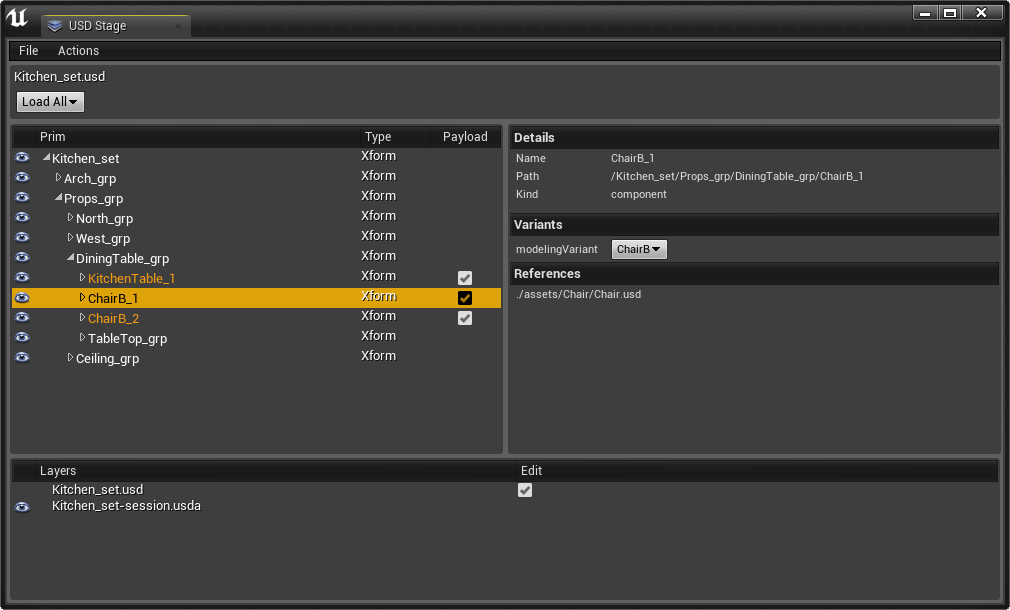
USD Stage Editor
The USD Stage Editor outlines the scene hierarchy from the USD file and offers you tools to modify the USD data. This includes:
-
Opening, saving, and reloading USD files.
-
Toggling visibility and payloads, or selecting variants for primitives.
-
Creating new layers, opening existing layers, or muting layers.
Rows in orange are composition arcs, and you can right-click any prim to add references to it (or clear references from it). Other right-click options include the ability to add or remove prims, and the ability to toggle, load, or unload payloads.
The Details panel in the USD Stage Editor displays information about the current selection, and provides the ability to choose between any defined Variants .
Click for full image.
USD Stage Actor Properties
After you create a USD Actor, you can use the properties in the Details panel to control how the Actor accesses and uses the data in its USD file.

|
Property |
Description |
|---|---|
|
Root Layer |
Selects a USD file to use for this Actor. |
|
Initial Load Set |
Defines what parts of the USD scene to load when starting the Level. Load All loads all data in the stage, Load None refrains from loading any objects in the stage until you load them in the USD Stage Editor window. |
|
Time |
The time code to evaluate the USD stage at for this Actor. |
|
Start Time Code |
The time code to start evaluation at for this Actor. |
|
End Time Code |
The time code to stop evaluation at for this Actor. |
|
Time Codes Per Second |
The number of time codes evaluated per second. |
|
Level Sequence |
The Level Sequence that is associated with this Actor. |