Choose your operating system:
Windows
macOS
Linux
In the following steps, we are going to create a short sequence that uses multiple camera angles.
Creating the Project
In this section, we will set up the project.
-
From the Unreal Project Browser window, create a New Project and use the Blueprint Third Person template.
![MatineeHowTo.jpg]()
-
Make sure that Include starter content is enabled.
-
Give the project a name.
-
With each of the above defined, click Create Project to create a new project.

Adding the Matinee, Camera and Props
In this step, we will add our Matinee Actor , our Cameras and a prop that will be our subject for the shots.
-
From the Toolbar menu, select Matinee and click the Add Matinee button.
![MHT1_AddMatinee.png]()
-
If the Matinee undo warning message appears, click the Continue button.
![MHT1_MatineeWarning.png]()
-
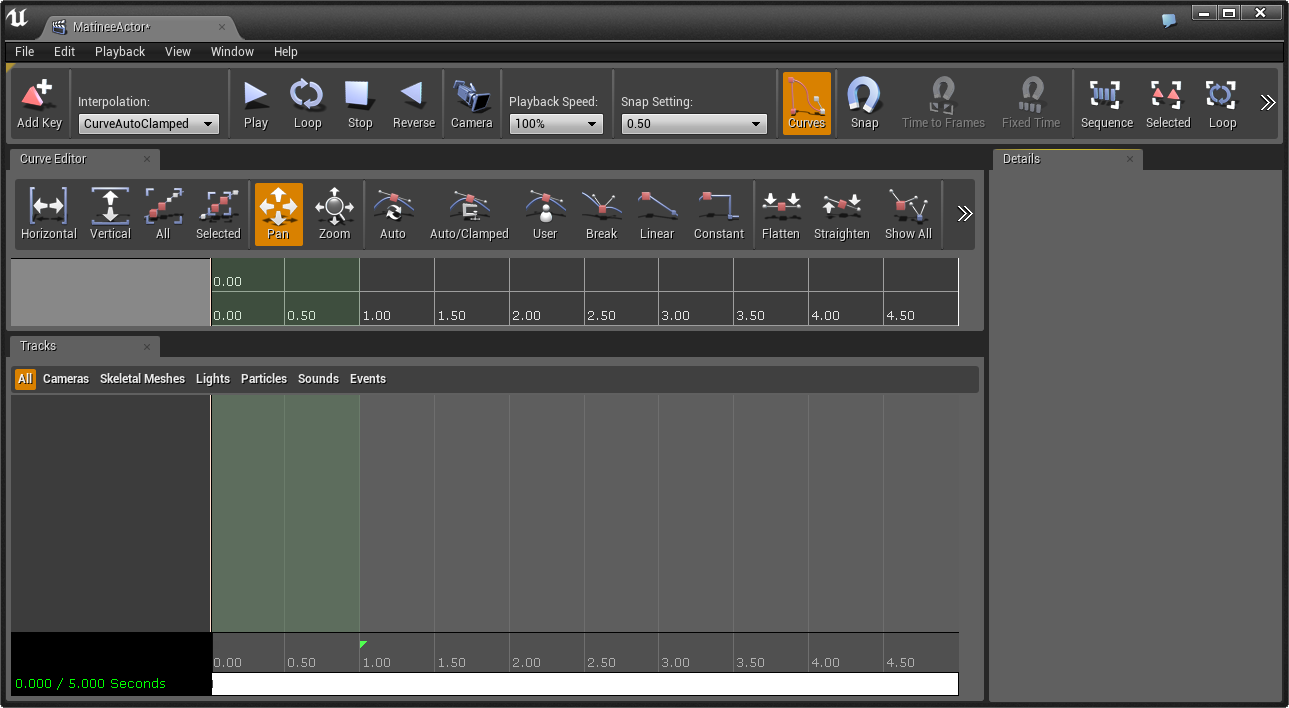
The Matinee Editor window will open.
![MHT1_MatineeOpen.png]()
Click for Full View.
-
Minimize the Matinee window, then from the Modes menu under the Basic tab, Drag-and-drop a Camera into the viewport.
![MHT_3_Drag_In_Camera.jpg]()
Try to place the Camera somewhere to the left of the template text as seen in the image above.
-
Place two more Cameras in the viewport and rotate them inward to face the box as seen in the image below.
![MHT3_All_CamerasPlaced.jpg]()
You can rotate a Camera by selecting it and pressing the E key, then using the widget to orientate it.
-
From the Content Browser under the Game/Props folder, locate the SM_Chair and Drag-and-drop it into the viewport, onto the box.
![MHT3_Drag_In_Chair.jpg]()
-
With the chair still selected, press E to enter Rotation Mode and rotate the chair around to 140.00 as seen below.
![MHT3_ChairRotated.png]()


Creating the Camera Sequences in Matinee
In this step, we will assign movement to each Camera and hook them up to our Matinee .
-
Open the Matinee window (if you have closed it you can re-open it by selecting the Matinee , then from the Details panel, selecting Open Matinee .).
![MHT3_OpenMatinee.png]()
-
With the first Camera that was placed in the viewport selected, Right-Click in the Tracks window and select Add New Camera Group from the menu.
![MHT3_AddCameraToMatinee.png]()
-
In the Name Camera Group box that appears, name the camera Camera1 and press enter to complete adding the track.
![MHT3_Camera1Added.png]()
-
Repeat the process above and add the remaining two cameras to the Matinee.
![MHT3_AllCamerasInMatinee.png]()
-
Next, we will increase the length of the Matinee by holding Control and dragging the red marker (in the yellow box below) to the 15.00 mark (yellow X).
![MHT3_Increase_MatineeTime.jpg]()
-
Click on the first keyframe at 0.00 on the Movement track of Camera1 the camera should be selected in the viewport.
![MHT3_Camera1KeySelected.png]()
-
In the Viewport, using the widget, move the camera up and angle it downward slightly (press E to enter Rotation mode).
![MHT3_Camera1Moved.png]()
We are going to pan the camera to the right across the template text, so try to angle the camera so that it will view the text.
-
Return to the Matinee window and move the Time Bar to the 5.00 mark for the Movement track of Camera1 and press Enter to add a new keyframe.
![MHT3_Camera1Key2.png]()
-
With the second keyframe still selected, return to the editor viewport and grab the Green arrow of the Translation widget and move the camera to the right past the text.
![MHT3_Camera1Done.png]()
You should see a yellow dotted line which indicates the movement the camera will take.
-
Return to the Matinee window and click on the first keyframe of the Movement track for Camera2 , then Control+Drag the keyframe to the 5.00 mark.
![MHT3_Camera2Key1.png]()
-
With Camera2's keyframe still selected, return to the editor viewport and move the camera towards the box (the chair is on) so that its view is filled by the box.
![MHT3_Camera2StartPosition.png]()
-
Return to the Matinee window and move the Time Bar to the 7.50 mark for the Movement track of Camera2 and press Enter to add a new keyframe.
![MHT3_Camera2Key2.png]()
-
With the new keyframe still selected, return to the editor viewport and grab the Blue arrow of the Translation widget, then move the camera upwards to view the chair.
![MHT3_Camera2Finished.png]()
-
Return to the Matinee window and move the keyframe at 0.00 for the Movement track of Camera3 to the 7.50 mark.
![MHT3_Camera3Key1.png]()
-
With Camera3's keyframe still selected, return to the editor viewport and move the camera up and slightly hovering over the chair.
![MHT3_Camera3Starting.png]()
-
Return to the Matinee window and move the Time Bar to the 11.00 mark and press Enter to add a new keyframe.
![MHT3_Camera3FinalKey.png]()
-
With the new keyframe still selected, return to the editor viewport and move the camera back using the widget to show the chair.
![MHT3_Camera3FinalShot.png]()
-
Return to the Matinee window and select the Movement track of Camera1 then move the Time Bar to 11.00 and press Enter to add a new keyframe.
![MHT3_Camera1LastKey1.png]()
-
With the new keyframe still selected, return to the editor viewport and click the Viewport Options button, then select Lock Viewport to Actor and choose Selected Actor (your Camera).
![MHT3_LockingViewport.png]()
-
Your view should look something like below with a Lock Icon located in the upper left corner of the screen.
![MHT3_CameraIsLocked.png]()
The viewport is now locked to our camera, which is useful for getting more precise angles as well as an idea of what the shot will look like.
-
Using W, A, S, D , fly the camera into a position where it is elevated and looking down on the chair.
![MHT3_Camera3InPosition.png]()
-
Then return to the Viewport Options window and Unlock the camera in the same manner it was locked above.
![MHT3_UnlockCamera.png]()
-
Return to the Matinee window and move the Time Bar to 15.00 and add a keyframe on the Movement track of Camera1 .
![MHT3_LastCameraKey.png]()
-
With the new keyframe still selected, return to the editor viewport and (using the Translation widget or by Locking the Viewport ), move the camera into position as shown below.
![MHT3_CamerasDone.png]()


Creating the Camera Cuts with a Director Track
In this step, we will add a Director Track which will handle all of our camera cuts.
-
Open the Matinee window (if you have closed it you can re-open it by selecting the Matinee , then from the Details panel, selecting Open Matinee .).
![MHT3_OpenMatinee.png]()
-
Under Camera3, Right-Click in an empty space in the Tracks window and from the context menu select Add New Director Group .
![MHT3_AddDirectorGroup.png]()
-
Move the Time Bar back to 0.00 (if it is not already there) and click on the Director track then press Enter to add a keyframe.
-
The Cut To Group pop-up window will appear, go ahead and press Ok for Camera1 to finish adding the keyframe.
![MHT3_FirstCutAdded.png]()
A bar will be added for Camera1 indicating that it will be used for the 15 second sequence, which we will change to include the other cameras.
-
Move the Time Bar to 5.00 , 7.50 and 11.00 and add a keyframe at each, cutting to Camera2 , Camera3 , and back to Camera1 respectively (see below).
![MHT3_FinishedMatinee.png]()
Click image for full view.
-
Close the Matinee window, then select the Matinee in the World Outliner and in the Details panel, check the following options: Play on Level Load , Looping , Disable Movement Input , Disable Look at Input , and Hide Player .
![MHT3_CutToGroup.png]()
![MHT3_MatineeActorSettings.png]()
-
From the main toolbar, click Build (optional to build the lighting in the level) then click the Play button.
![MHT3_BuildAndPlay.png]()
-
You should now have a Matinee sequence that starts when the level loads and cycles through three different cameras.


