Choose your operating system:
Windows
macOS
Linux
The Paper 2D Sprite Editor enables setup and editing of individual Sprite assets.
Opening the Sprite Editor
With a Sprite asset created, you can open it for editing in the Sprite Editor in the follow ways:
-
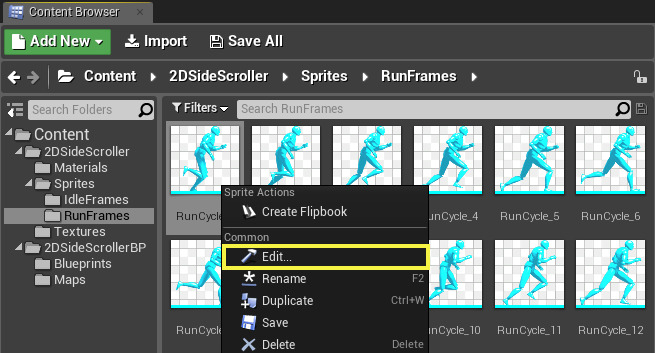
Double-click on a Sprite inside the Content Browser (or Right-click on a Sprite and select Edit ).
![open_sprite1.png]()
-
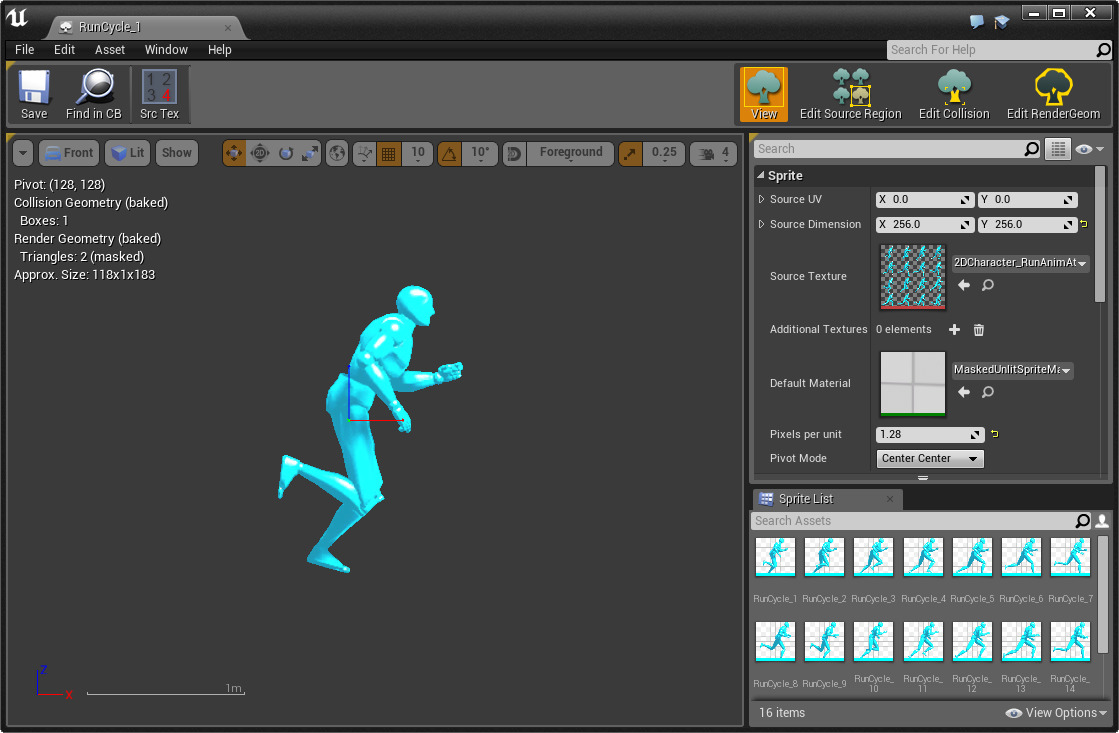
This will open the Sprite Editor window.
![open_sprite2.png]()
With a Sprite Actor in your level and the Actor selected, you can press Ctrl+E to open it in the Sprite Editor as well.
Sprite Editor Interface
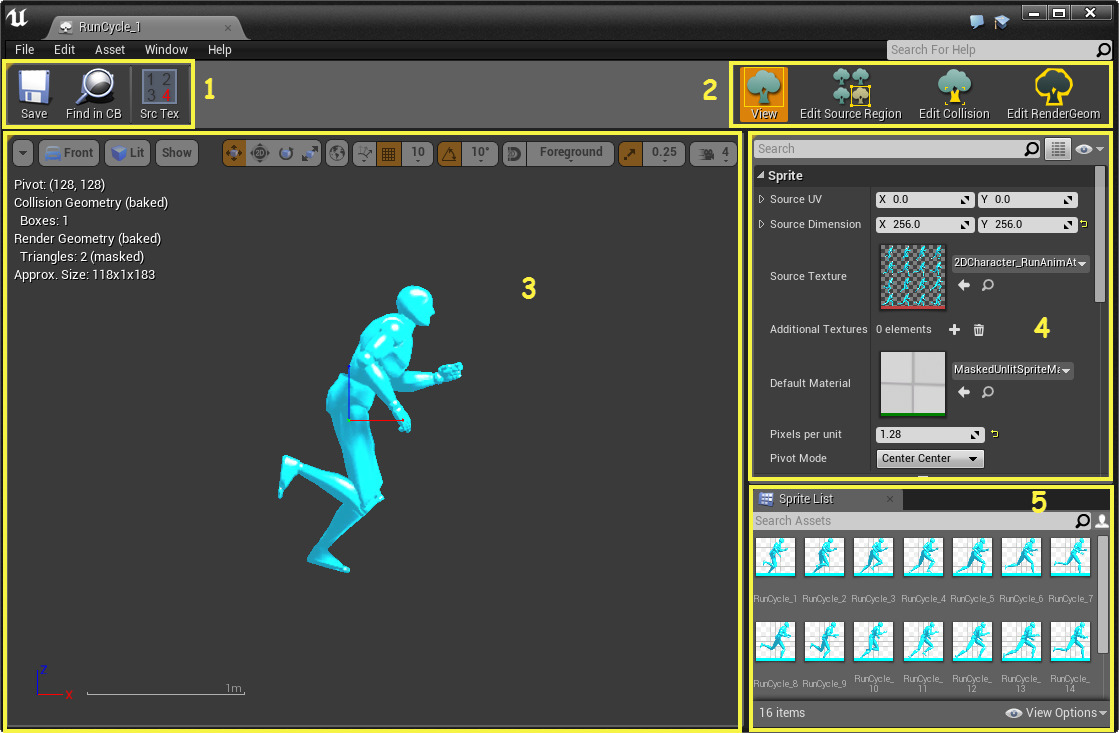
Below is the Sprite Editor Interface, along with a breakdown of its components.

-
Tool Bar
-
Mode Switching Toolbar
-
Viewport
-
Details
-
Sprite List
Toolbar
Each of the Tool Bar options are described in the table below:

|
Button |
Description |
|---|---|
|
Save |
Save the sprite being edited. |
|
Find in CB |
Show the sprite being edited in the Content Browser. |
|
Src Tex |
Toggles display of the entire texture that the sprite is referencing. |
|
Add Box |
Adds an additional box polygon when editing collision or render geometry. |
|
Add Polygon |
Adds an additional polygon when editing collision or render geometry. |
|
Snap to pixel grid |
Snaps all vertices to the pixel grid when editing collision or render geometry. |
Mode Switching Toolbar
The Mode Switching Toolbar allows you to edit and affect how your Sprite appears or its collision settings.

|
Mode |
Description |
|---|---|
|
View |
Displays a preview of the sprite in the viewport along with general statistics. |
|
Edit Source Region |
Displays the full source texture and enables you to set the area that composes the individual sprite. |
|
Edit Collision |
Displays and allows editing of the sprite collision shapes. |
|
Edit RenderGeom |
Displays and allows editing of the sprite render geometry. |
Viewport
The Viewport shows the Sprite being edited and enables access to interactive editing tools using standard gizmos. The Viewport Toolbar contains standard view options such as Lit or Unlit rendering modes, Mesh Edges, etc...

Details
This shows all of the editable properties of the opened Sprite asset.

|
Property |
Description |
|---|---|
|
Source Texture |
The source texture that contains the image to be used for the sprite. |
|
Source Dimension |
The size of the source region (in pixels) within the Source Texture. |
|
Source UV |
The offset of the source region (in pixels) within the Source Texture. |
|
Default Material |
This is the default material that will be used to render the sprite if a particular component does not have a custom material override. |
|
Pixels per unit |
Adjusts the scaling factor between pixels in the texture and Unreal Units (centimeters). For example, a value of 1.28 will size a 128 pixel wide sprite to be 1 meter. This value can be adjusted per sprite, but you can also set a global default value for newly created sprites in the project settings (Paper2D plugin page). Adjusting your scale to be in a realistic range helps greatly with the stability of physics simulations, among other things. |
|
Pivot Mode |
Controls the way that the sprite pivot is calculated. It defaults to being computed as the center of the source region, but can be set to any of the corners or mid-points on the edges. You can also define a custom pivot point by setting the mode to Fully Custom and typing in a value for the Custom Pivot Point property. |
|
Sockets |
Sprites can also define sockets, which can be used as attachment points for other components or reference points to spawn effects or do queries. These can be created by adding to the Sockets array in the Details panel and edited in the viewport using the standard gizmos. |
|
Sprite Collision Domain |
Controls whether or not the sprite has collision shapes, and which domain they will be created in. See the Editing sprite collision section for more details. When this is set to Use 3D Physics , Collision Thickness controls the thickness of 3D collision shapes. |
Sprite List
This shows all of the Sprites that share a common source texture. Double-clicking on another Sprite will switch the current asset being edited, which can be useful when adjusting a bunch of Sprites in a row. Another approach for bulk editing is to use the Property Matrix context menu option on several selected assets in the Content Browser .

Editing Sprites
Editing Sprites inside the Sprite Editor is done through either the properties inside the Details panel or by switching to one of the editing modes from the Mode Switching Toolbar . Additional documentation on each of the editing modes can be found on the following pages:
-
For Sprite Source Region editing, see the Edit Source Region documentation.
-
For Sprite Collision editing, see the Edit Collision documentation.
-
For Sprite Render Geometry editing, see the Edit RenderGeom documentation.

