Choose your operating system:
Windows
macOS
Linux


As universities, colleges, and trade schools continue to offer Unreal Engine 4 (UE4) to students and faculty, one of the most frequently asked questions we get from these users is how to distribute UE4 on school computers without exposing the academic account being used to access the engine. If you are installing UE4 in an academic environment, this document describes how deployment automation can be used to distibute academic installations of UE4.
Installing UE4 and Content
Typically, schools install UE4 on several computers, for example, in a computer lab or instruction room. At this time, we do not provide a silent (or one-step) installer for UE4, which means that the installer needs to be manually run at least once on a machine in the academic environment. Rather than mirroring the install machine or manually running the installer on the rest of the computers in the classroom, we automated part of the deployment process.
Perform the following steps to install UE4 in an academic environment:
Using the Launcher
If your school's network is behind a proxy server, it is a best practice to use the UE4 on GitHub build because the Launcher will not run behind the server. If, however, you prefer to use the Launcher version behind the proxy server, contact your IT department to have them open port 7777 or 7778. Keep in mind, though, that opening these ports does not always enable the Launcher to open or update behind a proxy server.
-
Download the latest installers using the following links:
-
Run the installer on the machine you want to make an image from.
-
After the installer finishes its routine, the Launcher automatically runs, enabling you to log in with your Epic Games credentials.
-
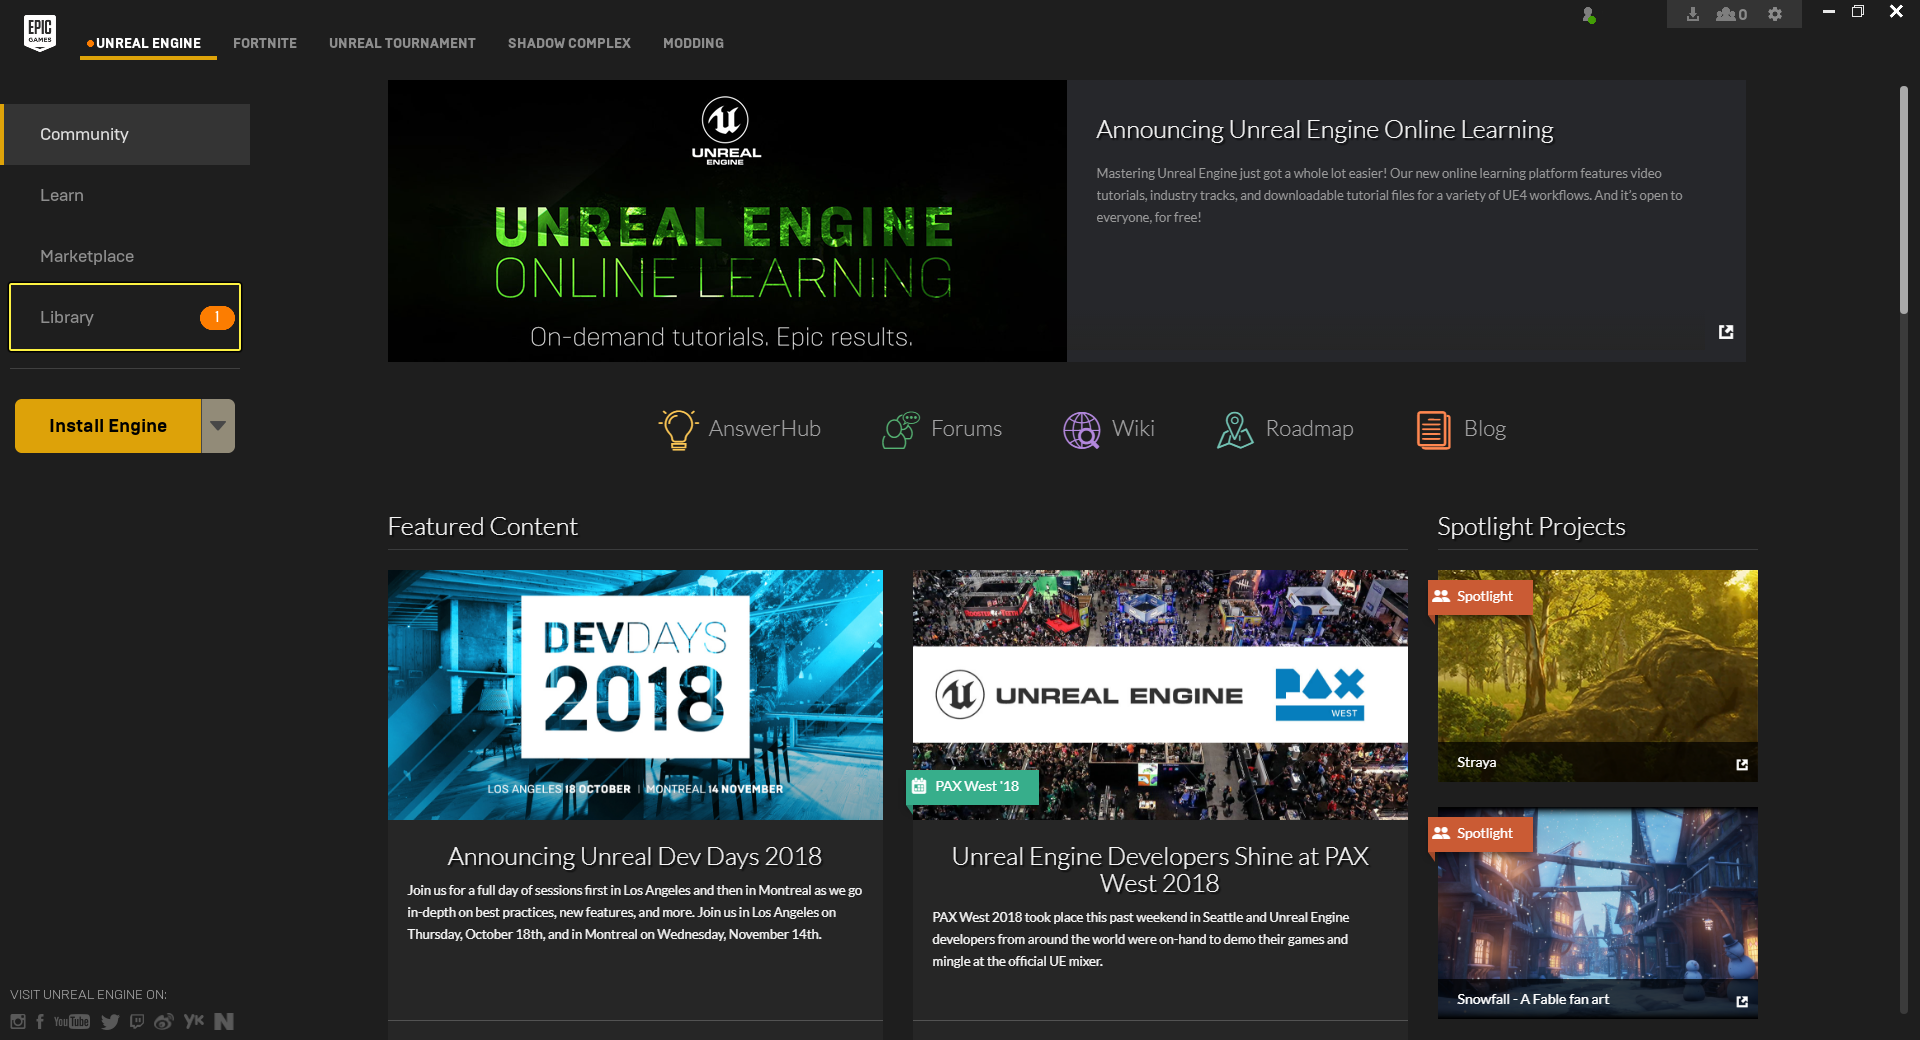
If the latest version of UE4 does not download automatically, you can either select the Install Engine button (1) or select the Library sidebar option (2) to download engine version you want your students to use.
![AcademicInstallLauncher_Step4.png]()
Click for full image.
-
As an example, download Unreal Engine 4.20.2 by first selecting the Library sidebar option.
![AcademicInstallLauncher_Step4a.png]()
Click for full image.
-
Now, select the Engine Versions ( + ) icon.
![AcademicInstallLauncher_Step4b.png]()
-
Open the drop-down list to select the engine version you want to download. For purposes of illustration, select version 4.20.2 .
![AcademicInstallLauncher_Step4c.png]()
-
Finally, select the Install button and follow the Installer's prompts to get Unreal Engine 4.20.2 onto your machine.
![AcademicInstallLauncher_Step4d.png]()
-
-
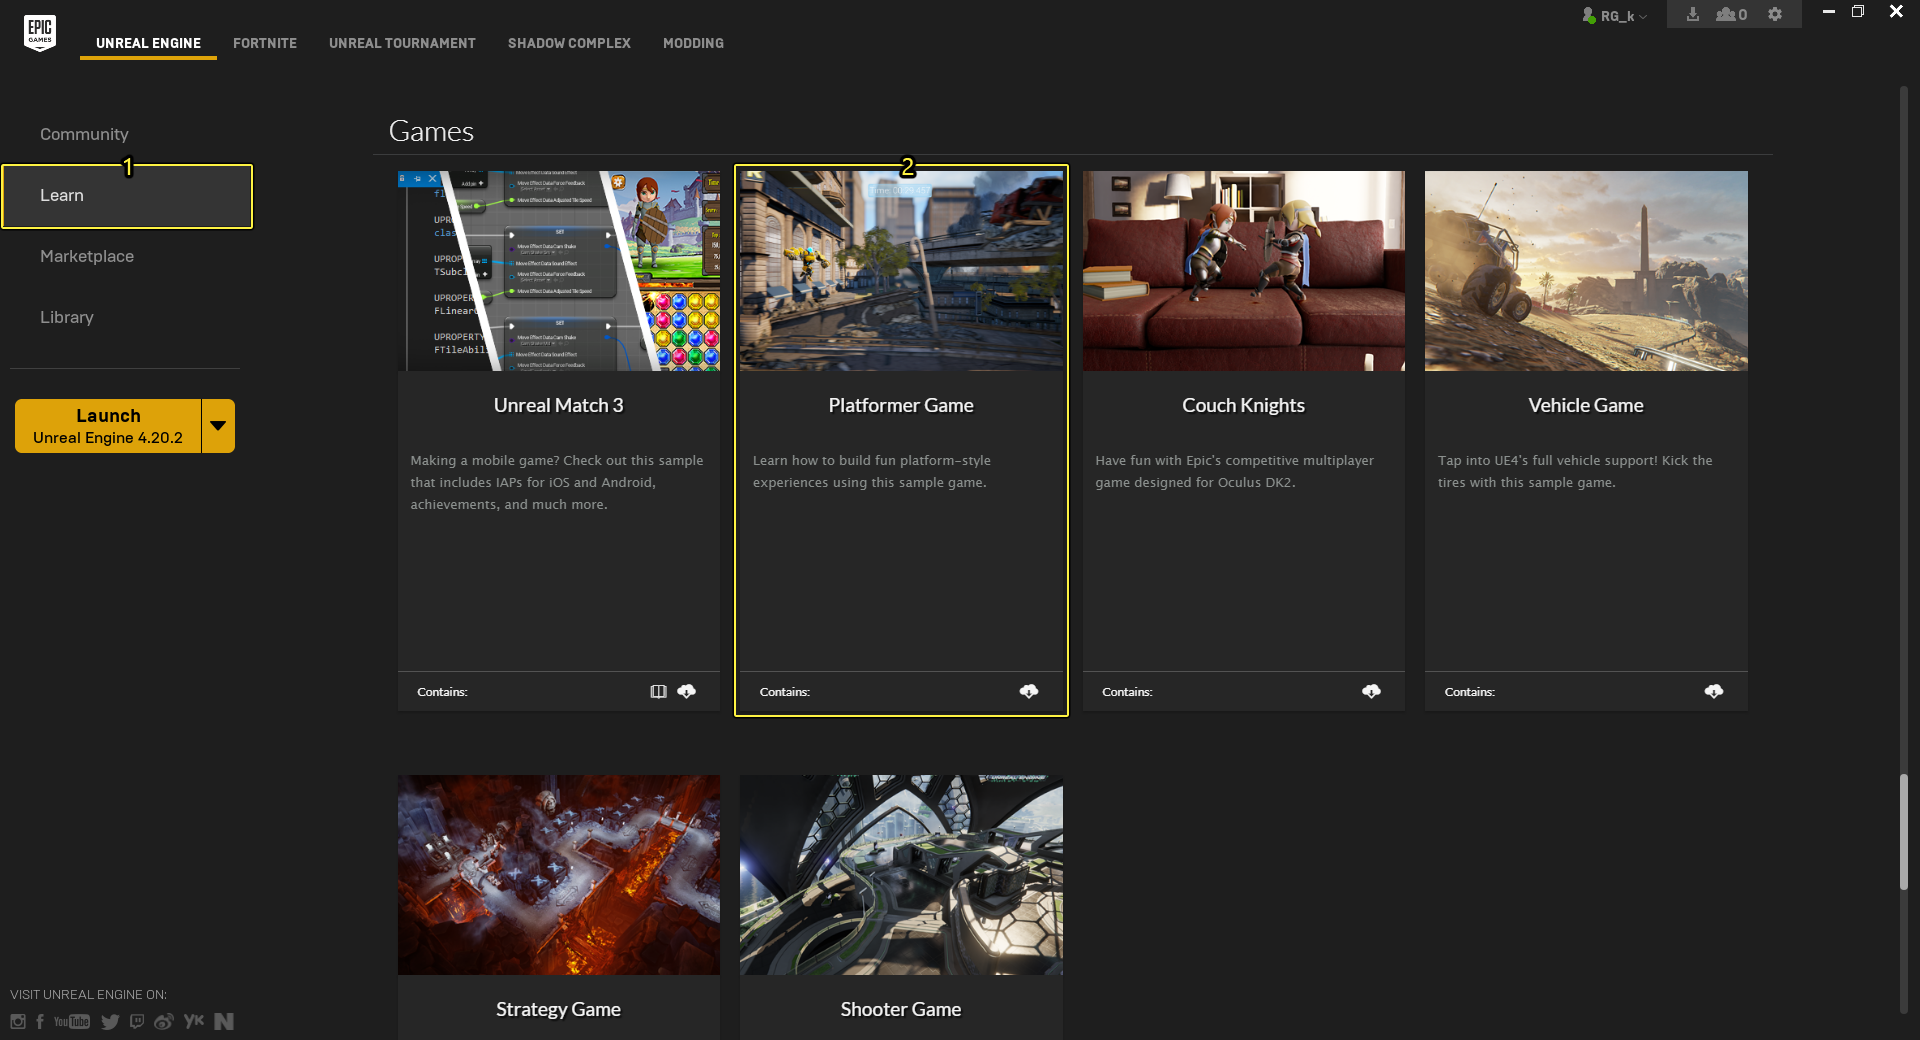
Some instructors use our learning samples in their curricula, and let us suppose, for example, an instructor teaching side-scrolling gameplay wants to use our platformer sample as a teaching tool. To download a side-scrolling platformer, they will need to select the Learn sidebar option (1) and scroll down to select Platformer Game (2).
![AcademicInstallLauncher_Step5.png]()
Click for full image.
-
From Platformer Game's Content Detail menu, select Create Project to start setting up the project.
![AcademicInstallLauncher_Step5a.png]()
Click for full image.
Before downloading a learning sample, refer to the Supported Platforms and Supported Engine Version sections of the Content Detail menu, which we update when deploying new releases.
-
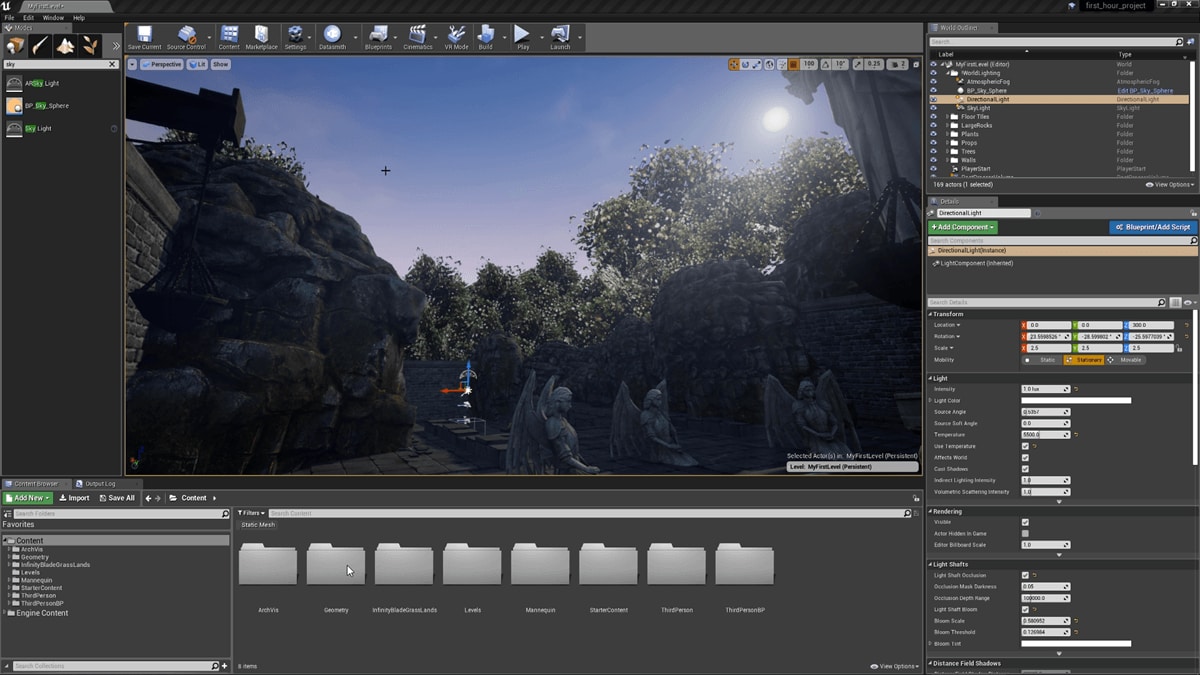
Set the project's name, its installation folder, and engine version (we are using version 4.20) before selecting Create .
![AcademicInstallLauncher_Step5b.png]()
-
When Platformer Game is done installing, you will see it in the Library > Vault menu.
![AcademicInstallLauncher_Step5c.png]()
Click for full image.
-


-
If you see any automatically created projects in the Library > My Projects menu, delete them.
If you do not delete projects that the Launcher automatically creates for you, it may cause problems for users on share-machines using the same projects.
-
After removing all of the automatically-created projects, you can mirror this machine's setup to the rest of your class's computers. Alternatively, you can save this machines image so that you can distribute it out to your lab's computers.
From GitHub
Visit the following pages (in order) to learn how to download, install, and update UE4 from GitHub:
Performing Updates
After installing UE4, you are ready to use the engine and some free content in an academic environment. It is important, however, to plan for updates because when new versions of UE4 are released, or when engine content is released, you can update the mirror or push out new content to install machines by copying the relevant files, which you can automate with a script.
Read through the following sections to learn how to update UE4 and engine content in an academic environment:
Using the Launcher
-
From a central machine, open the Launcher and navigate to the Library menu.
-
Select the Engine Versions ( + ) icon.
-
After the Launcher downloads the the latest version of UE4, you can update the mirror.
If you do not want to perform updates using the Launcher, read through the following section to learn how to copy updates to lab machines with UE4.
Copying UE4 and Content
-
Copy the following directories from the base machine to every machine that you want to update:
-
(Local Directory)\Epic Games\Launcher\VaultCache
-
[Local Directory]\Epic Games(Engine Version)
-
In some cases, it is possible to install the Launcher in the
C:\Program Files (x86)folder. -
If you are copying a specific version, for example, version 4.20, you can copy
C:\Program Files (x86)\Epic Games\4.20, otherwise, you can use the wildcard character (*) to automate the copy operation for all engine versions, which looks likeC:\Program Files (x86)\Epic Games\*.
-
-
Make the following directory on every machine that you want to update,
[Local Drive Letter]\ProgramData\Epic\EpicGamesLauncher\Data\Manifests. -
Assuming you recently downloaded the engine, copy the most recently downloaded manifest from
[Local Drive Letter]\ProgramData\Epic\EpicGamesLauncher\Data\Manifeststo the machine's local manifest directory (from the previous step).
As an example, the manifest file might look something like,
~\Manifests\6CB2FA12345680D212345678B525AE86.manifest.
-
To verify you have a copy of the most recently downloaded manifest, open the manifest file in a text editor and search for "AppNameString".
After following these steps, the Launcher automatically detects updates when a user runs the Launcher. This is true for new engine versions and downloaded content from the Marketplace.
If you want to disable the Launcher from automatically detecting updates, read through the following section.
Disabling Automatic Updates
By default, the Launcher automatically checks for updates during its launch routine. To prevent Launcher updates from taking up class time, perform the following steps:
-
Right-click the EpicGamesLauncher - Shortcut to open the Launcher's Right Click menu.
-
Select the Properties command to open the file's Properties menu.
-
Locate the Target: property and add the -noselfupdate command to the end of the target line.
Do not forget to re-enable Launcher updates when class is not in session.
Best Practices for Students
There are scenarios that might impact your students' ability to access UE4 (or downloaded content). For example, your school might regularly wipe computers for security (or resource) reasons, which might affect a student's progress in-class. To help those students, we have collected the following best practices for some common scenarios they might face while using UE4 in an academic environment.
During Network Outages
Students can run the Launcher during network outages by selecting the Skip Sign In option, which is located in the Launcher's network connectivity dialog window.
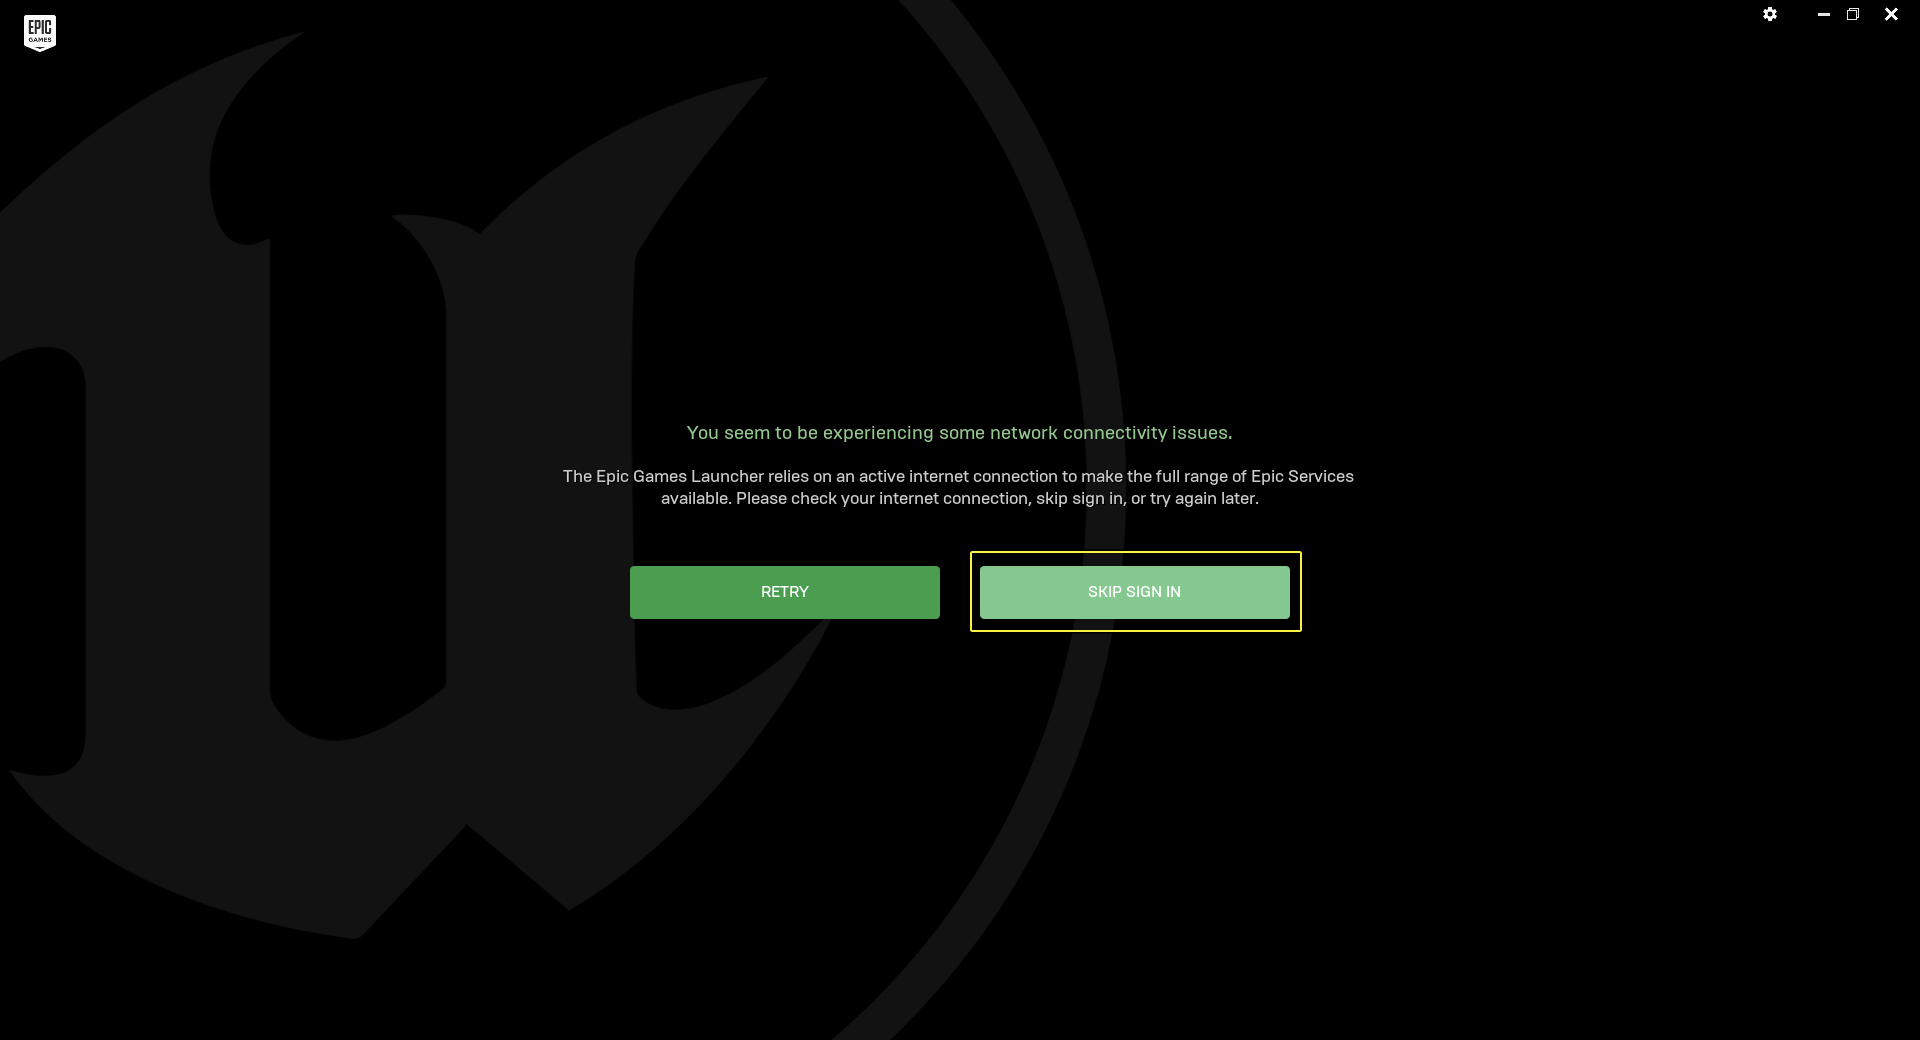
Click for full image.
After signing-in Offline mode, students can access UE4, their projects, and previously downloaded content.
Preparing for Memory Wipes
If your school has a policy of wiping computer (or drive) memory on a regular schedule, returning student computers to their base image, students must save their work in a directory that will not be wiped (or cleared).
-
For example, suppose a student creates a new Strategy Game project from their Vault on the Library tab.
![AcademicInstall_PreparingforMemWipes-1.png]()
-
When creating the new project, the student should specify a folder (or network directory, such as a Sandbox drive) that will not be removed when their computer is re-imaged.
![AcademicInstall_PreparingforMemWipes_1-1.png]()


As long as your school's policy allows it, students typically download additional content using the Launcher, however, if the downloaded content is not saved off the mirrored drive, the content will most likely be wiped during re-imaging.