Choose your operating system:
Windows
macOS
Linux
There will be times your Landscape will require that you use external programs to create both the heightmap and layers that you will need. Unreal Engine 4 (UE4) accommodates this style of workflow by allowing for the import of custom heightmaps and layers.
If this is your first time using the Landscape tools, you might want to check out the Landscape Overview first.
Layers
Landscape layers are special textures that can contain both heightmaps and color data. Which can be used customize the look and feel of your Landscape.
Layer Formats
Landscape layers can be imported from external programs via implementation of the
ILandscapeHeightmapFileFormat
and
ILandscapeWeightmapFileFormat
interfaces. The editor's existing support for image-based importing has been converted to use this interface and is fully supported. Images for the built-in formats are still required to be grayscale, 8 bits per pixel, single channel files in either .PNG or .RAW format. If you are creating layers in Photoshop, use the following settings when creating a new document:

Layer Import
Importing Layers that were made in an external application provides you with the flexibility to use your preferred terrain workflow, but you first need to make sure that a few things are set up in order to get everything to work smoothly.
-
First, make sure that you have created a Landscape to work with. If you have questions regarding the Landscape creation process, check out Landscape Creation .
-
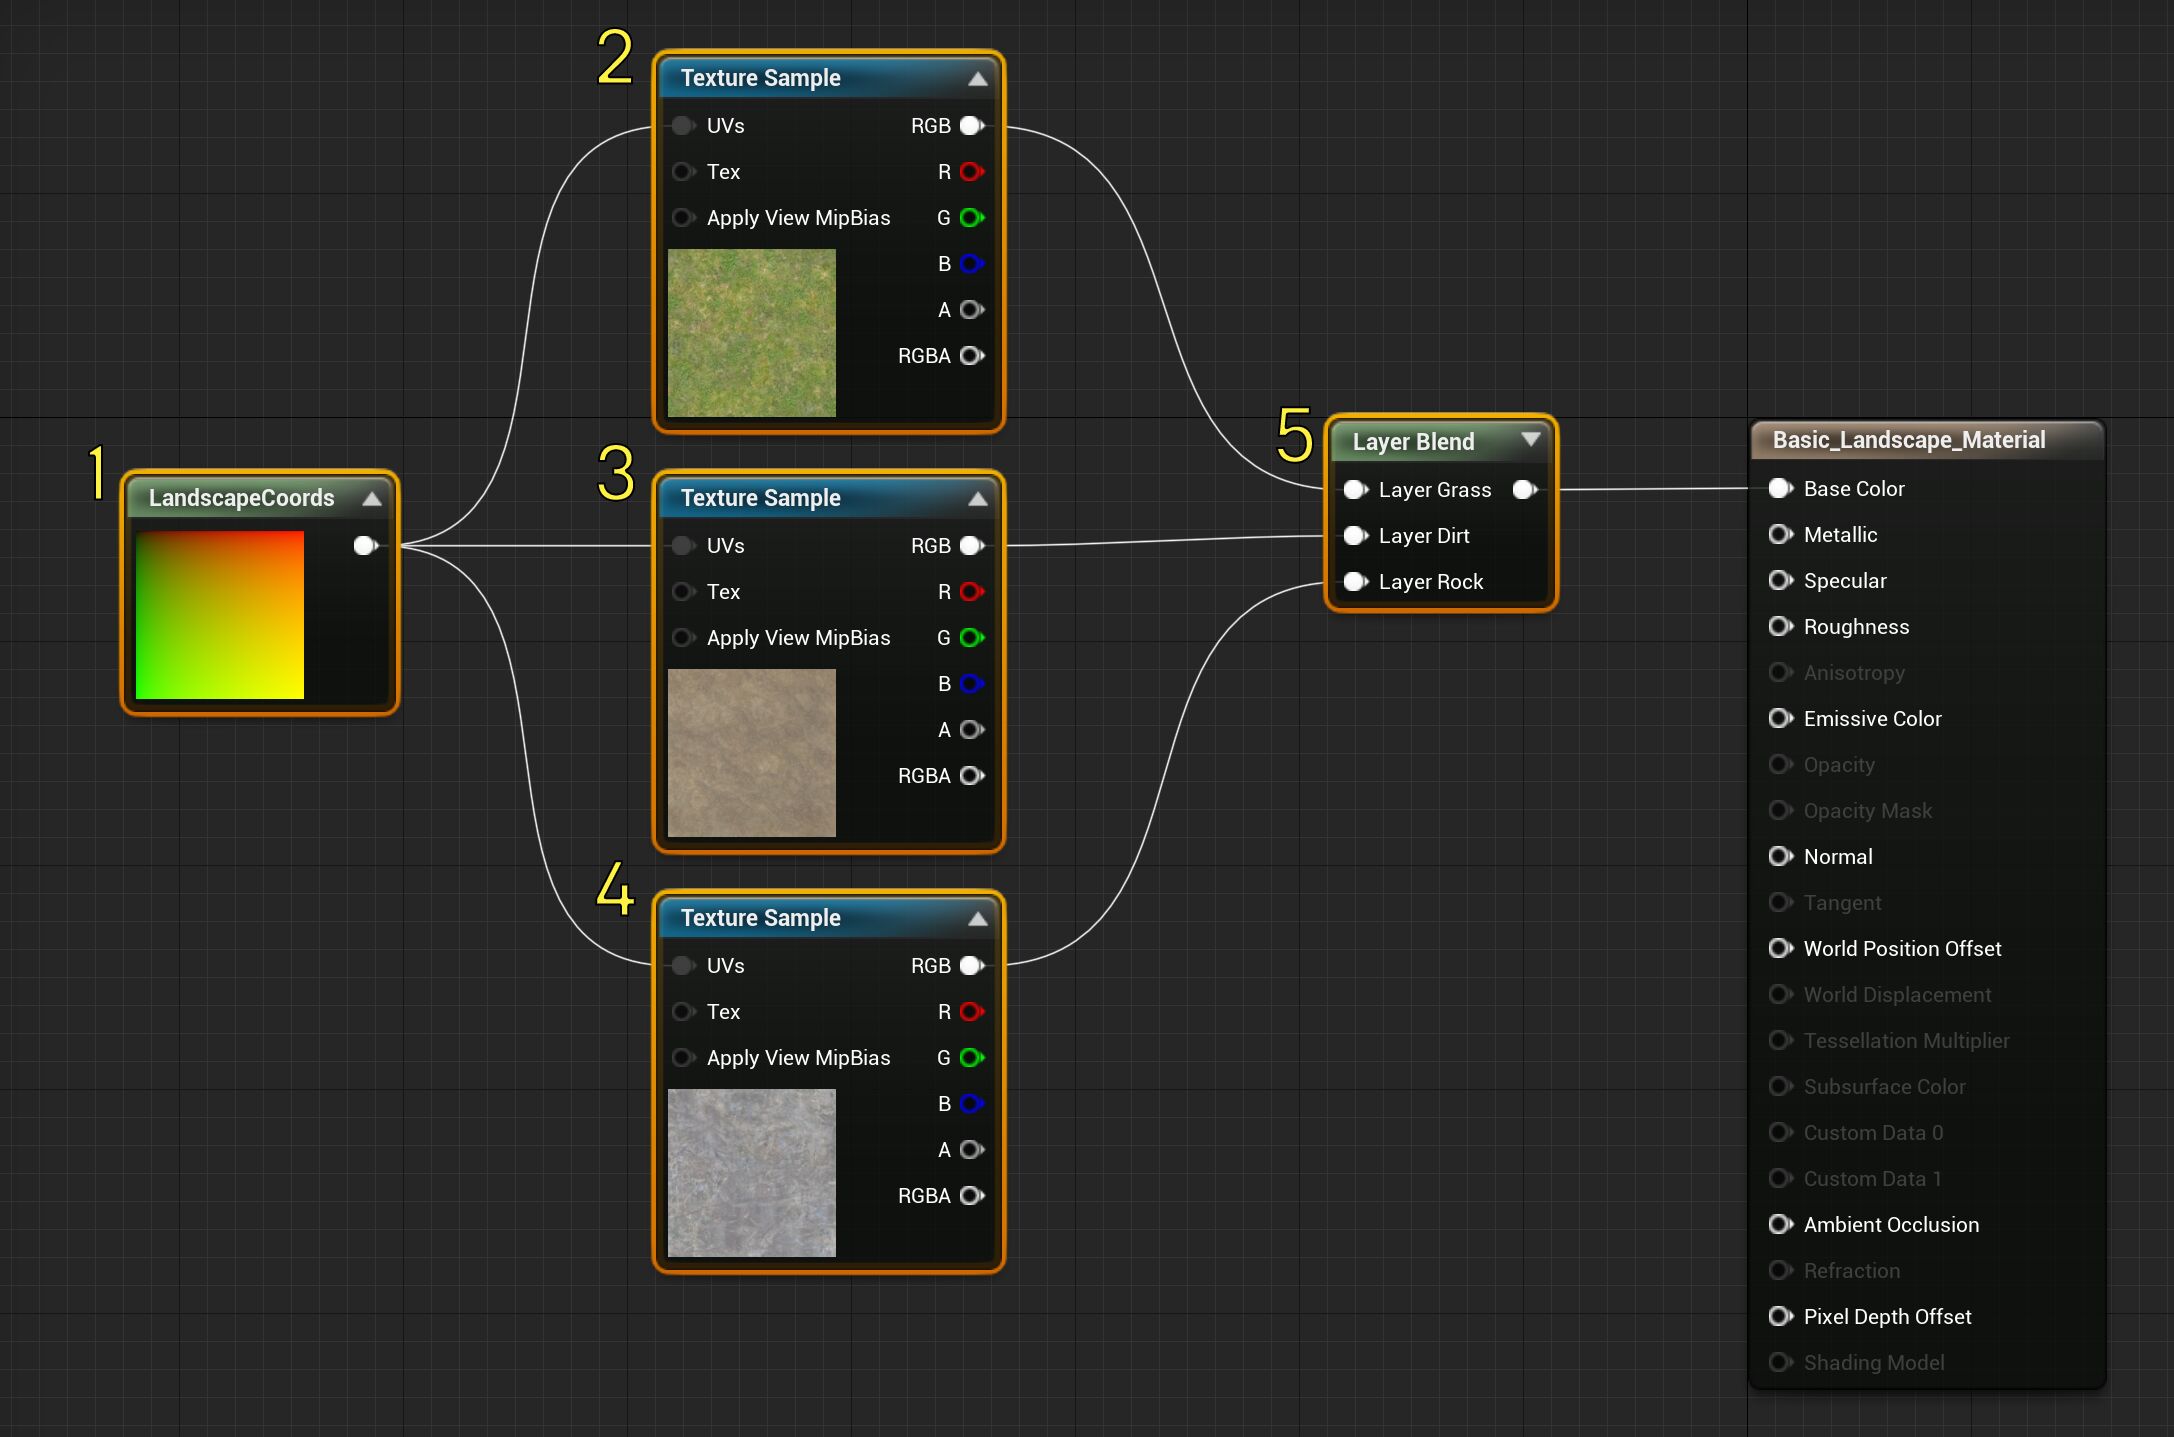
Next, make a new Material. For this example, we will be making a very basic Material that could be easily be expanded upon if needed. The Setup for your Material should look something like this.
![Basic Landscape shader setup Image of basic Landscape shader setup]()
|
Number |
Description |
|---|---|
|
1 |
LandscapeLayerCoords |
|
2 |
TextureSample: T_Ground_Grass_D (Found in StarterContent/Textures ) |
|
3 |
TextureSample: T_Ground_Gravel_D (Found in StarterContent/Textures ) |
|
4 |
TextureSample: T_Rock_Slate_D (Found in StarterContent/Textures ) |
|
5 |
LandscapeLayerBlend |
-
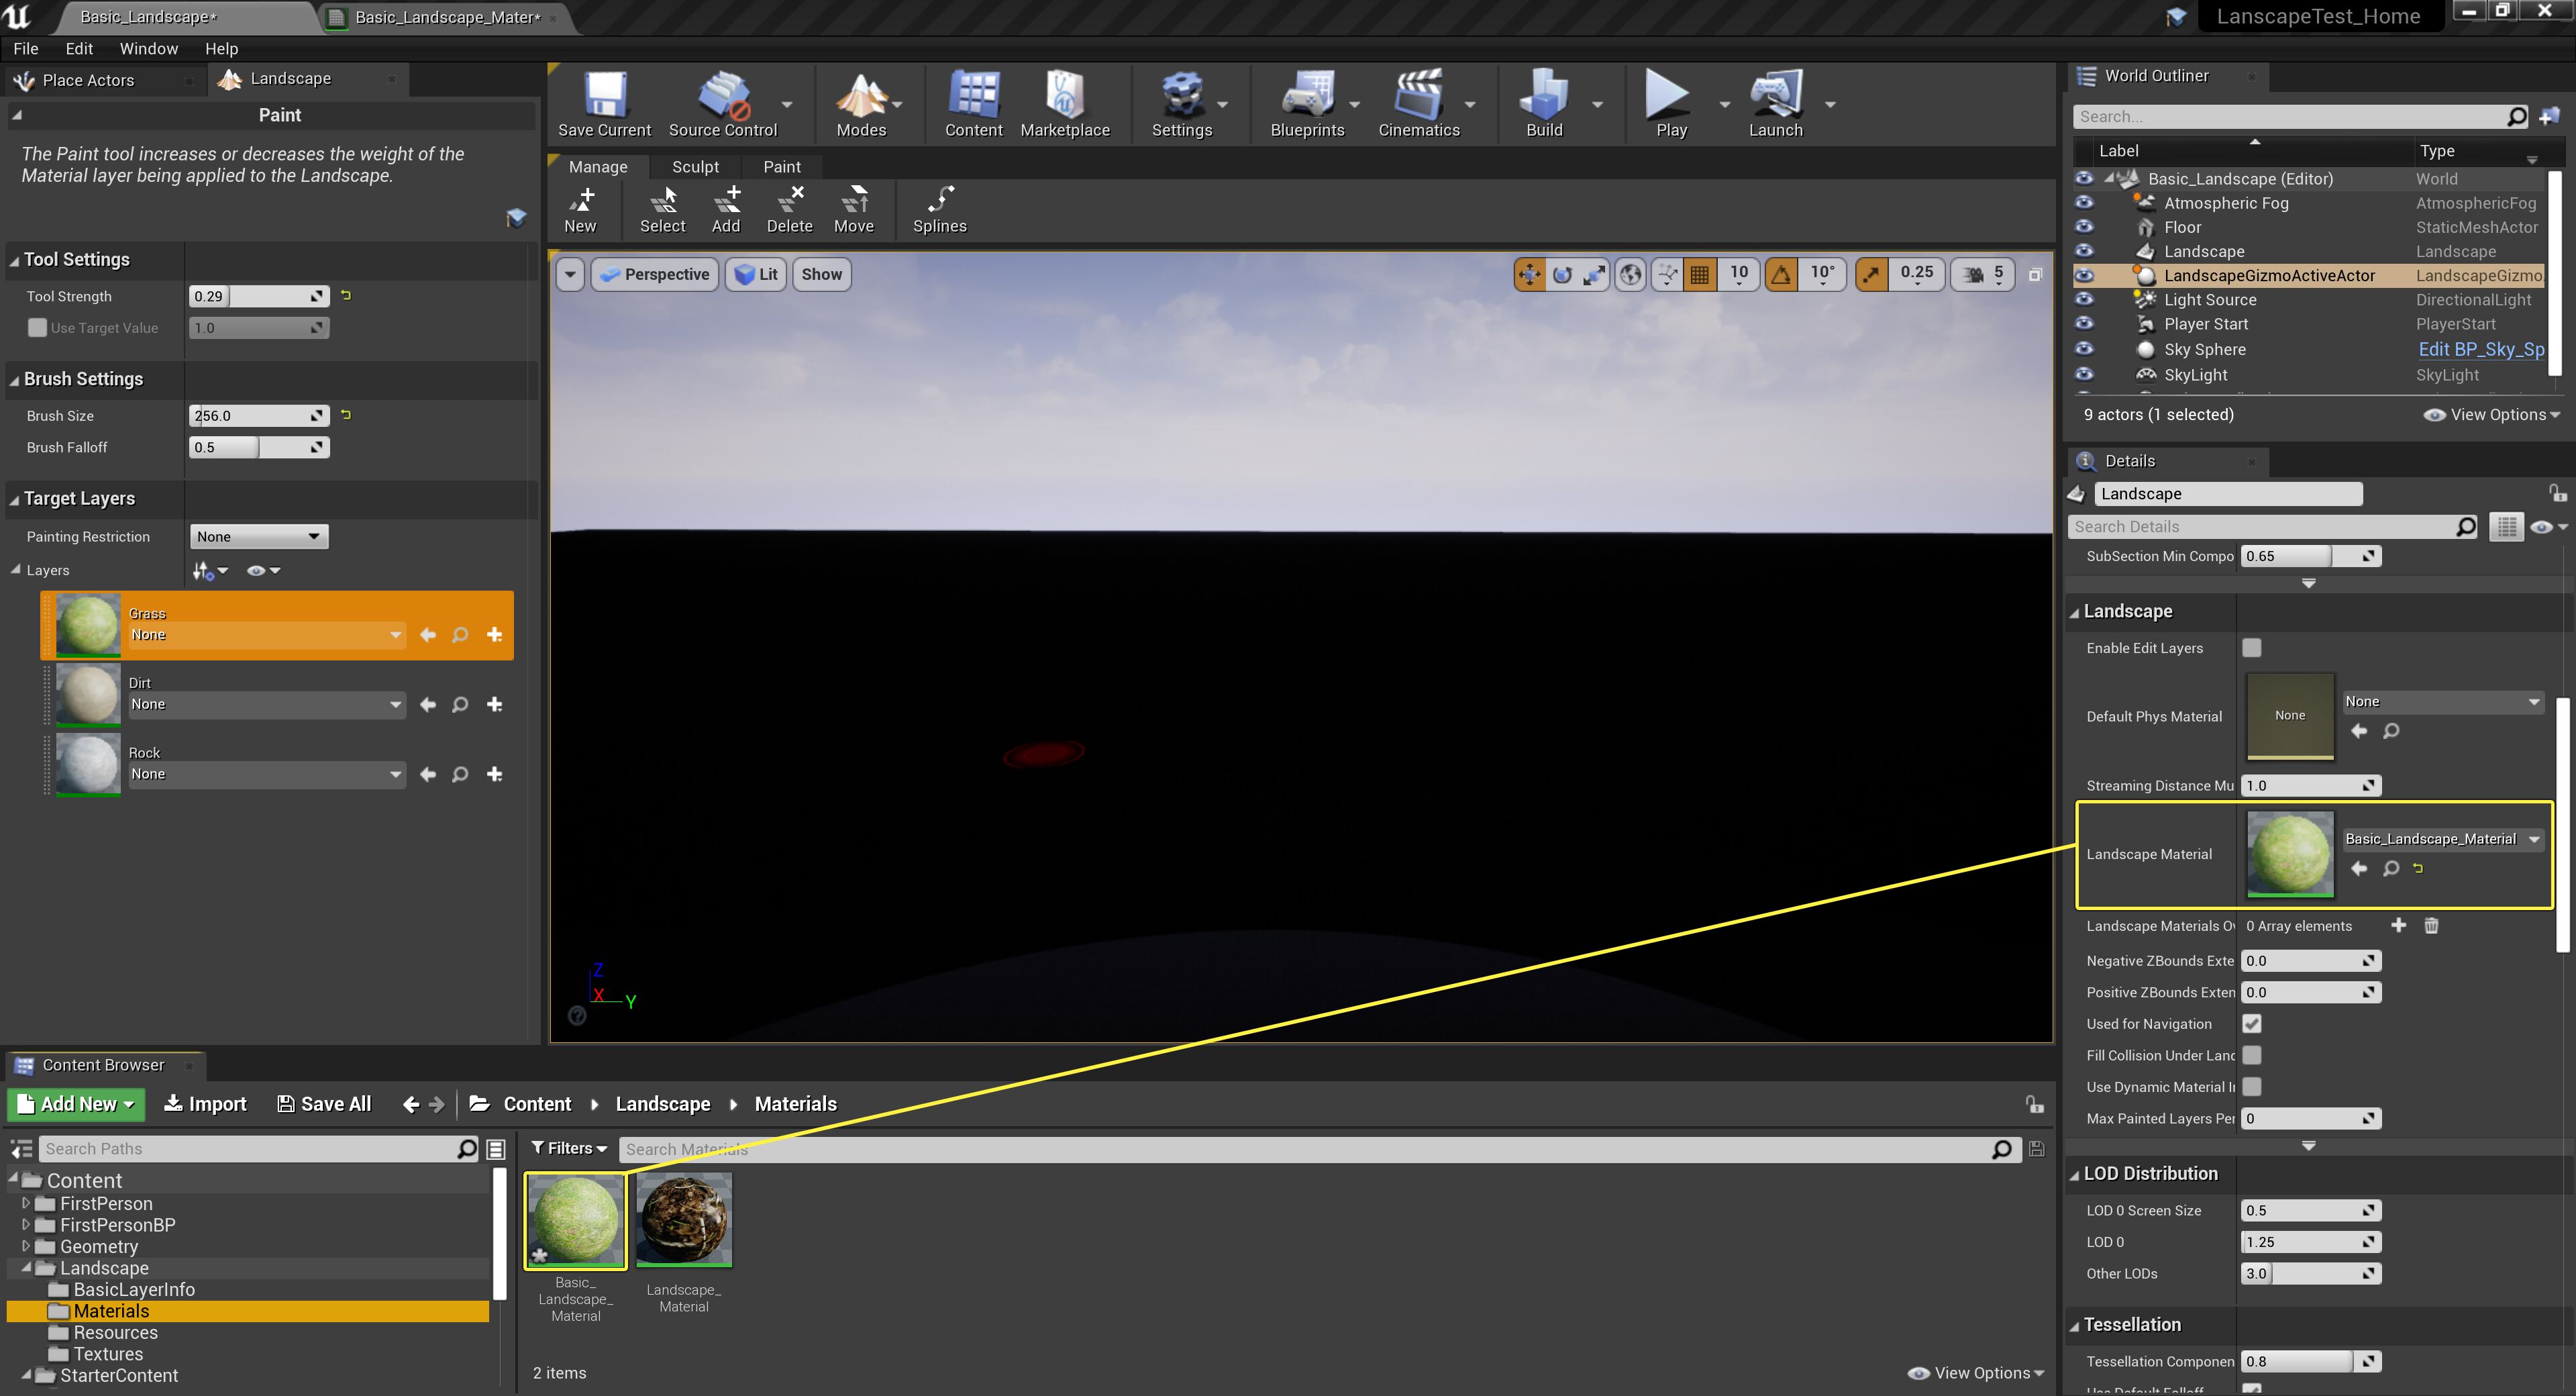
Once the Material is complete, apply it to the Landscape Actor. This will turn your whole landscape black.
![Applying the Landscape Material to the Landscape Actor Image of applying the Landscape Material to the Landscape Actor]()
-
To fix the issue, you will need to add some Layer Info to your Landscape Actor. For this example, create one Layer Info object for each of our three layers. To read more about Layer Info objects, refer to the Layer Info Objects page.
![Creating the Landscape Layer Info objects Image of Creating the Landscape Layer Info objects]()
-
When completed, your Target Layers section of your Landscape panel should look something like this.
![Layer Info objects in Target Layers section Image showing all Layer Info objects in the Target Layers section of the Landscape panel]()
-
Now it is time to import our custom layer. To do this, right-click on the chosen Target Layer and select the Import from file option from the pop up menu. This will prompt you to choose the .PNG or .RAW file that contains your custom layer data. Your custom layer file should be the same resolution as your Landscape Actor's Overall Resolution that was set when you created it (the default is 505 x 505).
![Importing custom layer data from file Image of Importing custom layer data from file]()
-
If your layers are not output at the correct size, you will see the following warning:
![Layer size warning Image of Layer size warning]()
To fix this issue, return to your image editing software and resize your file to match the correct Landscape extent as displayed by the warning message.
Heightmaps
Using external tools to create a base heightmap to use inside UE4 can be a excellent way of speeding up the Landscape creation process. Programs such as World Machine and Terragen can quickly create the base heightmap for your Landscape. Which can then be imported, cleaned up, or modified using the editing tools inside Unreal Editor, making it a better fit with the world and desired game play.
Heightmap Formats
When exporting heightmaps from external programs, only the following formats are usable inside UE4.
-
16-bit, grayscale PNG file
-
16-bit, grayscale RAW file in little-endian byte order
If you are using Photoshop to export your heightmap, set up your new images like the following:
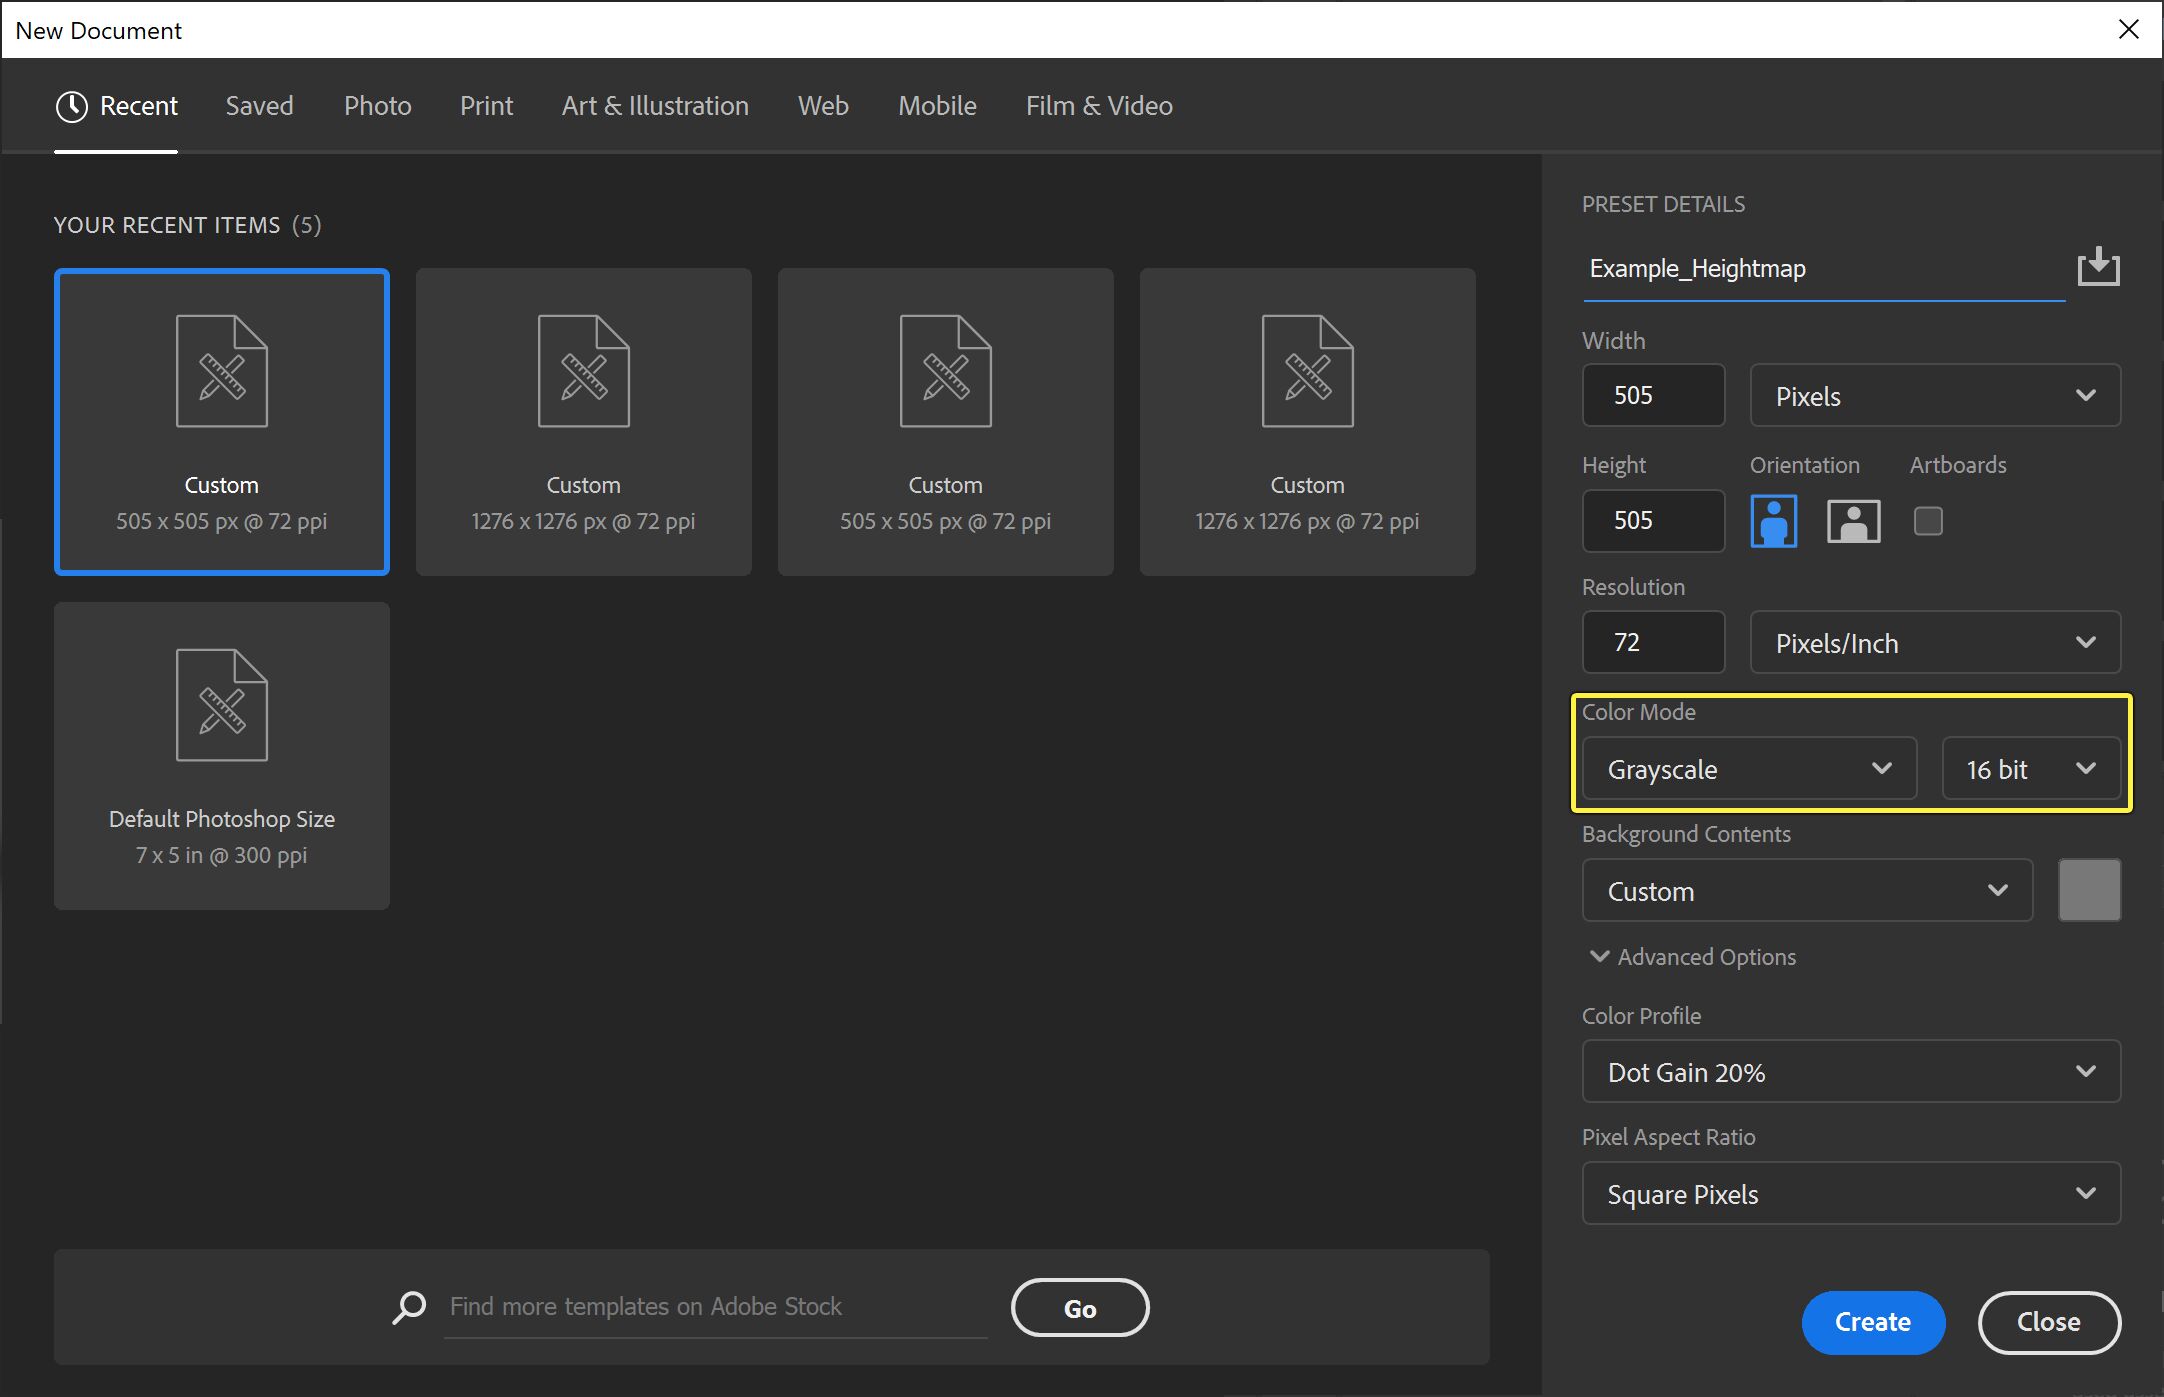
When making a heightmap in an external application, a value of White (255 in all channels) will represent the highest point on your heightmap and a value of Black (0 in all channels) will represent the lowest point on your heightmap.
Importing Custom Heightmaps
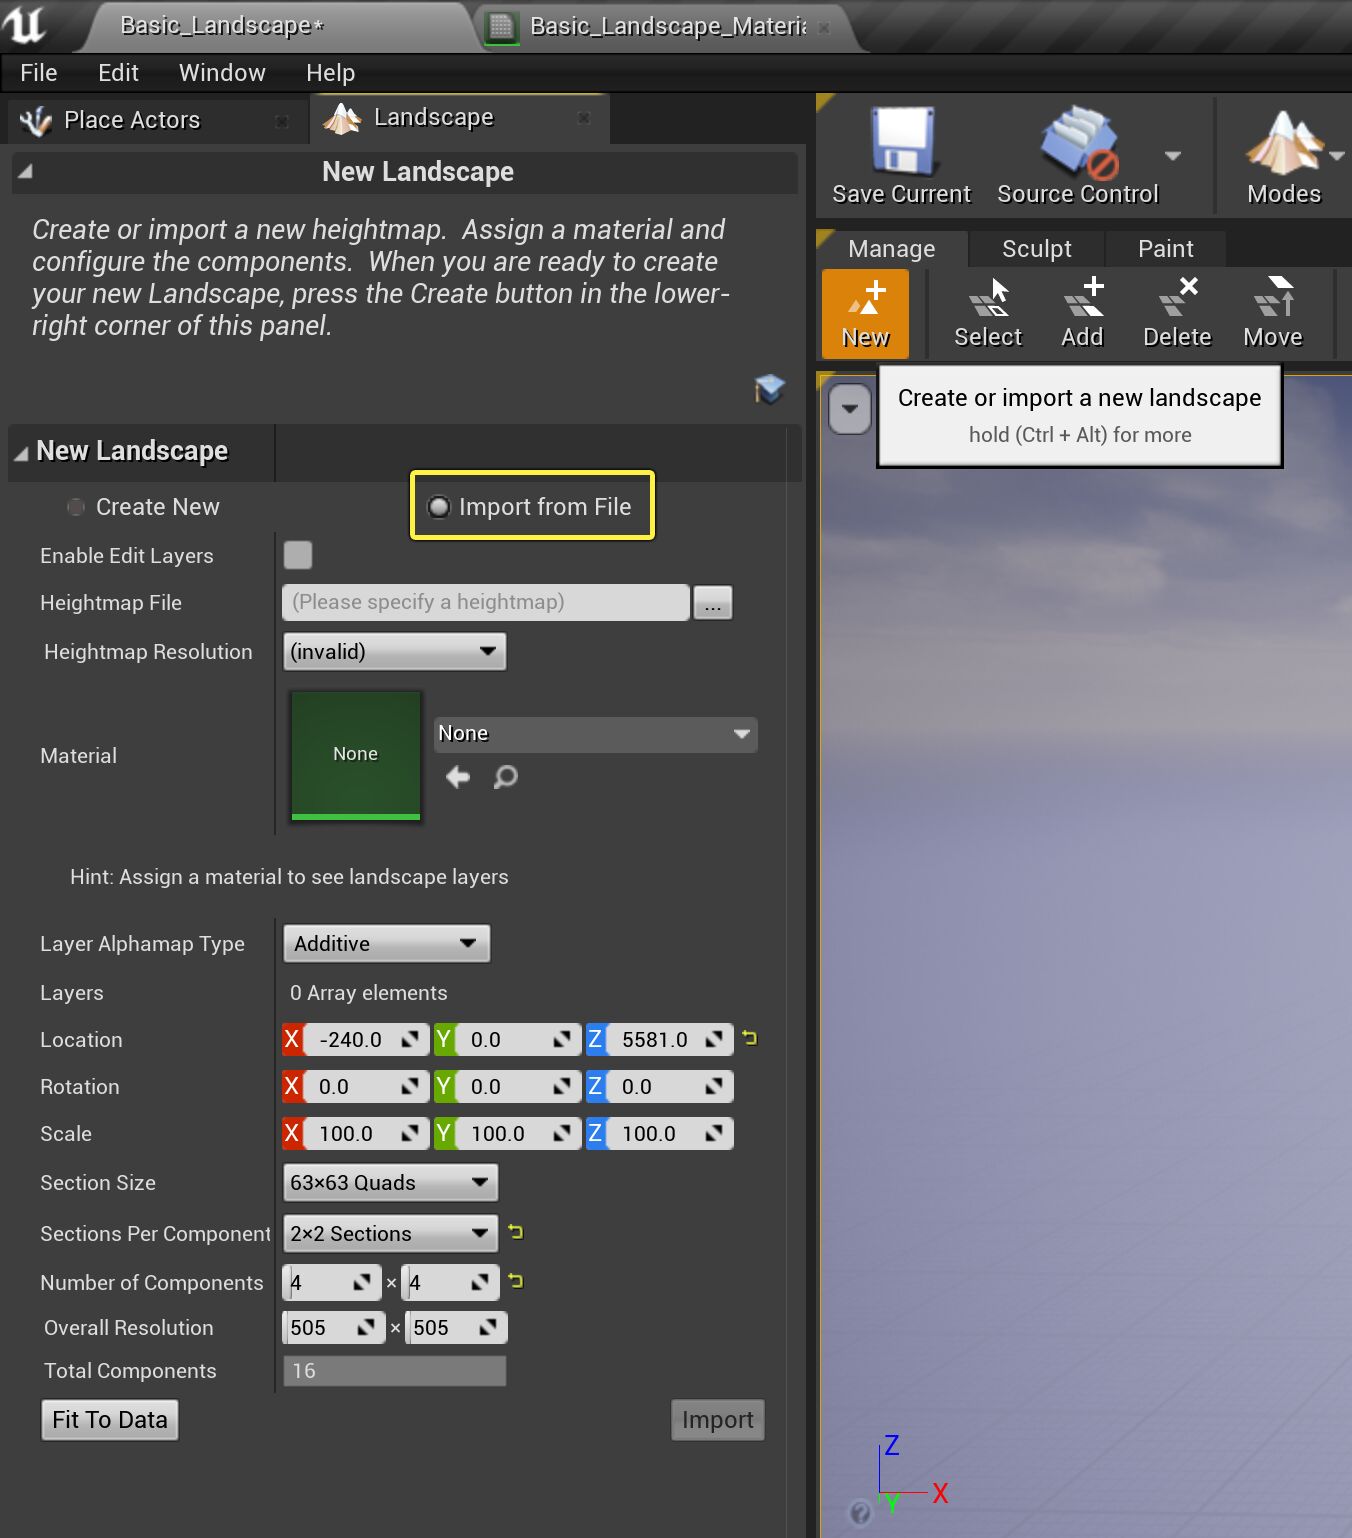
Importing a custom heightmap is initiated by clicking the New button from the Landscape Mode toolbar. To activate it, select the radio button labeled Import from File in the Landscape panel to open the ability to import a heightmap from a file.
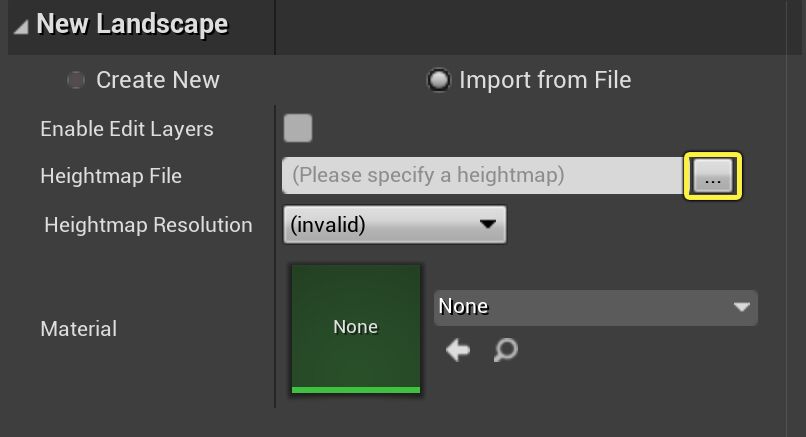
Select a Heightmap to import by pressing the button next Heightmap File option and then select your Heightmap using the file browser.
Now let's try importing a custom heightmap. For this example, we will be using the image below.

Make sure you right-click Save as on the image (above) to download it to your PC.
With the example heightmap saved to your PC, it is now time to use it in the Landscape tools.
-
Open the Landscape tool and click the New button from the Manage Mode tab.
![Opening Landscape Manage mode Image of opening Landscape Manage mode]()
-
Select Import from File.
![Enable the Input from File option Image of Import from File option]()
-
Click the button in the Heightmap File section and choose the example Heightmap you downloaded earlier.
![Choose the Heightmap file you just downloaded Image of Choosing the Heightmap file you just downloaded]()
-
Now press the Import button to create a new Landscape based on your heightmap.
![Click the Import button Image of Click the Import button]()
Before pressing the Import Button:
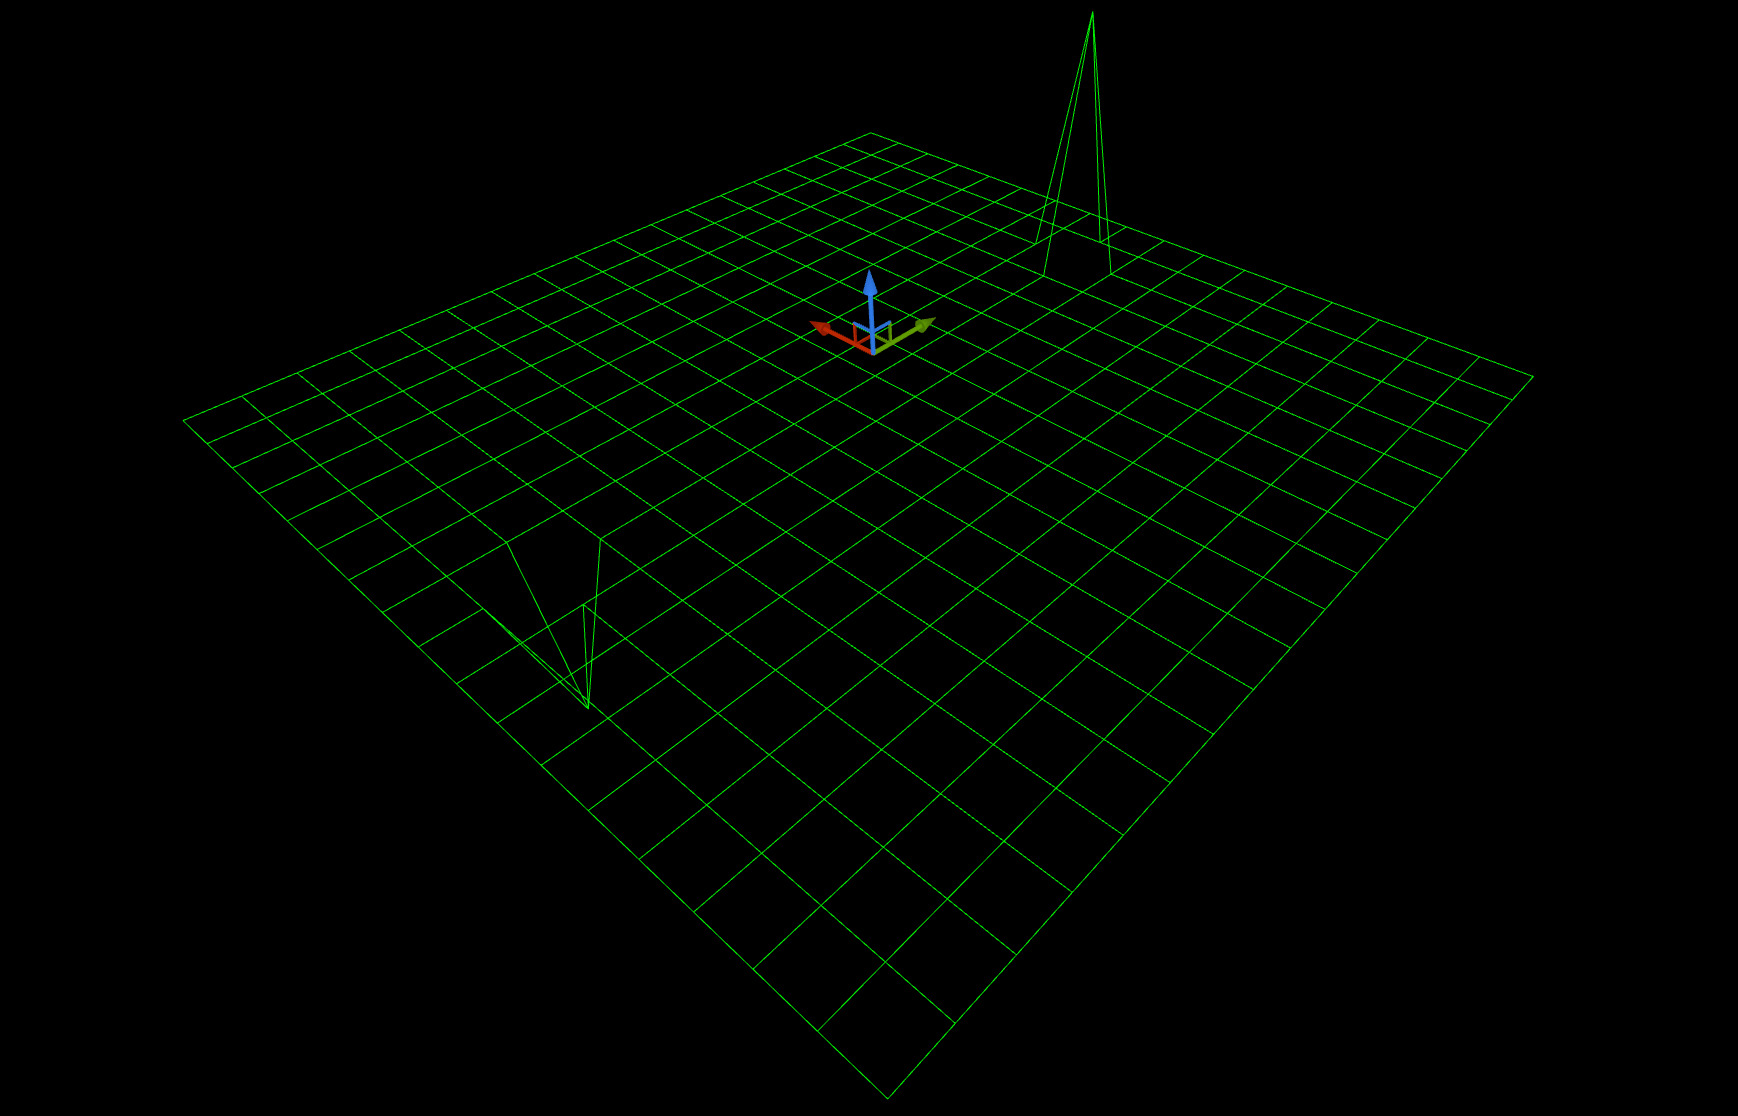
After pressing the Import Button:
