Explains the Landscape Edit Layers feature for non-destructive layers and splines in heightmaps.
Choose your operating system:
Windows
macOS
Linux
The tools in Paint mode enable you to modify the appearance of your Landscape by selectively applying Material layers to parts of your Landscape Actor.
For more information about Landscape Materials, see Landscape Materials .
Landscape Paint Mode also works in the VR Editor. For the controls for using Landscape in VR, see the VR Mode Controls .
Painting Tools
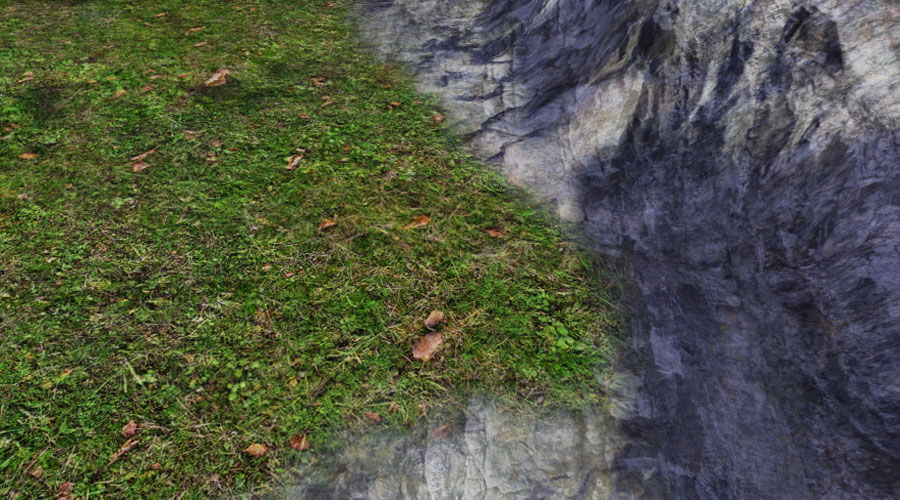
You can use the Painting Tools to modify the appearance of your Landscape by selectively applying layers of specially designed Landscape Materials to sections of it.
|
Common Controls |
Operation |
|---|---|
|
Left Mouse Button |
Performs a stroke that applies the selected tool's effects to the selected layer. |
|
Ctrl+Z |
Undo last stroke. |
|
Ctrl+Y |
Redo last undone stroke. |
The Paint Tools have some common options:
|
Option |
Description |
|---|---|
|
Tool Strength |
Controls how much effect each brush stroke has. |
|
Use Region as Mask |
When checked, the region selection acts as a mask with the active area being comprised of the selected region. |
|
Negative Mask |
When checked, and when Use Region as Mask is also checked, the region selection acts as a mask, but the active area is comprised of the unselected region. |
For more information about Landscape Material layers, see Layers , later on this page.
Paint

The Paint tool increases or decreases the weight of the Material layer being applied to the Landscape, in the shape of the currently selected brush and falloff.
|
Additional Option |
Description |
|---|---|
|
Use Target Value |
If checked, blends the values of the noise being applied toward a target value. |
Smooth

The Smooth tool averages the layer weights across the area on which the tool is used. The strength determines the amount of smoothing.
Layer Smoothing
|
Additional Option |
Description |
|---|---|
|
Filter Kernal Scale |
Sets the scale multiplier for the smoothing filter kernel. |
|
Detail Smooth |
If checked, performs a detail preserving smooth using the specified detail smoothing value. Larger detail smoothing values remove more details, while smaller values preserve more details. |
Flatten

The Flatten tool directly sets the selected layer's weight to the value of the Tool Strength slider.
|
Additional Option |
Description |
|---|---|
|
Flatten Mode |
Determines whether the tool will increase or decrease the application of the selected layer's weight, or do both. |
Noise

The tool applies a noise filter to the layer weight. The strength determines the amount of noise.
|
Additional Option |
Description |
|---|---|
|
Use Target Value |
If checked, blends the values of the noise being applied toward a target value. |
|
Noise Mode |
Determines whether to apply all noise effects, only the noise effects that result in increasing the application of the layer, or only the noise effects that result in reducing the application of the layer. |
|
Noise Scale |
The size of the perlin noise filter used. The noise filter is related to position and scale, which means if you do not change Noise Scale, the same filter is applied to the same position many times. |
Layers
A layer is the part of the assigned Landscape Material that you want to paint onto your Landscape to change its appearance.
Landscape layers determine how a texture (or material network) is applied to a Landscape Actor. A Landscape can use multiple layers with different Textures, scaling, rotation, and panning blended together to create the final textured terrain.
The layers defined in the Landscape Material automatically populate the list of Target Layers in the Landscape tool's Paint mode. Each layer is displayed with its name and a small thumbnail image.

Whichever layer is selected is the one you can apply to the Landscape with the Paint Tools, according to the tools' options and settings, and to the brush you are using.

Many of the Paint Tools are similar to the Sculpting Tools, and you use them similarly, but to manipulate the weight of layers instead of the heightmap.
You create layers in the Material itself. For more information about layers and Landscape Materials, see Landscape Materials .
Layer Info Objects
A layer info object is an asset that contains information about a particular Landscape layer. Every Landscape layer must have a layer info object assigned to it, or else it cannot be painted. You can create layer info objects from the Landscape panel.
There are two kinds of layer info object, Weight-Blended and Non Weight-Blended:
-
Weight-Blended - Painting a weight-blended layer will decrease the weight of all other weight-blended layers. For example, painting mud will remove grass, and painting grass will remove mud. This is the most commonly used type of layer info object.
-
Non Weight-Blended - Layers that are independent of each other. Painting a non weight-blended layer does not affect the weights of the other layers. These are used for more advanced effects, such as blending snow onto other layers: instead of having grass, mud, rock or snow, you would use a non weight-blended snow layer to blend between "grass, mud, or rock" and "snowy grass, snowy mud, or snowy rock."
You can either create a layer info object from the layer itself, or reuse an existing layer info object from another Landscape.
To create a layer info object:
-
Press the Plus icon to the right of the Layer name.
-
Choose Weight-Blended Layer (normal) or Non Weight-Blended Layer .
![WeightBlended_NonWeightBlended.png]()
-
Choose the location to save the layer info object.
After their creation, layer info objects exist as assets in the Content Browser :

They can then be reused by other Landscapes.
Even though it is possible to use the same layer info object in multiple Landscapes, within a single Landscape you can use each layer info object only once. Each layer in a Landscape must use a different layer info object.
To reuse an existing layer info object from another Landscape:
-
Find and select the layer info object in the Content Browser .
-
In the Landscape panel, in the Target Layers section, to the right of the layer with which you want to use the layer info type, click the Assign icon (
![Assign]()
Layer info objects can only be used if their layer name matches the layer they were originally created for.
The primary purpose of layer info objects is to act as a unique key for painted layer data, but they also contain a couple of user-editable properties:
|
Option |
Description |
|---|---|
|
Phys Material |
The Physical Material (if any) assigned to areas of Landscape where this layer is dominant. |
|
Hardness |
The value used by the Erosion tool. |
Orphaned Layers
If a layer is removed from the Landscape Material after it has been populated in the Target Layers list of a Landscape and it has painted data on the Landscape, it will be displayed in the list with a ? icon. This denotes an orphaned layer.

Areas previously painted with this layer will likely appear black, but the exact behavior depends on your Landscape Material.
Deleting Orphaned Layers
You can delete orphaned layers from the Landscape, though it is recommended that you first paint over any areas where the layer was used. The painted layer data is preserved until the layer is deleted, so no information is lost if you make a mistake in the Landscape Material.
To delete a layer from your Landscape:
-
Click the X icon to the right of the layer's name.
![Delete Layer]()
Weight Editing
At every Landscape vertex, each layer has a weight specifying how much influence that layer has on the Landscape. Layers have no particular blending order. Instead, each layer's weight is stored separately and the results added. In the case of weight-blended layers, the weights add up to 255. Non weight-blended layers are independent of other layers and can have any weight value.
You can use the Paint tool to increase or decrease the weight of the active layer. To do so, select the layer whose weight you want to adjust, and use one of the Paint tools to apply the layer to the Landscape. For Weight-Blended layers, as you increase the weight of one layer, the weight of the other layers will be uniformly decreased. Fully painting one layer will result in no weight on any other layer.
When you are reducing a weight-blended layer by holding down Ctrl + Shift while painting, it is not clear what layer should be increased to replace it. The current behavior is to uniformly increase the weights of any other layers. Because of this behavior, it is not possible to paint all layers completely away. Instead of painting layers away, it is recommended you choose the layer you want to paint in its place, and paint that additively.


