Choose your operating system:
Windows
macOS
Linux
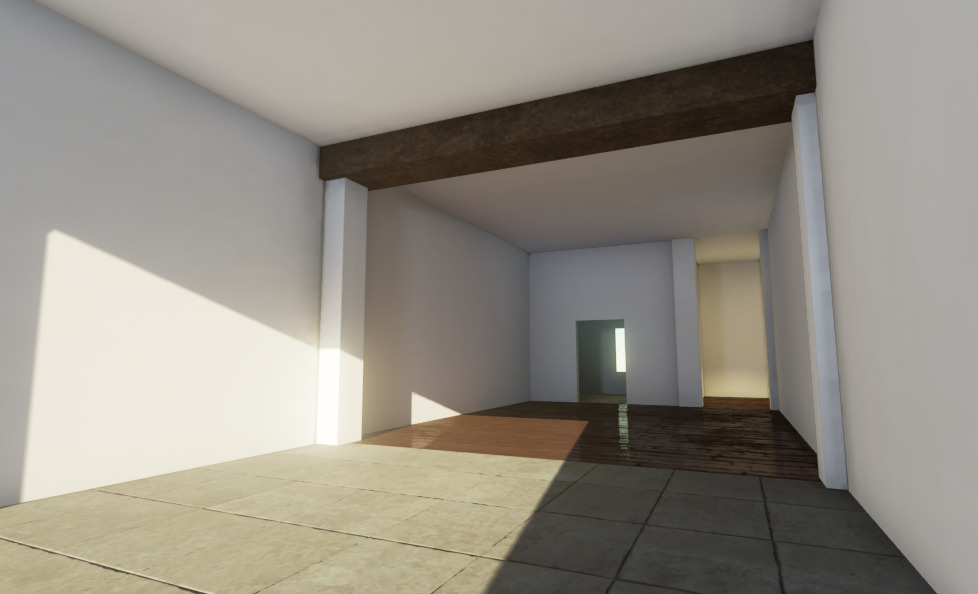
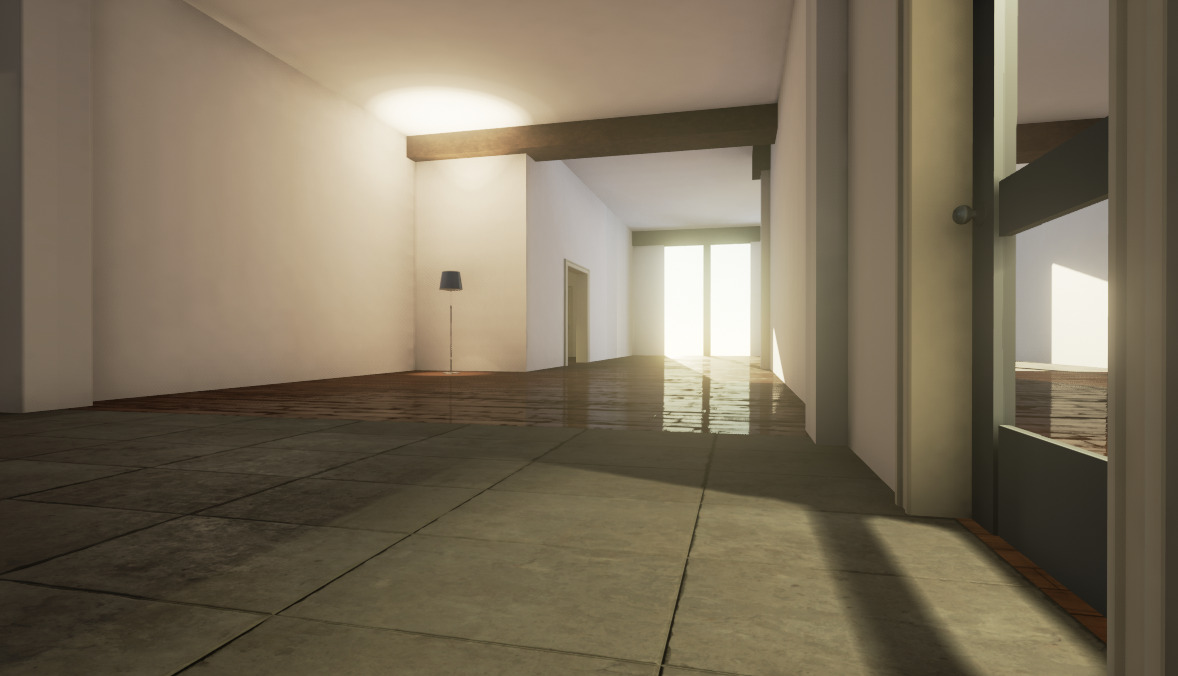
In this Lighting Quick Start Guide you will go through the basics of working with lighting in Unreal Engine 4 including: using Atmospheric & Directional Lighting to create a simple skybox and lit level, using Point Lights and Spot Lights to light rooms, changing the lighting quality and how reflections can be used to bounce light in a room and also using IES Light Profiles. At the end of this guide, you will have a room similar to the one pictured above. The final step of this guide will give you some ideas to take it and make it your own as well as provide links to related documentation.
While this guide will cover the actions needed to proceed through each step, if you have not worked with the Unreal Editor before, it is recommended that you first look over the Unreal Editor Quick Start guide to gain a better understanding of general editor usage, terms, and processes.
1 - Required Setup
For this tutorial series, we are using a new Blank project with Starter Content enabled. Please see the Project Browser page for information on creating new projects, using templates and defining project settings (including Starter Content ).
Inside your Blank project (with Starter Content ), follow the steps below to create our simple apartment we will use to light.
-
With your project open press Ctrl+N to create a new level, then select Empty Level .
-
Inside the Content Browser under the StarterContent > Architecture folder, drag a Floor_400x400 into the level.
![setup1.png]()
-
Inside the World Outliner , select the floor and press Ctrl+W 6 times to create the floors shown below.
![floors.png]()
-
Select the Floor_400x400 , then in the Details panel, set its Transform as shown below.
![SetTransform1.png]()
-
Set the Transform for the remaining floor pieces as shown in the table below.
Floor Piece
Transform
400x401
![setup4.png]()
400x402
![setup5.png]()
400x403
![setup6.png]()
400x404
![setup8.png]()
400x405
![setup9.png]()
400x406
![setup10.png]()
With all the floor pieces added, you should now have a floor and roof as shown below.
![floorandroof.png]()
To view your assets better, switch to Wireframe View Mode from the View options.
![setup3.png]()
-
From the Content Browser , drag a Wall_400x400 into the viewport.
![setup11.png]()
-
Inside the World Outliner , select the wall and press Ctrl+W 11 times to create the walls shown below.
![wallsOutliner.png]()
-
Select the Wall_400x400 , then in the Details panel, set its Transform as shown below.
![wall1Details.png]()
-
Set the Transform for the remaining wall pieces as shown in the table below.
Wall Piece
Transform
400x401
![setup13.png]()
400x402
![setup14.png]()
400x403
![setup15.png]()
400x404
![setup16.png]()
400x405
![setup17.png]()
400x406
![setup18.png]()
400x407
![setup19.png]()
400x408
![setup20.png]()
400x409
![setup21.png]()
400x410
![setup23.png]()
400x411
![setup24.png]()
With all the wall pieces added (highlighted below), you should now have outer walls and a small corner room.
![wallsAdded.png]()
-
From the Content Browser , drag a Pillar_50x500 into the viewport.
![setup25.png]()
-
Inside the World Outliner , select the pillar and press Ctrl+W 5 times to create the pillars shown below.
![pillarsAdded.png]()
-
Select the Pillar_50x500 , then in the Details panel, set its Transform as shown below.
![pillar1Details.png]()
-
Set the Transform for the remaining pillar pieces as shown in the table below.
Pillar Piece
Transform
50x501
![setup27.png]()
50x502
![setup28.png]()
50x503
![setup29.png]()
50x504
![setup30.png]()
50x505
![setup31.png]()
With all the pillars added (highlighted below), you should now have a structure that looks like the one below.
![setup32.png]()
-
In the World Outliner , select the Wall_400x407 wall piece.
![setup33.png]()
-
In the Content Browser , select the Wall_Door_400x400 , then in the Details for 407 wall piece, click the Assign button.
![setup34.png]()
-
Repeat the previous two steps for the Wall_400x410 piece to switch it to a wall with a door as well.
![setup36.png]()
-
Select the Wall_400x405 , then in the Content Browser select the Wall_Window_400x400 and assign it to the wall in the level.
![setup39.png]()
You should now have two doorways and a window.
Our simple apartment is complete with a small bathroom and an opening for a patio. In the Next Step we will begin lighting it.
2 - Atmospheric and Directional Lighting
With our basic apartment setup created in the previous step, we will now add the overall level lighting.
-
First (if you've enabled it), let's disable Wireframe mode and return to Lit mode (press Alt+4 ).
![step2_1.png]()
-
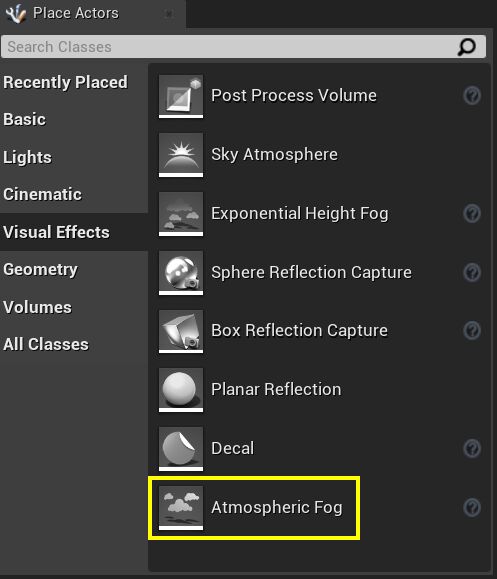
Inside the Place Actors panel in the Visual Effects tab, drag an Atmospheric Fog into the level viewport.
![step2_2.png]()
After doing so, your level should have a simple skybox and sunset lighting.
-
Inside the Place Actors panel in the Lights tab, drag a Directional Light into the level viewport.
![step2_3.png]()
After adding the light, you will notice that the text Preview appears inside our room.
![step2_4.png]()
This indicates that you are seeing a preview of the actual lighting that will appear in-game once we Build and run the game.
-
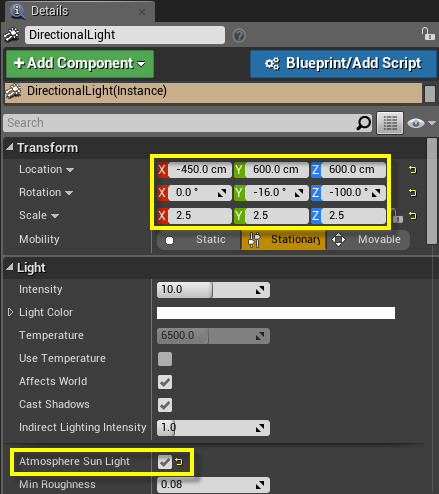
In the Details panel for the Directional Light , set its Transform as shown below and check the Atmosphere Sun Light checkbox.
![newDirectionalLight.png]()
With Atmosphere Sun Light checked, we can control the location of the sun using Rotation mode ( E ) and rotating our light.
The lighting in our level changes based on the location of the sun allowing us to easily switch between various times of day.
Currently our default lighting looks like this:

Let's change some settings on our Directional Light to create a warmer sunset feel.
-
In the Details panel for the Directional Light , click the Light Color bar and a Color Picker will appear.
![LightingColorPicker.png]()
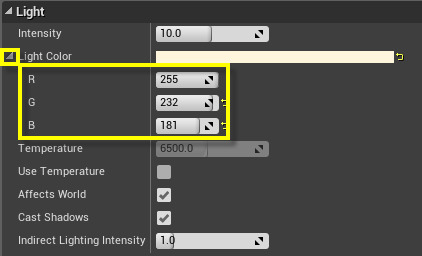
You can also instead, manually enter RGB values by clicking the expand icon.
![step2_11.png]()
Set the RGB as shown above.
Let's Build the game so that we get a better representation of what our light will look like in the game.
-
From the Main Toolbar , click the Build icon.
![step2_12.png]()
In the bottom-right corner of the Editor, you will see that the Build process has begun.
![step2_13.png]()
Wait until it says that it has completed.
![step2_14.png]()
Our lighting has been built and the preview text disappears.
![BuiltLighting.png]()
Anytime you add/move your lights or geometry in the level you will need to rebuild the lighting to get an accurate representation.
See Directional Lights for more information on the various Directional Light settings.
With our atmospheric lighting set up, in the Next Step we'll add some lights inside our apartment to light up the dark areas.
3 - Adding a Point Light
Now that we have some basic level lighting, we will add a Point Light inside our little apartment's bathroom.
-
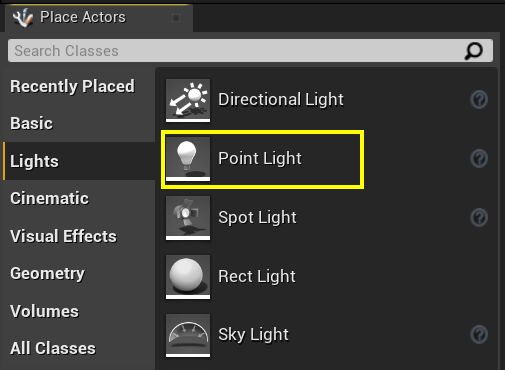
From the Place Actors panel in the Lights tab, drag a Point Light into the small bathroom.
![step3_1.png]()
You can use the Translation widget to move the light around.
![step3_2.png]()
Our light is now positioned at the following location:
![step3_3.png]()
-
In the Details panel for the light, change the light color and lower the Intensity of the light.
![step3_4.png]()
The Intensity is one of the settings that can be used to adjust the brightness of the light.
-
Select the Attenuation Radius field.
![step3_5.png]()
This controls the influence of the light. If you zoom out, you can see the sphere currently created.
![step3_6.png]()
Change the Attenuation Radius to 350.
![step3_8.png]()
The influence range is reduced to cover our small bathroom better.
![newLightAdded.png]()
-
Click the Build icon from the Main Toolbar to build the lighting.
See Point Lights for more information on the settings available to Point Lights .
We've added a Point Light in the bathroom, in the Next Step we will add a Spot Light to our little apartment.
4 - Adding a Spot Light
In this section, we are going to add a stylized light above our entryway by using a Spot Light .
-
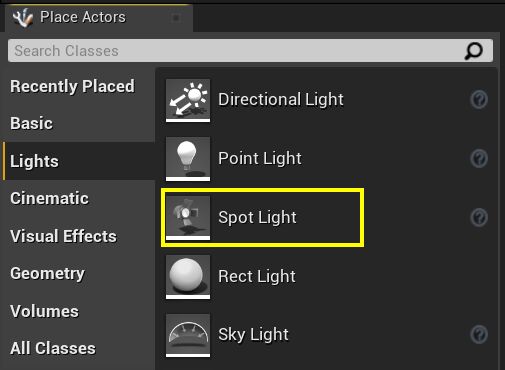
From the Place Actors panel in the Lights tab, drag a Spot Light into the level.
![step4_1.png]()
-
In the Details panel for the Spot Light, set its Transform as shown below.
![step4_2.png]()
This will place the light just above the entry doorway.
-
Change the Intensity and Light Color (suggested values are shown below).
![step4_3.png]()
-
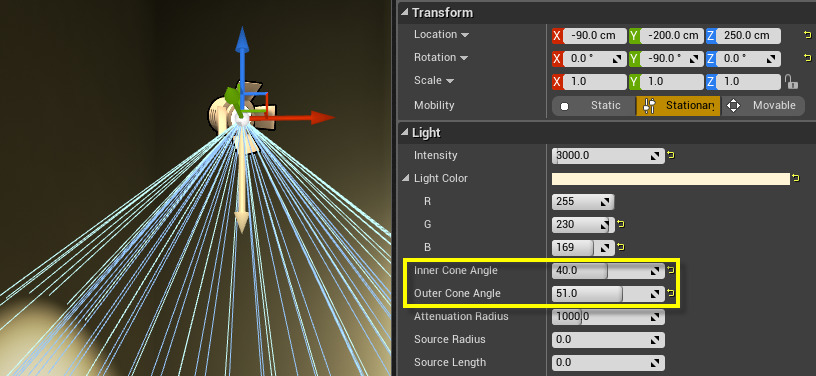
Adjust the cone shape of the Spot Light with the Inner Cone Angle (blue cone) and Outer Cone Angle (green cone).
![step4_4.png]()
-
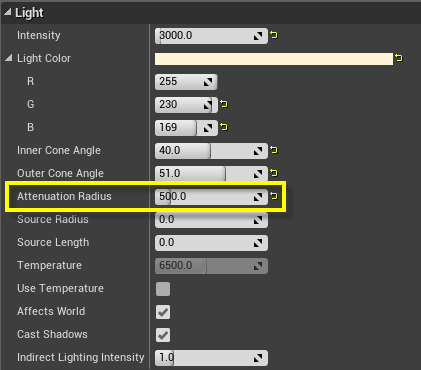
Change the Attenuation Radius to affect its influence.
![step4_5.png]()
-
Click the Build icon from the Main Toolbar to build the lighting.
You can also use Spot Lights to provide additional ambient light.
-
With the Spot Light selected, in the viewport press Ctrl+W to duplicate it then set its settings as shown below.
![step5_2.png]()
This will shine additional light into our apartment from the outside, let's make some additional changes.
-
Inside the Details panel for the new Spot Light, expand the additional settings button under Light .
![step5_3.png]()
-
Uncheck the Use Inverse Squared Falloff option.
![step5_4.png]()
This option affects the light falloff and most closely replicates the behavior of light in the real world.
See the Inverse Square Falloff Content Example for more information.
-
Set the rest of the settings for the light as shown below.
![step5_5.png]()
You may notice that we've elected to use a light blue color instead of the same color as our level lighting.
Doing this provides a contrast to our level lighting and creates a more naturally lit looking room.
We could have used a Sky Light instead of using a Spot Light for our extra ambient lighting. On a large scale area this might make more sense, however for our little apartment and to control the lighting more effectively, we used Spot Lights to create our ambient lighting.
In the Next Step we will improve the quality of our lights and add reflective lighting to our apartment.
5 - Light Quality and Reflections
Our apartment is lit, however there are some things we can do to improve the quality of the lighting, starting with Build options.
-
From the Main Toolbar , click the down-arrow next to Build to expand the options.
![BuildOptions.png]()
-
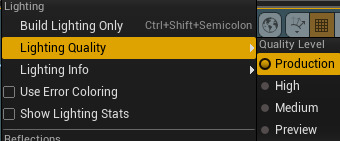
Under Lighting Quality , select the Production Quality Level.
![productionLighting.png]()
-
Click the Build icon to build the game.
You will notice that the build time has been increased with the increased quality of lighting. For quick iteration, the Preview setting is fine but once you are nearing completion of your project, you can switch over to Production to build your final or near-final project.
Another thing we can do is concentrate where the important areas to light are by adding a Lightmass Importance Volume .
-
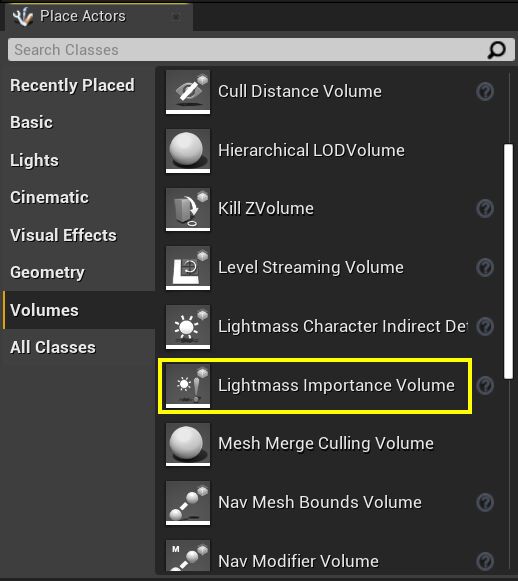
From the Place Actors panel in the Volumes tab, drag a Lightmass Importance Volume into the level.
![lightmass.png]()
-
Inside the Details panel for the Lightmass Importance Volume, set its Transform as shown below.
![LightmassSettings.png]()
The volume should now encompass the structure.
![LightMassVolumeSet.png]()
See the Lightmass Basics documentation for more information on work with Lightmass.
To create a more realistic look, we can use Reflection Capture Actors to reflect light off surfaces.
First, let's add some Materials to our apartment instead of using the default ones.
-
In the Content Browser under Content/StarterContent/Materials , drag the M_Concrete_Tiles onto the floor near the patio.
-
Drag that same Material into the small bathroom.
-
For the other floors, drag in the M_Wood_Floor_Walnut_Polished Material.
-
While we are at it, drag the M_Metal_Rust asset onto the pillars across the roof.
![materialsAdded.png]()
You can change up the Materials and use any you wish, however this will get us started.
-
From the Place Actors panel in the Visual Effects tab, drag a Box Reflection Capture into the level viewport.
![boxReflection.png]()
-
In the Details panel, set the Box Reflection Capture's Transform as shown below.
![boxSettings1.png]()
Also set the Box Transition Distance to 1.0 .
![BoxTransition.png]()
If you fly into the bathroom, you can see how the Box Reflection Capture affects the surface on the tile.
![boxPlaced1.png]()
The current Transform is not ideal as it creates a hard line in the room and was only used to illustrate how it affects the scene. You can move the Box Reflection Capture up and down, left and right to see how it affects the light in the room off the surface. You can use your own settings or try the ones shown below.
![finalBoxSettings.png]()
-
Click the Build icon to build your lighting (you can also return to Preview mode if you wish to speed up build times).
![bathroomBuilt.png]()
-
Duplicate the Box Reflection Capture , resize and position it over the other tiled area in the apartment (our settings are below).
![secondBoxedArea.png]()
Since we added a shiny wood floor Material, we did not add a Reflector above it however you can if you wish. You can also place just one Reflector in the level and adjust its settings to see how it impacts the lighting in the level.
-
Click the Build icon to build your lighting.
![litRoom.png]()
Our little apartment is now lit with some basic lighting. In the Next Step we will update one of our lights to a slightly more complex light.
6 - Using a Light Profile
With our apartment almost complete, next we will create a more advanced Point Light that uses an IES Profile which is a lighting industry standard method of diagramming the brightness and falloff of light as it exits a particular real world light fixture.
For more information, refer to the IES Light Profiles documentation.
-
Click on the Point Light in the small bathroom.
-
In the Details panel for the Point Light, click the None dropdown under Light Profile .
![lightProfileNone.png]()
-
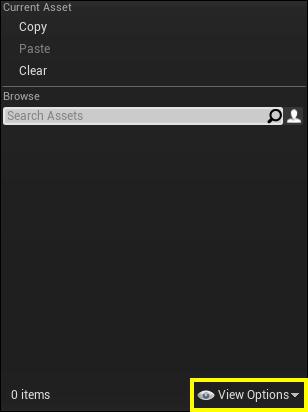
Click the View Options in the pop-up menu that appears.
![viewOptions.png]()
-
Click the Show Engine Content in the pop-up menu that appears after selecting View Options.
![ShowEngineContent.png]()
Unreal Engine 4 provides some example IES Light Profiles to use, but you can find others from the internet and import them as well.
-
Select the Complex_IES profile.
![complexIES.png]()
-
We'll need to update the Transform of the light to fully see its effect, set the following new Transform .
![NewLightSettings.png]()
-
Click Build to build your lighting.
![finalLight.png]()
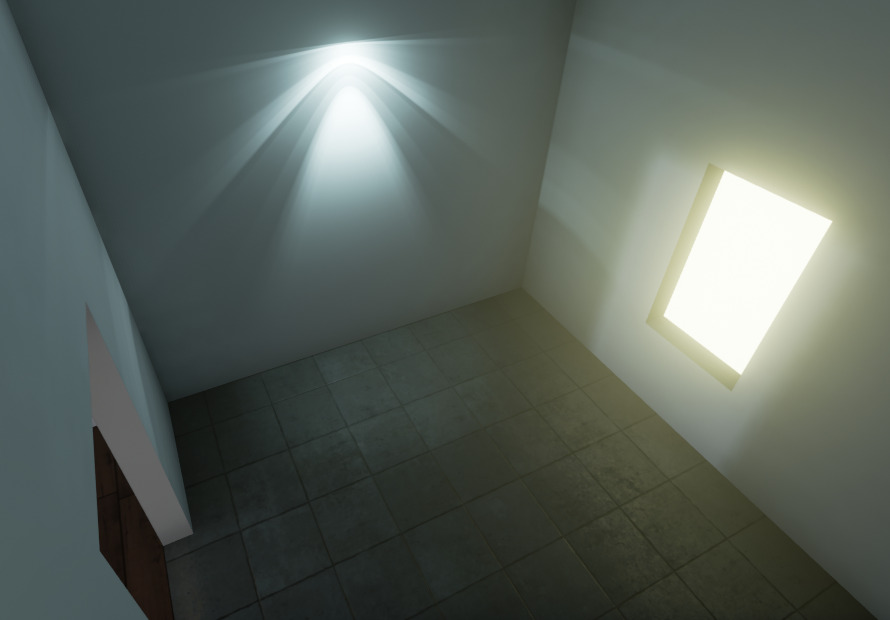
While we don't have a light fixture attached, you can see how the light now bends coming out of the Point Light.
In the Next Step and final of this guide, you will see some examples of things to try on your own as well as links to additional lighting documentation, samples and techniques.
7 - On Your Own!
Using what you have learned over the course of this Quick Start Guide, try to do the following:

-
Extend the apartment to add more rooms.
-
Light the other rooms with Point Lights or Spot Lights .
-
Add props from the Content/StarterContent/Props folder (such as door or window frames, doors or lamps).

-
Use a Sphere Reflection Capture in a room.
-
Use a different IES Profile on a light.
-
Create a floor lamp using Spot Lights .
-
You can also change the Directional Light to make it a night scene.

For more information on the topics covered in this Quick Start Guide, and across the entire editor, see Understanding the Basics .
As for coverage related to the topics in this guide:
-
For more information on Lighting Basics, see: Lighting Basics
-
For more information on the Lighting the Environment, see: Lighting the Environment
-
For more information on IES Profiles, see: IES Light Profiles
-
For more information on Light Functions, see: Light Functions
-
For more information on Rendering in Unreal Engine 4, see: Rendering Overview

