Choose your operating system:
Windows
macOS
Linux
The Virtual Scouting tools give filmmakers new ways to navigate and interact in virtual production environments, helping them make better creative decisions. Directors and cinematographers can easily find locations, compose shots, set up scene blocking, and get accurate representations of filming locations. Artists and set designers can experience a location in virtual reality (VR) while building it, and use measurement and interaction tools to check distances and modify the world. Images can be captured from the virtual world, and the whole production team can use those images to track decisions made during a VR session.
The Project Spotlight video below shows some of the advantages of using real-time virtual production tools in filmmaking, and some of the features of Virtual Scouting.
The Virtual Production Utilities plugin comes with a set of controls custom-tailored for filmmakers. This document describes these tools and how to use them. You can also dynamically customize the Virtual Scouting controls using Blueprints to suit specific requirements, without having to modify the underlying C++ code and rebuild the engine.
Virtual Scouting is compatible with the HTC Vive, HTC Vive Pro, Oculus Rift, and Oculus Rift S VR HMDs.
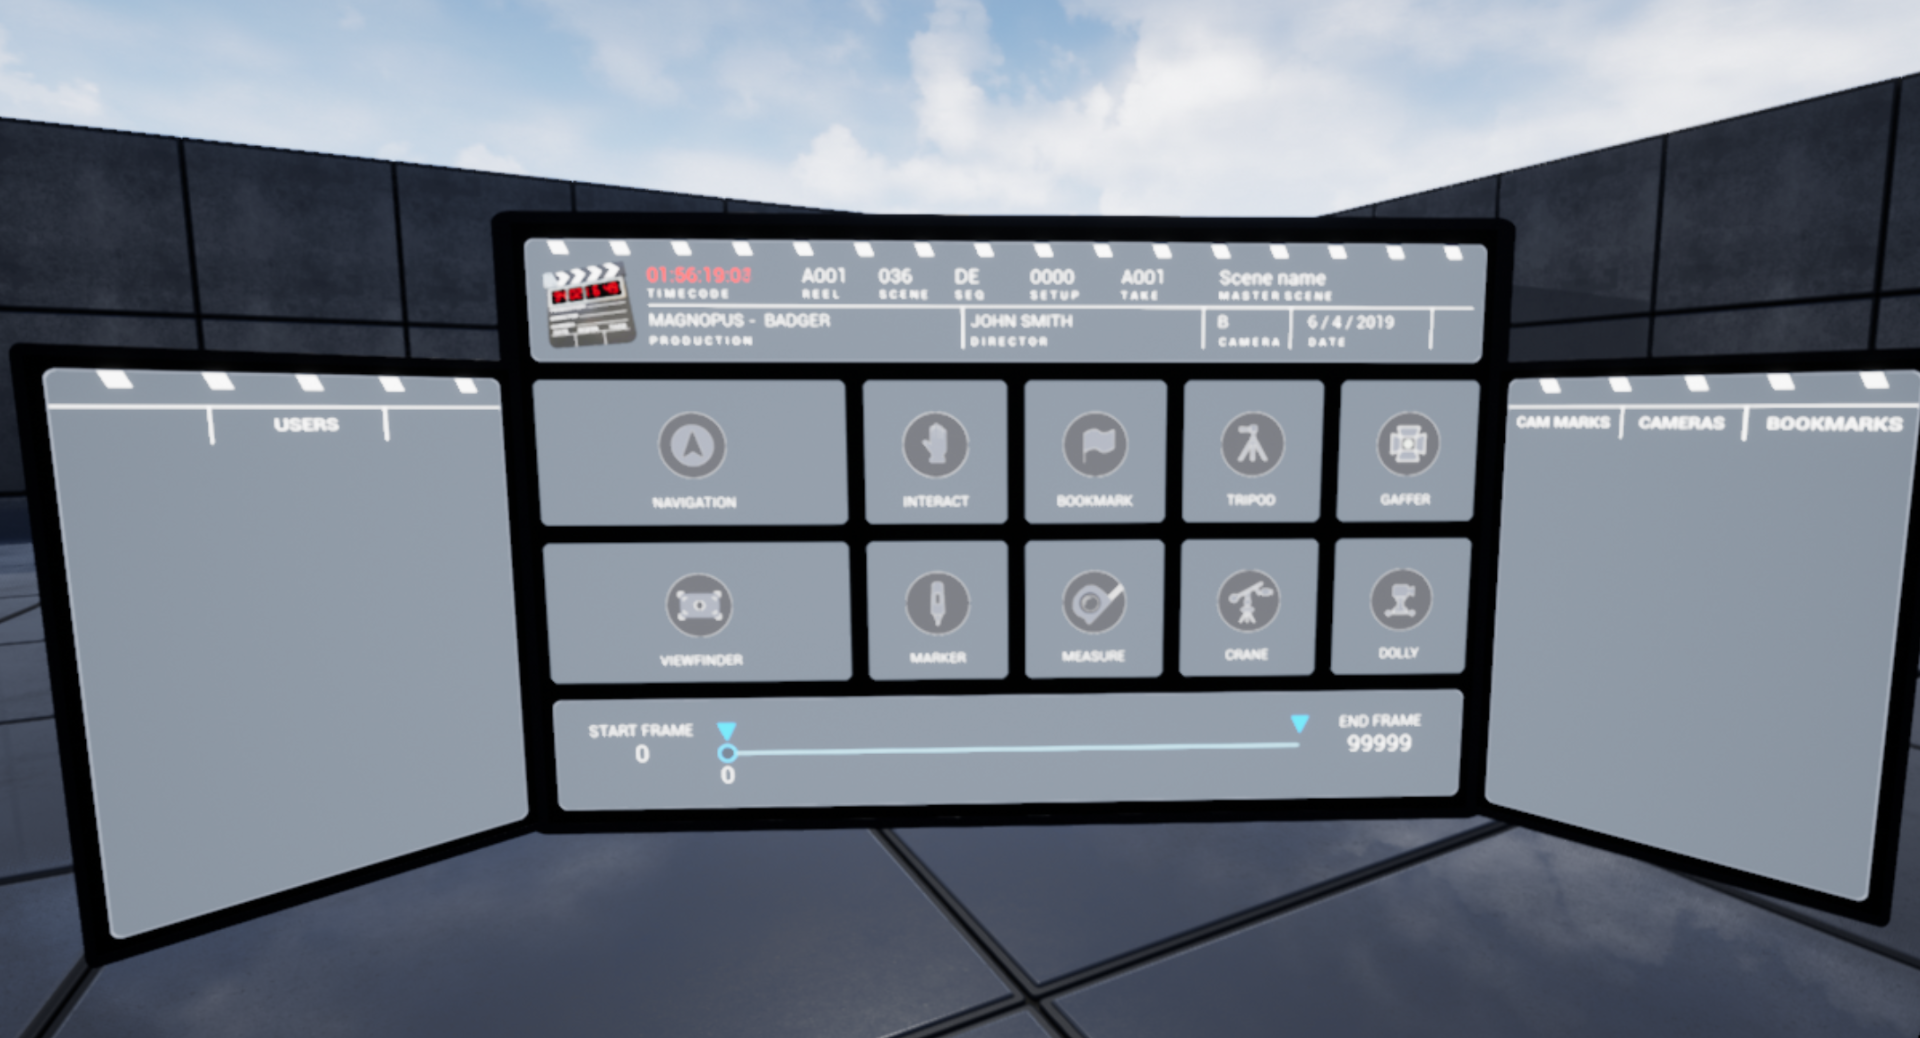
Menu
Virtual Scouting has a menu designed specifically to support virtual production scenarios. Navigation , Viewfinder , and other useful tools can be easily accessed from the menu.
You can toggle the Virtual Scouting menu on or off using the Menu button on your motion controller. The Menu button is just above the trackpad on the HTC Vive motion controller and is mapped to the A button on the right Oculus Touch controller and the X button on the left Oculus Touch controller.

Virtual Scouting Settings
You can modify the settings for some of the Virtual Scouting tools while in VR by accessing them in the panel. In the Virtual Scouting menu panel, navigate to the upper right corner and select the Settings button.

The Settings panel opens in front of the menu. The table below describes what settings you can change on your Virtual Scouting tools.

|
Settings Option |
Description |
|---|---|
|
Grip Inertia |
When this option is enabled, you glide to a stop when navigating with the Grip buttons. The distance traveled is based on how fast you move with the Grip Nav. |
|
Transform Gizmo |
When this option is enabled, the 3D Move, Rotate, and Scale Gizmos appear after selecting objects in VR.
|
|
Help System |
When this option is enabled, you can raise your motion controller in front of your HMD to see tooltips for the controller's buttons.
|
|
Unit Scale |
A toggle button to switch between Metric and Imperial units. |
|
Live Editing |
When this option is enabled, keyframes are created when you interact with objects on different Sequencer frames. These keyframes can be edited from the visible overlay. For more details, see the Live Editing with Sequencer section. |
|
Exit VR Mode |
Selecting this option returns you to the UE4 standard editor window. This is the same as the Alt+V keyboard shortcut. |
|
Flight Nav Speed |
A slider to specify how fast you move when you use the Navigation tool. |
|
Grip Nav Speed |
A slider to specify how fast you move when you use the Grip buttons to navigate. |


Navigation
You can fly around the scene with the Navigation tool while in Virtual Scouting Mode. Navigation is the default tool when you switch to Virtual Scouting in VR Mode. There are two ways to switch to the Navigation tool:
-
You can select the Navigation option in the Virtual Scouting menu.
![image_16.png]()
-
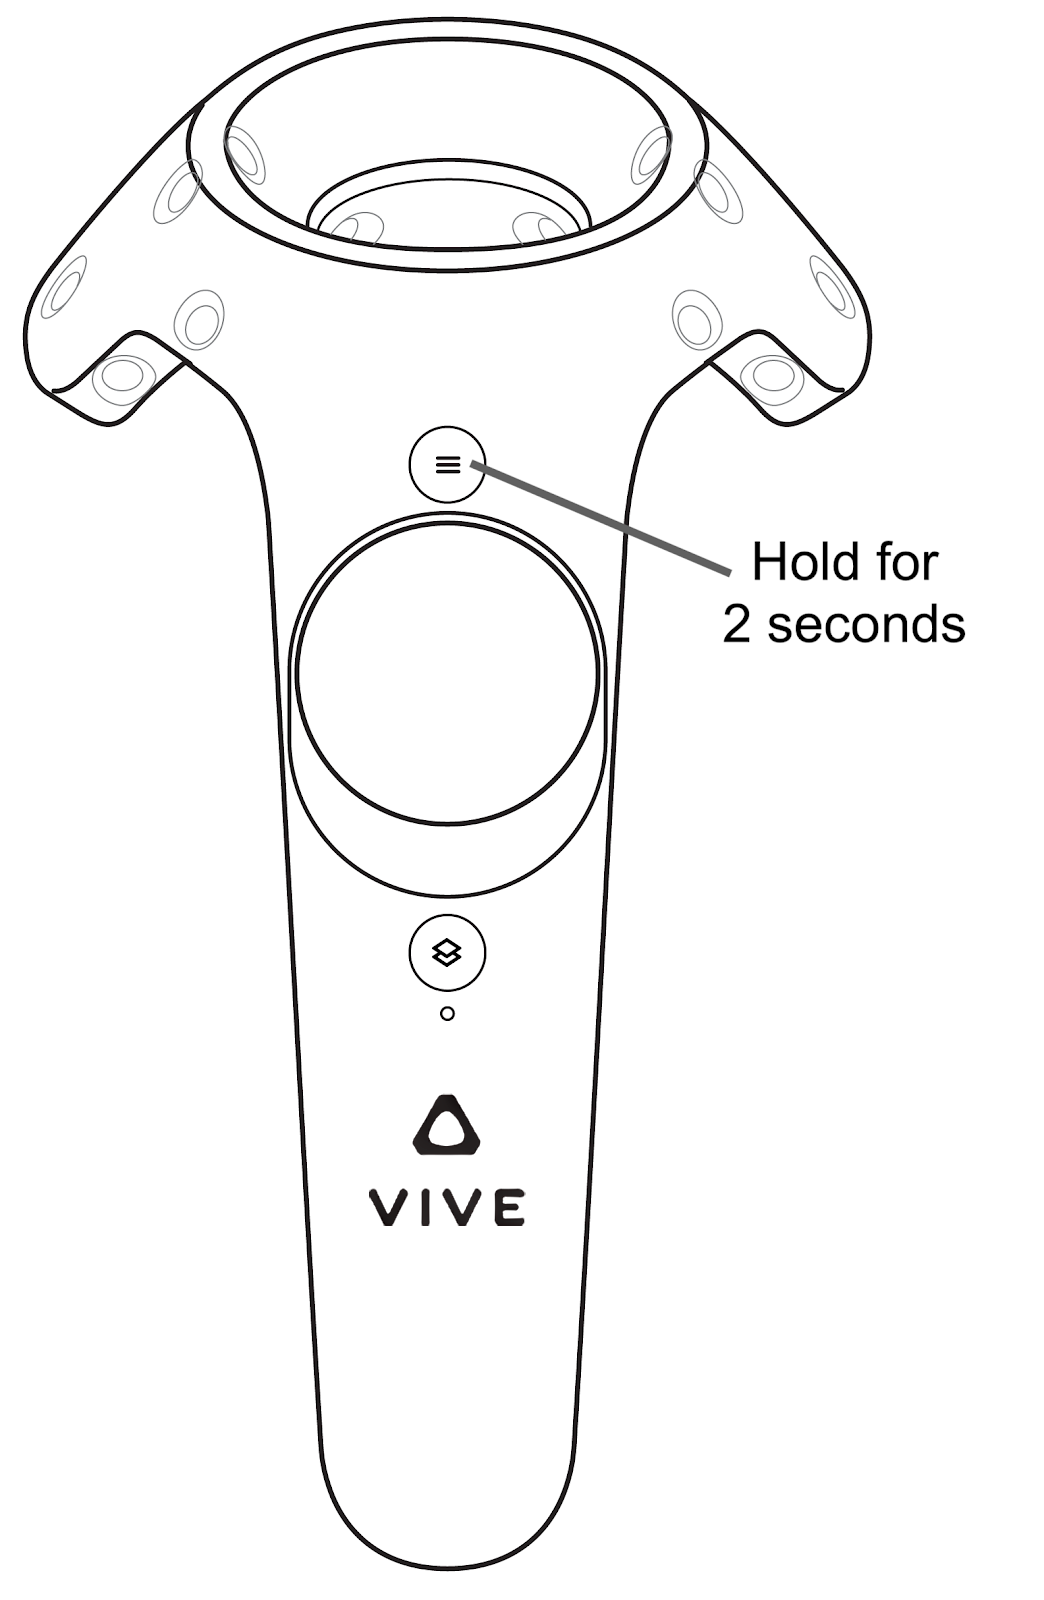
You can hold down the menu button on your motion controller for two seconds.
![01.png]()
![Oculus_Nav.png]()
Vive
Oculus Touch


To move around the scene with your Vive motion controller, point the motion controller in the direction you want to fly and press the trigger on the motion controller. To fly with the Oculus Touch controller, move the joystick in the direction you want to move. The harder you press the trigger on the Vive motion controller or the thumbstick on the Oculus Touch controller, the faster you fly. You can adjust the maximum speed in the Virtual Scouting Settings.
|
|
|
|
|---|---|---|
|
Changing the Navigation flight maximum speed |
||


Grip Controls
The previous methods of navigating in the scene require having the Navigation tool selected. Even when you are using other VR tools, you can also navigate through the scene by pressing and holding the Grip button on one of the motion controllers. With one Grip button pressed down, move your hand towards yourself, as if you're pulling yourself forward, and release the button.
|
|
|
|---|---|
|
Vive |
Oculus Touch |


Turn off World Movement Options
By default in Virtual Scouting mode, using the Grip buttons on your motion controller brings up a colored grid, the World Movement Grid. This grid automatically darkens the level around you. You can turn this feature off by disabling the Grid and Post Process settings.
-
Navigate to Edit > Editor Preferences.
-
Select VR Mode .
-
On the VR Mode settings page, modify the World Movement settings.

Teleport In addition to being able to fly around to navigate your scene, you can teleport to jump to another location in the level.
-
To use the teleport function, rest your thumb over the bottom section of the Vive motion controller's trackpad or hold down either the B or Y button on the Oculus Touch controllers.
-
Once the green locator appears in the scene showing you the teleport destination, you can move your motion controller around to move the locator's position in the scene.
-
Pressing down on the top section of the Vive trackpad or releasing the Touch's B or Y buttons while this locator is visible in the scene teleports you to the locator's position.
![02.png]()
![OculusPort.png]()
![image_17_cropped.png]()
Vive
Oculus Touch


Bookmark
With the Bookmark tool, you can place a location flag in your scene that you can return to at any point or that others can teleport to. To switch to the Bookmark tool, select the Bookmark option in the Virtual Scouting menu.

With the Bookmark tool equipped, press the trigger on your motion controller to place a location flag in your scene.

To view the location flags that exist in the scene, open the Virtual Scouting menu and in the right panel select the Bookmarks tab. Selecting a flag in the list teleports you to that location flag in the scene.

World Scale
You can change your world scale in the level to make yourself larger or smaller. Your world scale can range from 0.1 to 60. While you're scaling yourself, the backside of your virtual controller shows a readout for how much you've scaled yourself.
The following steps explain how to change your virtual scale within a scene while holding down the Grip buttons:
-
Scaling yourself larger:
-
Start with your hands far apart in front of you.
-
Press and hold the grip buttons on both controllers.
-
Bring your hands together in front of you and release the grip buttons.
-
-
Scaling yourself smaller:
-
Start with your hands close together in front of you.
-
Press and hold the grip buttons on both controllers.
-
Move your hands horizontally away from each other and release the grip buttons.
-
You can reset your world scale to 1.0 by double tapping one of the Grip buttons twice. Teleporting anywhere in the scene also resets your scale to 1.0.
|
|
|
|---|---|
|
Vive |
Oculus Touch |

