Choose your operating system:
Windows
macOS
Linux
Overview
Unreal Engine's Navigation System allows Agents to navigate the Level using a Navigation Mesh for pathfinding. In addition to the various Runtime Generation methods for the Navigation Mesh, the system also includes a way to only build the navigation locally around specific targets.
Navigation Invokers are Blueprint Actor components that generate the Navigation Mesh around the Agent at runtime. Using Navigation Invokers removes the need to build the Navigation Mesh in the editor and can also limit the number of tiles generated at runtime.
Navigation Invokers are ideal for big Levels where building the Navigation Mesh in the editor is impractical.
Goals
In this guide you will learn to use Navigation Invokers with your Agents to generate the Navigation Mesh during gameplay.
Objectives
-
Create a new Level and configure the Navigation System to use Navigation Invokers.
-
Modify the ThirdPersonCharacter Blueprint to roam around the Level using Navigation Invokers.
1 - Required Setup
-
In the New Project Categories section of the menu, select Games and click Next .
![Select the Games category and click Next]()
-
Select the Third Person template and click Next .
![Select the Third Person template and click Next]()
-
Select the Blueprint and No Starter Content options, then click Create Project .
![Select Blueprint and No Starter Content and click Create Project]()


Section Results
You created a new Third Person project and are now ready to learn about Navigation Invokers.
2 - Creating Your Test Level
-
Click File > New Level from the Menu Bar.
![Click New Level]()
-
Select the Default Level.
![Select the Default Level]()
-
Select the Floor Static Mesh Actor in the World Outliner and go to the Details panel. Set the Scale to X = 100, Y = 100, Z = 1.
![Select the Floor Static Mesh Actor in the World Outliner]()
![Set the Scale to X = 100, Y = 100, Z = 1]()
-
Click Settings > Project Settings and go to the Navigation System category. Enable the Generate Navigation Only Around Navigation Invokers checkbox.
![Click Project Settings]()
![Enable the Generate Navigation Only Around Navigation Invokers checkbox]()
-
Go to the Navigation Mesh category and scroll down to the Runtime section. Click the Runtime Generation dropdown and select Dynamic .
![Click the Runtime Generation dropdown and select Dynamic]()
-
Go to the Place Actors panel and search for Nav Mesh Bounds Volume . Drag it into the Level and place it on the floor mesh. Scale the Nav Mesh Bounds Volume to X = 500, Y=500, Z = 10.
![Drag the Nav Mesh Bounds Volume to the Level]()
![Set the Scale to X = 500, Y=500, Z = 10]()


Section Results
In this section you created a new Level and configured the Navigation System to use Navigation Invokers.
3 - Creating your Agent
-
In the Content Browser , right-click and select New Folder to create a new folder. Name the folder NavigationSystem .
-
In the Content Browser , go to ThirdPersonBP > Blueprints and select the ThirdPersonCharacter Blueprint. Drag it into the NavigationSystem folder and select the option Copy Here .
![Drag the Third Person Character Blueprint to the Navigation System folder and select Copy Here]()
-
Navigate to the NavigationSystem folder and rename the Blueprint to BP_NPC_Invoker . Double-click the Blueprint to open it and go to the Event Graph . Select all input nodes and delete them.
-
Right-click the Event Graph , then search for and select Add Custom Event . Name the event MoveNPC .
![Right-click the Event Graph, then search for and select Add Custom Event. Name the event Move NPC]()
-
Right-click the Event Graph , then search for and select Get Actor Location .
![Right-click the Event Graph, then search for and select Get Actor Location]()
-
Drag from the GetActorLocation node and search for and select Get Random Reachable Point In Radius . Set the Radius to 1000.
![Drag from the Get Actor Location node and search for and select Get Random Reachable Point In Radius]()
-
Drag from the Random Location pin of the GetRandomReachablePointInRadius node and select Promote to variable .
![Drag from the Random Location pin of the Get Random Reachable Point In Radius node and select Promote to variable]()
-
Connect the MoveNPC node to the RandomLocation node you just created.
![Connect the Move NPC node to the Random Location node]()
-
Right-click the Event Graph , then search for and select AI Move To . Connect the RandomLocation node to the AI Move To node.
![Right-click the Event Graph, then search for and select AI Move To]()
-
Right-click the Event Graph , then search for and select Get a reference to self .
![Right-click the Event Graph, then search for and select Get a reference to self]()
-
Connect the Self node to the Pawn pin of the AI Move To node. Connect the yellow pin of the Random Location node to the Destination pin of the AI Move To node, as seen below.
![Connect the Self node to the Pawn pin of the AI Move To node. Connect the yellow pin of the Random Location node to the Destination pin of the AI Move To node]()
-
Drag from the On Success pin of the AI Move To node, then search for and select Delay . Set the Duration of the node to 4. Drag from the Completed pin of the Delay node, then search for and select MoveNPC , as seen below.
![Drag from the On Success pin of the AI Move To node and add a Delay node. Set the Duration to 4. Drag from the Duration node and add a Move NPC node]()
-
Repeat the steps above to add these nodes to the On Fail pin of the AI Move To node. Set the Duration of the Delay node to 0.1.
![Repeat the steps above to add these nodes to the On Fail pin]()
-
Right-click the Event Graph , then search for and select Event Begin Play . Drag from the Event Begin Play node, then search for and select MoveNPC .
![Right-click the Event Graph, then search for and select Event Begin Play]()
![Drag from the Event Begin Play node, then search for and select Move NPC]()
-
Go to the Components tab, click the Add Component dropdown, then search for and select Navigation Invoker .
![Go to the Components tab, click the Add Component dropdown, then search for and select Navigation Invoker]()
-
With the Navigation Invoker component selected, go to the Details panel and find the Navigation section. Here you can change the Tile Generation Radius (radius around the actor used to generate Navigation Mesh tiles) and Tile Removal Radius (radius from the actor used to to remove Navigation Mesh tiles). For this example, set these values to 3000 and 5000 , respectively.
![Set the Tile Generation Radius to 3000 and the Tile Removal Radius to 5000]()
-
Compile and save the Blueprint.
-
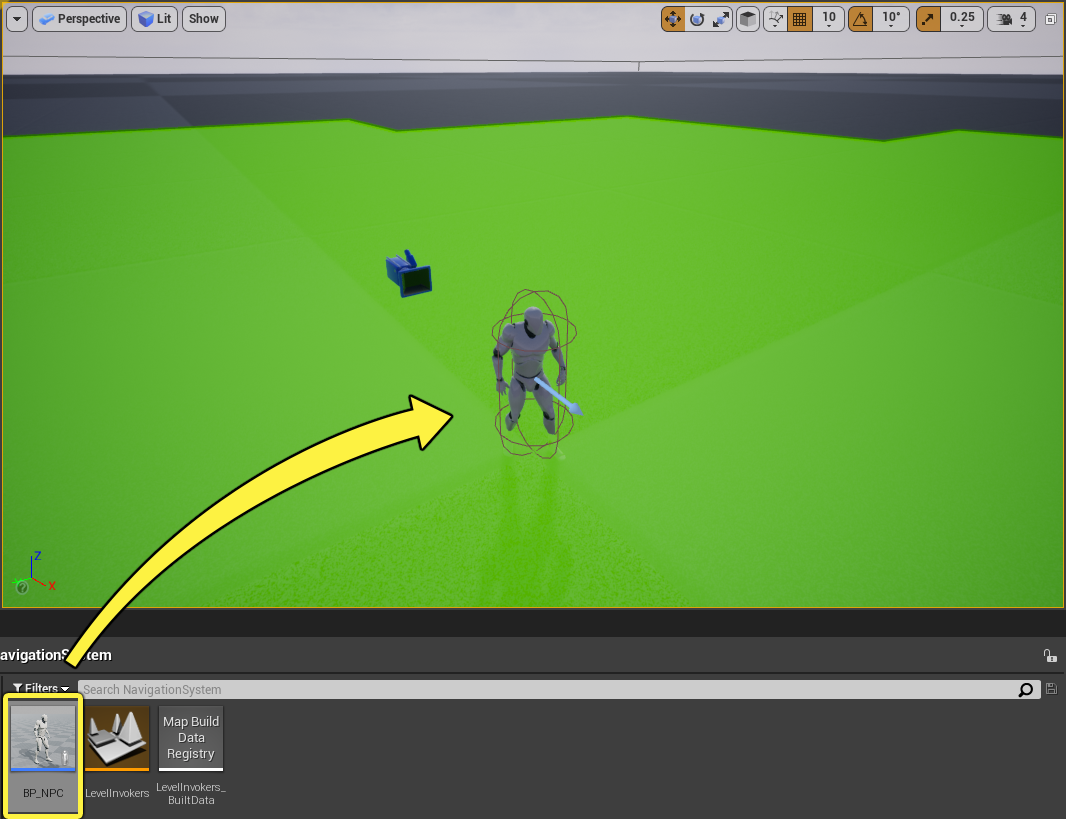
Drag several BP_NPC_Invoker Blueprints to your Level and click Simulate to see the navigation generating around each Agent.
![Drag several BP_NPC_Invoker Blueprints to your Level]()
If you don't see the navigation, press P on your keyboard to visualize the Navigation Mesh.
![Yours Agents are now moving in the Level]()


Section Results
In this section you created an Agent that roams around the Level and uses the Navigation Invoker component to build the Navigation Mesh around itself.