Choose your operating system:
Windows
macOS
Linux
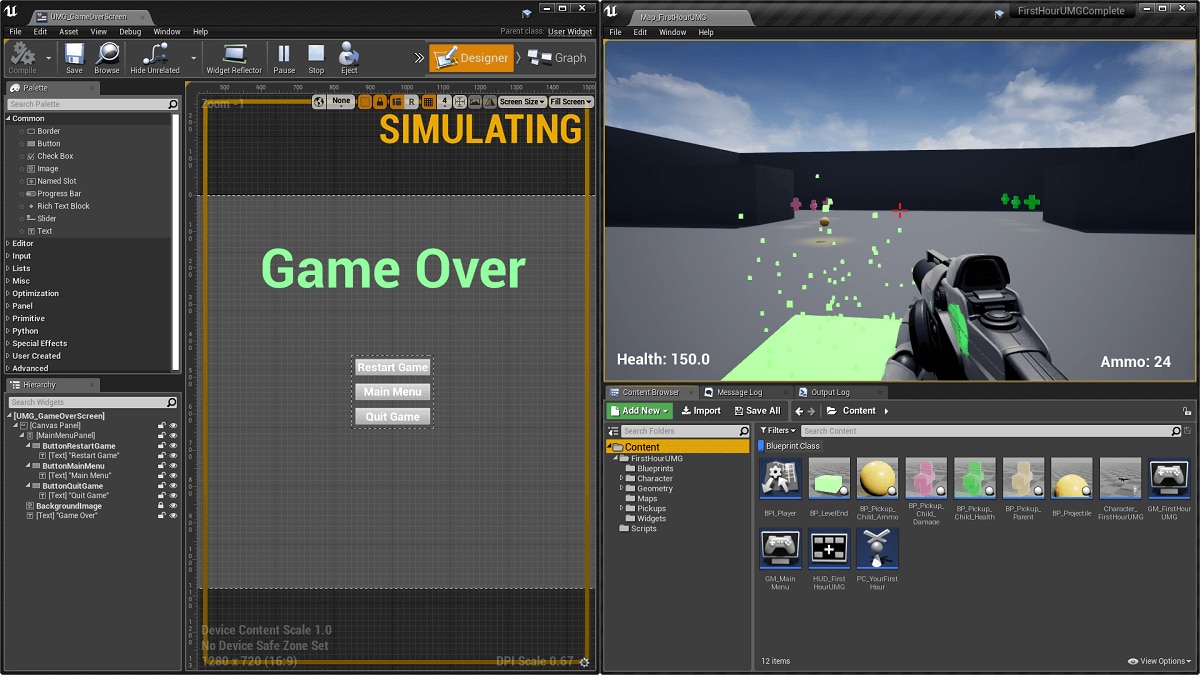
In this Quick Start Guide , you will learn how to implement some basic in-game HUD elements and a front end menu using Unreal Motion Graphics UI Designer (UMG) by learning how to implement Health and Energy Bars as well as a way to track and display the Ammo of a player.
Over the course of this guide, links to additional documentation will be provided which will go deeper into each section's subject should you have additional questions. While this guide will cover the actions needed to proceed through each step, if you have not worked with the Unreal Editor before, it is recommended that you first look over the Level Designer Quick Start guide to gain a better understanding of general editor usage, terms, and processes.
1 - Required Project Setup
For this tutorial we are using the Blueprint First Person template with Starter Content enabled.
-
Click the Add New button inside the Content Browser , then under User Interface select Widget Blueprint and name it HUD .
![RequiredSetup_1.1.png]()
All User Interface elements (HUD, Menus, etc.) will be created and housed inside a Widget Blueprint. The Widget Blueprint allows you to visually layout your UI elements as well as provides scripted functionality for those elements. We are creating this now so that we can tell it to be displayed when our player character spawns in the world, however we will set it up later.
For more information on Widget Blueprints see the Widget Blueprint documentation.
-
Create two more Widget Blueprints , one called MainMenu and another called PauseMenu .
![AllWidgets.png]()
-
Right-click in the Content Browser and create a new Level called Main .
![RequiredSetup_1.3.png]()
We will use this later in the guide for our Main Menu setup.
-
In the Content Browser , open the FirstPersonCharacter Blueprint located under the Content/FirstPersonBP/Blueprints folder.
![UMGQS2.png]()
This is the playable character's Blueprint in which we will create some information to pass to our HUD Widget Blueprint for display.
-
In the My Blueprint window, click the Add Variable Button.
![RequiredSetup_1.5.png]()
-
In the Details panel for the new variable, name it Health , change it to a Float variable type and set the Default Value to 1.0 .
![RequiredSetup_1.6.png]()
This variable will represent the player character's Health that we will display on the HUD.
-
Create another Float variable called Energy with a Default Value of 1.0 .
![RequiredSetup_1.7.png]()
This will represent the player character's Energy that we will display on the HUD.
Unable to enter a Default Value? Click the Compile button from the Tool Bar to compile the Blueprint then try again.
-
Create another variable of the Integer type called Ammo with a Default Value of 25 .
![RequiredSetup_1.8.png]()
-
Create one more Integer variable called MaxAmmo also with a Default Value of 25 .
-
Inside the Graph window, find the Event Begin Play node. Right click on the execution pin and select Break Link to Branch () .
![RequiredSetup_1.10.png]()
This will disconnect the Event Begin Play so we can add our new functionality.
You can also use Alt + Click on the execute pin to disconnect it.
-
Select the Event Begin Play node and drag it to the left to make room for the new nodes we will be creating in the next steps.
-
Drag off the Event Begin play then add a Create Widget node with Class set to your HUD Widget Blueprint.
![RequiredSetup_1.12.png]()
-
Off the Return Value of the Create HUD_C Widget , select Promote to Variable and name HUD Reference .
![RequiredSetup_1.13.png]()
This will create our HUD Widget Blueprint when the game is started and store it as a variable that we can access later. This is useful for calling functions or setting properties of the HUD later on, for example if you wanted to hide the HUD while the game is paused you can access the HUD through this variable.
-
Drag off the out pin of the Set node and add the Add to Viewport node.
![UMGQS9.png]()
As the name suggests, this will add the Widget Blueprint specified as the target to the player's viewport, drawing it onscreen.
Adjusting Character Variables
The last thing we will do before we start generating our actual HUD is provide a way for our character variables to change.
-
Inside the FirstPersonCharacter Blueprint, while holding Alt drag in the Energy variable and place it next to the Jump script.
![Step2_1.png]()
-
Hold Ctrl and drag in a copy of the Energy variable and connect it to a Float - Float node set to 0.25 and connect as shown.
![Step2_2.png]()
Each time the character jumps, 0.25 will be subtracted from the character's current Energy value.
-
Set up the same script for the Health variable but use an F Key Event (or any other key press event) for testing.
![Step2_3.png]()
This will allow us to test that our Health variable is properly displayed through our HUD whenever a key is pressed.
-
Find the Spawn Projectile script and following the InputAction Fire event, Right-click and add a Branch node.
-
For the Branch condition, Ctrl drag in the Ammo variable connected to a Integer > Integer variable set to 0 and connect as shown.
![Step2_4.png]()
This will only allow the player to fire a projectile if their ammo is greater than zero.
-
At the end of the Spawn Projectile script following the Play Sound at Location node, set Ammo to equal Ammo - 1 .
![required-setup-1-2-6.png]()
This will subtract 1 ammo each time the player fires a projectile, giving us something to display on our HUD.
To add the ability to reload, add an R key event, alt drag in the ammo variable, ctrl drag in the max ammo variable and connect it as shown in the image below:
![RequiredSetup_ReloadAmmoNote.png]()
-
Compile and Save then close the Blueprint.
In the next step we will set up the displaying of our Health, Energy and Ammo variables on our HUD and get them working in-game.
2 - Displaying Health, Energy & Ammo
Visual: Health, Energy and Ammo
Here we will begin setting up the visual aspects of our HUD.
-
Open your HUD Widget Blueprint to access the Widget Blueprint Editor .
![Step2_6.png]()
Inside the Widget Blueprint Editor we can provide the visual layout and scripted functionality of our HUD.
For more information on each of the different facets of the Widget Blueprint Editor, see Widget Blueprints .
-
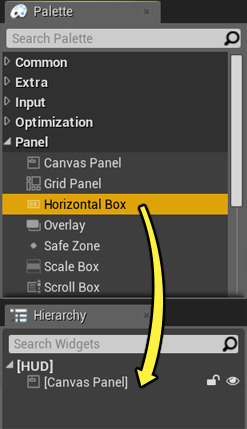
Inside the Palette window under Panel , drag a Horizontal Box onto the CanvasPanel in the Hierarchy window.
![DisplayingHealth_2.2.png]()
Panel Widgets are sort of like containers for other widgets and provide additional functionality for the widgets that are inside them.
-
Also under Panel , drag two Vertical Boxes onto the Horizontal Box .
![Step2_8.png]()
-
Under Common , drag two Text widgets onto the first Vertical Box and two Progress Bars onto the second Vertical Box.
![Step2_9.png]()
-
Select the Horizontal Box , then in the graph resize the box and position it in the upper left corner of the window.
![Step2_10.png]()
The progress bars will appear very small but don't worry, we will fix that next.
-
Select both Progress Bars , then in the Details panel set both to Fill for the Size .
![DisplayingHealth_2.6.png]()
-
Select the Vertical Box containing the Progress Bars and set it to Fill as well.
![DisplayingHealth_2.7.png]()
-
Select the Horizontal Box again and resize it so the bars line up with the text.
![Step2_13.png]()
-
Select the top-most Text widget in the Hierarchy window then in the Details panel under Content enter Health : .
![DisplayingHealth_2.9.png]()
Do the same for the other Text widget but label it as Energy so your graph looks like below.
![Step2_15.png]()
By default, UMG text widgets use a font that ships with Unreal Engine. This gives you something to work with out of the box so you can get started quickly. However, this built-in font has some limitations; for example, it only supports a small set of languages. For most projects, especially those that require UIs with non-English text, you'll want to import your own custom fonts into Assets and set up your text widgets to use your fonts. For details, see the documentation on Fonts .
-
Select the Progress Bar next to health and in the Details panel set the Fill Color and Opacity to a green color.
![UMGColorPicker1.jpg]()
You may notice that Progress Bar does not change color when assigning a color. This is because the Percent value to fill the bar is set to 0.0 (you can change this to test out different colors, later we will link this to the health value of our character).
-
Also set a Fill Color for the Energy bar (we selected an Orange color).
-
For the display of Ammo, using the methods from above, add widgets to the Hierarchy so your setup is laid out like below.
![Step2_16.png]()
-
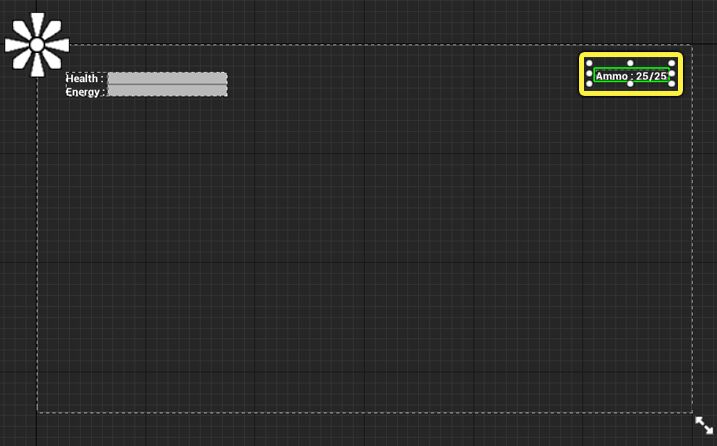
With the Horizontal Box containing the ammo information selected, resize it and position it in upper right corner.
![DisplayingHealth_2.13.png]()
-
With the Horizontal Box still selected, in the Details panel click Anchors and select the upper-right Anchor.
![DisplayingHealth_2.14.png]()
This will move the Anchor Medallion to the upper-right corner of your screen.
![Step2_19.png]()
By Anchoring a Widget, you are indicating to the Widget that it is to appear in its placed position relative to the position of the Anchor Medallion regardless of screen size. In other words, when the screen size changes, move the widget the same distance away from the Anchor Medallion's position (in this example the same distance away from the upper-right corner of the screen).
You can test different screen sizes by clicking and changing the Preview Size option inside the graph.
Script: Health, Energy and Ammo
Now that we have our visual layout, we can add the hooks to provide the functionality behind our HUD elements.
-
Click the Graph button in the upper-right corner of the Widget Blueprint Editor window.
![Step2_20.png]()
-
In the Graph under the Event Construct node, Right-click and add a Get Player Character node.
-
Drag off the Return Value pin and select Cast to FirstPersonCharacter
![ScriptHealthEnergyAmmo_2.3.png]()
Here we are checking if the Character Blueprint being used by the Player Character is indeed the First Person Character Blueprint.
-
Drag off the As First Person Character pin and select Promote to Variable (name it My Character ) then connect as shown.
![Step2_22.png]()
This will allow us to access the variables contained inside our FirstPersonCharacter Blueprint.
-
Click Compile in the toolbar to compile the script.
-
Return to the Designer tab and select the Progress Bar next to Health .
-
In the Details panel under Progress , click the Bind option next to Percent and set it to use Health from MyCharacter .
![ScriptHealthEnergyAmmo_2.7.png]()
This binds the value of the Progress Bar to our Health variable inside our First Person Character Blueprint. Now whenever our Health value changes in our Character Blueprint it will automatically be updated in our HUD as well. You may also notice that the Progress Bar does not change after binding it. That is because we've stated this to occur upon Event Construct (or when the HUD is constructed, which occurs when the game is started).
-
Select the Progress Bar next to Energy and repeat the process above, binding Percent to Energy from MyCharacter .
![ScriptHealthEnergyAmmo_2.8.png]()
-
Select the 25 following the Ammo text, then in the Details panel for Text , click Bind and Create Binding .
![ScriptHealthEnergyAmmo_2.9.png]()
Now, like the way we previously used Sub-Object Properties to bind properties of the same type, we can also create our own custom bindings. Here we are going to bind our Text property to an Integer property from our First Person Character Blueprint giving us a display of our current Ammo.
-
Inside the function that is created and automatically opened, hold Ctrl and drag the MyCharacter variable into the graph.
![Step2_27.png]()
-
Drag off the pin MyCharacter and select get Ammo .
-
Connect the Ammo pin to the Return Value of the Return Node .
![Step2_28.png]()
A conversion node To Text will automatically be created for you when connecting.
-
Repeat the process above for the other 25 text and creating a binding for the "Max Ammo" text.
![Step2_29.png]()
You probably don't need to do this if your Max Ammo is going to remain the same, however this will allow you to change it.
-
Click Compile and Save then click the Play button to play in the editor.
Our Health, Energy and Ammo values are now displayed on our HUD and reflect our current values from our Character Blueprint. Pressing Space will have the character jump and deplete Energy, pressing the Left Mouse Button will fire the weapon reducing our Ammo, and pressing F will cause us to lose Health (which you could hook up to a damage system at a later date)
In the next section we will create a Main Menu which we can use to load into our game that we've setup.
The next section will provide you with additional information on working with Unreal Motion Graphics and Blueprints .
3 - Further Reading
To continue to build on the HUD you created in this Quick Start guide, see the Creating a Main Menu and Creating a Pause Menu .
As for coverage related to the topics in this guide:
-
For more information on Unreal Motion Graphics, see: UMG UI Designer
-
For more information on Blueprints, see: Blueprint Visual Scripting
