Choose your operating system:
Windows
macOS
Linux
In this How-to tutorial you will expand upon the logic you created in the
Using a Static Camera
guide to create additional
Overlap Volumes
and
Camera Actors
in your level, then you will navigate your player character through each volume to demonstrate the transition between Camera views.
Changing the Overlap Volume Logic
In order to accommodate for the new camera transition functionality, you will need to make some adjustments to the previous Overlap Volume logic.
Choose your implementation method:
C++
-
In the Content Browser, double click your BP_BlendTriggerVolume to open it's Class Defaults .
![BlendTriggerVolume Blueprint]()
Click image to enlarge.
-
In the My Blueprint tab, navigate to the Variables category, and click the + sign to create a new variable. Name this variable CameraToFind , make its type CameraActor , then click Compile .
![CameraToFind variable]()
-
Click the Eye icon next to your CameraToFind variable to make its visibility public; doing so provides the capability to edit this variable for each instance of the Blueprint.
![Eye icon to set the variable as public]()
-
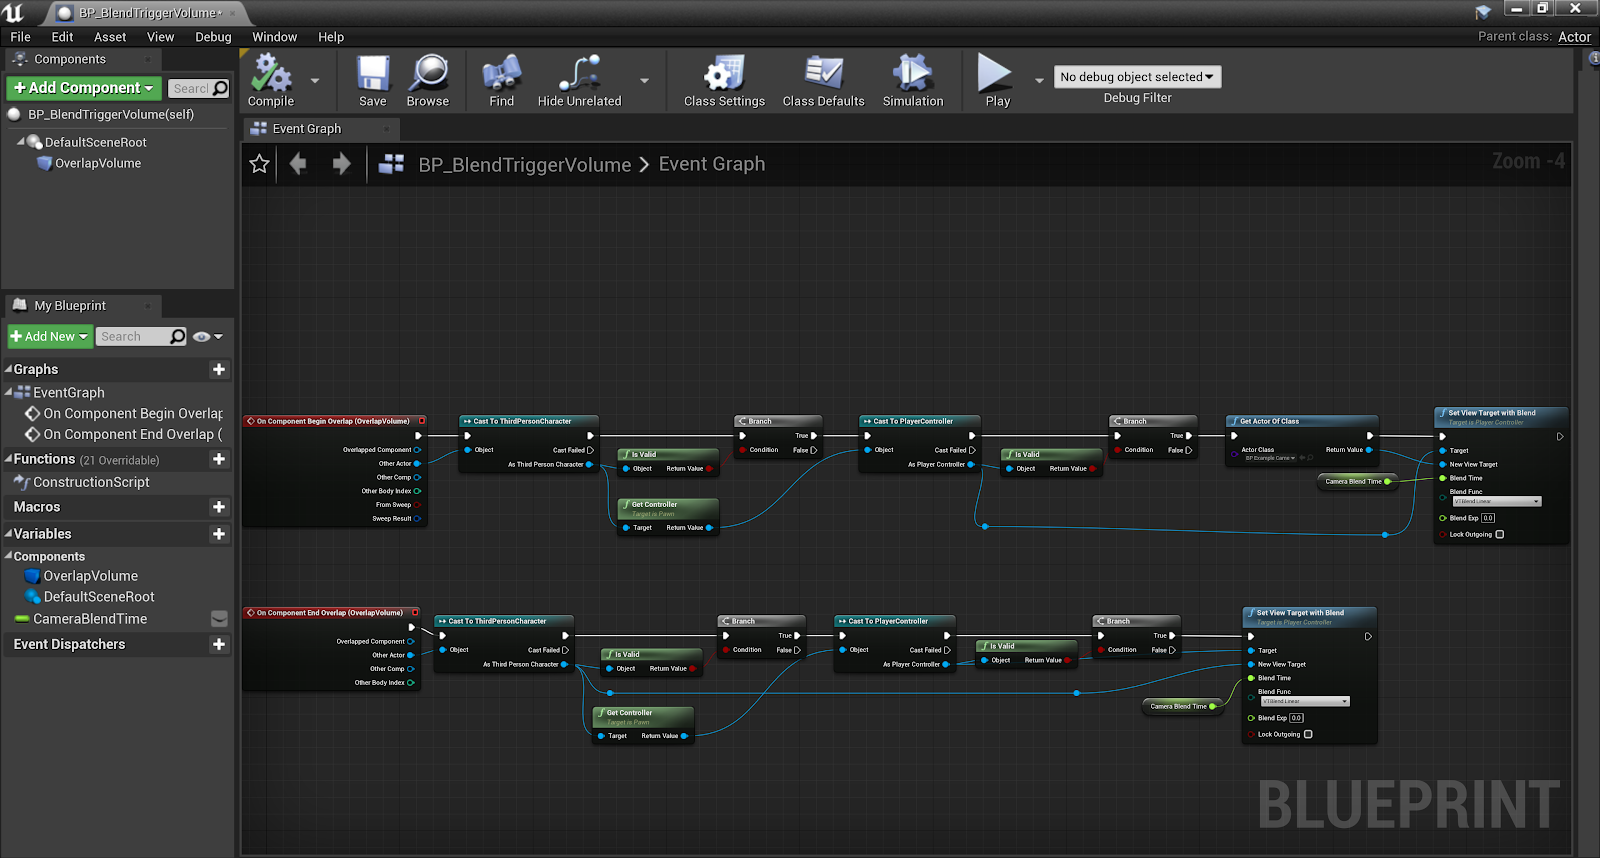
Navigate to the Event Graph , and from the On Overlap Begin event logic, delete the Get Actor Of Class node.
![Delete Get Actor Of Class node]()
Click image to enlarge.
-
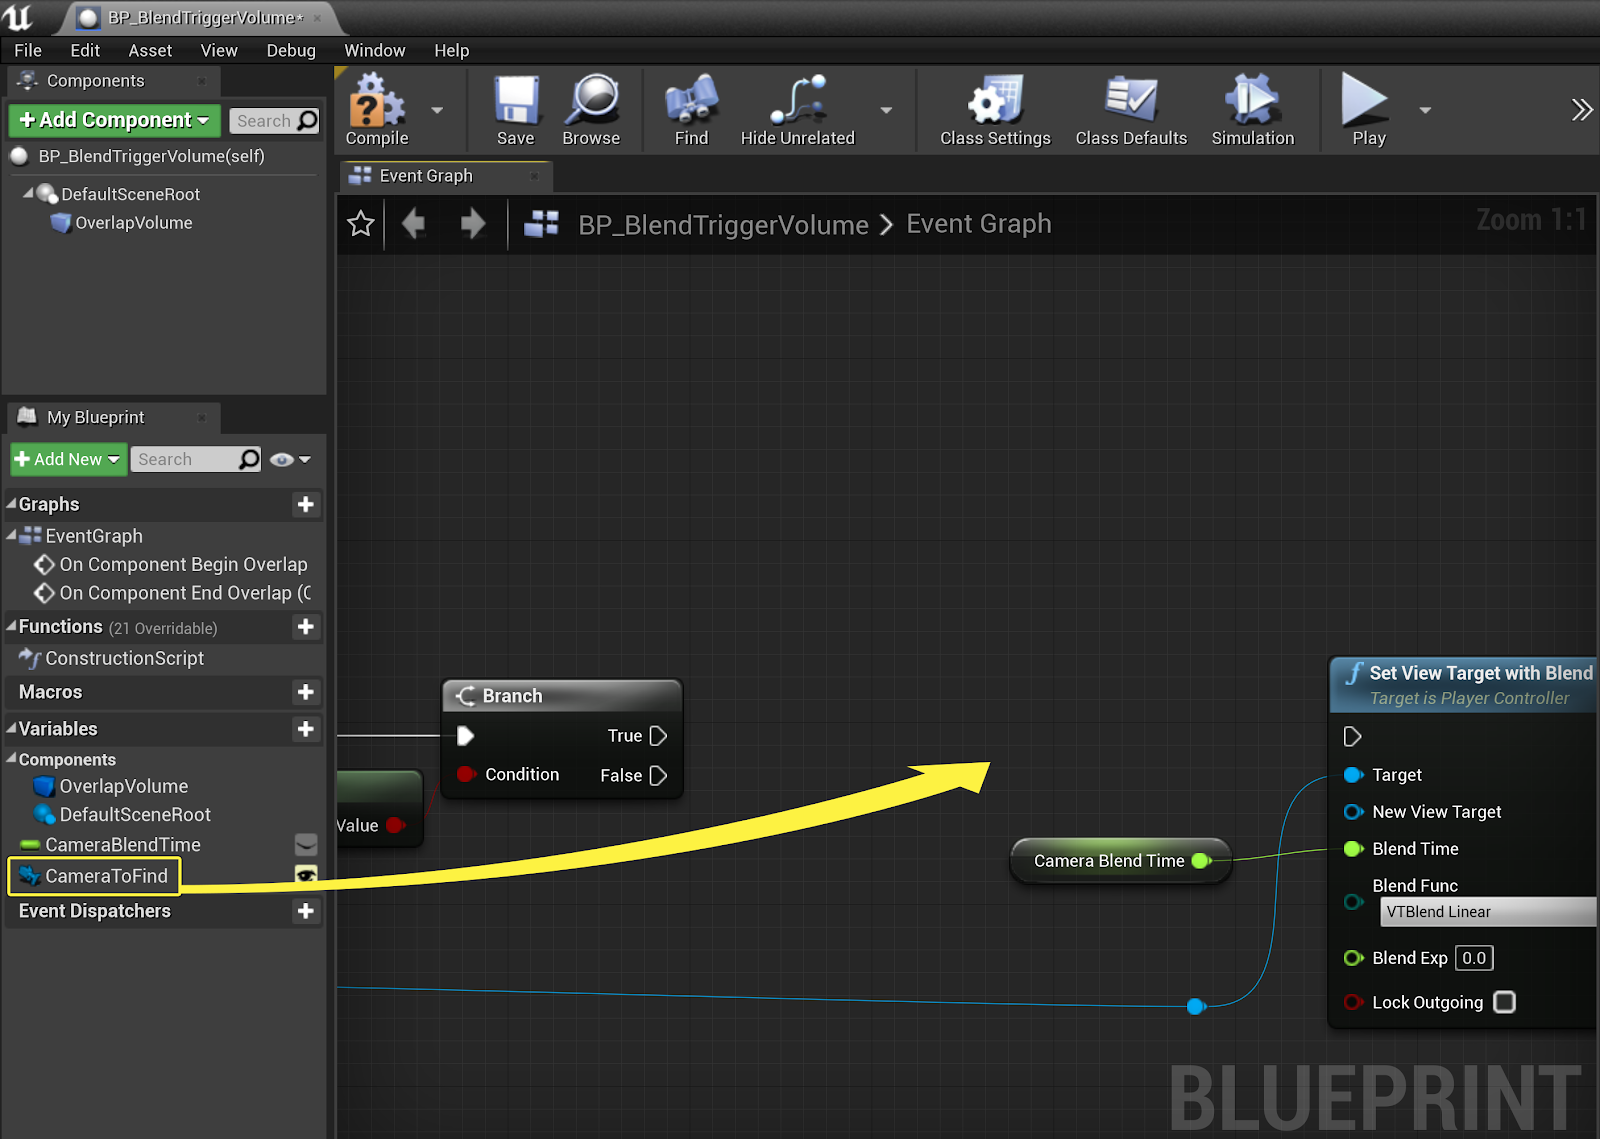
From the My Blueprint tab, click and drag a copy of your CameraToFind variable onto the Event Graph .
![Add variable to Event Graph]()
Click image to enlarge.
-
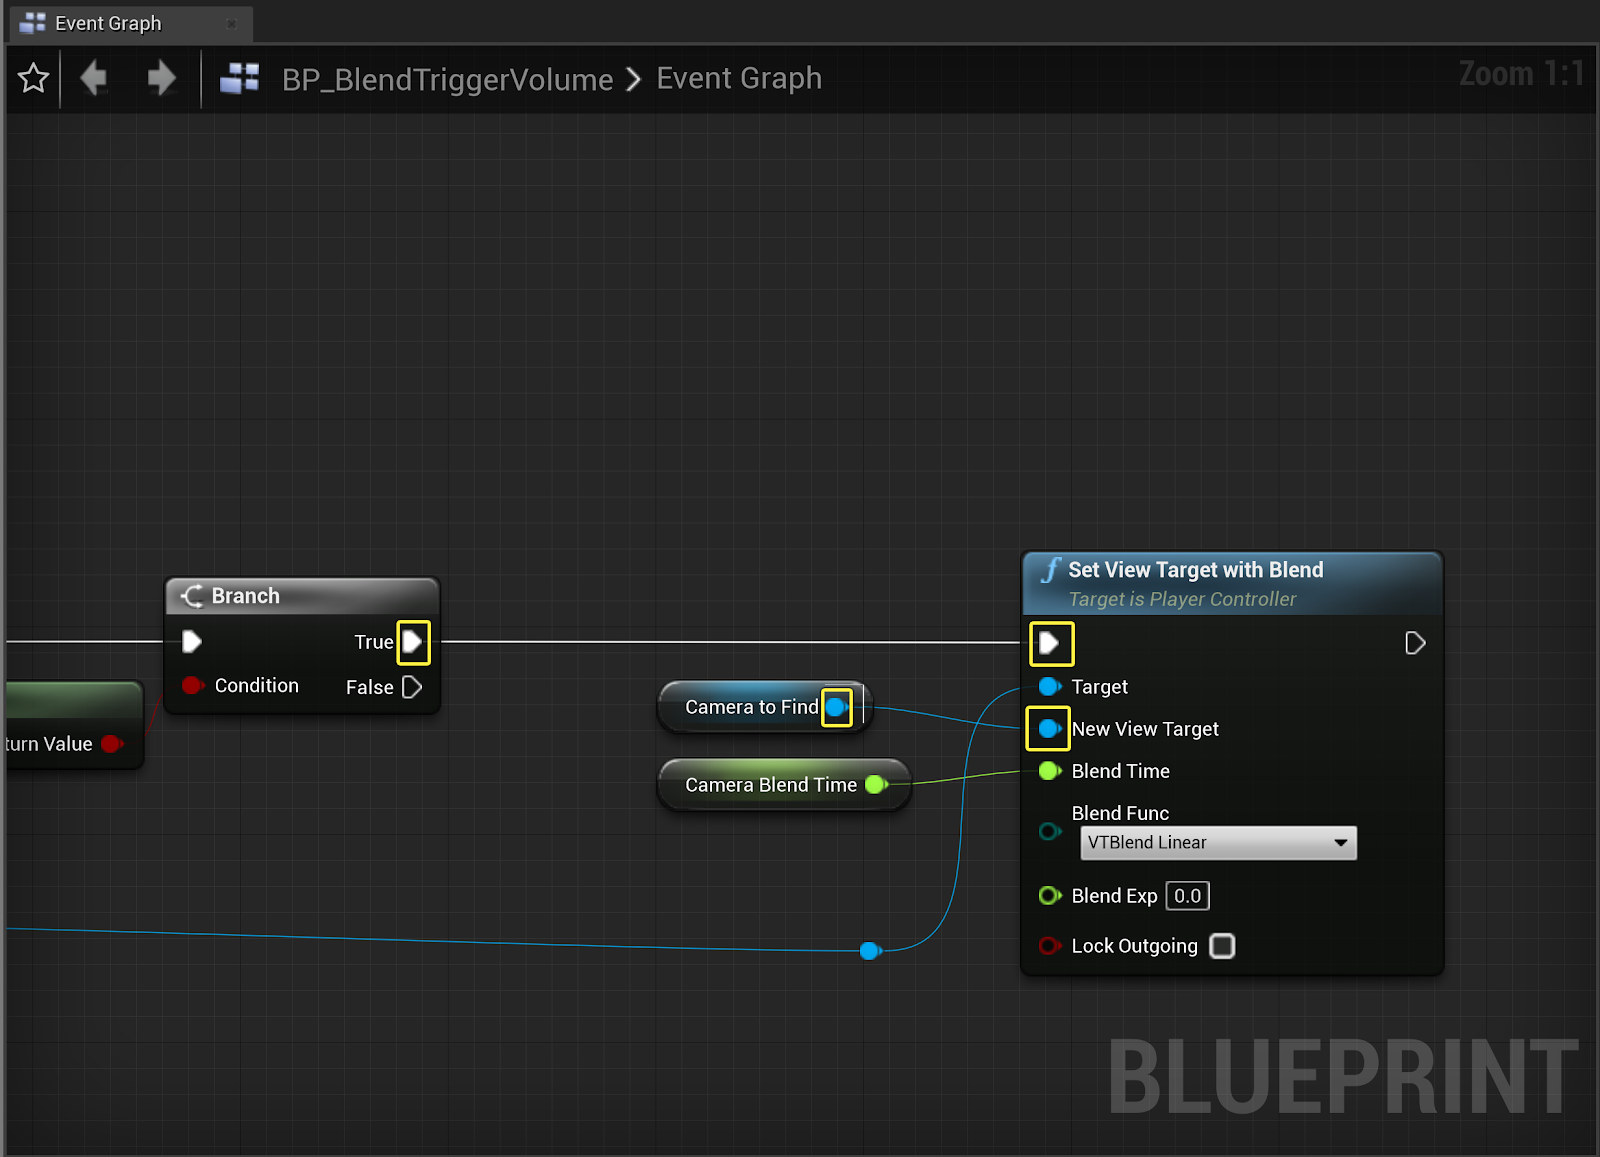
Connect its output pin into the New View Target input pin on the Set View Target with Blend node. Then, drag off from the If Branch node True execution pin and connect to the Set View Target with Blend node.
![Connect pins]()
Click image to enlarge.
-
Compile and Save.


Finished Blueprint
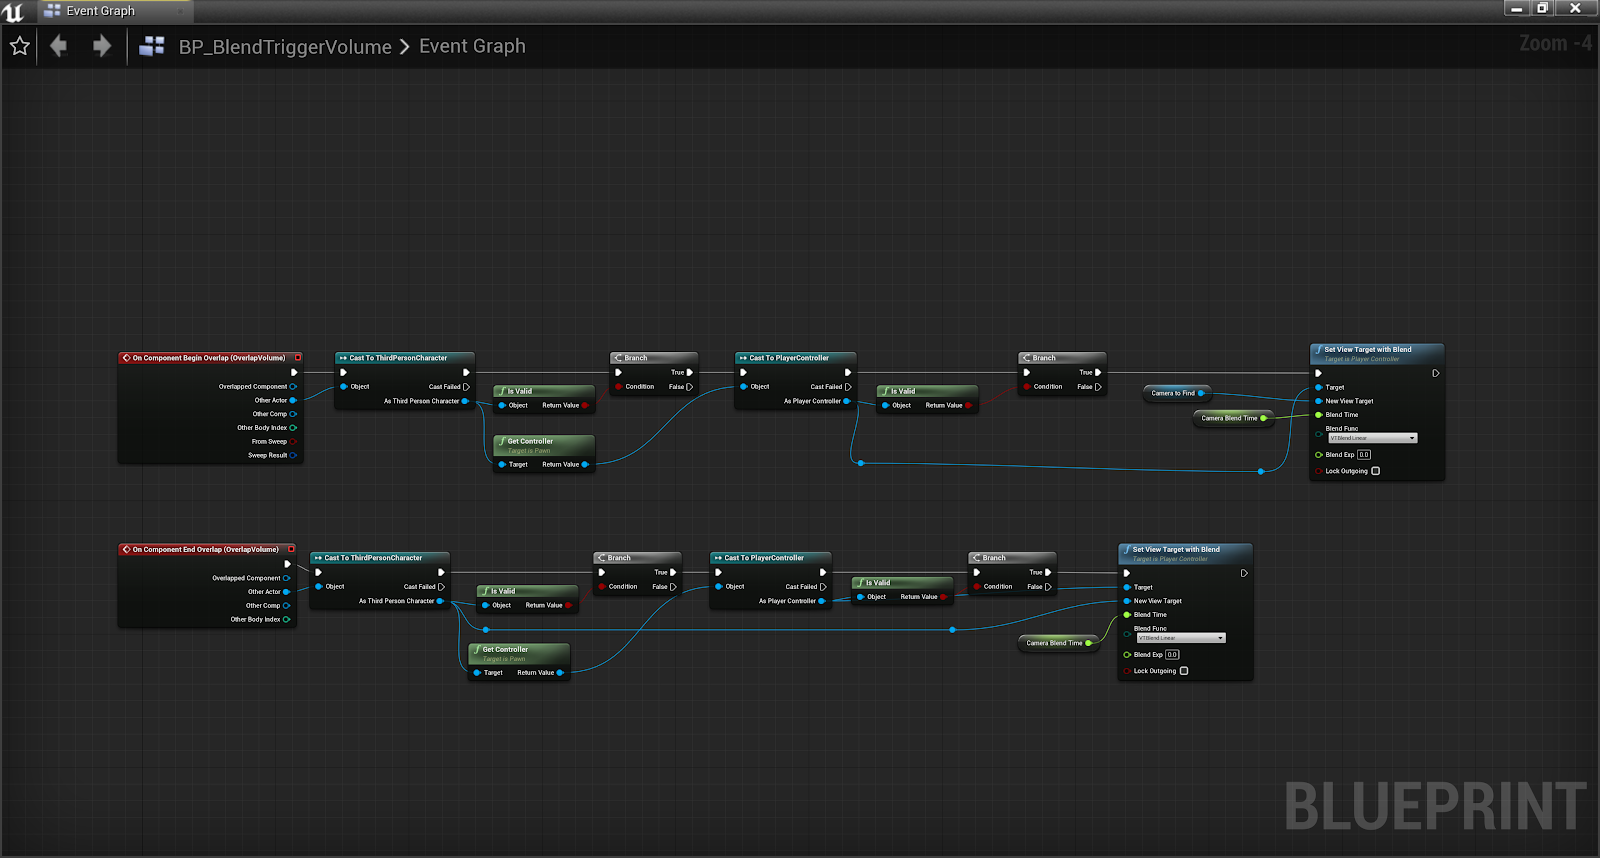
Click image to enlarge.
-
In the Content Browser, navigate to your C++ classes folder, and open your
BlendTriggerVolume.hclass defaults.![C++ Classes in the Content Browswer]()
-
In the class defaults, delete the existing TSubClassOfAActor declaration, and replace it with
protected: UPROPERTY(EditAnywhere, BlueprintReadWrite) ACameraActor* CameraToFind; -
Next, navigate to the
BlendTriggerVolume.cppfile, and in the constructor ABlendTriggerVolume::ABlendTriggerVolume , declare the following:// Sets default values ABlendTriggerVolume::ABlendTriggerVolume() { // Set this actor to call Tick() every frame. You can turn this off to improve performance if you don't need it. PrimaryActorTick.bCanEverTick = true; OverlapVolume = CreateDefaultSubobject<UBoxComponent>(TEXT("CameraProximityVolume")); OverlapVolume->SetupAttachment(RootComponent); CameraToFind = CreateDefaultSubobject<ACameraActor>(TEXT("CameraToFind")); } -
Within the ABlendTriggerVolume::NotifyActorBeginOverlap method, remove the following lines of code:
//Array to contain found Camera Actors TArray<AActor*> FoundActors; //Utility function to populate array with all Camera Actors in the level UGameplayStatics::GetAllActorsOfClass(GetWorld(), CameraToFind, FoundActors); //Sets Player Controller view to the first CameraActor found PlayerCharacterController->SetViewTargetWithBlend(FoundActors[0], CameraBlendTime, EViewTargetBlendFunction::VTBlend_Linear);Replace the removed code with:
//Sets Player Controller view to the CameraActorToFind variable. PlayerCharacterController->SetViewTargetWithBlend(CameraToFind, CameraBlendTime, EViewTargetBlendFunction::VTBlend_Linear); } } }In the above declaration, we replaced our logic so that when our player character overlaps the volume, it will transition to the Camera Actor variable instantiated in the class's constructor.

Finished Code
BlendTriggerVolume.h
//Copyright 1998-2021 Epic Games, Inc. All Rights Reserved.
pragma once
#include "CoreMinimal.h"
#include "GameFramework/Actor.h"
#include "BlendTriggerVolume.generated.h"
UCLASS()
class STATICCAMERAS_API ABlendTriggerVolume : public AActor
{
GENERATED_BODY()
public:
// Sets default values for this actor's properties
ABlendTriggerVolume();
protected:
// Called when the game starts or when spawned
virtual void BeginPlay() override;
UPROPERTY(EditAnywhere, BlueprintReadWrite)
class UBoxComponent* OverlapVolume;
UPROPERTY(EditAnywhere, BlueprintReadWrite)
ACameraActor* CameraToFind;
UPROPERTY(EditDefaultsOnly, meta =(ClampMin = 0.0f))
float CameraBlendTime;
virtual void NotifyActorBeginOverlap(AActor* OtherActor);
virtual void NotifyActorEndOverlap(AActor* OtherActor);
public:
// Called every frame
virtual void Tick(float DeltaTime) override;
};BlendTriggerVolume.cpp
//Copyright 1998-2021 Epic Games, Inc. All Rights Reserved.
#include "BlendTriggerVolume.h"
#include "Components/BoxComponent.h"
#include "StaticCamerasCharacter.h"
#include "Camera/CameraActor.h"
#include "Runtime/Engine/Classes/Kismet/GameplayStatics.h"
// Sets default values
ABlendTriggerVolume::ABlendTriggerVolume()
{
     // Set this actor to call Tick() every frame.  You can turn this off to improve performance if you don't need it.
    PrimaryActorTick.bCanEverTick = true;

    OverlapVolume = CreateDefaultSubobject<UBoxComponent>(TEXT("CameraProximityVolume"));
    OverlapVolume->SetupAttachment(RootComponent);

    CameraToFind = CreateDefaultSubobject<ACameraActor>(TEXT("CameraToFind"));
}
// Called when the game starts or when spawned
void ABlendTriggerVolume::BeginPlay()
{
Super::BeginPlay();
}
void ABlendTriggerVolume::NotifyActorBeginOverlap(AActor* OtherActor)
{
if (AStaticCamerasCharacter* PlayerCharacterCheck = Cast<AStaticCamerasCharacter>(OtherActor))
{
if (APlayerController* PlayerCharacterController = Cast<APlayerController>(PlayerCharacterCheck->GetController()))
{
PlayerCharacterController->SetViewTargetWithBlend(CameraToFind, CameraBlendTime, EViewTargetBlendFunction::VTBlend_Linear);
}
}
}
void ABlendTriggerVolume::NotifyActorEndOverlap(AActor* OtherActor)
{
if (AStaticCamerasCharacter* PlayerCharacterCheck = Cast<AStaticCamerasCharacter>(OtherActor))
{
if (APlayerController* PlayerCharacterController = Cast<APlayerController>(PlayerCharacterCheck->GetController()))
{
PlayerCharacterController->SetViewTargetWithBlend(PlayerCharacterController->GetPawn(), CameraBlendTime, EViewTargetBlendFunction::VTBlend_Linear);
}
}
}
// Called every frame
void ABlendTriggerVolume::Tick(float DeltaTime)
{
Super::Tick(DeltaTime);
}Level Setup
In order to demonstrate the newly implemented logic, you will need to set up an additional room, Camera, and Overlap Volume to your Level.
-
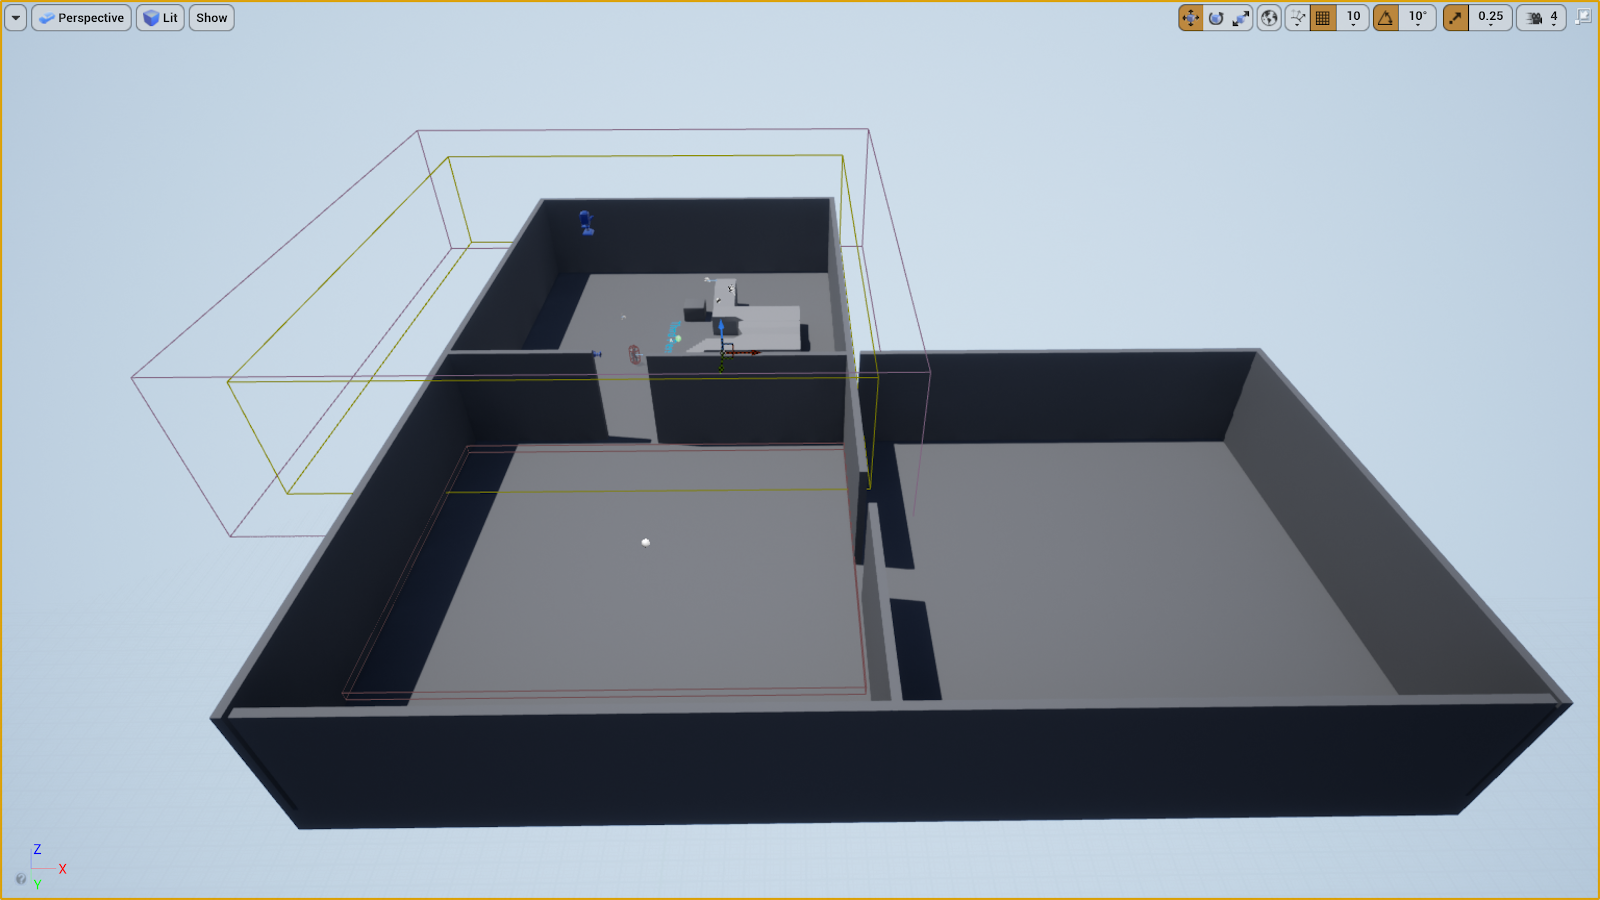
Using the map created previously from the Using a Static Camera how-to guide, create an additional room.
![Additional rooms]()
Click image to enlarge. We duplicated then modified the third person example map to create two additional rooms.
-
In the World Outliner, select your BP_BlendTriggerVolume Actor, then in the Details panel, navigate to the Defaults category. Open the dropdown menu adjacent to the Camera To Find variable.
![Camera To Find variable dropdown menu]()
Select your BP_ExampleCameraActor .
![Select Camera Actor]()
-
From the Content Browser, drag an instance of your BP_CameraActor (BP_CameraActor2) into the world, then adjust its transform coordinates to your desired viewpoint within your newly created room.
![New Camera Actor]()
Click image to enlarge. BP_Camera Actor2 is piloted into the corner of the room.
-
From the Content Browser , drag another instance of your BP_BlendTriggerVolume Actor into the world ( BP_BlendTriggerVolume2 ), then navigate to the Details panel and change its Box Extent X, Y and Z values to fit the size of your newly added room.
![New Blend Trigger Volume]()
Click image to enlarge.
-
In the Details panel, navigate to the Defaults category and open the dropdown menu adjacent to the Camera To Find variable.
![Camera To Find variable dropdown menu 2]()
Select your BP_ExampleCameraActor2 .
![Select new Camera Actor]()
-
Navigate back to the toolbar, and click the Play(PIE) button.
![Play In Editor button]()


End Result
When the game starts, the player controls their character's movement using WASD. Upon overlapping the multiple BP_BlendTriggerVolumes in the level, the camera view will transition to the BP_CameraActors that you have created and placed in your level.
