Choose your operating system:
Windows
macOS
Linux


This document contains an overview of how to work with keys and curves within the Timeline editor in Blueprints.
Choose your implementation method:
C++
A Curve defines a track of interpolated points to evaluate over a given range. Curves can be vectors , floats , and colors . Each track can have any number of keys that define a time and value. The data can be interpolated between these keys to calculate the value at any point during the Timeline.
Working with Keys and Curves
In this example, you will create a Curve Float that defines a curve of interpolated float points to evaluate over a given range.
-
In the editor, Create a new Actor Blueprint that contains a Timeline Component .
-
Double-click your timeline component to open the Timeline Editor .
-
Click the Add Float Track button to add a CurveFloat to your Timeline Component.

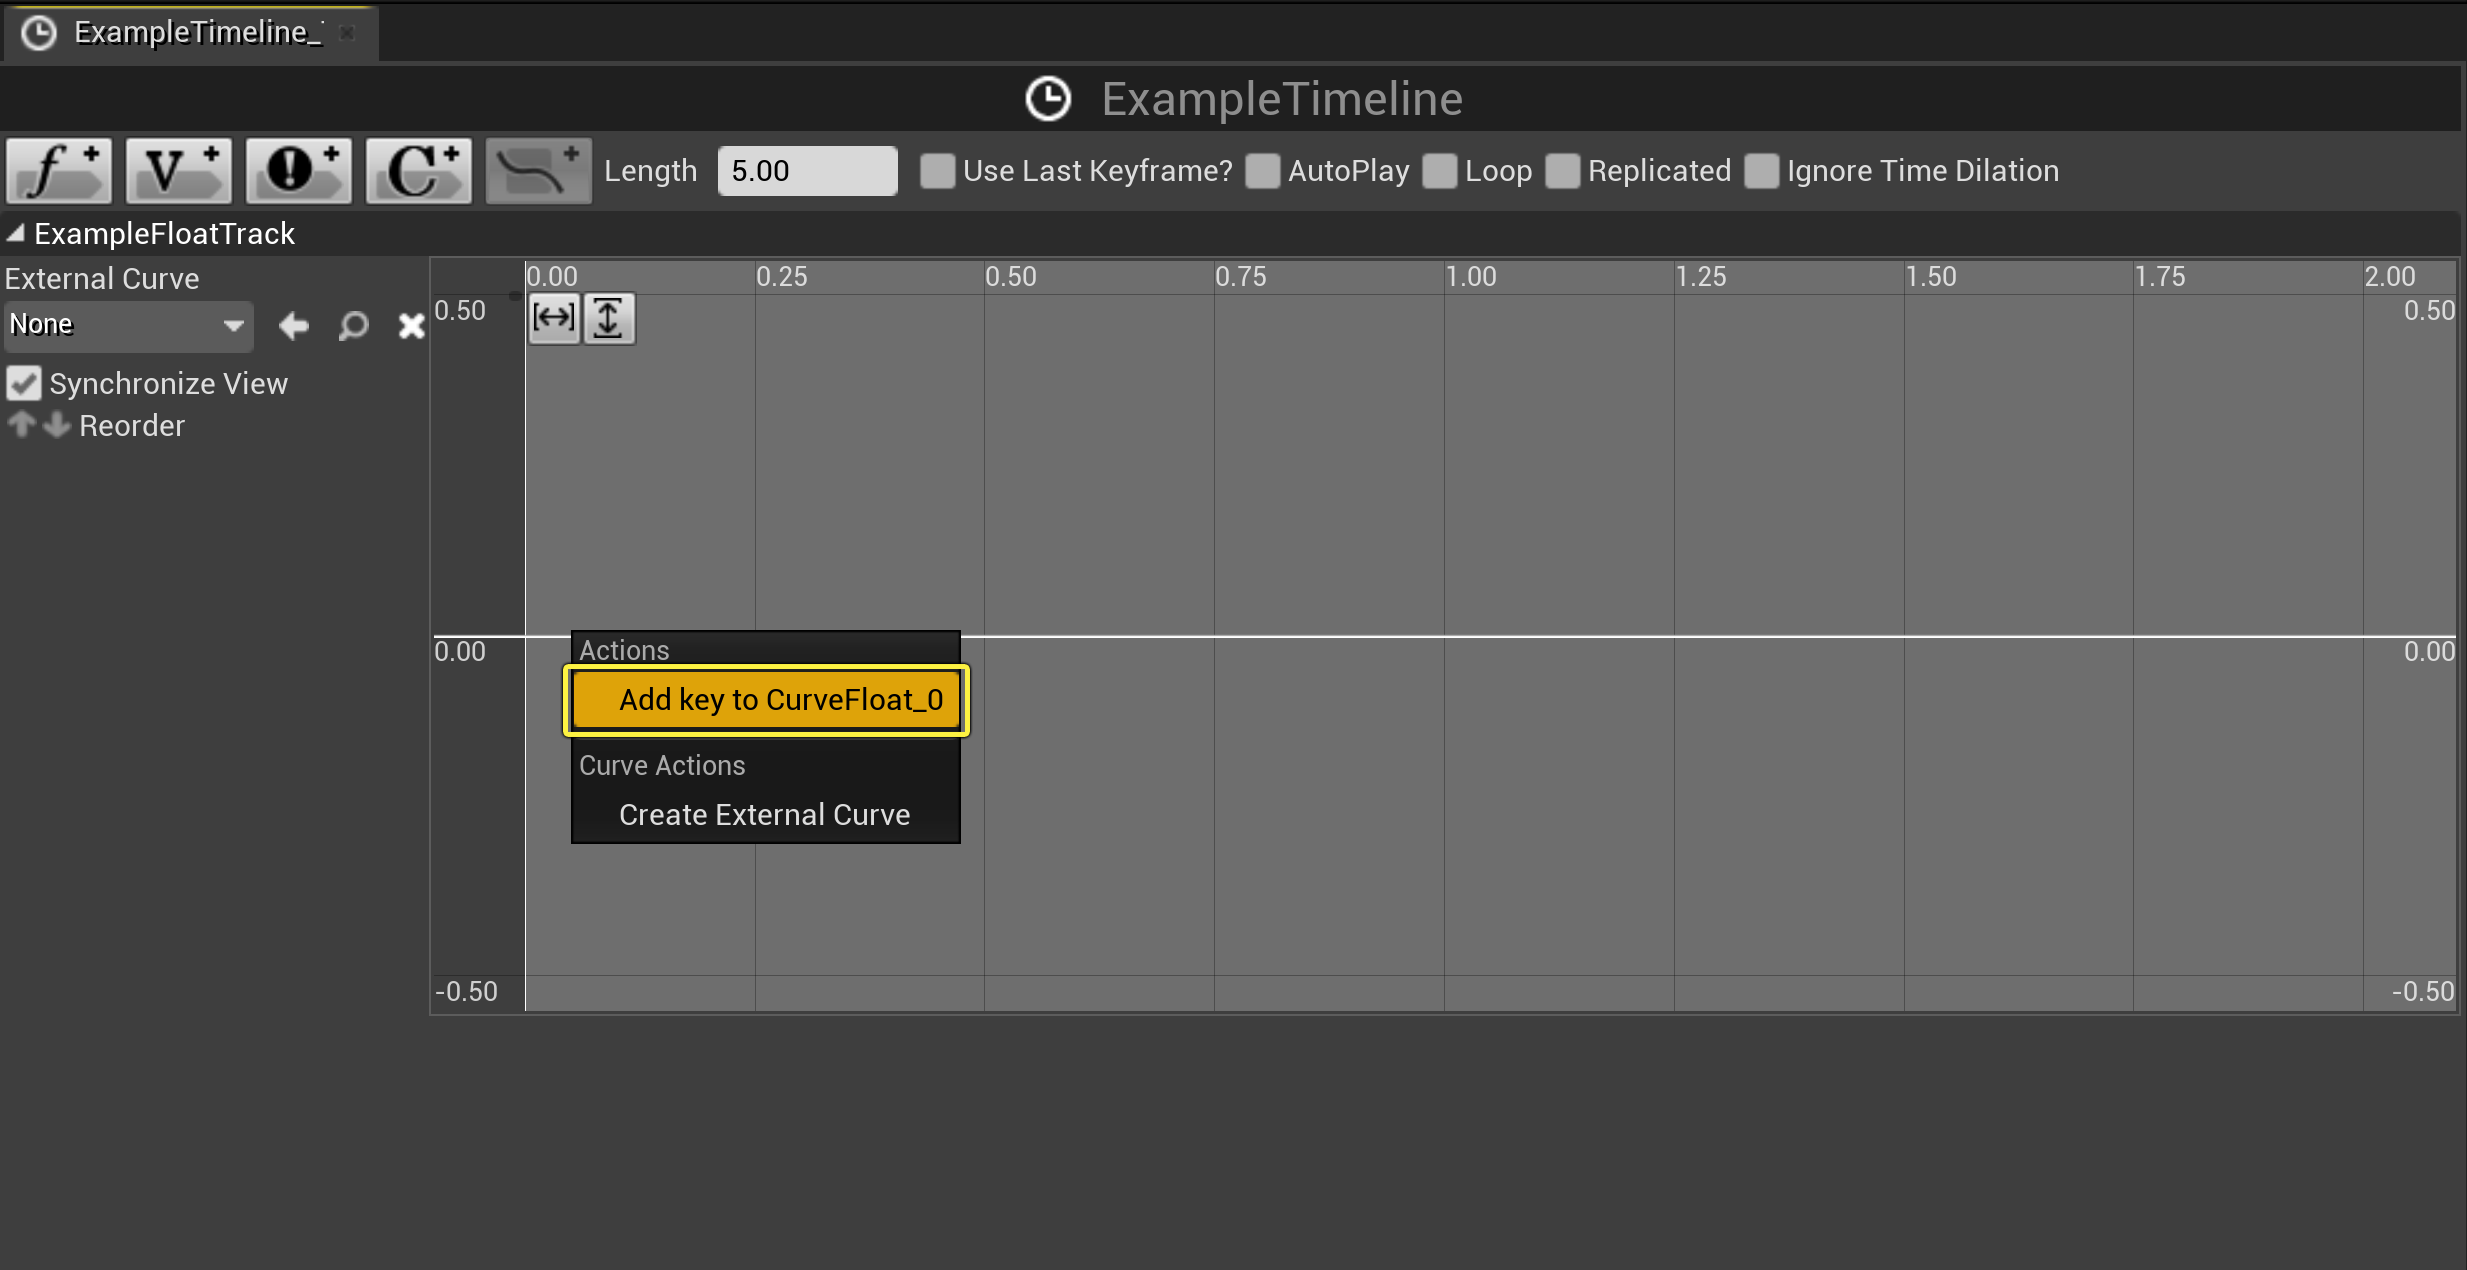
Adding Keys
Keys are added by holding the Shift key and clicking on the gray bar, or by right clicking on the gray bar and selecting the action Add Key To CurveFloat from the drop down menu.

Editing Keys
The time and value of the key can be set by clicking the key and entering the values into the time and value fields near the top of the track.

Deleting Keys
Selected keys can be deleted by pressing the Delete key on the keyboard.
Moving Keys
To move a key along the timeline, select the key, then drag it. Multiple keys can be selected using the Ctrl key. Dragging horizontally will update the Time value of the key, while dragging vertically will update the Value .
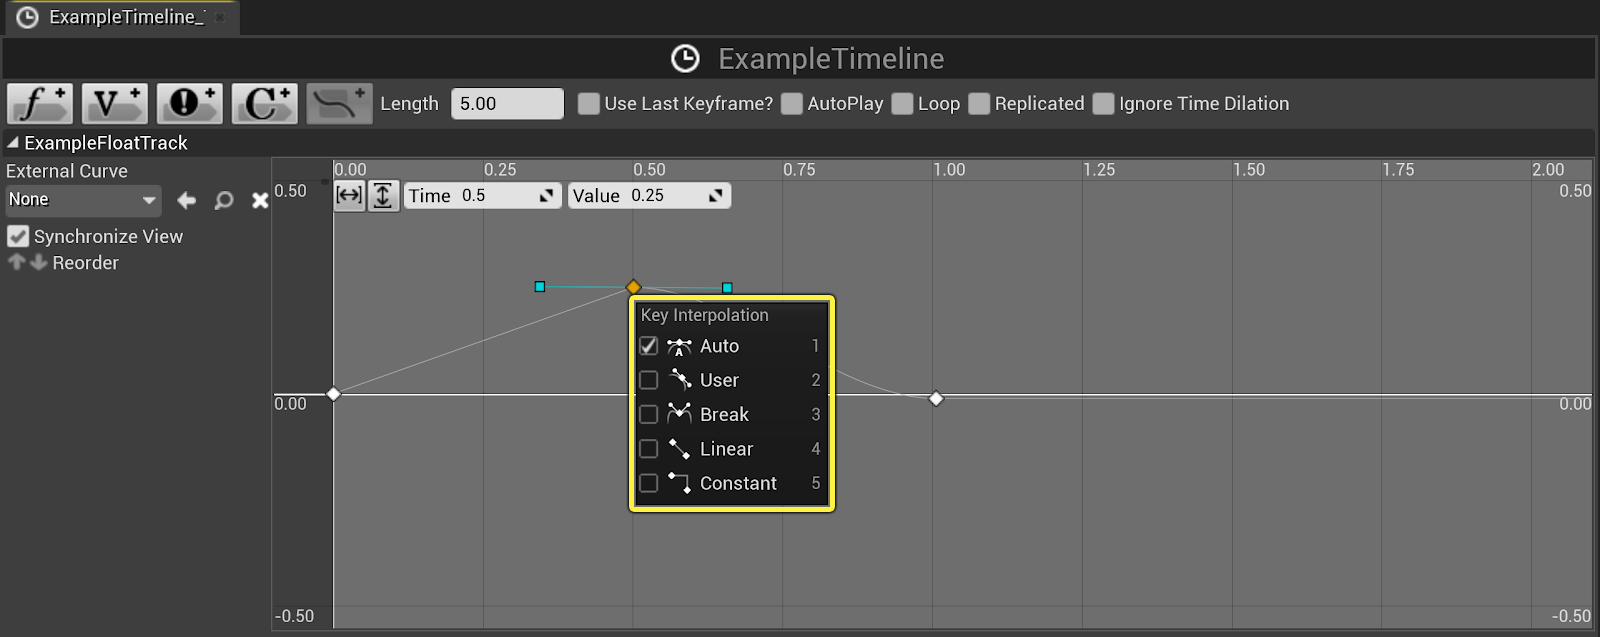
Key Interpolation
By right-clicking a key, a drop down menu will appear for you to choose the interpolation type for that key.

Key interpolation only affects the curve between the key you interpolate for and the next key after that. For example, with all other keys set to Linear , and the center key set to Cubic-Auto , the track will look similar to the image below.

Available interpolation types are:
-
Auto
![image alt text]()
-
User
![image alt text]()
-
Break
![image alt text]()
-
Linear
![image alt text]()
-
Constant
![image alt text]()


External Curves
To the left of the main key area is a field where you can add an external curve asset from the Content Browser to that track.

|
External Curve Icon |
Description |
|---|---|
|
|
Use the curve selected in the Content Browser for this track. |
|
|
Browse in the Content Browser to select a curve for this track. |
|
|
Convert an imported external curve to an internal curve so that keys and curves can be edited. |
You can also right-click any curve (with at least one key selected) and choose Create External Curve . This brings up a context window in which you can edit the path for where the curve asset will be saved. In doing this, you can then use this curve again on other timelines.

A Curve ( UCurveBase ) defines a track of interpolated points to evaluate over a given range. Curves can be vectors , floats , and colors . Each track can have any number of keys that define a time and value. The data can be interpolated between these keys to calculate the value at any point during the Timeline.
Working with Keys and Curves
In this example, you will create a UCurveFloat that defines a curve of interpolated float points to evaluate over a given range.
To create and instantiate a
UCurveFloat
to a
Timeline Component
, follow the steps below:
-
Create an Actor class that contains a UTimelineComponent .
// Copyright 1998-2021 Epic Games, Inc. All Rights Reserved.

#pragma once

#include "CoreMinimal.h"
#include "GameFramework/Actor.h"
#include "Components/TimelineComponent.h"
#include "MyActor.generated.h"

UCLASS()
class UTIMELINEKEYSCURVESEXAMPLE_API AMyActor : public AActor
{
    GENERATED_BODY()

public:
    // Sets default values for this actor's properties
    AMyActor();

protected:
    // Called when the game starts or when spawned
    virtual void BeginPlay() override;
    UPROPERTY(EditAnywhere, BlueprintReadWrite)
        UTimelineComponent* ExampleTimelineComp;

public:
    // Called every frame
    virtual void Tick(float DeltaTime) override;

};
For more detailed steps on how to create a
UTimelineComponent, see Creating Timelines . -
From the class definition of your
TimelineActor.hfile, declare the following:public: UPROPERTY(EditAnywhere) UCurveFloat* ExampleTimelineCurve; -
Compile your code in the Unreal Editor .
-
From the Content Browser , select Add/Import > Miscellaneous > Curve > CurveFloat , then name your CurveFloat Asset ExampleFloatTrack .
![image alt text]()
-
Create a Blueprint class based on the Actor that contains your
UTimelineComponent. -
Open the class defaults and assign your Example Timeline Curve with your ExampleFloat Track.
![image alt text]()
-
Double-click your Example Float Track from the Content Browser to open the Timeline Editor .


Adding Keys
Keys are added by holding the Shift key and clicking on the gray bar, or by right clicking on the gray bar and selecting the action Add Key To CurveFloat from the drop down menu.
Editing Keys
The time and value of the key can be set by clicking the key and entering the values into the time and value fields near the top of the track.

Deleting Keys
Selected keys can be deleted by pressing the Delete key on the keyboard.
Moving Keys
To move a key along the timeline, select the key, then drag it. Multiple keys can be selected using the Ctrl key. Dragging horizontally will update the Time value of the key, while dragging vertically will update the Value .
Key Interpolation
By right-clicking a key, a drop down menu will appear for you to choose the interpolation type for that key.
Key interpolation only affects the curve between the key you interpolate for and the next key after that. For example, with all other keys set to Linear , and the center key set to Cubic-Auto , the track will look similar to the image below.

Available interpolation types are:
-
Auto
![image alt text]()
-
User
![image alt text]()
-
Break
![image alt text]()
-
Linear
![image alt text]()
-
Constant
![image alt text]()


External Curves
To the left of the main key area is a field where you can add an external curve asset from the Content Browser to that track.

|
External Curve Icon |
Description |
|---|---|
|
|
Use the curve selected in the Content Browser for this track. |
|
|
Browse in the Content Browser to select a curve for this track. |
|
|
Convert an imported external curve to an internal curve so that keys and curves can be edited. |
You can also right-click any curve (with at least one key selected) and choose Create External Curve . This brings up a context window in which you can edit the path for where the curve asset will be saved. In doing this, you can then use this curve again on other timelines.
