Choose your operating system:
Windows
macOS
Linux


Use your Materials to store custom data in an index array that is accessible through Blueprint and code to effect changes for scene primitives when using the Custom Primitive Data (CPD) workflow. This functions similarly to how Material Instance Dynamics (MID) does, providing a way for you to control parts of your material graph dynamically at runtime through scalar and vector parameters. The difference is that CPD has the advantage of storing data on the primitives themselves rather than with the Material Instance, which lowers the number of draw calls for similarly placed geometry in your Levels (such as walls, floors, or other duplicated geometry).
Usage and Workflow
Here's how Custom Primitive Data works for your scene primitives by:
-
Set Scalar and Vector Material Parameters to control parts of your material logic. On each parameter you want to set and control dynamically, enable Use Custom Primitive Data .
-
For each parameter that has this option set, give it a unique Primitive Data Index that can be referenced in Blueprint or code.
-
Use the Set Custom Primitive Data nodes in Blueprint to set and control the Material Parameters for the values stored in the custom data array.
Material Usage
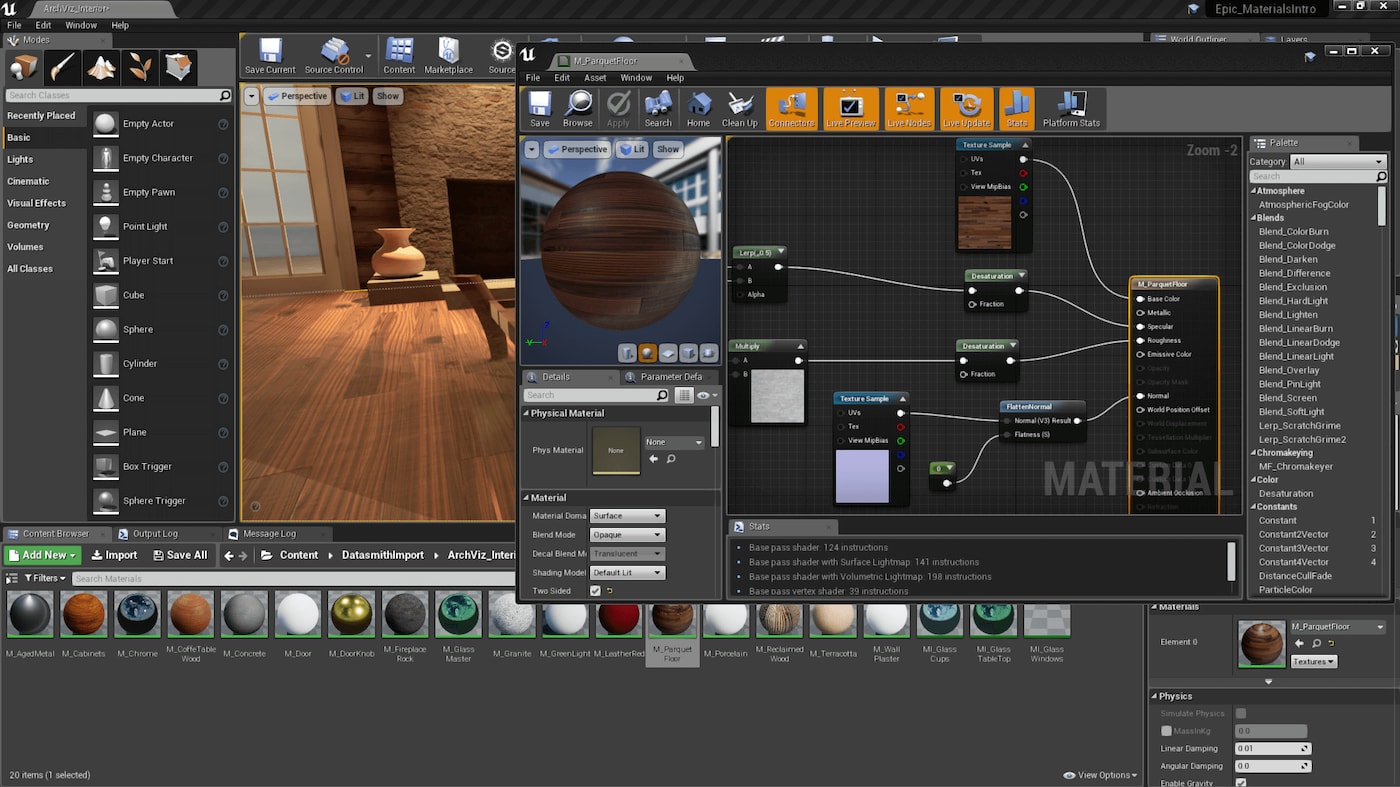
Control parts of your material graph using Scalar and Vector Parameter expressions the way you would drive controllable parts of your Material in a Material Instance . With a Parameter selected, use the Details panel to enable Use Custom Primitive Data for that expression.

Left: Default scalar and vector Parameter expressions; Right: Scalar and vector Parameter with enabled Custom Primitive Data.
Once enabled, the parameter displays "Custom Primitive Data" below its given name along with its assigned indices in the array.

The Primitive Data Index value sets the assigned index this parameter is stored in. This index is used for reference in Blueprint and code.
When setting an index on a scalar (float) parameter, it's just that index that is used. When doing the same on a Vector parameter, a float value is set on each output, of which there are four. For example, setting the Primitive Data Index to 0 on a vector parameter assigns a float value on index 0, 1, 2, and 3—one for each RGBA output.
Blueprint Usage
Access scene primitives that use Custom Primitive Data through Blueprint using the following nodes:
-
Set Custom Primitive Data Float
-
Set Custom Primitive Data Vector
These nodes require no string-matching to parameter names. Instead, they use the assigned Primitive Data Index to set and get data in the array per primitive.

Accessing custom data in this array from a material is similar to working with Material Parameters in a Material Instance. The difference is that on Parameter nodes, the parameter in the material must be a string-matched uniform rather than matching a numbered index.
Actor Defaults Usage
Set up default values for custom primitive data on scene primitives using the Details panel to add array elements to the Custom Primitive Data array.

Each numbered array element references the Custom Primitive Data Index with the corresponding value. If an index does not exist for the array element, it is ignored. Setting defaults using this method is ideal when you want to manually adjust some values without attaching a Blueprint or making a Material Instance to control them.
Example Setup and Comparison
The following example demonstrates use with a simple material that is driven by several parameters—both Ssalar and vector—to randomly select a color from a Vector Parameter and set the emissivity and object scale of the mesh in the scene through material logic in the graph. Blueprint is used to drive these parameters for the stored custom data.
Material Example Setup
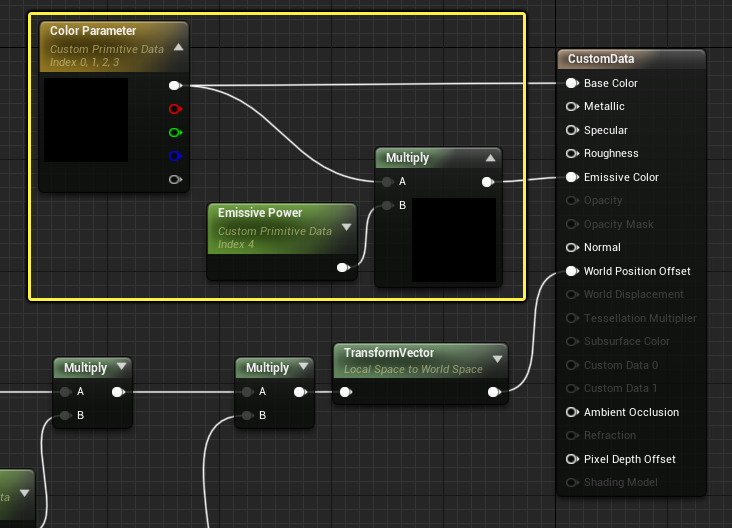
For the material setup, Use Custom Primitive Data is enabled on select parameters in this material graph:
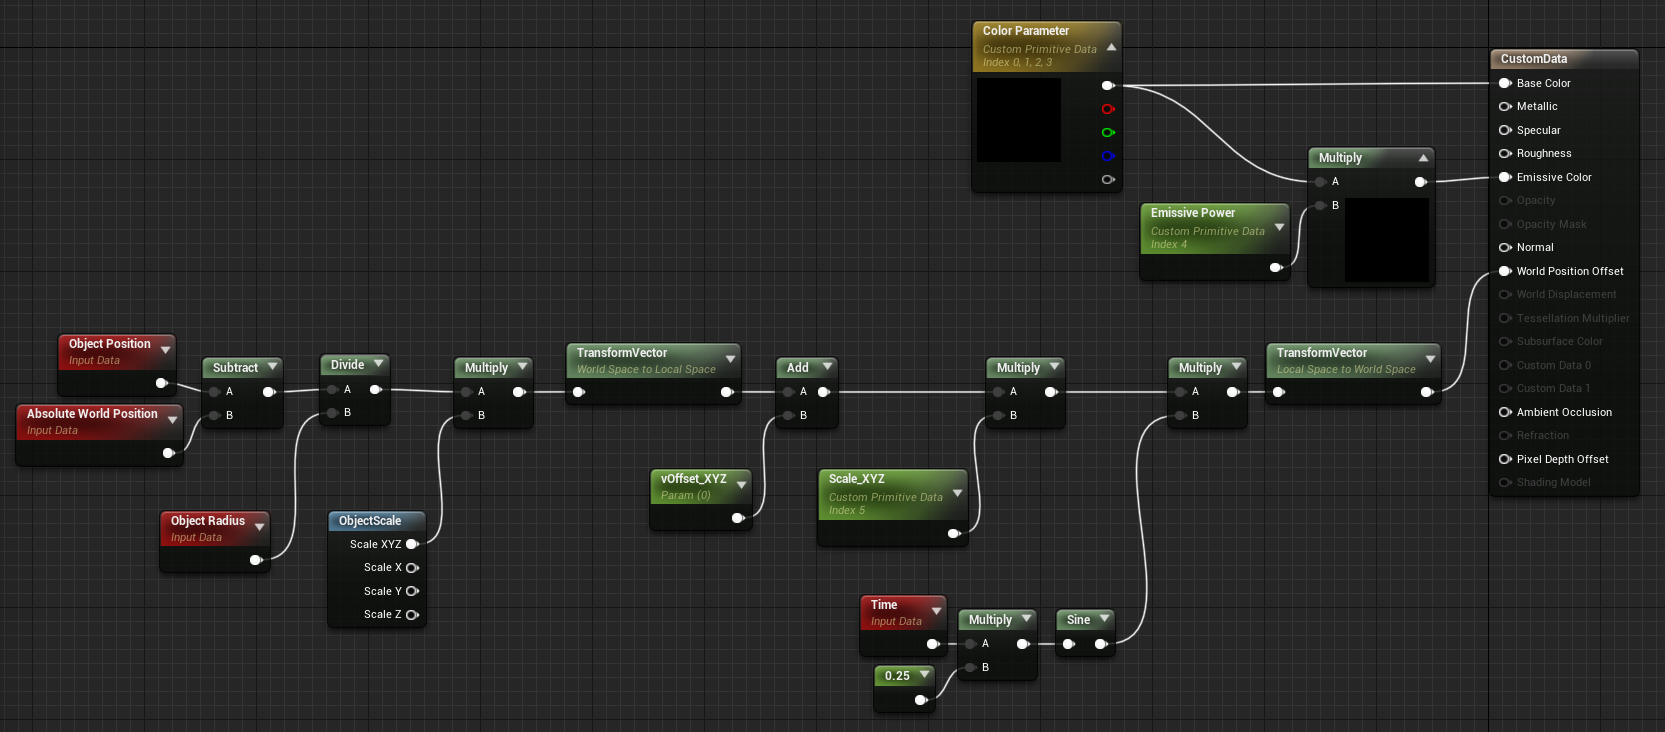
Click image for full size.
The Base Color and Emissive intensity are driven by two parameters; a Vector 4 Parameter called "Color Parameter", and a scalar parameter called "Emissive Power."
Click image for full size.
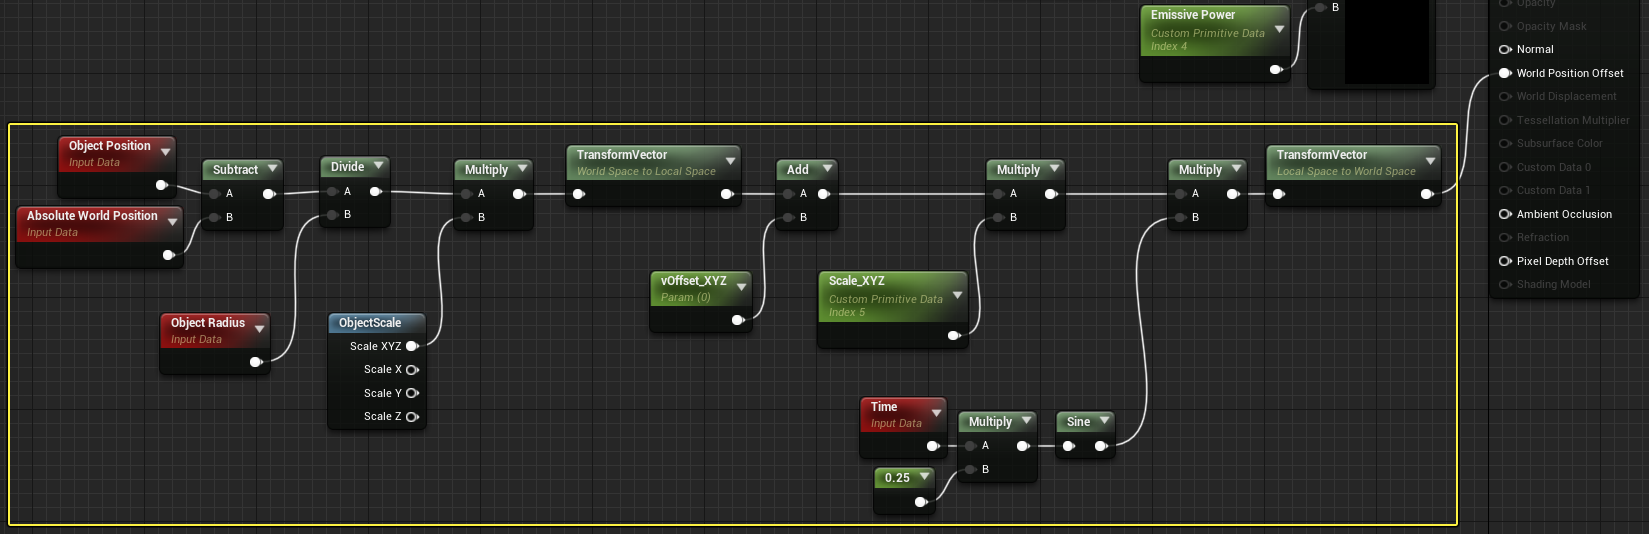
The second part of this graph uses logic to uniformly scale the mesh it's assigned to in the Level. The scalar parameter called "Scale_XYZ" controls how much the assigned object is scaled:
Click image for full size.
Blueprint Example Setup
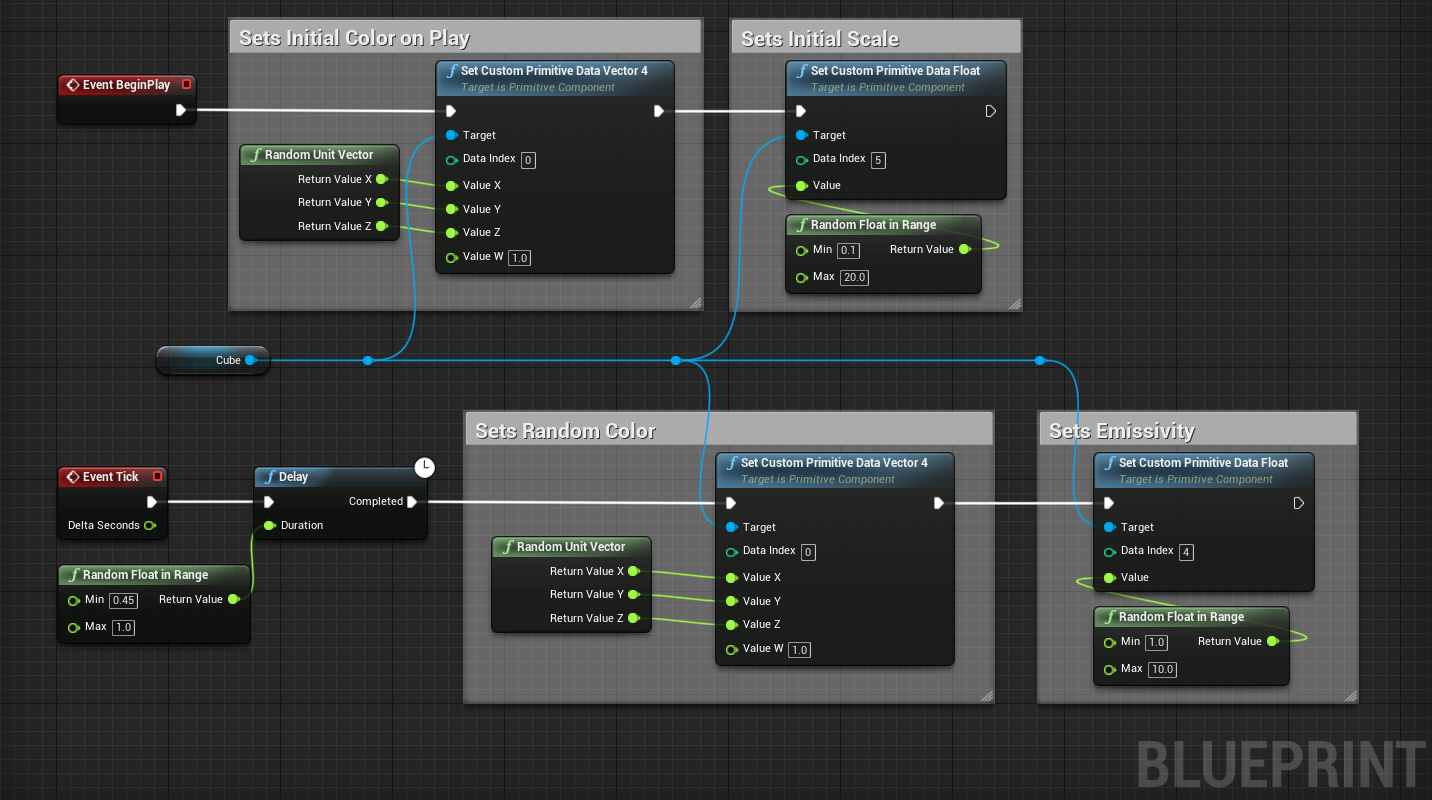
Custom Data on parameters—like MIDs— is a way to make changes using Blueprint or code at runtime. The graph below sets and stores values in these material parameters to set a random color, its emissivity, and its initial scale when the game session starts.
Click image for full size.
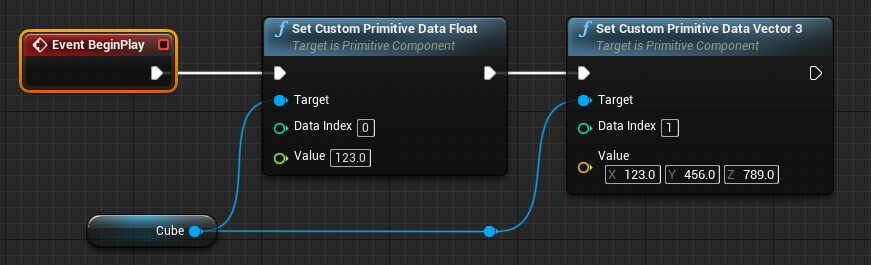
On Event BeginPlay, two CPD parameters have their color and scale values initialized using the Set Custom Primitive Data nodes in Blueprint.

Click image for full size.
The Data Index on both Set nodes initializes material parameters using the same Primitive Data Index in the Material.

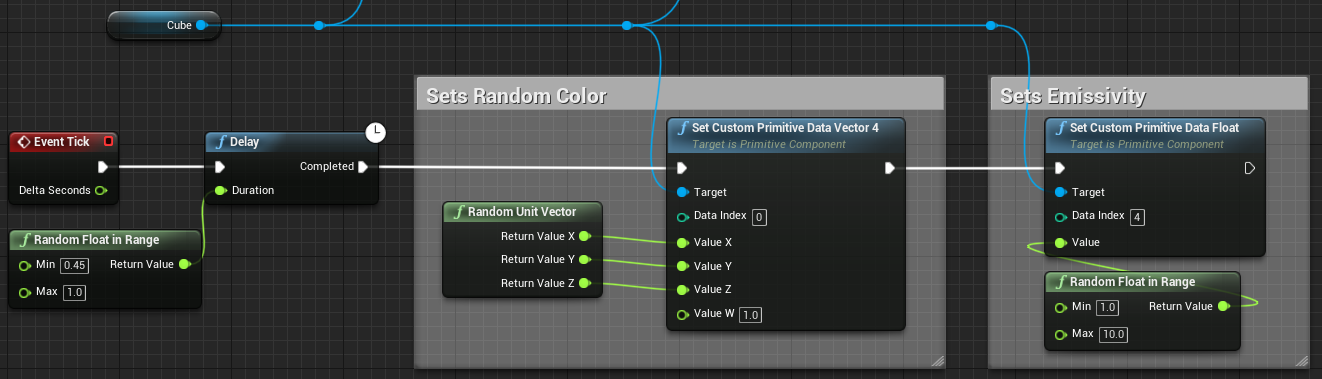
On Event Tick, the Set nodes reference the Primitive Data Index for CPD parameters to set a new color and emissive intensity based on the random time set by the Delay node each tick. The color is set by a random range of float values for the XYZ (which translates to the RGB values in the Material's Vector parameter expression). The emissive intensity is also set using a defined range of float values.
Click image for full size.
Be careful when setting up and using Event Tick. For the purposes of this demonstration, it's good for quick tests and debugging, but is not always best for continuous use at runtime.
Example Result
The result of this example gives you a Material with some CPD parameters that are controlled by Blueprint to set color, emissivity, and scale of the mesh using material parameters.
The information on this page compares the setup and usage of CPD as being similar to Material Instance Dynamics . Let's actually compare the Material and Blueprint setup required for each of these to have a better understanding:
The Material setup only requires that parameters using CPD enable Use Custom Primitive Data and set a Primitive Data Index , which is referenced in Blueprint later. For MID, the name of the parameter is all that is needed later in Blueprint.
|
|
|
|---|---|
|
MID Material Parameters |
Custom Primitive Material Parameters |


Now, let's compare the Blueprint setup required:
-
Material Instance Dynamics Workflow:
![MID_BP_Workflow.png]()
Click image for full size.
For additional information on instancing with Materials, see Instanced Materials .

-
Custom Primitive Data Workflow:
![CPD_BP_Workflow.png]()
Click image for full size.
The workflow is similar, with the exception that there is some additional steps to take in Blueprint. The MID workflow requires the Create Dynamic Material Instance node and some Set Parameter Value nodes that reference the string-matched Parameter Name found in the Material for the wanted parameter.
If we compare both of these setups in the Level at runtime, they are visually identical. However, CPD comes with performance-saving benefits using the mesh drawing refactor that is covered in the section below.
Left: Custom Primitive Data workflow; Right: Material Instance Dynamics workflow.
Performance
The CPD workflow has the advantage of significantly reducing draw calls for similar geometry in your Level when it is using a material set up with custom data. Draw calls are reduced using the Mesh Drawing refactor that automatically dynamically instances scene primitives.
To check how well dynamic instancing is working for your Level, open the console (`) and enter the command **stat scenerendering**. This command shows general rendering statistics for your current scene view. It is a good starting point to finding general areas of slow performance in the rendering process, along with counters for the number of mesh draw calls and lights in the scene.

Default Level scene rendering stats
While working in the Level viewport, hit the G key to toggle Game View mode, or choose to Play-In-Editor (PIE) or Simulation to get more accurate results. When not using one of these options, other draw calls are being attributed to Editor-only geometry, like icons for the Directional Light.
In this example scene, we start with a floor mesh, the sky sphere mesh in the background, and several duplicated meshes using custom data in their materials.

The scenerendering stats shows the number of draw calls registered in this current view—14 in total.

Because the engine automatically dynamically combines draw calls with the Mesh Drawing Policy, it's good to disable dynamic instancing to see how well it's currently working for this scene. Disable it with the following command:
r.MeshDrawCommand.DynamicInstancing 0
Notice that the number of
Mesh draw calls
has increased with just a few primitives:

To see a more dramatic difference, let's duplicate the meshes some more that are using CPD; 25 spheres with varying sizes, in this case.

-
With dynamic instancing disabled, there are 94 Mesh draw calls . Using MIDs will give you a similar result because they are not instanced liked CPD.
![CPD_StatSceneRenderin4a.png]()
-
Reenabling dynamic instancing now shows 46 Mesh draw calls .
![CPD_StatSceneRenderin4b.png]()


When storing custom data in your Materials and using similar geometry in your Level, you can clearly get a difference in the number of draw calls, even over using alternative methods like Material Instance Dynamics.
Additional Notes
-
Float Limit of 32
-
In a future release, we'll look at making this a Project Setting as a configurable setting.
-
-
Support for user-defined default and override of Custom Primitive Data parameter values
-
Currently, when setting up a Custom Primitive Data parameter in your Material, the default value is always 0. If you want an initial value set while working in the editor, you can do this using the Construction Script in Blueprint for the mesh that the material is assigned to.
-