Choose your operating system:
Windows
macOS
Linux


When creating certain surface types such as water or glass, you need the ability to make the surface not only see through, but also give the surface a sense of depth and color. In the real world, these properties are often referred to as Transparency or Opacity and are often used interchangeably to describe the same thing. However inside of Unreal Engine 4(UE4), Transparency is used to describe if a surface is see-through or not while Opacity is used to define how see-through the surface is. In the following How - To, you will learn everything you need to know about how to introduce Transparency to your Materials in Unreal Engine 4.
Transparency
Transparency is the term used to describe a surface's ability to block or allow the passage of light. For example, a brick would be an object that has no Transparency while stained glass would be an object that has Transparency. Inside UE4, Transparency works by allowing pixels to not be 100% Opaque, or non see-through, but have some varying degree of Transparency, or see-through.

The image above demonstrates how Transparency works in UE4 using a Texture to help define which areas should have Transparency and how transparent these areas should be. The Texture is a gradient that goes from Black at the top, or full Transparency, to White at the bottom, or no Transparency. The areas in the middle have a varying degree of Transparency based on how close to Black or White the pixel in the Texture is.
Uses for Transparency
Transparency can be used to simulate a variety of different real world surface types. Below is a list of some of the most common uses for Transparency inside UE4.
-
Hair
-
Glass
-
Water
-
Smoke or Fire Visual Effects
-
Clouds
-
Impact Decals
-
Foliage
Transparency and Opacity
When dealing with Transparency in UE4 you will also hear terms like Opacity being used. Opacity refers to how see through a surface is while Transparency is used to describe that a surface can be see through. In the image below, we can see this in action.

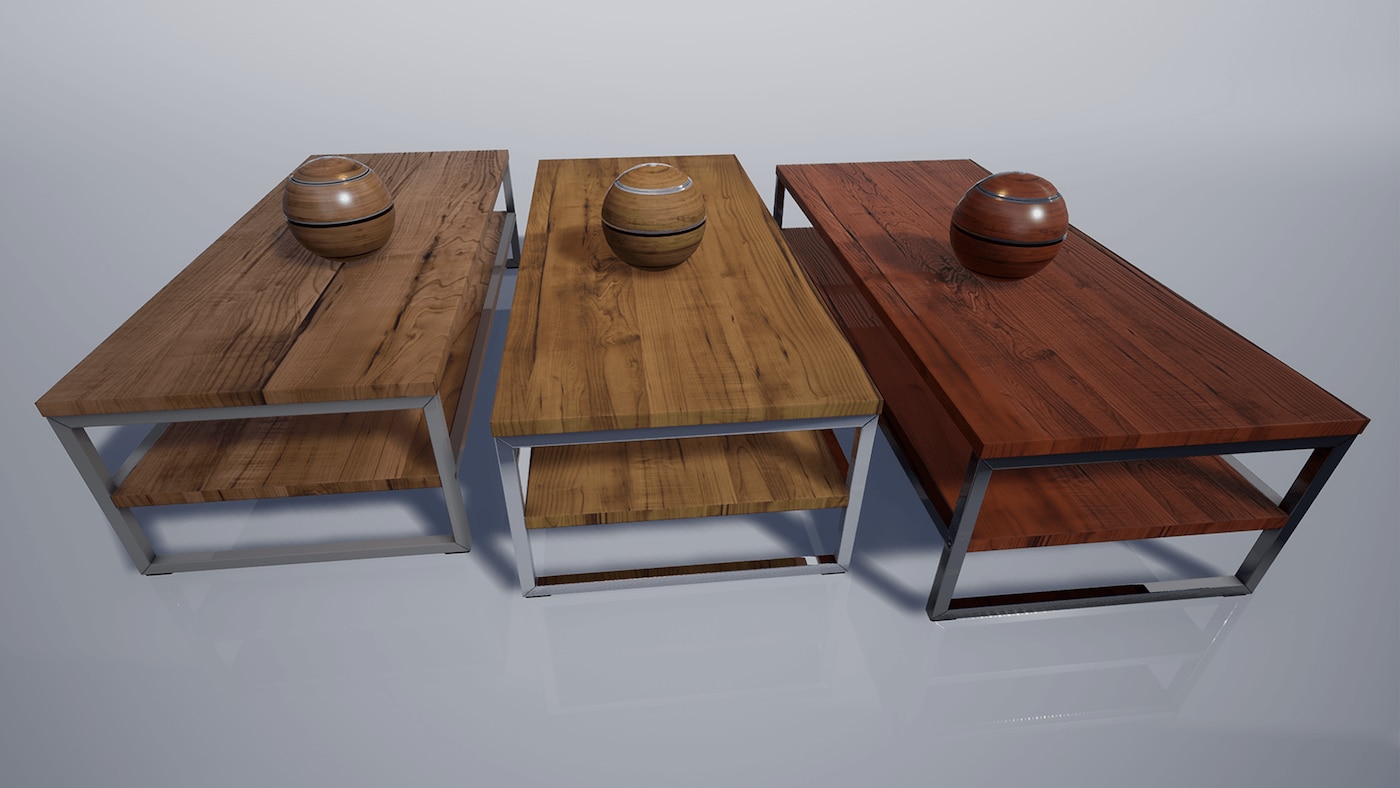
Starting on the left and moving to the right, the Opacity of the Material is increased from 0 to 1. This makes the Material go from completely transparent, or see-through, to completely opaque, or non see-through. However this is only happening because the Material was setup so that it uses Transparency. Changing the Opacity on a Material that is not setup for Transparency will have no effect on how see-through that Material is.
-
Transparency: Used to define if a surface can be seen through.
-
Opacity: Used to define how transparent or opaque (How see-through / Non see-through ) a surface is.
Using Transparency in Materials
Setting up a Material to use Transparency can be accomplished in the following steps.
This tutorial will make use of content that can be found if you included the Starter Content with your project. If you have not included the Starter Content in your project you can look into the Migrating content page for information about how to move content between projects. This way you can add the Starter Content to your project and not have to make a new one.
-
First use the mouse to Right-Click in the Content Browser and then from the Create Basic Asset section of the pop-up Menu, select Material .
![Trans_Create_New_Material.png]()
-
Name the Material Transparency_Material and then open it up by using the Left Mouse Button and Double-Clicking on the Material in the Content Browser .
-
With the Material now open, go to the Details panel and under the Material section set the Blend Mode from Opaque to Translucent .
![Trans_Change_Blend_Mode.png]()
-
Now that the Blend Mode has been correctly set, look for the following Material Expression nodes. You can find the nodes by using the following names to search for them in the Material Pallet. Once found click on them with the Left Mouse Button and drag into the Material Graph releasing the Left Mouse Button to place them in the graph.
-
Vector Parameter x 1
-
Scalar Parameter x 1
![Trans_Required_Nodes.png]()
-
-
With the correct Material Expression nodes added it is now time to hook everything together. First name the Vector Parameter node to Base_Color and give it a color value. For this example, a color of white was input as the default color. Next, connect the output of the Vector Parameter node into the Base Color input. After that, name the Scalar Parameter to Transparency_Amount and give it a default value of 0.5. Then, plug the Scalar Parameter output into the Opacity input on the Main Shader Node.
![Trans_Completed_Shader.png]()
-
Make sure to press both the Apply and Save buttons and the closed down the Material Editor.
![R_Apply_&_Save.png]()
-
Find the Transparency_Material in the Content Browser and Right-Click on it with the mouse and from the menu that is displayed, select the Create Material Instance option.
-
Now we need to find an object to place the Material Instance on so we can see the Material in action. Inside of the Content Browser , under the Starter Content folder there is a Shapes folder. Locate the Shape_Sphere and then select it with the Left Mouse Button and then drag it into the current level with the Left Mouse Button still held down. Once in a location you like, release the Left Mouse Button to place the mesh in the level.
![Trans_Add_Test_Mesh.png]()
-
With something in the level to test with, find the Transparency_Material_Inst that was created before in the Content Browser . Once located, select it with the Left Mouse Button and then drag it from the Content Browser onto the Shape_Sphere . Once over the Shape_Sphere , release the Left Mouse Button to apply the Material Instance to the mesh.
-
Once the Material Instance has been applied to the mesh, open the Material Instance up by Double-Clicking on it with the Left Mouse Button in the Content Browser . Once open enable the Transparency_Amount by clicking on the grayed out check mark box with the Left Mouse Button . Once enabled you can adjust the value of Transparency_Amount to change how transparent the object will be.


Transparency & Reflections
Objects that make use of Transparency can display scene reflections if the following options are set. However keep in mind that having a lot of translucent Materials that have reflections enabled could cause performance issues.
-
Open up the Transparency_Material that was created above by double-clicking on it in the Content Browser . Once open, in the Details panel under the Translucency category, change the Lighting Mode from Volumetric NonDirectional to Surface TranslucencyVolume .
![Trans_Change_LM.png]()
-
Inside of the Material Graph, select the Transparency_Amount Material Expression and duplicate it twice by pressing CTRL + W on the keyboard. When completed, your Material Graph should look something like this.
![Trans_Dup_Nodes.png]()
-
Rename the two Material Expression nodes to Metallic and Roughness . Set the default value of the Metallic Material Expression to 1.0 and set the default value of Roughness to 0. Then connect each Material Expression node to the corresponding input on the Main Material Node.
![Trans_Reflection_Final_Material.png]()
-
Make sure to Apply and Save the Material and then close down the Material Graph.
![R_Apply_&_Save.png]()
-
Now when you look at the level, you should be able to see reflections and transparency on the mesh.
![Trans_Reflection_In_Level.png]()


By adjusting the parameters of the Material Instance, you can make the Transparency have extremely different looking results.

Tinted or Colored Transparency
With the Thin Transparent shading model and material expression, you are able to accurately represent tinted and colored transparent materials, such as tinted or colored glass and plastics. This Shading Model enables white specular highlights with correctly tinted background for transparent surfaces.


Enable Thin Translucent material output by setting the following in the Material Details panel:

Click image for full size.
-
Blend Mode: Translucent
-
Shading Model: Thin Translucent
-
Lighting Mode: Surface ForwardShading
Translucent Colored Shadows
Translucent materials are able to cast colored shadows with light transmission in some cases. The amount of light that passes through the material is determined by its opacity values and how much light is being cast onto the material.

Translucent colored shadows is currently only achievable with Static Lighting and Lightmass .
For additional information and usage, see Using Colored Translucent Shadows .
Transparency & Performance

Rendering lots and lots of objects with transparency on top of one another, especially if using lit transparency, can very quickly become a rendering / performance bottleneck. The term used to describe this problem is called Overdraw and overdraw occurs when you have lots and lots of objects with Transparency rendering on top of one another. The reason that overdraw can cause such a performance problem is because the rendering cost to render transparency becomes more and more expensive for each layer of Transparency that you introduce.
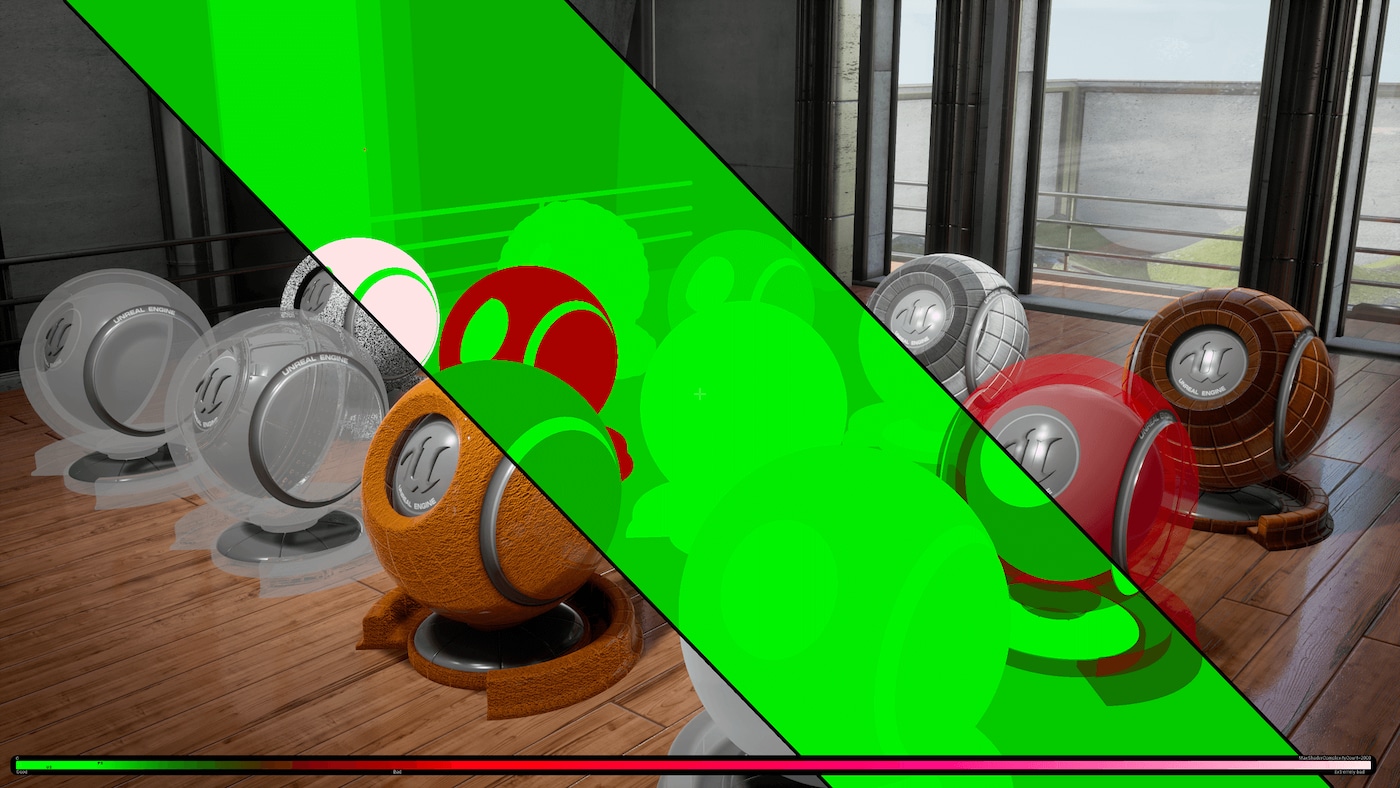
To help you better identify if this issue is happening and where, UE4 has a special view mode called Shader Complexity mode. Shader Complexity mode shows you how complex a given surface is to render by using colors to show complexity. The more green that you see, the cheaper things are to render and the more red that you see, the more and more expensive things become to render. To enable this view mode, all you have to do is the following.
-
To enable Shader Complexity , use the Left Mouse Button to click on the View Mode option at the top of the Editor Viewport. Currently the View Mode is set to Lit the default.
![Trans_SC_View_Mode.png]()
-
Once you click on the View Mode with the Left Mouse Button, a menu will appear. From the menu, select the Shader Complexity option.
![Trans_Set_To_SC.png]()
-
After clicking on the Shader Complexity option, the level viewport should look like the following.
![Trans_Shader_Complexity_On.png]()


From this view you can tell where possible performance issues could be happening. The areas that are in red are becoming very expensive to render while areas that you see in green are cheaper to render. While it is not 100 percent possible or advisable to get rid of all overdraw, this view mode can make it very helpful when trying to figure out exactly where your performance issues could be coming from.
Translucency Sort Priority
When having multiple Transparent objects in the scene close together, you will sometime notice that the Transparent objects have issues figuring out which object to render in front or behind the other transparent objects. The following example demonstrates this happening using the Materials that were created above and the lit steam VFX from the Starter Content.
Notice how the steam will be in front of the meshes and then all of a sudden it will pop behind a mesh. To prevent this from happening, the Translucency Sort Priority needs to be set so that the VFX of the smoke will always render on top of other translucency in the scene. To change the Translucency Sort Priority on the VFX, do the following.
-
First select the object or objects that you want to render on top of all other Translucency in the level by clicking on them with the Left Mouse Button. For this example, we will be selecting the steam VFX.
![Trans_Select_VFX.png]()
-
In the Details panel, under the Rendering section, click on the White Triangle to expose additional properties.
-
From the new list of options, look for the Translucency Sort Priority and then input a value of 100.
![Trans_Set_Sort_Order.png]()
By default, everything that is added to a level has a Translucency Sort Priority of 0. If you want something that is transparent to always draw over the top of everything else that is transparent, use positive numbers. If you want something that is transparent to always draw behind everything else that is transparent, use negative numbers.
-
Now check out the steam VFX in the scene. With a Translucency Sort Priority set to 100, the steam will always draw on top of the other translucent objects.
-
Setting the Translucency Sort Priority to -100 will make it so that the steam always draws behind other translucent objects.


While adjusting the Translucency Sort Priority can fix sorting issue in the level, it could introduce new sorting issues when spawning effects or objects during game play. Because of this, it is a good idea to define what Translucency Sort Priority number to use and where. For example, you could say that all spawned effects will have a Translucency Sort Priority of 100. So, if there are some sorting issues in the level, you can adjust the objects in the levels Translucency Sort Priority to be any number up to 99. This way, the spawned game effects will always render on top of everything else no matter what Translucency Sort Priority objects in the level have.
Conclusion
Transparency is a very powerful tool that can help to make your 3D projects really come to life. However, like with every powerful tool, care must be taken to make sure that power is kept in check. Remember to try and keep the number of Transparent objects that use reflections to a minimum whenever possible. Finally, make sure to constantly check Shader Complexity mode both in the editor and during game play to make sure that Transparency overdraw is kept to a minimum.